The Fresh Loaf

A Community of Amateur Bakers and Artisan Bread Enthusiasts.

cloche

dabrownman's picture
dabrownman

After changing my Multi grain Challah recipe to make it a S&F long ferment and retard bread, I decided to see if baking it in a cloche would make for an even better every day sandwich bread.  My Mother In Laws old Warner Ware Roaster 13" X 10" X 8" high seemed to be the only thing we own that might fit the bill.  I also has a nice rack to hold the bread pan off the bottom.    I heated the oven to 500 F (convection on) and put the entire roaster in the oven to heat up for 45 minuted.  No normal steam at all.  Once the roaster was hot ,I easily dropped the loaf pan in with oven mitts on and baked the loaf in the covered roaster for the first 20 minutes, turning the temperature down to 450 F convection.

The loaf, before it went into the roaster, had doubled in size from the overnight retard even though it still only came half way up the pan.  I was making a small test loaf.  The spring was an additional 100% as the finished loaf doubled again in the roaster.  After 20 minutes I took the roaster out of the oven, took the bread out of it and put the bread back into the oven to reach 200 F in the center of the loaf.  I then turned off then oven, cracked the door open and allowed the crust to dry.

The only thing I can say is that this might be the best loaf of this bread I have ever baked.  The crust was very dark brown with light brown specks.  Just beautiful!!  It was crispy crunchy yet still chewy.  The crumb was moist, light and also speckled with light brown flakes.  It tasted fantastic.  I bake this bread every week and this was by far the best.  I will bake it this way from now on.  The previous attempt I baked at 350 F with steam so the higher temperature played a big part I am sure.  So I will bake it next time the old way, No Cloche, but at the higher temperature to see what effects that has on this bread.

And who wouldn't want this bread to sop up a nice Garbonzo Bean Soup?

Breadandwine's picture

Using your oven and a cloche for a fast prove

April 17, 2011 - 3:18am -- Breadandwine
Forums: 

I needed some bread in a hurry yesterday, and turned out some decent rolls in just under the hour, using a combination of extra yeast, the undercover method and the oven for proving.

The story and pic are on my blog:

http://nobreadisanisland.blogspot.com/2011/04/using-oven-and-cloche-to-prove-your.html

Cheers, Paul

dmsnyder's picture
dmsnyder


I have made the Basic Country Bread from Chad Robertson's “Tartine Bread” twice before. (See: Tartine Basic Country Bread as Bâtards and Oven steaming using the SFBI method) However, I did not bake the loaves in the cast iron “cloche” that Robertson prescribes. I baked them on a pre-heated baking stone and used the SFBI oven steaming method or the "magic bowl" technique.

Caroline (“trailrunner” on TFL) recently blogged on Vermont Sourdough with Increased Whole Grain from Hamelman's “Bread” which she baked in Dutch Ovens – one cast iron and the other enameled cast iron. Her beautiful loaves finally pushed me to try this method with the Basic Country Bread. (See: David's Vermont SD w/ increased rye ---response to cast iron bake)

Caroline used an heirloom cast iron Dutch oven and a Le Creuset Dutch oven. There was no difference in her results. I decided to try a similar experiment with two other cloches: A 5 qt Copco enameled cast iron pot that was a wedding present (which means we've had it for going on 44 years) and a 4 qt Calphalon anodized aluminum all purpose pan.

Copco enameled cast iron on the left and Calphalon Anodized Aluminum Dutch Ovens

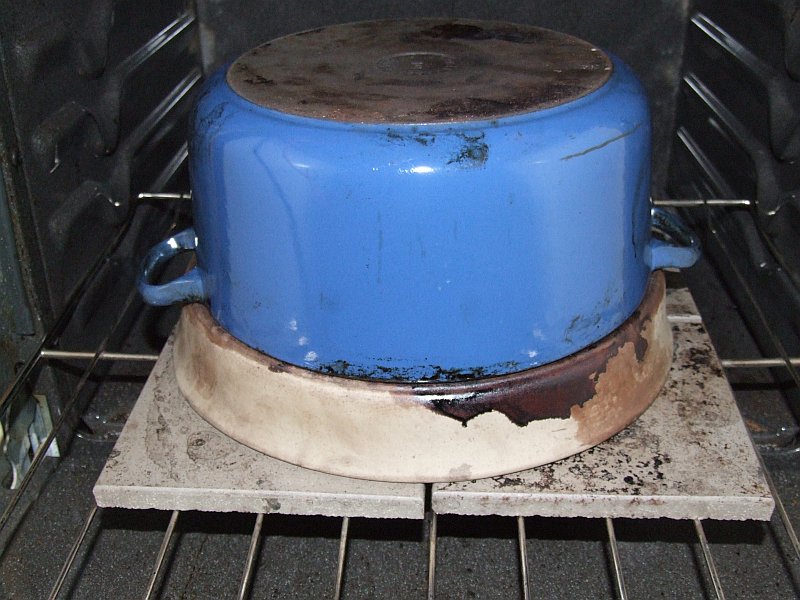
I made the dough according to Robertson's instructions. I followed Carolyn's well-described method for baking, except that I placed my cloches right on the oven rack, rather than on a baking stone.

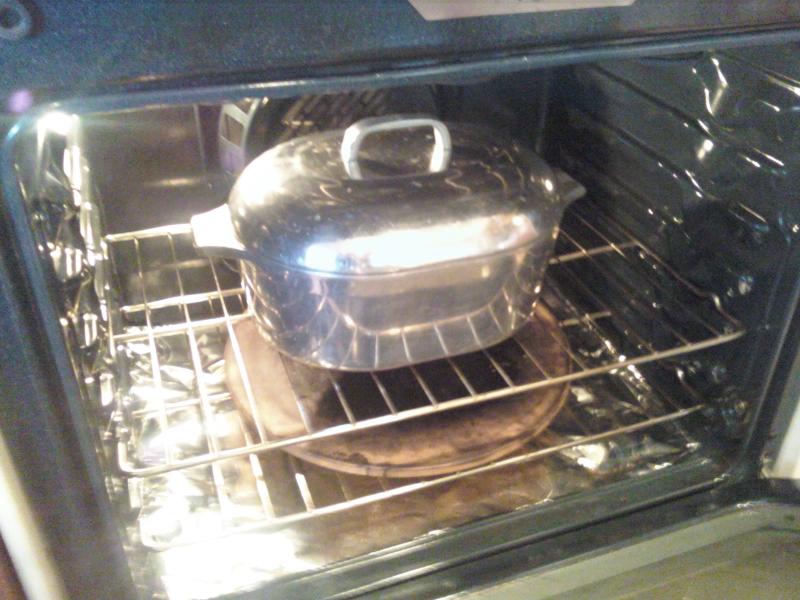
Loaves uncovered after baking 20 minutes covered at 460ºF.

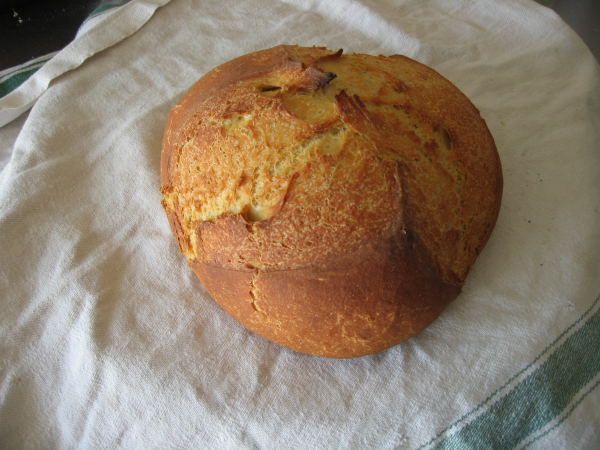
I baked the loaves for an additional 25 minutes after uncovering them to achieve the crust coloration seen below. I think I could have baked a bit longer to get as dark a crust as those in pictured in "Tartine Bread."

Loaf baked in Copco, on the left, and loaf baked in Calphalon, on the right

Both loaves had great oven spring and bloom. The one baked in the Copco oven had significantly great height, but I don't know whether this had anything to do with differences in thermal properties between the two "cloches" or simply reflects differences in their shape and/or volume. Certainly, there was no significant difference in the crust appearance.

The prolonged high heat did discolor the handles of the Calphalon pan. The Copco interior discolored quite a lot. I don't know if this was from the heat or, possibly, from the parchment paper. Anyone who can share experience with this would be appreciated.

The crust is staying crisp as the bread cools. The crumb is well aerated but less open than that of the bâtards I made. It is tender and has a lovely wheaty-sweet flavor with a mild but definite sourdough tang.

I must say I am very favorably impressed with the results of baking this bread in the Dutch ovens. I think the oven spring and bloom are remarkable and much more dramatic than what I have seen with baking on an oven stone covered with a stainless steel bowl. I'll have to try this technique with other breads, but trailrunner's results with the lower hydration Vermont Sourdough certainly suggest my experience will be repeated.

Thanks for the prompt, trailrunner!

David

Submitted to YeastSpotting


leucadian's picture

Why do we turn down the oven after introducing the bread?

May 19, 2010 - 2:47pm -- leucadian

It's commonplace to recommend turning down the temperature from 500 to 450 when the proofed loaf is put in the oven. Why do we do that? In a WFO, you don't do that, and I would expect that in a commercial deck oven you wouldn't either. Is it to simulate a stone hearth which might be hotter than the air in the oven? I don't think so.

Mini Oven's picture
Mini Oven

Ready in 3 1/2 hours?  (Make it longer if you wish, use 1/2 teaspoon of yeast, add salt & caraway and use cold water to make it rise slower.)

Wheat shaped form ... White Bread   crusty

  • 450g hot water (you can just manage to keep a finger in it)
  • 7g instant yeast
  • 650 g Wheat flour (250g AP, 400g Bread flour)
  • 1 1/2  to 2 teaspoons table salt
  • 1/2 teaspoon ground caraway
  • olive oil for bowl & form

Pour hot water into a large 2.5 ltr. mixer bowl and sprinkle with yeast.  Add the flours and stir until all the flour is moistened and a shaggy dough has formed.  Cover and let stand 2 hours or until the dough has risen up to the cover.  Remove cover and scrape out dough onto a lightly floured surface.  Sprinkle with the salt and caraway.  Fold or roll up the dough and knead to blend for about two minutes.  Shape into a tight ball and cover with the bowl.

Soak top and bottom of a Clay form (total volume 2 liters) 10 min in warm water.  Allow to drip dry and surface water to absorb, one minute.  Smear inside with olive oil.  Re-shape and tighten dough to form a loaf.  Rub with oil and place into bottom form.   Oil the inside of cover and place over dough.  Set in cold oven for 15 minutes.   Turn on oven to 225°c  (440°F) on Hot air (convection) and time for 45 minutes.   Remove form and brown loaf another 5 minutes in hot oven on rack.   Cool on rack for 15 minutes and serve warm with bread knife on cutting board. 


I was given this form for Christmas without any instructions.  As you can see the ingredients add up to just over a kilo of dough, about the right amount to fill this two liter volume form.  The loaf crust is very crunchy and thick.  The crumb slightly chewy and tender.  I removed the top for the last 5 minutes of baking but wished I had removed the whole form to let the bottom brown more as well.   Slices are almost round and crumb is fine.  The oil in the form adds to an almost buttery flaky crust.   This loaf was sliced warm.

Mini


JeremyCherfas's picture
JeremyCherfas

I was re-reading Elizabeth David's English Bread and Yeast Cookery and discovered the passage in whiich she describes the author Virginia Woollf's technique for making a cottage loaf. That sounded like fun, so I decided to give it a try, and was very pleased with the outcome. I blogged about it here.

Here's the loaf just after removing the cloche.

And here it is after final browning.

I'm very pleased with both cold-start and cloche techniques, and will continue to use them. Of course, I quickly discovered that they are old news here!

Jeremy

ericjs's picture
ericjs

Here is a picture of my jury-rigged cloche. Not pretty but it works quite well.

It is a La Creuset round dutch oven (enameled cast-iron, I'm not sure the size) over a Sassafras "Deep Dish Pizza and Pie Baker" (ceramic), upside-down. Someone gave me this as a gift years ago and I've hardly used it until now as I'm not a deep dish pizza fan and can't imagine baking a pie in that thing.

Note that the handles of the dutch oven are not flush with the top, but the stick below the level of the rim slightly (above when right side up) so this won't work unless the deck is raised and just the right size like this pizza pan. It's sheer luck that these worked together so perfectly.

I started out using quarry tiles, with an enormous terra cotta flowerpot as the top (hole plugged with wadded up aluminum foil), but I worried that the spaces between the tiles would let steam out and defeat the purpose of the cloche. Also the flower pot is unweildy and has no handles. I've left the quarry tiles in place under the pan, but I'm not sure if they contribute anything.

The only downside is it only fits one boule at a time and you have to have decent aim delivering the loaf from the peel. I've had a couple of loaves wind up squashed on one side (which didn't impair their taste or texture, but they looked a bit wonky).

The pizza baker has developed some cracks, but I've patched them with high temperature silicone (hoping nothing toxic is coming out...I've only patched from the other side, not the baking surface). While the silicone was drying, I switched to a metal pizza pan (also upside down...and larger) with the flower pot. The couple of loaves I baked on that wound up burned slighly on one side which has never happened with the stone which always produces evenly baked loaves.

I just recieved a baker's stone from NY Bakers and intend to make myself a couple of terra cotta cloches (I'm also a potter) to replace this setup eventually, probably in different shapes and sizes. I wonder how closely the cloche needs to fit around the bread to work? Would too much space make it less effective?


xaipete's picture

Should I use steam or put a cloche on it?

July 13, 2009 - 10:03am -- xaipete

A while back I had a discussion with David about when he used steam and when he used a cloche (or something like that), and I think his reply was some like "I'm still working that out". I've been trying to work that out over the last 3 or 4 months now too, so I thought it might be a nice time to share my thoughts and get the opinions of other TFLers.

When is it better to use steam and when is it better to use a cloche (I'm using cloche here as a generic term for an inverted roaster, tin foil pan, Le Cloche, etc.)?

dmsnyder's picture

"Magic Bowl" effect with an aluminum foil roasting pan

April 10, 2009 - 10:42pm -- dmsnyder

Covering loaves during the first third to half of the bake is one way of achieving a humid environment in a home oven, Its purpose is to approximate the effects achieved by injecting steam into commercial ovens. It enhances oven spring and the spreading of cuts (bloom) in the loaves. This technique has been discussed extensively and repeatedly on TFL.

Pages

Subscribe to RSS - cloche