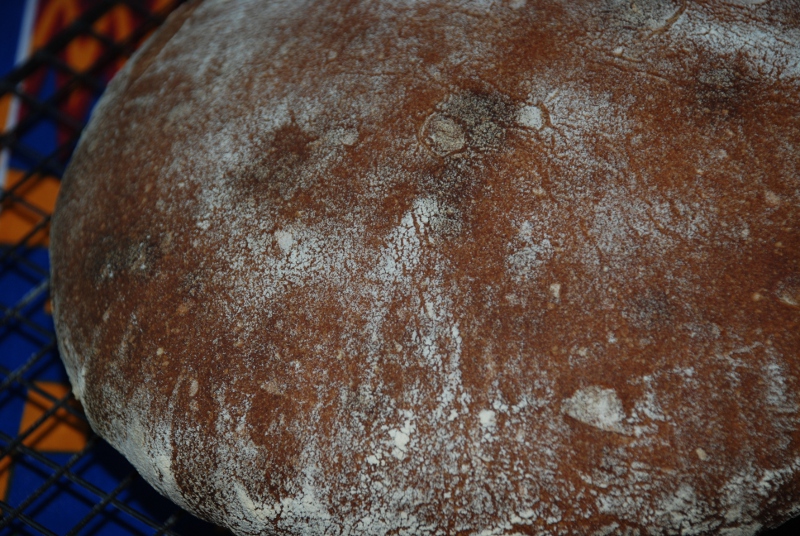
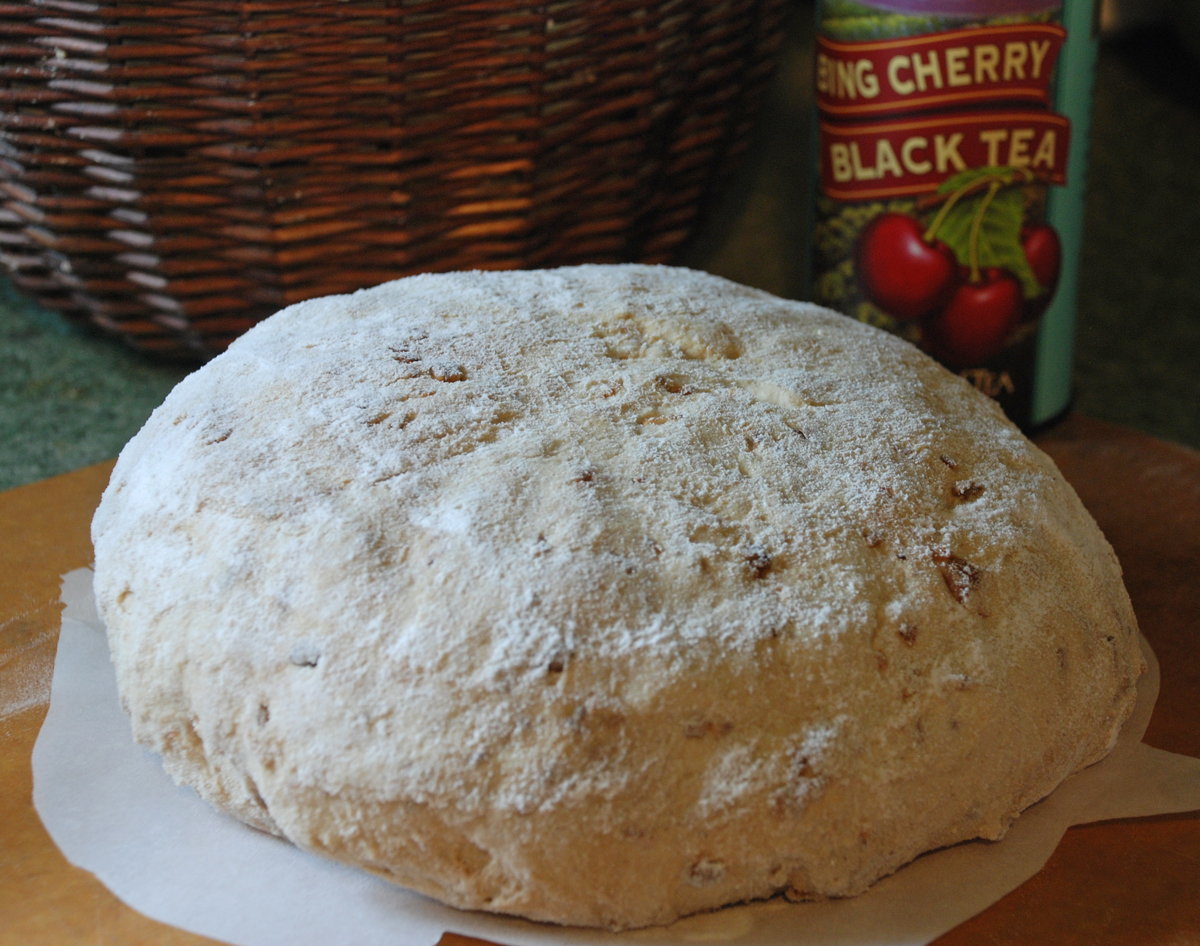
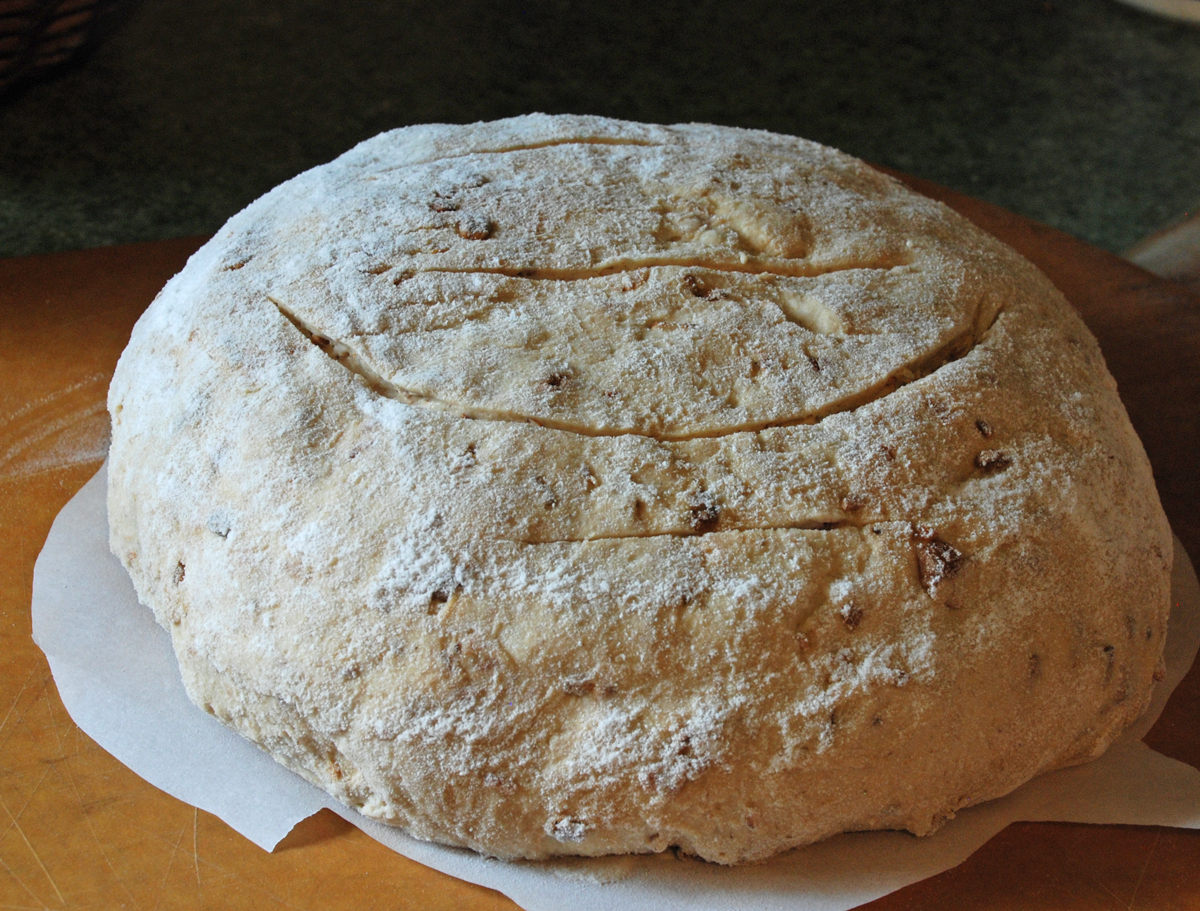
The storm has come and it has delivered as promised. Here on the South Shore of Long Island where I live we spent most of the morning digging out of 20+ inches of icy heavy snow. In between the snow plowing and digging I managed to shape and get my latest bread in the oven.
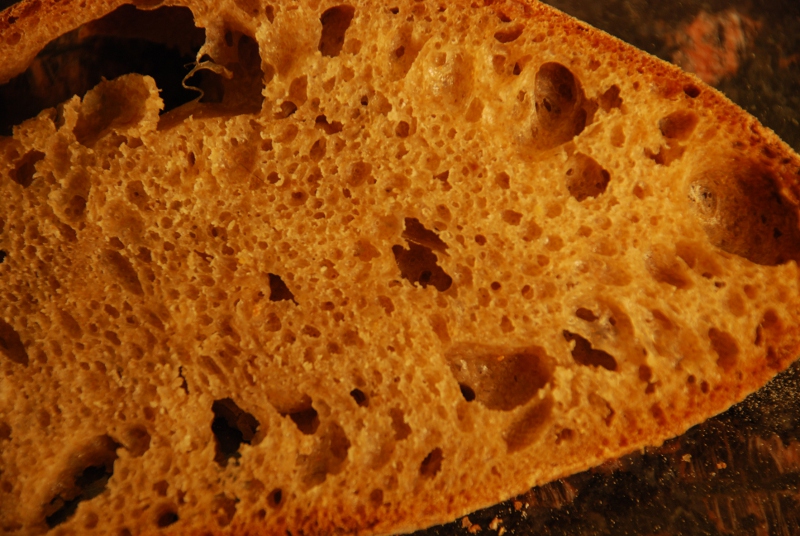
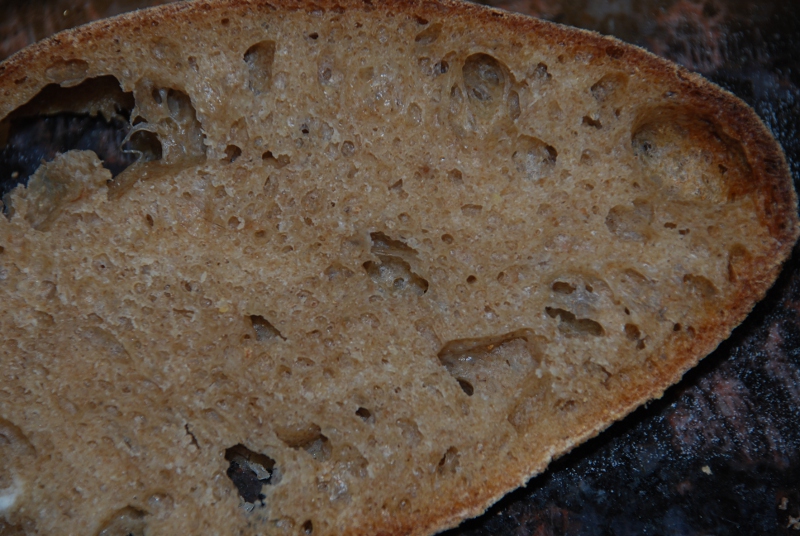
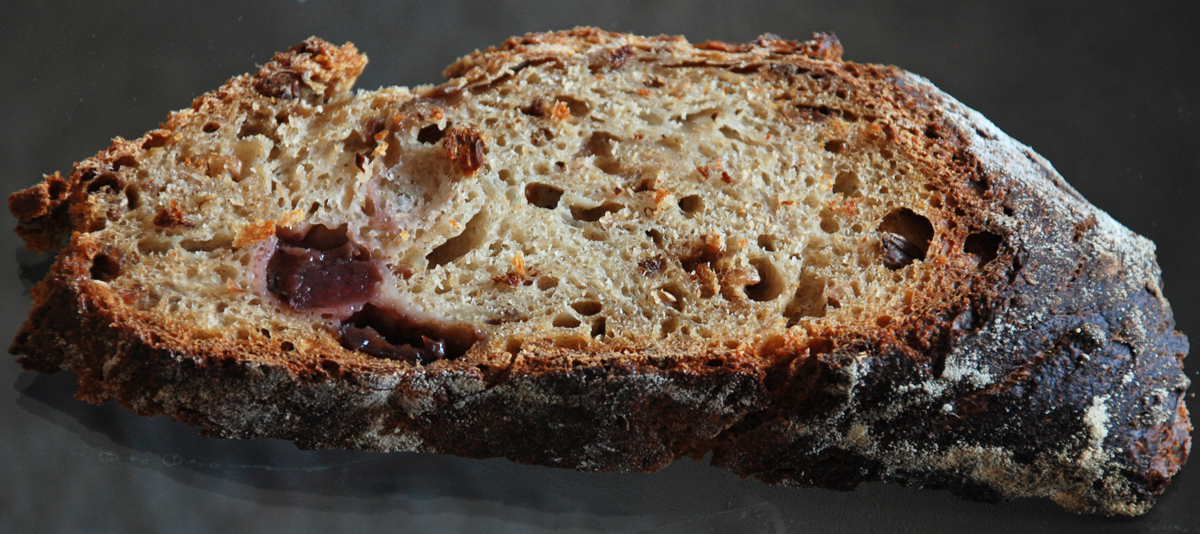
Using the 36 hour technique I adapted from TxFarmer's blog posts on The Fresh Loaf, I made a hearty style loaf with my favorite cherry flavored tea, fresh chopped cherries and some oat flour. I used the oat flour in the levain as well as the final dough. Some potato flour and malted wheat flakes were added to round out this dough.

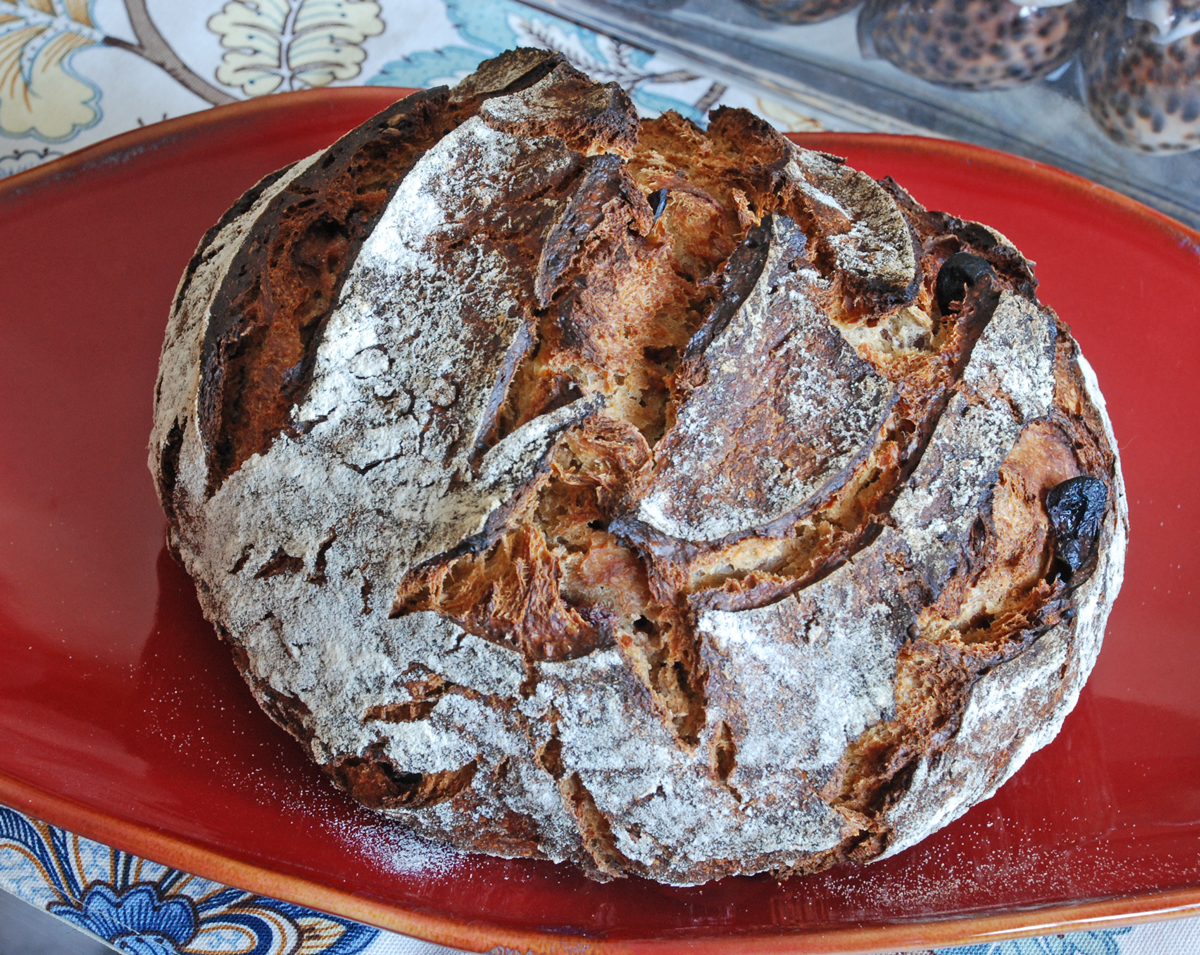
The end result was a nice moist crumb with a great chewy crust with cherry chunks. This was a large loaf and took almost 2 hours to bake. I lowered the temperature to 425 F. to prevent the crust from getting too dark which is one of the reasons why it took so long.

This exciting technique takes a while but it is worth it. I actually let the dough retard longer than 24 hours called for in the recipe due to my schedule and I don't think it effected the final bread either way.
Directions
Starter Build 1
104 grams Seed Starter (Mine is a 65% White AP starter)
100 grams Oat Flour (KAF)
200 grams European Style Flour (KAF)
203 grams Water at Room Temperature (80-90 degrees F.)
Mix ingredients in a bowl until thoroughly combined. Cover the bowl and let it sit at room temperature for around 8 hours. The starter should almost double when ready to proceed.
Starter Build 2
All Starter from Build #1:
35 grams Water at Room Temperature (80-90 degrees F.)
Mix ingredients in a bowl until thoroughly combined. Cover the bowl and let it sit at room temperature for around 4 - 6 hours. The starter should almost double when ready to proceed.
Main Dough Ingredients
300 grams Starter from above (note: you should have a small amount left over)
450 grams European Style Flour
200 grams Oat Flour (KAF)
100 grams Potato Flour
100 grams Malted Wheat Flakes
20 grams Seas Salt or Table Salt
88 grams Fresh Cherries (Pitted and chopped)
600 grams Cherry Tea Iced (Make sure the tea is ice-cold before using. I added the hot tea to ice cubes)
Procedure
Mix the flours, malted wheat flakes and the ice tea together in your mixer or by hand until it just starts to come together, maybe about 1 minute. Put the dough in a slightly covered oiled bowl and put in the refrigerator for 12 hours.
The next day add your starter and salt to the dough and mix by hand until it is thoroughly mixed and evenly distributed. Due to the high water content in the 100% hydration starter this dough is very easy to mix by hand and is very silky and smooth.
Bulk rise at room temperature for 2-3 hours until it grows around 1/3 in volume doing stretch and folds every half hour until it has developed the correct amount of strength. During the last stretch and fold flatten out the dough slightly into a rectangle and add the chopped cherries.
Put the dough back into the refrigerator for around 20-30 hours. I ended up letting it go around 30 hours.
When you take the dough out of the refrigerator you want it to have almost doubled in volume. Mine only rose about 1/3 in volume. Let it rise at room temperature for around 2 hours or until the dough has doubled from the night before.
Next, shape as desired. I made a large Miche and placed it in my cloth lined basket. Make sure you use enough rice flour with flour in your bowl/basket to prevent this moist dough from sticking.
Cover the dough with a moist towel and let sit at room temperature for 1.5 to 2 hours.
Score as desired and prepare your oven for baking with steam.
Set your oven for 500 degrees F. at least 45 minutes before ready to bake. When ready to bake place the loaves into your on your oven stone with steam and lower the temperature immediately to 450 degrees. Since this loaf was so big I ended up lowering the oven after 35 minutes to around 425 degrees. When the loaf is nice and brown and reached an internal temperature of 200 degrees F. you can remove it from the oven.
Let the loaves cool down for at least an 3 hours or so before eating as desired.

- Cat-Angel Bell Weathering the Storm

- The Dolphin is Trying to stay above the snow

- Misty waiting for some Cherry Sourdough.....okay so she's waiting for some Kibble!