The Fresh Loaf

A Community of Amateur Bakers and Artisan Bread Enthusiasts.

Blogs

punkchef77's picture
punkchef77

Isand66's picture
Isand66

  Stranded in my house for another day since Nemo swamped Long Island with 20 -30 inches of snow I needed some more bread to eat. I decided to make some nice soft and tasty rolls that will be great for sandwiches and/or snacking.

I had some left-over starter from my last Cherry Sourdough Bread so I decided to combine that with some of my AP starter along with some cream cheese, milk, butter, maple syrup for some sweetness and assorted flours.

I have to say the rolls came out great and I already ate 2 before dinner! I need to build up my strength for an early AM drive to the train station to trek into the city. Normally this would not be a big deal, but I'm afraid it may take me longer to drive to the station than the actual train ride to Manhattan.

I used multiple toppings including toasted onions, cheese powder and poppy seeds but these rolls will work with just about any topping you desire.

Directions

The night before refresh your starter and if you have some oat flour make an additional starter using 50% oat flour to bread or AP flour. The oat flour starter was kept at 100% hydration while my AP starter was at 65%.

You need to have a total amount of starter at 375 grams.

Main Dough Ingredients

200 grams AP Starter at 65% hydration

175 grams Oat Flour Starter at 100% hydration

300 grams Sir Lancelot High protein Style Flour (you can substitute bread flour if necessary)

112 grams Durum Flour (KAF)

100 grams White Rye Flour (KAF)

102 grams Cream Cheese softened

50 grams Unsalted Butter (cut into pieces and softened)

16 grams Seas Salt or Table Salt

30 grams Maple Syrup or Honey

353 grams Milk (I used 2% but you can use which ever you prefer) at room temperature

Procedure

Mix the flours, maple syrup and 300 grams of the milk together in your mixer or by hand until it just starts to come together, maybe about 1 minute. Let it rest in your work bowl covered for 20-30 minutes. Next add the salt, butter, starters and cream cheese and mix on low for a minute. Add the rest of the milk unless the dough is way too wet. Note that the dough should be rather moist so don't be afraid to add the rest of the milk. Mix on low-speed for another 3 minutes. Remove the dough from your bowl and place it in a lightly oiled bowl and do several stretch and folds. Let it rest covered for 10-15 minutes and then do another stretch and fold. Let it rest another 10-15 minutes and do one additional stretch and fold. After a total of 2 hours place your covered bowl in the refrigerator and let it rest for 12 to 24 hours.

When you are ready to bake remove the bowl from the refrigerator and let it set out at room temperature still covered for 1.5 to 2 hours. Remove the dough and divide into around 10-12 pieces depending on the size of your rolls and form them as desired. Place them on a parchment lined sheet pan and let them rest.

Cover them with a moist tea towel or sprayed plastic wrap for 1.5 to 2 hours. Around 45 minutes before ready to bake, pre-heat your oven to 500 degrees F. and prepare it for steam. I have a heavy-duty baking pan on the bottom rack of my oven with 1 baking stone on above the pan and one on the top shelf. I pour 1 cup of boiling water in the pan right after I place the dough in the oven.

Before putting the rolls into the oven, apply an egg wash and your favorite toppings.

Place the pan with the rolls in the oven, add the boiling water or which ever method of steam you prefer and lower the temperature to 450 degrees. Bake for 20-30 minutes until the rolls are nice and brown.

Take them out and let them cool on a bakers rack for at least an hour before eating.

dabrownman's picture
dabrownman

I joined in on The 3 Twisted Sister’s GMA bake this week to do a Valentine Rose.  The premise was to do Vienna bread dough and make it into a Valentine Rose somehow.  The GMA’s posted their fine examples yesterday so this was a tough act, all 3 of them, to follow.  But, we had the last of our left over panettone to use up and on our side.


There were all kinds of new things for us on this bake.  We have never made a Vienna bread before and was sort of taken back by the sugar, egg, fat and milk in most of the recipes on the Internet.  It was sort of Challah like when it came right down to it.  There are some recipes out there without all of these enrichments but if you can use them all – why not?


We wanted to put our own twisted outlook into this bread so we decided to take it pink and savory only to change our mind later, after the savory was in, to take it sweet too.  The pink came from slicing ¼ of a beet and putting it into the mini chopper with 50 g of water and having the mini chopper do its best to liquefy it.  After straining, we were left with some really beet red juice and some red beet pulp.


We mixed the beet juice with the water for the dough and it ended up making a pretty as pink dough.  The beet pulp we sautéed with some beet greens and a clove of garlic to use for the filling in the rose roll-up thinking savory was the way to go and the red and green filling would be nice in this bread.


Then at the last minute Red Velvet Cake into my apprentices brain somehow and she thought that the dough was more sweet than savory and some cocoa powder and sugar added to the filling would make it taste more red velvety.  She also thought that some chocolate chips would also be a good addition to the filling since she and most ladies know roses and chocolates are the bare minimum for Valentines day.


I went ahead with Lucy’s recommendations wondering how the savory beet greens, beet pulp and garlic would jive with the chocolate and sugar.  We added a mix of whole grains, to the leavain only.  It was our usual rye, spelt, Kamut and whole wheat  and got the whole grains up to nearly 20%.


While the last feeding of the levain was ongoing, we autolysed the rest of the ingredients sans filling for 3 hours.  Once the autolyse and the levain came together we did 10 minutes of French slap and folds and then let the dough rest for 20 minutes before performing 3 sets of French folds on 20 minute intervals. 


After the last fold we allowed the dough to rest 10 minutes before dividing it in two and rolling each out to 10” x 18” rectangle.  We brush each with melted butter first then sprinkled on the beet green and pulp, sugar and cocoa mix followed by the chocolate chips.


We then rolled it up from the wide end, pinching the seams and ending up with a rope 18” long.  After finishing the 2nd rope, we split each with a paring knife down the middle ending up with 4 rope halves.


Two of the rope halves were crossed in the middle and then braided each direction making sure to keep the cut side up.  Once the other 2 half ropes were braided together, each of the 2 braided ropes were placed on a baking sheet covered in parchment by coiling each in a snail shape, one following the other, again trying to keep the cut sides up.  The result was one fairly big pink rose.


We let it proof on the counter for 90 minutes in a plastic trash can liner before refrigerating it for a 12 hour retard.  The next morning the rose was allowed to warm up and final proof for 4 hours before being brushed with an egg wash and going into the 425 F baking stone for 10 minutes of steam.  We used a combo Sylvia’s steaming pans and David’s 12” Iron skillet with lava rocks for the steam.


The rose had expanded nicely while doing its final proof but it also sprang very well in the oven too.  After 12 minutes the steam was removed and oven turned down to 350 F, convection this time.  The bread was turned on the stone every 8 minutes to ensure even baking.  The rose reached 205 F and we turned off the oven with the door ajar to allow the crust to further crisp on the stone for 8 more minutes.


The rose was removed from the oven to the cooling rack.  Total baking time was 30 minutes – 12 minutes of steam and 18 minutes without plus 8 minutes resting on the stone for 38 minutes total.  The rose browned nicely due to the egg wash.  It is nice looking rose where we hope the pink survived under the crust but, we will not know for a couple of hours.

This bread turned out to be shocking 3 ways.  One, the pink dough went away with just some red where the beet pulp and leaf saute was incorporated - I was robbed!  Two, you can't taste any beet either - not a trace - nor the garlic either.  Three, this bread tastes wonderful as a sweet chocolate bread. So if you want the pink to stay, put in some red food coloring :-)

The crumb is so soft, moderately glossy and fairly open.  Where the yellow tinge in the crumb came from is strange since it is  coming from a definite pink.  I guess the egg and butter finally won out ?  I love the taste of this bread but I also want tomake a straighten up Vienna bread without the goodies added in.  It also has to be a fantastic bread on the sweet side.

Formula

Starter Build

Build 1

Build 2

Build 3

Total

%

WWW & AP SD Starter

13

0

0

13

1.82%

Kamut

6

6

12

24

3.37%

Spelt

6

6

12

24

3.37%

Dark Rye

6

6

12

24

3.37%

Whole Wheat

6

6

12

24

3.37%

Water

24

24

48

96

13.47%

Total

61

48

96

205

28.77%


SD Starter Totoals


%


Flour

102.5

14.39%


Water

102.5

14.39%


Starter Hydration

100.00%


Levain % of Total

15.89%


Dough Flour


%


Red Malt

10

1.40%


Bread Flour

300

42.11%


AP

300

42.11%


Total Dough Flour

610

85.61%


Salt

10

1.40%


Beet Infused Water

320

44.91%


Dough Hydration w/o starter

52.46%


Add - Ins


%


Sugar

40

5.61%


Egg

50

7.02%


NF Dry Milk powder

15

2.11%


Butter

40

5.61%


Total

145

20.35%


Total Flour w/ Starter

712.5


Beet Infused Water 320 & Water

422.5


Hydration w/ Starter & Adds

65.68%


Total Weight

1,510


% Whole Grain

19.30%


Chocolate Chips

100


Beet, Almond & Cocoa Filling

120


Filling is sauted beet leaves, 2 tsp ea cocoa & sugar


35 g of almond meal & left over beet juice pulp


Mebake's picture
Mebake

It has been a while since i have posted any thread, baked any bread, or joined in any conversation with the TFL community. 3 months have elapsed since the day i had my spine fused, and i now feel good, and have recuperated enough to be able to bake bread again.The bread shown is one of my favorites: Hamleman's Whole Wheat Multigrain.

As far as pain, it is mild, yet tolerable. I have removed the brace now, so i can bend easily.

It is worth mentioning that i had kept my BDS (aka Baking deprivation syndrome) at bay by engaging in yet another addiction (like i need one). I have sketched away for days and weeks, and sought to increase my skills at drawing/digital art, and have been pleased with the results. Anyway, enough about me, and here is the bread:

With soaked millet/buckwheat/roasted sunflower seeds/Flaxseeds, and wholewheat freshly milled at home, this bread is mindblowing! Superior to any multigrain bread i have tasted.

I'm glad to be back!

Khalid

linder's picture
linder

A month ago, the three gmas baked a great looking lemon anise seed tea loaf from Dan Leader's book 'Bread Alone'.  Having lots of lemons and being a lover of all things anise (including anisette), I decided to bake a loaf for us to have with tea in the evenings.  I up'ed the lemon flavor by adding a teaspoon of limoncello to the lemon and simple syrup glaze.  Haven't cut into it yet, but it makes a very big loaf of tea bread.  It is baked in a 9 x 5 inch loaf pan and rises in the oven to fill the loaf pan to the very top.  In baking this, however, I did find the 30-40 minute baking time quite optimistic, mine wasn't done until an hour had passed in the 350F oven. 


Wingnut's picture
Wingnut

Messing around..........

Good Crumb, nice sweet nutty flavor with just a hint of sour.

Cheers,

Wingnut

davidg618's picture
davidg618

Saturday evening's dessert: Peach Upside Down Cake. (I had my piece sprinkled with a few drops of Amaretto.)

and Sunday morning's bagels. (Ciril Hitz Baking Artisan Bread, CHEWY Bagel formula converted to natural levain.)

David G

Isand66's picture
Isand66

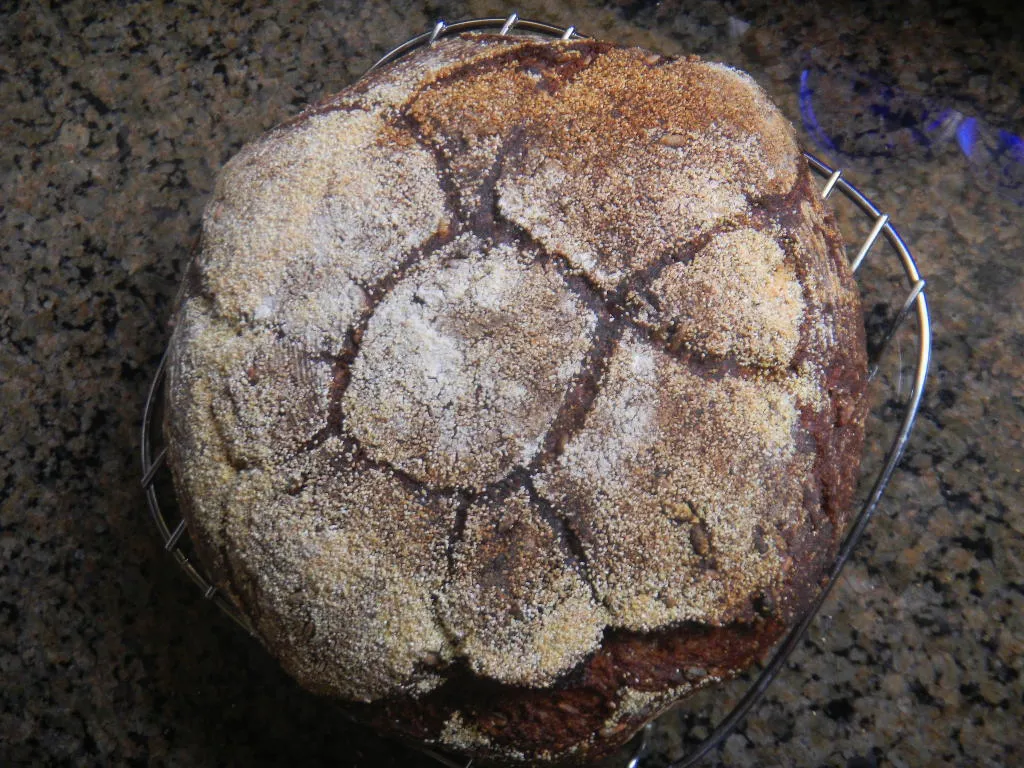
The storm has come and it has delivered as promised.  Here on the South Shore of Long Island where I live we spent most of the morning digging out of 20+ inches of icy heavy snow.  In between the snow plowing and digging I managed to shape and get my latest bread in the oven.

Using the 36 hour technique I adapted from TxFarmer's blog posts on The Fresh Loaf, I made a hearty style loaf with my favorite cherry flavored tea, fresh chopped cherries and some oat flour.  I used the oat flour in the levain as well as the final dough.  Some potato flour and malted wheat flakes were added to round out this dough.

The end result was a nice moist crumb with a great chewy crust with cherry chunks.  This was a large loaf and took almost 2 hours to bake.  I lowered the temperature to 425 F. to prevent the crust from getting too dark which is one of the reasons why it took so long.

This exciting technique takes a while but it is worth it. I actually let the dough retard longer than 24 hours called for in the recipe due to my schedule and I don't think it effected the final bread either way.

Directions

Starter Build 1

104 grams Seed Starter (Mine is a 65% White AP starter)

100 grams Oat Flour (KAF)

200 grams European Style Flour (KAF)

203 grams Water at Room Temperature (80-90 degrees F.)

Mix ingredients in a bowl until thoroughly combined.  Cover the bowl and let it sit at room temperature for around 8 hours.  The starter should almost double when ready to proceed.

Starter Build 2

All Starter from Build #1:

35 grams Water at Room Temperature (80-90 degrees F.)

Mix ingredients in a bowl until thoroughly combined.  Cover the bowl and let it sit at room temperature for around  4 - 6 hours.  The starter should almost double when ready to proceed.

Main Dough Ingredients

300 grams  Starter  from above (note: you should have a small amount left over)

450 grams European Style Flour

200 grams Oat Flour (KAF)

100 grams Potato Flour

100 grams Malted Wheat Flakes

20 grams Seas Salt or Table Salt

88 grams Fresh Cherries (Pitted and chopped)

600 grams Cherry Tea Iced  (Make sure the tea is ice-cold before using.  I added the hot tea to ice cubes)

Procedure

Mix the flours, malted wheat flakes and the ice tea together in your mixer or by hand until it just starts to come together, maybe about 1 minute.  Put the dough in a slightly covered oiled bowl and put in the refrigerator for 12 hours.

The next day add your starter and salt to the dough and mix by hand until it is thoroughly mixed and evenly distributed.  Due to the high water content in the 100% hydration starter this dough is very easy to mix by hand and is very silky and smooth.

Bulk rise at room temperature for 2-3 hours until it grows around 1/3 in volume doing stretch and folds every half hour until it has developed the correct amount of strength.  During the last stretch and fold flatten out the dough slightly into a rectangle and add the chopped cherries.

Put the dough back into the refrigerator for around 20-30 hours.  I ended up letting it go around 30 hours.

When you take the dough out of the refrigerator you want it to have almost doubled in volume.  Mine only rose about 1/3 in volume.  Let it rise at room temperature for around 2 hours or until the dough has doubled from the night before.

Next, shape as desired.  I made a large Miche and placed it in my cloth lined basket.  Make sure you use enough rice flour with flour in your bowl/basket to prevent this moist dough from sticking.

Cover the dough with a moist towel and let sit at room temperature for 1.5 to 2 hours.

Score as desired and prepare your oven for baking with steam.

Set your oven for 500 degrees F. at least 45 minutes before ready to bake.  When ready to bake place the loaves into your on  your oven stone with steam and lower the temperature immediately to 450 degrees.   Since this loaf was so big I ended up lowering the oven after 35 minutes to around 425 degrees.  When the loaf is nice and brown and reached an internal temperature of 200 degrees F. you can remove it from the oven.

Let the loaves cool down for at least an 3 hours or so before eating as desired.

Cat-Angel Bell Weathering the Storm
The Dolphin is Trying to stay above the snow
Misty waiting for some Cherry Sourdough.....okay so she's waiting for some Kibble!
Crider's picture
Crider

I'm approaching the age of sixty and I've been baking regularly for about ten years and doing it by hand. But a bug got in my soup more than two years ago when txfarmer posted the breathtaking blog "Sourdough Pan de Mie - how to make "shreddably" soft bread". She wrote and demonstrated about intensive kneading and how that was the secret to those amazing loaves. She showed different windowpane characteristics which developed as she cranked her mixer for rather long periods of time.

I was intrigued, to say the least. I even played around with long-time kneading by hand. I remember how I spent fifty minutes hand kneading a white dough until it finally showed signs of over-kneading. Not practical. A mixer is definitely needed for that kind of thing. But I never really liked the way home mixers appear to beat the hell out of the dough. It seems they spin way too fast, especially compared to commercial mixers, and especially compared to fork mixers and falling arm mixers. There were (are?) actual countertop falling arm mixers Artofex made. Santos still makes a fork mixer that gently turns the dough. It sells in the US, but $1,200? Not only couldn't I afford something like that, I'd rather use that kind of money to lie on a warm beach in Hawaii right now.

The truth, probably, is that these home mixers really aren't being harsh on the dough at all and I'm just clinging to my superstitious hand-knead ways. Temptation came when I saw a video on Youtube of somebody demonstrating a little Bosch MUM 4 Compact mixer, and when they turned it to speed one to incorporate the ingredients, it was slow — real slow. I loved that! I downloaded the manual for that machine to see if it is willing to operate on speed one indefinitely. It is!

Weird thing is, Bosch USA still doesn't admit they sell the things. All they feature on their website are the big MUM 6 Universals. But Pleasant Hill Grain happily sells them whenever they have some to sell. One ninety nine! You could get six MUM 4s for the price of one Santos fork mixer . . .

When it arrived I didn't have any flour milled or sourdough started for a big loaf, but I did have a sack of all-purpose white flour in the cupboard and yeast in the 'fridge. What could be more fun than a sandwich loaf? Haven't made a white sandwich loaf in years. I didn't do txfarmer's Pen de Mie, but I did a lean loaf at 65% hydration. I stood there and stared at the mixer for fifteen minutes as it gently, very gently kneaded the dough round and round on speed one. It was fun watching. Do you all stare at your mixer when it's kneading? Could have gone longer, but maybe next time. The dough felt and handled wonderful. Flour, water, salt & yeast. Why do supermarket bakeries refuse do make a simple sandwich loaf like this?


evonlim's picture
evonlim


Dried black mission figs, dried white USA figs, turkish dried brown figs, fresh turkish figs and fresh Japanese figs..

In the history of foods the fig is one of the earliest fruits to be desiccated and stored by men.  Sumerian civilization, Phoenicians, Ancient Greeks and old Chinese promoted fig culture and gave it sky-scraping fame. In China it has been grown since one thousand years back. Ancient Greeks offered figs to each other as precious gifts. Greek players used it to increase their potency and muscles.  

 Antediluvian king of Pontus Mithridates had ordered his citizens to use figs everyday to keep them away from diseases. It is said that in ancient Rome and Greek, farmers and slaves were given figs on a daily basis to increase their working capabilities. 

The fruit have both nutritional and medicinal values therefore it is regarded as functional food. It has property of keeping people physically and mentally strong. Dry fig has nutrition values more than its fresh variety. Protein, carbohydrates, calcium, thiamin, riboflavin, potassium, iron and high amount of fibers are its main constituents. It contains second highest amount of calcium after Oranges.  The major section has sugar which forms 51 to 70 %of the whole fruit.

Beauticians recommend it for beautification and personal care. Eating figs prevent cracking of lips and premature wrinkles. It puts off bad breath. The milky juice of green fig has necrotic property and can be applied to soften the thickening of skin of toe (Corn). Its sodium-free, cholesterol free, fat free and high fiber properties make it ideal food for dieters.  For those who are planning to quit smoking, figs can be an alternative. For long time it has been used to treat skin pigmentation, warts, mole and blisters. It is used as a medical dressing which applied on infectious skin to get rid of abscess. Its sugary pulp is ideal for making sweetener for dieters. 
 
Softening and soothing effects of figs provide relief from respiratory tract inflammation, cough, colds and aching throats. In folk medicine it is used as a demulcent for the irritation of soft skin tissues. Due to anti-bacterial properties it can inhibit bacterial growth.

For chefs and bakery product makers fig is a favorite ingredient for making of deserts, jams, jelly, cakes, pies etc. Adding figs to food products enhance both their taste and dietetic values. Presence of a substance known as humectants makes figs useful to keep the bakery products fresh and moist for long time. 

In south East Asia, Anjeer and Guava blended, together to make a healthy and refreshing fruit drink. In Mediterranean countries its extract is added in alcohol and tobacco. Dry roasted figs are pressed and grounded to use as alternative to coffee. In America fig puree is part of many sweet recipes.  Combination of figs and milk ensure sufficient supply of proteins, calcium and iron.  

In western countries green figs are available in can and tin and added to yogurt and cream to make deserts.

Figs are rich source of soluble and insoluble dietary fibers. Soluble fibers help to lower blood cholesterol while insoluble fibers prevent breast and colon cancer and heart attack.

in my case, this is how i enjoy fresh and dried figs...


Black mission figs in country boule


black and white..in flaxseeds sourdough


fresh turkish figs on toasted sourdough bread with walnuts and swiss chard


Japanese fresh figs on toasted sourdough bread with grilled gorgonzola and smoke salmon


Health benefits of figs
  • Fig fruit is low in calories. 100 g fresh fruits provide only 74 calories. However, they contain health benefiting soluble dietary fiber, minerals, vitamins, and pigment anti-oxidants that contribute immensely for optimum health and wellness.

  • Dried figs are an excellent source of minerals, vitamins and anti-oxidants. In fact, dried fruits are concentrated sources of energy. 100 g dried figs provide 249 calories. 

  • Fresh figs, especially black mission, are good in poly-phenolic flavonoid anti-oxidants such ascarotenes, lutein, tannins, chlorogenic acid...etc. Their anti-oxidant value is comparable to that ofapples at 3200 umol/100 g.

  • In addition, fresh fruits contain adequate levels of some of the anti-oxidant vitamins such as vitamin A, E, and K. Altogether these phyto-chemical compounds in fig fruit help scavenge harmful oxygen derived free radicals from the body and thereby protect us from cancers, diabetes, degenerative diseases and infections.

  • Furthermore, research studies suggest that chlorogenic acid in these berries help lower blood sugar levels and control blood-glucose levels in type-II diabetes mellitus (Adult onset) condition.

  • Fresh as well as dried figs contain good levels of B-complex group of vitamins such as niacin, pyridoxine, folates, and pantothenic acid. These vitamins function as co-factors for metabolism of carbohydrates, proteins, and fats.

  • Dried figs are excellent source minerals like calcium, copper, potassium, manganese, iron, selenium and zinc. 100 g of dried figs contain 640 mg of potassium, 162 mg of calcium, 2.03 mg of iron and 232 mg of potassium. Potassium is an important component of cell and body fluids that helps controlling heart rate and blood pressure. Copper is required in the production of red blood cells. Iron is required for red blood cell formation as well for cellular oxidation.

enjoy... a fig a day keep the doctor away too :)

evonlim


Pages

Subscribe to RSS - blogs