The Fresh Loaf

A Community of Amateur Bakers and Artisan Bread Enthusiasts.

Blogs

Wingnut's picture
Wingnut

I made some quick sourdough dinner rolls for my stew last night, I know there is a little bit of yeast in it so not a "true" sourdough but tasty.

And I got my starter a new home for being so nice to me.

Cheers,

Wingnut

I made another batch with 2 T of Arugala Walnut pesto added, me likey.

linder's picture
linder

I am continuing to practice my baguettes.  This latest iteration shows some promise .  It seems my oven bakes slow.  I turned up the heat to 480F on the second batch and got some better results.  I also steamed and steamed for the first 10 minutes of the bake, then switched to convection bake, hoping the increased air flow would help to vent the steam.  One other thing I did was use 10% whole wheat flour in the formula from Txfarmer for straight baguette dough.  I also let the loaves proof a bit longer.  I will continue my quest.  I've ordered a good oven thermometer from Amazon to check the oven's temperature.  Better steaming apparatus is also in the cards - with a trip to Home Depot for some lava rocks. 


Baguette crumb -

 
MarieH's picture
MarieH

There have been a lot of English Muffin recipes posted all over the web. While I yearned for a homemade muffin, I didn’t relish the steps to make them. I don’t have a griddle and cooking them in batches in a frying pan seemed problematic.

I have an English Muffin bread recipe that I have used for years. It is posted here. When I read trailrunners blog post about burger buns and saw how the buns were cut into pieces I thought – hey, I can do that with my English Muffin bread dough. The handling is a bit different because the dough is very loose and sticky, more like a batter.

Success! This was a fun experiment with a great outcome. Try them if you’d like to have homemade English Muffins without all the fuss. Start to finish this recipe took about 1 1/2 hours. I have included step-by-step photos since this is an unusual technique.

Prepare the baking pan and heat oven to 400 degrees. Fit a piece of 11" x 15" parchment paper into a 9" x 13" rimmed baking sheet pan, folding 1" of the paper up all four sides of the pan. Buttering the bottom of the pan before putting in the paper will help hold it in place. Lightly butter the bottom of the parchment paper and sprinkle evenly with cornmeal.


Stir together in a large bowl. Note: the oat flour can be substituted with 3 1/4 oz old fashioned oatmeal, finely ground in a food processor.

3 oz (3/4 cup) whole wheat flour

3 1/4 oz (1 cup) oat flour

1/2 tbs sugar

1 tsp salt

1/4 tsp baking soda

2 1/4 tsp instant yeast

1 oz (1/4 cup) bakers milk powder

Heat until 120-130 degrees and add to the dry ingredients. Beat well with a wisk to make a smooth batter. The batter will be quite thin.

9 1/2 oz water

1 oz orange juice

 Add and stir in until well blended to make a loose batter.

5 oz (1 1/4 cups) bread flour


Spoon the batter over the parchment paper and using a wet rubber spatula, spread the batter evenly to the sides of the pan. Wet the spatula as necessary to smooth the top of the batter. Lightly sprinkle top of the batter with cornmeal.


Cover and let rise in a warm place for 30 - 45 minutes until very puffy. It works best to place the pan in a very large, seal-able plastic bag or to use a proofing cover. If using plastic wrap, spray the wrap heavily with cooking spray before placing on top of the batter.

 When ready to bake, score the dough about 1/8" deep into 12 pieces each 3 1/4" x 3". A bench knife that has been sprayed with cooking spray works well.


Bake at 400 degrees for 15 minutes. Remove the pan from the oven and carefully slide the parchment paper onto a flat rimless cookie sheet. Cut the dough into 12 pieces, following the score lines and cutting all the way through. Spread the muffins out a bit leaving about 1/2" between each muffin. Return to oven and bake another 5 minutes until golden brown. Remove from pan and parchment paper to a cooling rack.


When completely cool, use a fork or muffin splitter to split the muffin squares.


Note: the muffin squares seem large but they shrink a bit in the toaster, so resist the temptation to make them smaller.

hungryscholar's picture
hungryscholar

Visiting the arts & crafts store with my wife and daughter I picked up a stencil and on the second try got a design that I was quite happy with.:


The Ciril Hitz video that gave me the idea and illustrates the method is here: www.youtube.com/watch?v=OZt1WWSAj6M. I spritzed the dough with water before stencilling and I think that helped, but I still found myself hold the stencil in place with one hand.


Aminax's picture
Aminax

My love for bread, cooking in general, and gardening centers around one, important person in my life. I am fully willing to admit that, at least when it comes to Mamo (my maternal grandmother), my memory may be a tad biased. With that said, if I were to describe Mamo (pronounced "ma'am-moe"), I would certainly include the words intelligent, beautiful, capable, and even superhero. She sewed, gardened, baked, cooked, and cleaned in her spare time. She worked as a secretary for an incredibly successful real estate broker in my hometown of Arlington, TX. I realize that the title 'secretary' has negative connotations for some, but Mamo was very good at and proud of the work she did. Her boss suffered from Parkinson's Disease, and I got the impression that she took on more and more of the responsibilities of keeping his business running as he succumbed to the inevitable symptoms of the ailment. She even earned and held her own real estate license. Although now, as an adult, I wish I had paid more attention to her, and spent more time with her and learning from her;  she died suddenly while I was in my snotty, too-cool-for-family, adolescent stage.

Her kitchen was simply a haven. The wallpaper had a pattern that included pussywillows, and the counters were a sunny yellow. I tasted many "firsts" at the small, glass-top table at the kitchen's center; including two of my favorite foods of all time: crab legs & pickled okra. Many casual dinners, board games, holiday meals, conversations, and other memories took place at that table. Hunger overcame me anytime I stepped foot onto that vinyl floor.

Whether it was a gift related to Christmas or her birthday, or "just because" I don't recall, but I clearly remember her getting a bread machine, and the excitement and enthusiasm she expressed while learning to use it. It caused some frustrations in the beginning, if I remember correctly, but she never gave up. The baked goods that came out of that machine were delicious, and I probably had more than my fair share of "tastings".

To date and not counting quick breads, I can count the number of loaves I have baked on one hand. The very first attempt resulted in a very dense white bread. I cannot overstate how dense those first, two loaves were. As I type this I am on the verge of laughing because I was under the impression that if I had to cram all the flour the recipe suggested into the dough. I also didn't have the slightest clue about kneading or getting air into the dough, etc. A more detailed account of my first attempt may be good enough material to warrant its own blog entry. For now, I will simply say it was clumsy and messy.

Some hobbies remain just that: activities done in our free time for pleasure. Now and then, we try a new activity on which we are instantly hooked. Each session with this "hobby" is an attempt to improve our skills or broaden what we know. We find ourselves wishing we had more time to devote to this activity; perhaps we even daydream of ways to do so. We're never quite sure when exactly the hobby became a passion (or maybe even an obsession). This is what bread has become for me.

greedybread's picture
greedybread

Si, si, si per favore!!  I have to say these little beauties (in general) are gorgeous and so easy to make .

The ones in Venezia are sublime, especially the ones with the pastry creme in them.

Heavenly.

I have seen other variations throughout Italy but i didn't take much notice at the time:(  They were selling something similar at night in Siena at the odd stall around the city.

Not at Palio time, in winter.......

So this my Frittelle friends, is what we are aiming for!!

Assorted Frittelle mmmmmm

Lets get Yeasty!!

Fritelle dough

Ingredients:

  • 4 cups of flour, I used strong bread
  • 1/2 cup of castor sugar
  • ½ tsp salt
  • 2 eggs
  • 1 & 3/4 cup milk
  • 2 Tbsp dried yeast
  • 6-8 cups oil  for frying err preferably NOT fat.
  • 1  jar Nutella err, not quite as large as this one in my photo!!
  • 2 tsp cinnamon for garnishing
  • 1 cup castor sugar for garnishing
  • A big Beasty!!

Method:

  • In a bowl warm half the milk, add in the sugar to warmed milk until dissolved
  •  Stir in the yeast.
  • Leave in warm place until creamy/frothy.
  • Place all dry ingredients in a bowl, flour and salt.
  •  Stir the eggs and half of the milk together and add it to the flour mixture a little at a time.
  •  Add the yeasty mixture to the flour mixture and stir until all the ingredients are combined.
  •  The dough will be wet and sticky. Don't be alarmed!!
  • Cover the bowl with a tea towel and let rise for about 5 hours when it should have doubled in size.
Pour that Oil in!!

On the matter of oil, my husband and I have often debated getting a mini fryer. He says no, we would put on 5-10 kgs in a VERY short time and sadly i think it is true but then when i make something like this, doughnuts, beignets or deep-fried ice cream balls, then we have this huge pot of oil (which i will filter) which will be on the stove for a while until its used. When I cook, i like to use olive oil but sadly the cost of filling a pot with olive oil would make the cost of the frittelle astronomical! The kids use the oil and make chips a few times (but that for them is LABOUR intensive) and i will slowly chip away at it but i do wonder, " mini fryer"? Would be easier and i could just pop it in the cupboard. Hmmm, more pondering maybe?

Hmmm wondering???

Back to the dough:

  • Prepare the sugar and cinnamon mix on a large plate.
  • When the dough is ready, stir it again. It should be sticky. If it's not, add a little more milk.
  • In a heavy pot for frying, heat the oil . I don't have a thermometer but i usually test the heat by putting a wee piece of raw food in it. My granddad used to spit in the oil!!
  •  Spoon the dough batter into the oil. I used a tablespoon but the original recipe used an ice cream scoop. Not plastic obviously!!
  • Fry until the frittelle are cooked through, about 5 minutes. I like to turn them over with tongs. They brown pretty quickly. Don't overcrowd your pot as they will take longer to cook .
  • Remove the frittelle with a slotted spoon and place on a plate covered with paper towels to drain.
  •  Once drained, quickly roll them in the sugar.
  • Poke a hole in the frittelle and fill a pastry bag fitted with a tip with Nutella and pipe Nutella into each frittelle.
  • Best eaten when warm.
  • Don't forget the most important thing!! Enjoy, enjoy and enjoy!!
yummmm
Almost all gone
filled with Nutella

P.S : You can easily insert other delights into these, white chocolate, milk chocolate, jam, pastry creme, cream, moro bars err perhaps not cream,  the list is endless........But things that hold shape and have some heat resistant are probably better. My son seemed to think jelly lollies would be nice!! I don't think so............You could,  if you were really adventurous, make it a savoury recipe but that we will look at another day :)

Frittelle how i love thee!!

Recipe adapted from Luscious Lucca Blog @ i love Lucca tours  

http://greedybread.wordpress.com/2012/05/31/back-to-the-yeasty-beasty-frittelle-anyone/

GSnyde's picture
GSnyde


This is a variation on Hamelman’s Cheese Bread, using Cheddar and Jarslberg instead of Parmasen, and sprinkling Sesame Seeds on the loaves.  It all started because the fridge was full of cheese.  And I love cheese breads.  I have made the Cheese Board’s Onion-Curry Cheese Bread  (http://www.thefreshloaf.com/node/22549/some-spice-breads-%E2%80%93-one-sweet-and-one-savory) many times.  But I wanted to try something new.  So I flipped through several baking books, and found Hamelman’s Cheese Bread to be a good starting point.

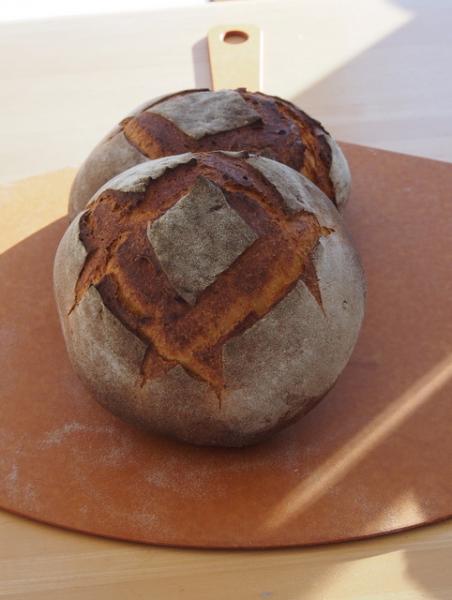
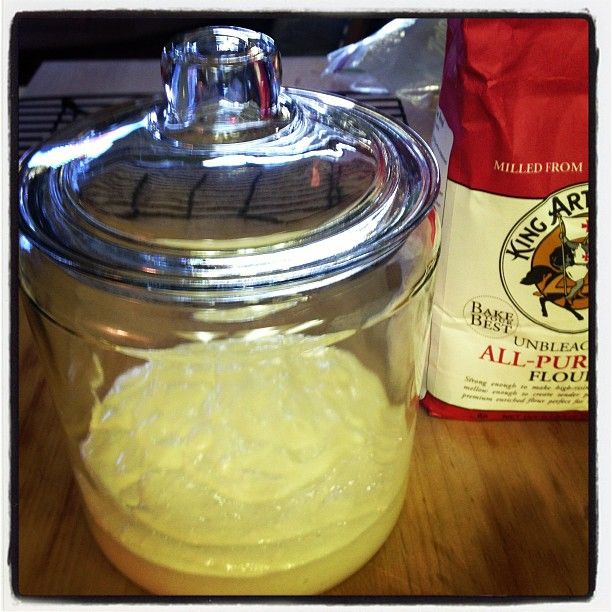
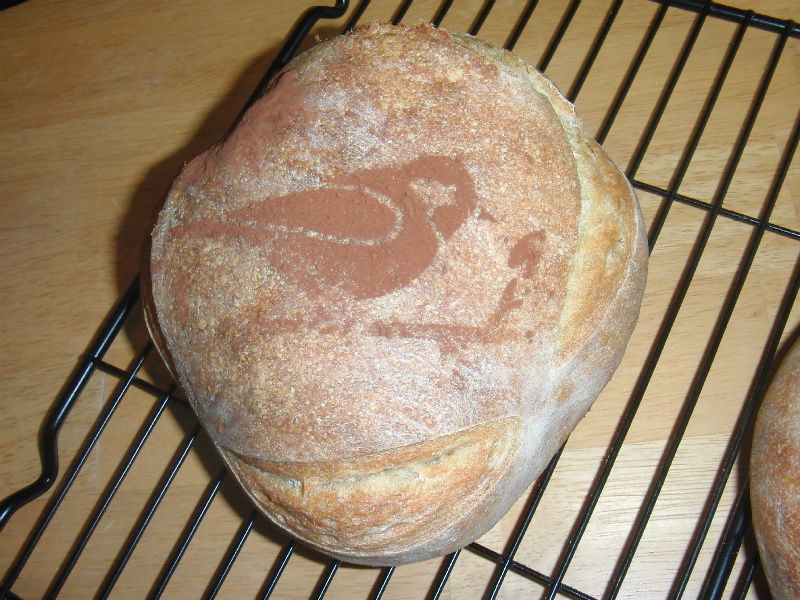
I used a very active starter, left over from the Tartine Basic Country Bread, as the seed culture, and made the stiff levain per Hamelman’s formula.  The final dough was also from the Hamelman formula, but I substituted the surplus cheeses (sharp Cheddar and Jarlsberg) for the Parmesan in Hamelman’s formula.  And I topped the proofed loaves with a light egg wash and sesame seeds just before scoring and baking.

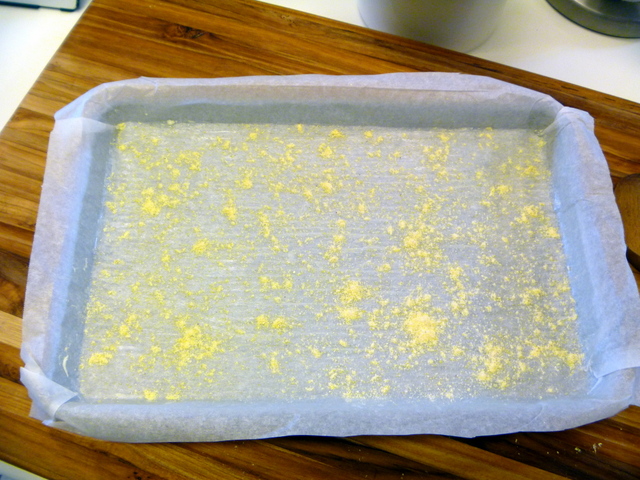
I recommend using parchment under the loaves to keep the mess off your baking stone.

Here’s the formula and procedure.

Overall Formula

Ingredient

Weight (oz)

Bakers’ %

AP Flour

32

100

Water  (75 F)

19.2

  60

Olive Oil

  1.6

    5

Salt

    .5

 1.5

Instant Yeast

    .1 (1 tsp)

 1

Cheese

  6.4

  20

Sesame Seeds

To taste


Egg wash (1 egg and 1 Tbsp water)


Stiff Levain Build

Ingredient

Weight (oz)

Bakers’ %

AP Flour

  5.8

100

Water (75 F)

  3.5

  60

Mature culture (stiff)

  1.2

  20


Final Dough

Ingredient

Weight (oz)

AP Flour

26.2

Water (80 F)

15.7

Olive Oil

  1.6

Salt

    .5

Yeast

    .1

Levain

  9.3

Cheese (1/2 Cheddar and ½ Jarslberg), half grated and half in ½ inch cubes

  6.4


Procedure

1.  Make the levain about 12 hours before mixing the dough.  Cover and let ripen at room temperature.

2.  Mix all final dough ingredients, except the cheese, at low speed for 3 minutes, then at medium speed for 3 minutes, to moderate gluten formation.  The dough should be quite stiff.  Add cheese and mix on low speed just until incorporated.

3.  Scrape the dough onto a board, round up into a ball and place in a lightly oiled bowl.  Cover the bowl and let ferment about 2 ½ hours, with folds at 50 minutes and 100 minutes.

4.  Divide into two or three loaves, pre-shape into rounds and let rest, covered, for 15-20 minutes.

5.  Shape into boules or batards and proof about 1 ½ to 2 hours at room temperature.

6.  Pre-heat oven to 500 F, with stone in place and steaming apparatus of choice (I used cast-iron skillet with lava rocks, plus Sylvia’s steamy towels).

7.   When proofing complete, move loaves to parchment covered peel.  Brush loaves lightly with egg wash, and sprinkle with sesame seeds.   Then score the loaves , slide the parchment paper onto the oven stone, and steam the oven.

8.  As soon as the loaves are in the oven, reduce heat to 450 F.  Bake with steam for 18 minutes, remove steam apparatus, reduce heat to 400 F, and bake another 16-18 minutes (too internal temperature of 206-207 F). 

9.  Cool on rack.

This bread is amazing when almost, but not quite, cooled.  And it makes nice toast.  The combination of cheese and sesame is really good!

Enjoy.

Glenn

BobS's picture
BobS

We had a can of pumpkin puree kicking around. I'm tired of the usual pumpkin quick bread and wanted something lighter.  Some time ago our paper had a braided yeast-raised pumpkin bread, originally from King Arthur. I started there and somehow ended up here:

Sorry, no crumb shot; the good light was gone by the time I sliced it.

I'm going to try another spin, this time with a preferment to punch it up a bit; then I think this one will be done.

linder's picture
linder

We have a big pot of borscht to eat and wanted some hearty rye bread to go with it, so last night I mixed up the soaker and wild yeast starter for Rye Sandwich Meteil.  I had read on TFL that the bread had come out quite sweet for some, so I used only half the sweeting called for in the formula.  The bread 'rose' more sideways than anything else, but is still very tasty. 

I'm also wondering if some of the lack of rise was not letting it proof long enough (45 min instead of the full 60).  In any event - here is the loaf.  Any comments on how to achieve a better rise upwards are appreciated.  (Maybe I really do need to add some vital gluten?)Thanks.


jacobsonjf's picture
jacobsonjf

Locked up indoors while mending from some winter crud, Saturday night I took my recently refreshed liquid levain and made two preferments. One whole wheat and one whole spelt. Sunday morning I added them to some water, then added bread flour, salt, and yeast. Fermented, stretch fold, ferment, shape, proof, bake. Seems no matter what I do, the sharp edges of the spelt bran never soften. Energy bread,s surface I make using spelt, feels like 220 grit sandpaper. I fined nothing wrong with it, but find spelt is the only whole grain flour wwhere I experience  rougher the texture.

Pages

Subscribe to RSS - blogs