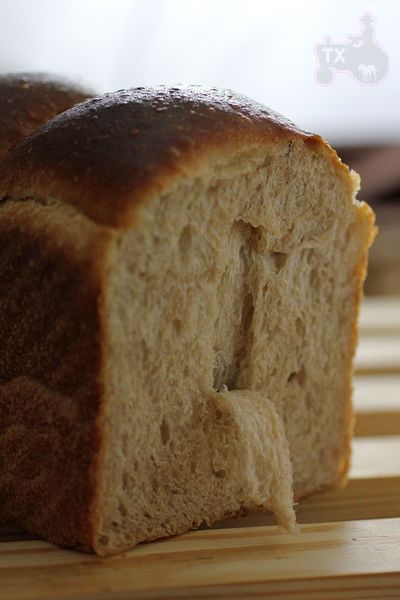
The Fresh Loaf

A Community of Amateur Bakers and Artisan Bread Enthusiasts.

txfarmer's blog

txfarmer's picture
txfarmer

Sending this to Yeastspotting.

Click here for my blog index.

This is the theme for this month's Daring Bakers' Challenge. One look at the original recipe (see here), I knew it wouldn't produce the croissants I want. Don't get me wrong, I worship Julia Child, but I think she made some compromises here so that it's less daunting for the home bakers, however, the quality suffers as the result. All the changes I made were based on the lessons I learned over the last few months of croissant marathon, you may find that they correspond closely to the tips I gave in this original croissant post.

1. Reduced the water amount by A LOT
2. Reduced the oil amount by A LOT. The original recipe yields incredibly wet doughs, while it's easier to roll out, it affects crumb negatively. The first 2 changes mean to make the dough drier, and crumb more crisp. Note that this recipe uses oil rather than butter in the dough, which makes the dough more extensible(i.e. easier to roll out). It would make the dough stronger if I replace it with butter, but I kept oil to stay somewhat true to the original recipe - I can get the dough strength in other ways.
3. Reduced salt. The original recipe yields VERY salty croissants.
4. The original recipe soften the roll-in butter then "smear" it onto the rolled out dough. It may see easier than making a butter block then enclose it, but softened butter is warmer butter, which means it's easier to melt, a big NO NO if you want clear flaky layers. In addition, smearing doesn't produce even butter layers either. I still used my usual method to enclose butter: make a butter block, fridge, enclose into dough. (picture below with recipe)
5. Used bread flour rather than AP flour.
6. Kneaded the dough much longer than what the recipe required. Both 5 and 6 aim to increase dough strength. Stronger dough rises higher during baking, creating clear layers and open honeycomb crumb. Yes, stronger dough is also harder to roll out, but it's worthwhile.
7. The original recipes requires 4 bookfolds, which IMO, is way too much for such small croissants (much smaller than the standard size I made before). More folds == more layers, good in theory, easy to have leaky butter in practice. Even if the butter doesn't leak, more layers in such a small roll would just make the crumb less "open". I only made 3 bookfolds as usual.
8. The original recipe doesn't produce a lot of dough, yet still makes 12 croissants, so each one is tiny-mini. On top of that, the shaping process has unusal sizes (bottom and sides are of the same length for each triangle, which means each croissant is very long, but doesn't have a lot of layers), and too much stretching (easy to melt the butter). I changed the sizes to make 8 croissants (still much smaller than standard size, but at least each croissant is rolled up enough times to create a layered crumb).
9. Extended proofing time from 1.5 hr to 3.5 hr. Croissants MUST be fully proofed for a good crumb.

Note: this recipe requires a builk rise , which is different from all the other croissant recipes I tried before. Bulk rise made the dough extra strong - again, harder to roll out, but crumb is better.

Croissants (majorly adapted from Julia Child)
Note: Makes 8 small croissants
Note: for details and tips, please see this post
Note: for more tips on making croissants in warm weather, see here

Bread Flour, 228g
Milk, 120g
Water, 13g
Sugar, 14g
Salt, 5g
Instant Yeast, 2.7g (a scant tsp)
Oil, 15g
Roll-in Butter, 125g

1. Mix everything together but the roll-in butter. Knead @ low speed for 3min, @medium speed for 7min, the dough should be very smooth, relatively strong, a relatively weak windowpane.
2. Bulk rise at room temp (24C) for 3 hours until doubled, mine even tripled. Knead to get rid of air, press flat, put in fridge for 2 hours or overnight.
3. Tap roll-in butter between two sheet s of plastic, roll into 5inch square. Put in fridge for at least one hour.
4. Roll out dough into 7inch square, enclose butter block as following, seal well

5. Roll out to 6X14inch rectangle, do first bookfold along the longer side. Don't forget to trim the edges.

6. Put in fridge and rest for 1 hour. Take out dough and repeat the rolling and folding 2 mroe times, which gives 3 folds in total.
7. Put in fridge and rest for at least 120min.Roll out to 8X16inch, 1/8inch thickness. You may need to rest the dough in fridge several times.
8a. For classic croissants: cut into 4 rectangles, each 8X4inch. Then cut each rectangle diagonally into 2 triangles. Trim edges, stretch lightly into skinny long triangles.
8b. For Bear claws, cut into 5X3inch rectangles.
9a. For classic croissants: roll up fairly tight, stretch out the tip with one hand when you roll the bottom with the other hand. Since they are smaller, you won't get as many layers as the standard ones

9b. For bear claws, put a TBSP of almond filling on the dough, fold in half along the longer side. Seal, and make 4 cuts for the "claw" effect.

10. At this point, you can proof right away, fridge overnight and proof next day, or freeze (defrost overnight in fridge before proofing). Brush with egg wash (1 egg beaten with 1 TBSP of water), then proof @ about 80F until very soft and jiggly. About 3.5 hours for me. Brush another layer of egg wash after proofing.


12. Bake at 425F for 10min, 375 for 15min.


The very round cross section indicates enough dough strength. The crumb is open with a clear honeycomb effect.

I am fairly happy with the crumb, but there's always room for improvement. The smaller rolls has less layers than standard ones, which means the crumb has less "holes".

The bear claws came out pretty well, with or without powder sugar. And I used the leftover dough from bear claws for some mini chocolate croissants.


Bear claws and chocolate croissants were rolled up in less turns than croissants during shaping, so the layers are very clear and very flaky - easier to make than the standard ones IMO.

With some major overhaul, this recipe produces very good results.

txfarmer's picture
txfarmer

Sending this to Yeastspotting.

Index for my blog entries

I have been wanting to make a tomato flavored bread for a while now, after quite a few attempts, I found
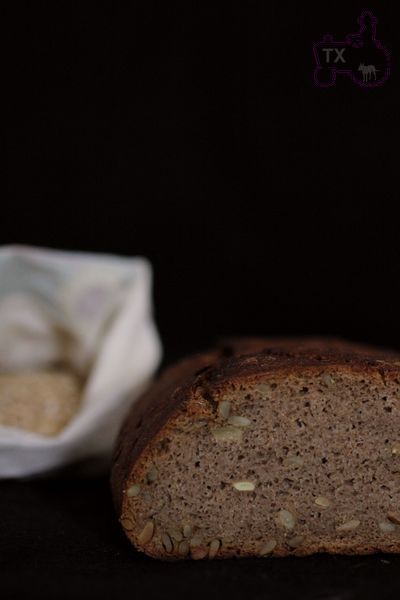
* The bread needs to have a very strong tomato flavor, otherwise it tastes oddly sour, sort of like spoiled food(at least to me). In order to get that intense tomato flavor, all of the liquid in this formula is tomato juice, AND I added some tomato pastes.

* WW flavor complements tomato very well, add depth to the sour/sweet note

* WW also makes the red color deeper, rather than light pink, which I love on my dresses, but not my breads

* With that much acidic tomato juice/paste in the dough, it's not a good candidate for sourdough. I have tried a few times, the dough ends up falling apart a little at the end of proofing, unable to rise very tall in the oven - small sourdough rolls would still be OK, but sourdough tomato sandwich loaves would be short and small. I finally gave up and make this loaf using dry yeast.

* Cheese/basil/garlic are classic matches to tomato for a reason - they are super delicious.


100% WW Tomato Basile Cheese Bread
Note: makes a 650g bread, using a 8.5X4.5 loaf tin
ww flour, 450g
instant yeast, 5g
brown sugar, 45g
salt, 7g
tomato juice, 284g
tomato, paste, 28g
olive oil, 45g
- filling
parmesan cheese, 30g, grated
basil pesto sauce

1. Mix flour, sugar, tomato juice, tomato paste, olive oil, autolyse for 20-60min. Add salt and yeast, knead until passing windowpane.This intensive kneading is the key to a soft crumb, and proper volume. The windowpane will be thin and speckled with grains, but NOT as strong as one would get form a white flour dough. For more info on intensive kneading, see here.

2. Bulk rise until double, about 90min @ 75F. S&F, slap to get rid of air, round and rise again until double, about 45min.
3. Round, rest for 15min. Roll out to 9X16inch, spread pesto sauce, then cheese

4. Roll up from the short side (i.e. roll along the long side), seal well. Cut along center, turn to let cut surface facing up, braid and put into oiled tin

5.Proof for 45-60min, until about 1 inche above the rim

6. Bake at 350F for 35-40min, after 15min, start checking, cover with tin foil if the cheese starts to burn and the top brown too quickly.


WW goes well with the classic tomato/pesto flavor combo, cheese just push it over the edge


I actually don't like to drink tomato juice directly, and it's a good way to use up the two big cans of tomato juice my mother unloaded to me. I made the pesto sauce as well, with fresh basil, pine nuts, olive oil, (lots of)garlic.

txfarmer's picture
txfarmer

Sending this to Yeastspotting.

Index for my blog entries


First saw this formula from Shiao-Ping's blog post, which is adapted from Mariana-aga's blog post here. I stuck to the original version pretty closely but added 20% of toasted sunflower seeds for extra flavor. I was a little wary of baking an 100% rye in free form, but as long as fermentation is managed well, I can still get decent height and volume.


Noticably sour with strong rye flavor, this is a complex and delicious loaf. Very easy to make too.

I followed the original method of bulk fermenation for 2 hours, then shape and proof for 35-50min (40 for me). While some say bulk fermentation is not necessary for rye breads, I find bulk rise +shape +proof helps to redistribute the air bubbles, leading to a more even crumb.

txfarmer's picture
txfarmer

Sending this to Yeastspotting.

Index for my blog entries

Lumos' blog post inspired me to make a bread with seaweed. In my miso soup loving mind, seaweed must go with miso paste, must. There are many different kinds of miso paste, you can find details here. The big bucket I stock at home to make miso soup is "soy miso" with dark reddish color. Since miso has a lot of  fermentated soy bean and salt, it's important not to go overboard and add too much. 15% seems to be a good balance for me: enough miso flavor, yet doesn't completely destroy the dough. With that much miso, plus my very fast rye starter, both bulk rise and proof were very fast. I didn't cold retard the proofing, since the fermentated soybean in miso might have negative effect on the dough over such a long period.

I used dried seaweed found at Asian markets, before use, I soak them in water for 5min+, and they expand to this:


Miso Rye with Seaweed
note: Make a 750g bread

- levain
whole rye, 57g
water, 45g
rye starter (100%), 6g

1. Mix and let rise 12-16hours.

- final dough
bread flour, 340g
miso paste, 60g
water, 220g
dried seaweed, 20g, soak for 5min+ then squeeze dry before use
all levain

2. Mix everything except for seaweed, autolyse for 30min, mix @ medium speed for 5min until gluten starts to develop. Add soaked and dried seaweed, mix @ slow speed until evenly distributed.
3. Bulk rise at room temp (~75F) for about 2.5hrs. S&F at 30, 60, 90, 120min.
4. Shape into boule, proof bottom up in basket, until it springs back slowly when pressed, about 60min for me and my TX kitchen.

6. Bake at 450F with steam for the first 15min, lower the temperature to 430F, keep baking for 25-30min.

I must admit all that miso does weaken the dough, but if fermentation and S&F are managed well, there still be decent oven spring.

Nice open crumb, very moist

You really must love miso/seaweed to like this bread, because both flavours have noticeable presence here.


txfarmer's picture
txfarmer

Sending this to Yeastspotting.

Click here for my blog index.

Honestly, I do blame it on Eric. Firstly, he posted a mouth watering blog about his initial attempt at replicating the famous NO French bread (see here); then he emailed me and asked me to do futher investigation; just to make it final, he even fowarded me some links and pictures to get me started. After a few tries, my final version actually is not that different from Eric's original formula, with the following modification:

- To make crumb velvety soft
* Knead, knead, and knead, see this post for details. If your bread is too dense, too tough, knead more.
* Some enriching ingredients like sugar, powdered milk, and fat. However if there are too much enriching ingredients, the crust will become soft too. Eric's original formula provides a good balance.
* I used a combination of AP and Bread Flour. BF is there to ensure enough strength, so the bread can have a lot of volume, thus guarantee a soft mouthfeel, as well as some "bounciness". AP flour is used to add tenderness. You can certainly adjust the AP/BF ratio to get the crumb you like.

- To make crust very thin and crispy
* 10% of rice flour. I have made baguettes with rice flour before with very good and crispy crust, it does the same thig here.
* Bake with steam (Eric's version does that too).
* Brush the dough with liquid before baking. I tried different liquid with different results: cold water -> thin, crispy, probably the most "authentic" version; egg whites/corn starch+ water -> even crispier than water but thicker; olive oil -> still crispy but less crackly, very fragrant, my favorite
* Size matters. I tried to make them smaller, but the baking time ended up too short to create a very crackly crust. If the size is too big, crust would be baked too long , which means too thick. The size I am making below is smaller than Eric's original version, but still big enough to get the crust right.

New Orleans Po-Boy French Bread (adapted from Bernard Clayton's "New Complete Book of Breads")
Note: makes 2X400g loaves

Bread Flour , 225g
AP Flour, 150g
Rice Flour, 45g
Water, 300g
Instant yeast, 1.5t
Salt, 8g
Sugar, 10g
Powdered Milk, 5g
Butter, 10g, softened

1.Mix everything but butter, knead until gluten starts to form, add in butter, knead until pass windowpane test, see this post for details. Note that rice flour is pretty coarse, may interfere with gluten formation, so the kneading would take a while, and the windown pane would be a bit thick.

2. Bulk rise at room temp (75F) for 70min until more than doubled, S&F at min 50.
3. Divide into 2 parts, preshape and relax for 20min. For each dough, roll out to 14X6inch, get rid of all air bubbles, roll up, seal, roll out to 16inch in length.

4. Proof at room temp until double, 45min to 60min. Brush with water (or other luqid), score.

5. Bake at 425F for 20min with steam, lower to 375F, rotate baking sheet, and keep baking for another 20min. The last 5min with door cracked open.


Very crispy and crackly crust, crumbs everywhere when cut or torn


Crumb is velvety soft and shreddy, I could pull the inside out like this


I know the most popular Po-Boy sandwich is pulled pork/beef, but I love fried shrimp filling. This time I just rolled shrimps in bread crumb, then baked until done. Equally delicious.

txfarmer's picture
txfarmer

Sending this to Yeastspotting.

Click here for my blog index.


It's another variation for my favorite sourdough sandwich breads. This time there are 30% rye in the flour, 15% of which in levain, the rest in final dough. Before this loaf, I tried other rye ratios, 30% seems to be the sweet spot - enough rye flavor yet the dough is still strong enough to be soft, bouncy, and fluffy. The total flour amount is 280g for my Chinese pullman tin, which is 30g more than an all white flour sandwich dough. I knew I would need more dough to compensate for the rye, but 30 is much less than I anticipated, just shows that a bit of rye won't hurt the dough strength that much.

30% rye sourdough sandwich loaf
Note: 15% of the flour is in levain
Note: total flour is 280g, fit my Chinese small-ish pullman pan. For 8X4 US loaf tin, I suggest to use about 302g of total flour. For KAF 13X4X4 pullman pan, I would suggest using about 481g of total flour.

- levain
rye starter (100%), 12g
water, 19g
medium rye flour, 36g

1. Mix and let fermentation at room temp (73F) for 12 hours.

- final dough
bread flour, 196g (I used half KAF bread flour and half KAF AP flour for a balance of chewiness and volume)
medium rye, 42g
brown sugar, 28g
oil, 28g, softened
milk, 143g
salt, 6g
egg, 34g

1. Mix everything until stage 3 of windowpane (-30sec), see this post for details.

2. Rise at room temp for 1 hours, punch down, put in fridge overnight.
3. Takeout, divide, round, rest for 1 hour. shape as instructed here for sandwich loaf.

4. rise at room temp for about 5 hours. For my pullman pan, it should be about 80% full; for US 8x4inch pan, it should be about one inch above the edge. The dough would have tripled by then, if it can't, your kneading is not enough or over.

5. for sandwich loaf, bake at 400F for 15min, then 375 for 25-30min, brush with butter when warm.


To counter the effect of rye flour, there needs to be enough tenderizing ingredients in the dough: oil, sugar, egg, milk all serve this purpose. The slices were extremely soft and fluffy, yet full of flavor.


Used brown sugar rather than white sugar, oil rather than butter, to better complement the rye flavor

txfarmer's picture
txfarmer

Sending this to Yeastspotting.

Click here for my blog index.

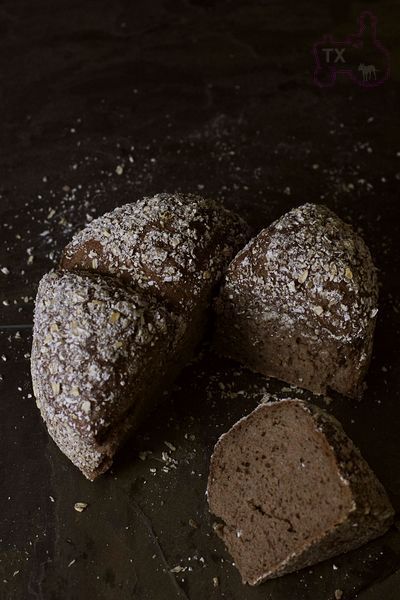
Another great loaf from the book "A Handmade Loaf". 73% whole wheat, 27% rye (all in starter), and lots of oatmeal on the crust, it's a flavorful whole grain loaf.

The following is my adaption of the formula: cut the amount by half, baked in a 6inch cake tin, and increased hydration a tad. My kneading method is also different from the original.

water, 140g
rye starter (100%), 150g
instant yeast, 2g, about 1/2 tsp
ww flour, 200g
salt, 4g
oatmeal, 37g, coarsely grounded

1. mix water, starter, ww flour, autolyse for 30min, add yeast and salt, knead until gluten starts to form (about 5min at medium speed for my KA).
2. bulk rise for 70min, S&F at 25min and 50min.
3. oil the spingform round tin (I used one with removable bottom), spread half of the oatmeal on surface.
4. preshape, relax, then round the dough and put into the tin, flatten and push to the edge. score deeply (all the way to the bottom). spread the rest of oatmeal on top.
5. proof until spring back slowly and partialy, about 75% larger in volume, 45min for me (75F room temp).
6. bake at 410F for 20min, then 375F for 20min. remove from tin, cool on rack.


The crusty oatmeal shell contrasts nicely to the soft and moist crumb.


Noticably sour, but not overboard, I love the flavor combo of ww and rye.


txfarmer's picture
txfarmer

Sending this to Yeastspotting.

Click here for my blog index.

Often used in Chinese cooking, Goji berries are known to have all kinds of health benefits. I often have dried Goji berries on hand to make soup, congee, or even tea with.They are good for me and pretty looking, but don't really have any strong taste, so I combined them with pine nuts in this loaf to jazz up the flavor.

Light Rye Sourdough with Goji Berry and Pine Nuts
Note: makes a 730g loaf

- levain
medium rye, 136g
water, 110g
rye starter (100%), 7g
1. Mix together and leave at room temp for 12 hours.

- final dough
bread flour, 295g
medium rye, 23g
water, 207g
salt, 8.5g
levain, 245g
dried Goji berries, 57g, soaked in water for 20min then drained
pine nuts, 57g

2. Mix together flour, water, and levain, autolyse for 20 to 60min, add salt, mix @ medium speed for 3-4 min until gluten starts to develope. Add Goji berries and pine nuts, mix @ slow speed until evenly distributed.

3. Bulk rise at room temp (~75F) for about 2.5hrs. S&F at 30, 60, 90min.

4. Shape into batard .

5. Proof face down in basket until the dough spings back slowly when pressed, about 90min in my case.

6. Bake at 450F with steam for the first 15min, lower the temperature to 430F, keep baking for 30 min.

My rye starter is VERY fast, please adjust fermentation schedule to fit your own starter if you decide to give it a try.


Goji berries add visual interests, while pine nuts made it so fragrant.


Nutty and fragrant, it's perfect with some PB.

txfarmer's picture
txfarmer

Sending this to Yeastspotting.

Click here for my blog index.

This is inspired by the ww croissant formula from "AB&P", but I used sourdough starter to make a levain, rather than the original sponge. Also adjusted the liquid ratio (as well as a lot of other things), the original formula was a bit too wet, the dough was too soft and went "faster" than the butter block when rolled out. Yolk and milk in the formula do a good job of tenderising the ww dough,croissants were beyond delicate. Gotta say the ww flavor went perfectly with the the rich buttery taste, add sourdough on top, it's my favorite croissant dough so far! "AB&P" suggests that it would go well with savoury fillings, and they are right. I used some for sandwich, also made a few ham/cheddar & spinach/feta croissants, both were heavenly.

WW Croissant with Natural Starter (adapted from "AB&P")

Note: makes 12 croissants

Note: for details and tips, please see this post

Note: for more tips on making croissants in warm weather, see here

-Levain

100% starter, 30g

water, 48g

bread flour, 89g

1. mix and let mature for 12 hours.

-Final Dough

bread flour (KAF), 309g

ww flour (KAF), 103g

milk, 187g (before adjustment, it was 195g of water)

egg yolk, 43g

sugar, 53g

salt, 7g

osmotolerant instant yeast (SAF gold), 4g, 1tsp+1/4tsp

butter, 25g, softened

levain, all

roll-in butter, 287g

1. Mix everything but the roll-in butter, knead until gluten starts to form. In my KA mixer, 3min at first speed, 5 min at 3rd speed.

2. Then following the procedure illustrated here to make normal ones. For ham/cheese, spinach cheese ones, cut dough into 5.25inchX9inch pieces, lay ham and cheese(or spinach and cheese) on top near bottom, roll along the short edge twice with seam on the bottom. Cut the roll into 3 pieces, each 3inch wide.

First batch, before adjusting liquid, the dough was a tad too soft. Crumb was still nice and open, but a little "messy", walls of the "holes" were not crisp.

After adjusting the liquid, structure was more crisp. The difference was not huge, probably just obvious to my own picky eyes.

With liquid amount adjusted, but rolled out a bit thinner than usual to get more layers. The "holes" are clean and separated, however, a bit too small, I probably won't roll the dough out so thin next time, even though some of my tasters liked this version.

Makes a GREAT sandwich, I love how this cut surface looks. It shows a different perspective on the crumb structure.

Of course the ones with filling rolled in were super yummy too, look at the leaking cheese

However you make them, I highly recommend this formula!

txfarmer's picture
txfarmer

Sending this to Yeastspotting.

Click here for my blog index.

Or not. Because my laminating obsession is resulting in all kinds of delicious breads. This one is inspired by a blog post I came across sometime ago, whiich has interesting backstory and detailed shaping instruction. The filling is laminated into the dough rather than directly kneaded in. My previous fourgasse(see here) was airy and crispy all around, this one is crispy on the outside, soft/slightly chewy on the inside - a different kind of yummy.

I used the Rustic Bread recipe from "Bread" for the dough, and two kinds of fillings.

Laminated Fougasse (inspired by "Bread" and this post)
Note: Makes two one pound loaves

--Poolish
Bread Flour, 267g
Water, 267g
instant yeast, 1/8tsp, i.e. a very small pinch

1. Mix and let rise at room temp for 12-16hours.

-Final Dough
Bread Flour, 267g
Water, 102g
Salt, 2tsp
Instant Yeast, 2.8g, a scant tsp
Poolish

- Fillings
Savory Filling: black olive, ham, cheese, 115g, chop finely and mix well
Sweet Filling: cranberries, almonds, pistachios, sugar, cinnamon, 115g, chop finely and mix well

2. Mix poolish, flour, and water, autolyse for 30min. Add salt and yeast, mix at medium speed for 3-4 min until gluten starts to develope.
3. Let rise at room temp until double (about 70min at 75F), S&F at minute 25 and 50.
4. Shape as this blog instucts. One with savory filling, and the other with sweet filling.
5. No proofing, bake right away at 425F for about 25min.

I like how the filling color shows through


Crispy on the outside, soft and chewy with intense filling flavor on the inside, whats not to love

I think it's the best eaten warm from oven

Pages

Subscribe to RSS - txfarmer's blog