Blog posts
The next level
[size=18][b]Introduction[/b][/size]
Usually I am not too much involved in the blogging world, or the blogosphere, as it seems to be called. There is a fine line between writing just for serving your own ego and writing as part of a social endeavour, the desire to contribute to the wide array of knowledge and media which is the source for all the people, including myself, in the need for advice. I always feared going too much for the former.
My Baking Philosophy
This isn't a recipe, nor is it instructions to anyone other than me, it's just a statement of where I am right now in terms of baking bread. Some will be appalled, others might be inspired. Most probably won't care!
- Log in or register to post comments
- 6 comments
- View post
- amolitor's Blog
Advice for those who have tried recipes and have failed...
Maybe this is unsolicited advice, but here goes...
For those of you who have tried recipes and have failed, my advice to you is to make note of what went wrong, and try it again. Try it again until you it works for you. And keep trying until it comes out how you want it to. This is the only way to get better. Success is not a very good teacher. Learning from your mistakes is... This applies not only to baking bread, but life in general...
Tim
- Log in or register to post comments
- 7 comments
- View post
- breadbakingbassplayer's Blog
9/20/10 - Loaf For My Brother and Friends...
Hey All,
- Log in or register to post comments
- 9 comments
- View post
- breadbakingbassplayer's Blog
Something new
I took the trip to the Amish store, and I brought back two types of bread flour, some high gluten flour, wheat gluten, whet germ, oat bran, and spelt. I wanted to try the spelt to make something hearty, something chewy and rich and full of old world flavor. The first thing I made was pasta. Talk about good! We usually use bread flour because I don't have any semolina to buy nearby. It is always good, but the spelt I put in changed it from good to ridiculously amazing.
- Log in or register to post comments
- 11 comments
- View post
- odinraider's Blog
Chinese mooncakes - Happy Mid Autumn Festival !
This year Chinese Mid Autumn Festival falls on 9/22, Wed, even though it still feels like high summer here in Dallas, I have been making traditional mooncakes to mark the occasion.
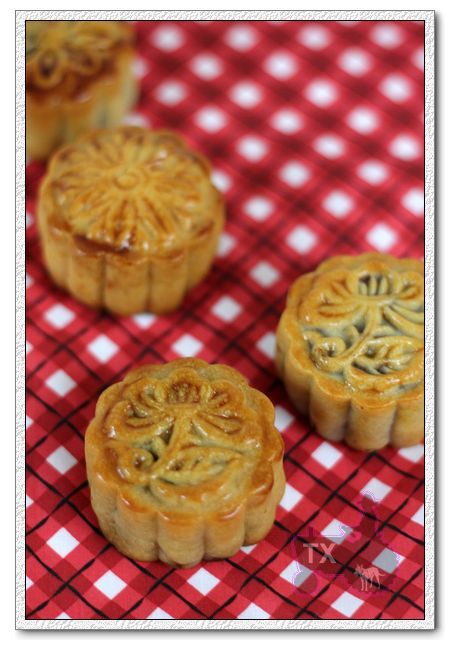
Traditionally, it''s a holiday for people to gather with loved ones. The round moon symbolizes "togetherness" and "family". My parents are in Seattle, while my husband's family is all the way in China, so we can only celebrate with them spiritually.
- Log in or register to post comments
- 19 comments
- View post
- txfarmer's Blog
9/19/10 - The "Perfect" Crumb...
Hey All,
- Log in or register to post comments
- 11 comments
- View post
- breadbakingbassplayer's Blog
Baklava, in an Italian Recipe Box?
This Baklava recipe isn’t overly sweet and for large group parties it is a winner.
http://turosdolci.wordpress.com/2010/09/20/baklava-in-an-italian-recipe-box/

Walnut Levain
This is my imitation of Acme Bakery's walnut levain. It's based on the Mixed Starter bread recipe in Baking With Julia. If you're not comfortable working with doughs by feel, if you really prefer to weigh ingredients, this recipe will not be helpful to you.
First starter:
- Log in or register to post comments
- 6 comments
- View post
- amolitor's Blog