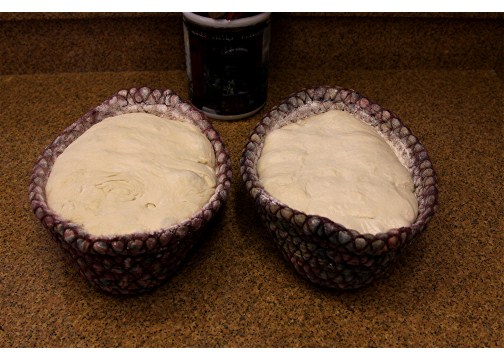
The Fresh Loaf

A Community of Amateur Bakers and Artisan Bread Enthusiasts.

holds99's blog

holds99's picture
holds99

This bread is made using 50% Golden Temple Atta durum wheat flour (not semolina) and 50% King Arthur bread flour.  In the past I have used King Arthur durum flour.  For this bake I decided to try Golden Temple Atta.  The main difference I noticed between the King Arthur and Golden Temple durum flour, is King Arthur durum gives a yellowish color to the crumb, whereas Atta gives the crumb a light- golden tan color.  Other than color, I think the flavor of the two flours are comparable in taste/flavor.  After I finished baking this bread, I was putting away the Golden Temple Atta, it dawned on me that Varda had written a blog a while back on Atta durum flour, where she discussed some problems, options for mixing and hydration.  Using the TFL search function I found Varda’s: “Atta Durum Hearth Loaf” and read her excellent post on the characteristics of this flour and how she dealt with “taming the beast”.   The comments on the post were also interesting.  Varda used 100% Atta durum in her loaf, where I used only 50% Atta.  Incidentally, Varda’s loaf was beautiful.  Next time I will try using 100% Atta durum flour for this formula to see what results I get.

As can be seen in the photos, I used the Dutch oven method, which works well with this high-hydration dough.  In fact, I bake about half of all my bread in a Dutch oven.  As for shape, my personal preference is oval, rather than round Dutch oven.  The main reason is the oval (except for each end of the loaf) allows the slices to be fairly uniform in size/shape; nice for sandwiches.

After shaping, the loaves were retarded overnight in bannetons inside a plastic bag.  I preheated the oven to 500 degrees.  The temperature of the Dutch oven were room temp., not preheated.  I turned the shaped loaves from the bannetons into the Dutch oven, put the lid on and set them on the stone in my oven (see photo).  As can be seen in the photo, these Dutch ovens are large; the pair span the entire oven rack. 

I made slightly less than 8 pounds (7.85 lbs.) of dough and divided it equally into 2 – nearly four pound loaves.  The formula can be halved to produce approximately 4 pounds of dough, which can then be divided equally to produce 2 – approximately two pound loaves.  I also used a double-levain build.  The first build takes 12-14 hours (overnight), the second build, because of the yeast activity, takes much less time, 2-3 hours.  The final-dough flour and water was mixed together and allowed to autolyse for 30 minutes before adding the levain to the final dough mix.  After the autolyse, the levain was mixed with the final dough mixture for approximately 8 minutes (DLX Attendent - 10 qt. stand mixer - low speed) before the salt was added.  After adding salt it was then mixed an additional 4 minutes on low speed.  The dough was given 4 stretch and folds; one at the beginning of bulk fermentation, 3 more at 20 minute intervals for a total of one hour.  The dough was allowed to bulk ferment for an additional hour after the stretch and folds.  At the end of the 2 hour folding and bulk fermentation process the dough was divided, pre-shaped and allowed to rest on the work surface, covered, for 30 minutes.  Then the final shaping was done, after which the dough was placed into bannetons (seam side up) and retarded in the fridge overnight in plastic bags.

Note 1:  Before turning the dough into the Dutch oven, generously sprinkle the top of the dough in the bannetons with semolina.  After the dough is turned out of the banneton(s) into the Dutch oven, the semolina will act as an insulator and keep the bottom of the loaf from scorching.

Note 2: After 20 minutes of baking at 500 deg. F, reduce the oven temperature to 480 deg. F.  After an additional 10 minutes further reduce the oven temperature to 470 deg. F.

Also, turn the Dutch ovens around every 20 minutes.  Remove the lids approximately 10 minutes before the end of the baking cycle.  These 4 lb. loaves were baked for 58 minutes, the final 10 minute with the lidsoff the Dutch ovens.

Note 3: A few months ago I started experimenting with Chad Robertson’s technique for high-hydration dough.  He uses warm water in his final dough mix.  After final dough mix, Robertson places the dough into a plastic tub and over a 3-4 hour period he thoroughly turns the dough back on itself at half hour intervals (see Chad Robertson’s Masters Video clip on YouTube).  This method is really effective for developing strong gluten and really gets the yeast cranking.  So much so that when you try to retard the dough the yeast keeps on cranking/fermenting in the fridge, and when it is taken out of the fridge the following day the dough is over-proofed.  This results in the dough degassing when it is scored, before going into the oven.  This happen to me three times, with two different types of dough.  So, I asked David Snyder what he thought about solving the problem?  He suggested using cold water in the final dough mix and lowering the fermentation temperature.  Thank you, David.  That’s what I did.  In short, I used cold water for the final dough mix, shortened the total bulk fermentation time to 2 hours and retarded it overnight for about 12 hours.  The combination of cold water and shorter bulk fermentation time kept the yeast activity suppressed during retardation.  After removing the bannetons from the fridge I was able to leave the dough in the bannetons for close to two hours, allowing them to nearly double in volume, at room temperature, before putting them onto the D-o, scoring them, covering them and placing them in the preheated oven.

Note 4: If you are not retarding your loaves, then you don’t need to use cold water in the final dough mix.  You can use room temperature water.

Overall, the final dough mix has: 71 oz. flour, 53.25 oz. water and 1.42 oz. salt.  These ingredients make 7.85 lbs. of dough. The final dough is 75% hydration. 

Levain build No. 1  (12—14 hours)

2 oz. ripe sourdough starter (heaping tablespoon)

8 oz. water

8 oz. bread flour

Levain build No. 2  (2-3 hours)

All of levain build no. 1

8 oz. water

8 oz. bread flour


Final Dough Mix

 19.5 oz. bread flour

35.5 oz. Atta durum flour

37.25 oz. cold water (keeps the dough from over-proofing during retardation)

1.4 oz. salt


holds99's picture
holds99

A few years back I was testing English muffin recipes on TFL.  After I posted a recipe I received a comment from Dan Lepard who provided a recipe for excellent English muffins.  The other day I decided to give the recipe another try.  The only thing I changed was a couple of stretch and folds at 20 minute intervals after the dough came out of the refrigerator, after reaching room temperature.  This is a really good recipe which produces a light, flavorful muffin, and it's easy to make.  They take about 7 minutes per side on a medium low grill or in a cast iron skillet.  Don't try to hurry them or the outside will be brown before the inside is done.  I used a digital thermometer to check the internal temperature.  These reached an internal temperture of 202-204 deg. F.  Incidentally, I quadrupled the recipe to make 4 times the amount of dough, which is the reason the dough amount in the first photo under the recipe is fairly large.

Edit: I also added 3 Tbs. ripe 100% sourdough starter to the dough mix.

Below is the recipe that Mr. Lepard published in the Guardian newspaper.

Howard


Cider vinegar English muffins

What the Americans call an English muffin we used to call, well, a muffin. But since those little cakes in paper cases have invaded the supermarket shelves and stolen the name, our own little plain bread muffin has become neglected in Britain. In the US, bakers have raised the quality of their English muffins to something close to perfection. Crisp on the outside, sour and holey inside, and chewy when toasted and slathered with butter. Make these and you'll see what we've been missing all these years. In this recipe, the dough gets mixed and lightly kneaded the night before and is left in the refrigerator overnight to rise slowly. You can even leave it until the following evening if that works better for you.

Makes 8-10 muffins

50g unsalted butter

100ml warm water (by weight: approximately 4 oz. or 116 g.)

50ml cider vinegar [by weight: approximately 2 oz. Or 58g.]

100ml plain live yoghurt [slightly less than ½ cup]

1 large egg

1 level tsp salt

375g strong white flour

2 tsp easy-blend yeast [I used instant yeast and it worked fine]

Oil for the bowl

The night before, melt the butter in a saucepan [use stainless steel with the vinegar], then remove from the heat and beat in the warm water with the vinegar, yoghurt, egg and salt until smooth. Measure the flour and yeast into a bowl, tip [pour] in the butter and vinegar mixture and stir to a thick batter. Cover the bowl and leave for 10 minutes. Lightly oil the work surface and knead the dough gently for 10-15 seconds (see Basic techniques). Scrape the bowl clean of scraps of dough, wipe the inside with a little oil, place the dough back in the bowl, cover with a plate or cling film and place in the refrigerator overnight.

The following morning (or evening), lightly oil a dinner tray and upturn the dough on to it. Stretch and fold the dough in by thirds (see Basic techniques), then cover with a tea towel and leave to rest for 1-2 hours until it warms and begins to rise again. [It takes a full 2 hours at 75 deg. F.]

Line a dinner tray with a tea towel and dredge the surface liberally with flour. Gently roll out the dough [on a work surface] about 1½ cm [approximately 5/8 inch] thick, trying not to knock too much of the gas from it. Cut the dough into discs using a 12cm-diameter [approximately 4 ¾ inches] cutter (yes, that large, as they'll pull inwards as they bake), or take a sharp knife and cut the dough into 6 rectangles or something close to that. Carefully lay the cut dough on the floured cloth. Dust the tops with flour and cover with a tea towel. Leave for 1½-2 hours [they’ll take the full 2 hours at 75 deg. F.] or until doubled in height.

Get a large heavy-bottomed frying pan with a snug-fitting lid if possible. Place on a moderate heat until the surface is hot but not scorching.

Uncover the muffins and flip them one by one on to your hand with the cloth, then slide them into the pan. You should be able to fit 3 or 4 in at a time. Cover the pan with the lid to create a bit of steam to help them rise and cook for 2-3 minutes.  Then check to see that they're not burning. If the bottom is a good brown, flip them over using a spatula. Cook on the other side for about 3-4 minutes. [I used an electric skillet with a lid, set at 340 deg. F. cooking them in a dry pan for 6 minutes on side 1 and 4 minutes on side 2 until they reached an internal temperature of 190 deg. F.] When done, remove to a wire rack, drape a tea towel over to keep them soft, and continue with the remaining muffins. Freeze in a zip-lock bag as soon as they're cold.

holds99's picture
holds99

Pain au Levain - Rye with Cracked Rye Soaker and Caraway Seeds

This formula produces an excellent rye bread that tastes great and is good plain or
toasted.  With  cracked rye soaker and caraway seeds
incorporated into the final dough mix, toasting this bread brings out a pleasant
and more pronounced rye and caraway taste. 
The soaker and caraway seeds gives it a good texture and a distinct rye
taste.  This is a medium rye,
high-hydration dough that produces a rustic type bread with open crumb and nice
color and crust.

Yield: 8 lbs 15 1/4 oz of dough or 4.08 kilograms (4 loaves @ 1
kilogram (2.2 lbs) each, or 2 loaves @ 2 kilograms (4.4 lbs) each.  This recipe may be halved to produce 2 loaves @
1 kilogram (2.2 lbs) each or 1 large miche type loaf @ 2.2 kilograms (4.2 lbs).

Time:

  • Ferment: Double levain build (starting with a mature rye
         starter): 1st levain build 12-14 hours, 2nd levain mix 2.5 - 3 hours for a
         total of approx. 15 hours prior to final dough mix, depending on room
         temperature
  • Soak cracked rye: Overnight
  • Mix final dough: 8 minutes
  • Stretch and Fold : 1 hour with 4 stretch and folds at
         20 minute intervals
  • After 4th stretch and fold, shape the dough into a
         large ball and place it in a lightly oiled covered plastic container and retard
         dough in refrigerator overnight.
  • The following day remove from refrigerator, allow dough
         to come to room temperature (75 deg. F)
  • Pre-shape, rest, and shape: 35 minutes
  • Proof: 2.5 – 3 hours
  • Bake: approximately 45 minutes

Desired dough temperature: 75 deg. F

Levain Build No. 1 Ingredients:

  • 1 Tb (1.2 oz./34g) ripe 100%-hydration sourdough
         starter
  • 8 oz (226g) water at 75 deg. F)
  • 8 oz (226g) light rye flour

Levain Build No. 2 Ingredients:

  • All of Levain Build No. 1 plus:
  • 8 oz (226g) water at 75 deg. F
  • 8 oz (226g) pumpernickel flour

Final Dough Ingredients:

  • 10.5 oz (298g) first clear flour
  • 44.5 oz (1,262g) bread flour
  • 1.3 oz (37g) salt (2 Tb)
  • All of the double levain build
  • 35 oz (992g) water
  • All of the soaker
  • .5 oz (15g) caraway seeds (2 Tb.) Note. If you prefer a
         stronger caraway seed taste, add an additional tablespoon of caraway seeds
         to the final dough mix

Soaker Ingredients:

  • 7 oz (200g) cracked rye (1 1/2 cups)
  • 12 oz (500g) boiling water (1 1/2 cups)

Note.  Conversion rate of 28.3495321 or 28.35 grams per
ounce was used in this formula.

Method:

Soaker

Prepare the soaker (at least 8 hours
in advance, or overnight) before you plan to mix your final dough.  Measure out 7 oz (200g) cracked rye (1 1/2
cups) and place it in a 1 quart bowl, e.g.: stainless steel bowl.  Pour 12 oz (500g) boiling water (1 1/2 cups)  of boiling water over the cracked rye, cover
immediately with aluminum foil and allow to sit at least 8 hours, or overnight.

Levain Build No. 1

  1. In a 2 quart container add 1 tablespoon active starter
         to 8 oz (226g) room temperature water (75-78 deg. F).  Mix with a wire whisk until the starter
         is completely dissolved into the water.
  2. Add 8 oz (226g) of light rye flour to the container
         and, using a Danish dough hook or wooden spoon, mix well until the flour
         and starter-water is thoroughly mixed together.  This will be the 1st levain build.
  3. Cover the container and leave out at room temperature for
         12-14 hours, or overnight.  This 1st
         levain mixture should double in volume.

Levain Build No. 2

  1. After 12-14 hours, add 8 oz (226g) room temperature
         water (75-78 deg. F) to the container holding the 1st levain build and mix
         thoroughly.
  2. Add 8 oz (226g) of pumpernickel flour to the container
         and, using a Danish dough hook or wooden spoon, mix well until the flour
         and starter-water is thoroughly mixed together.
  3. This will be the 2nd levain build.
  4. Cover the container and leave out at room temperature
         for 2-3 hours.  This 2nd levain
         mixture will be much more active and will double in volume at room
         temperature (75-78 deg. F) in approximately 2-3 hours.

Final Dough Mix

  1. Add the 35 oz (992g) of final dough water (75-78 deg.
         F) to the container with the levain mixture and mix thoroughly.  Note. Hold out salt until after autolyse
         (initial final dough rest period).
  2. In a separate large bowl mix the 10.5 oz (298g) first
         clear flour with the 44.5 oz (1,262g) of bread flour for the final dough
         mix and set aside until completion of the next step.
  3. Pour the levain/final dough and water mixture from the
         container into the bowl of a stand mixer. 
         Turn the mixer on low and begin adding the final dough flour (mixed
         first clear and bread flour), a half cup at a time.  When the dough has reached the shaggy mass stage shut off the
         mixer, cover the top of the mixer bowl with film and allow the dough to
         autolyse (rest) for 30 minutes.  Remove
         the plastic film from the top of the mixer bowl, turn the mixer on low and
         slowly sprinkle the salt 1.3 oz (37g) salt (2 Tb)  onto the dough.  Mix until the salt has been thoroughly
         incorporated into the dough, about 3-4 minutes. 
  4. At this point add the cracked rye soaker (19 oz (700g)
         3 cups) to the dough mixture. 
         Continue mixing on low/medium speed until the soaker is evenly distributed
         throughout the dough (3-4 minutes).
  5. Lightly spray the inside of a large enough plastic
         container with vegetable oil.  The
         container should be large enough to hold nine (9) pounds of dough (or alternatively,
         four and a half (4 .5) pounds if you're making half the formula).  Turn the dough out of the mixer bowl
         into the oiled container and cover. 
        
  6. Give the dough 4 stretch and folds at 20-25 minute
         intervals.
  7. Cover the container and place in refrigerator overnight
         to retard for at least 12 hours.

Baking Day

Remove the container of dough from the refrigerator and
allow the dough to come to room temperature (75-78 deg. F).  This will take approximately 3 hours.

  1. Turn the dough out onto a lightly floured work surface, divide
    the dough into either 2 or 4 pieces and pre-shape each piece into a ball.  Cover the pre-shaped dough and allow it to
    rest, covered, for 10-15 minutes before final shaping.
  1. For the final shaping, lightly dust a section of the
         work surface with flour and place the dough on the floured area.  Using the flat of your hand gently degas
         the dough and flatten it out into either a round or oval shape. Move the
         flattened dough to an area of the work surface that's free of flour.  Gather the outer edges of the flattened
         dough and fold it into the center. 
         Continue turning the dough and folding the edges tightly into the
         center forming a roughly shaped ball or oval.  Tuck and rotate the dough and tuck the
         edges of the dough underneath and tighten the dough surface. This final
         shaping is done on a clean work surface free of flour to provide resistance
         needed to get the ball very tight.  After
         final shaping, the seam will be on the bottom of the dough ball.  Don't bother trying to seal the bottom seam.
  2. Lift the dough off the counter and place it, seam side
         down, into bannetons that have been generously dusted with a mixture of
         50% rice flour and 50% bread flour.
  3. Proof, covered, at room temperature, for 2 – 3 hours,
         until the dough passes the "finger poke" test, an indentation
         left by a fingertip comes back slowly.
  4. Note.  One hour prior to putting the loaves
         into the oven, preheat the oven, with baking stone along with a cast iron
         skillet, or pan, on the oven rack located below the baking stone.  Preheat the oven to 500F. You will need steam during the initial phase of
         baking.  Heat a cup and a half of
         water in the microwave on high until it's boiling (approx. 3 minutes) just
         prior to putting the loaves into the oven.  Immediately, after placing the loaves
         into the oven, pour about a cup of the boiling water into a cast iron
         skillet or pan sitting on the oven rack located below the stone.  Use oven mitts to handle the cup of
         boiling water.


Baking
the loaves

  1. When the loaves have passed the "finger poke"
         test, they're fully proofed and ready to bake.  Turn the loaves out of the floured bannetons
         onto parchment-lined baking pans that have been liberally dusted with
         semolina, with the floured side up.
  2. Score the loaves and place the baking pans on the stone
         in the oven.  Pour the boiling water
         into the skillet or pan on the shelf beneath the stone.  Close the oven door and don't open it
         until midway through the baking cycle, 20 minutes).
  3. After 10 minutes at 500 deg. F, reduce the oven
         temperature to 475 deg. F.
  4. Midway through the baking cycle (about 20 minutes), open
         the oven door and turn the pans around a full half-turn to ensure even
         baking and also allow the steam to exit the oven.  Reduce the oven temperature to 450 deg.
         F. for the remaining baking cycle.
  5. About 35 minutes into the baking cycle, check the
         internal temperature of the loaves using a digital thermometer.  When they reach an internal temperature
         of 205-208 deg. F, remove the pans from the oven and transfer the loaves onto
         wire racks to cool.  Allow loaves to
         cool at least 3 hours before cutting them. 


holds99's picture
holds99

Joe,

Thank you so much for your terrific formula: Pane con Semola Rimacinata di Grano Duro.  The only thing I did different than your formula was raise the hydration level to 68 percent.  I made 7.62 lbs of dough and divided it into two equal pieces of 3.81 lbs each, bulk fermented each in seperate containers, which minimized the handling of the dough during shaping. 

Howard

Here are some photos.


holds99's picture
holds99


I'm not really sure if there is a fixed definition for a miche.  From what I can determine, from reading baking books and information posted on the Internet, there are numerous miche formulas, ranging from exclusively whole wheat to mixed-flour.  Based on my limited research, one thing that seems to make them stand out from the crowd is their size---they're big.  The legendary French baker Lionel Poilâne, who reintroduced the miche in Paris in the 1970s created his loaves using stone-ground flour, natural fermentation and a wood-fired oven.  Mr.  Poilâne's loaves weighed 2 kilograms each (4.4 lbs).  I made mine approximately the same size.  His were round, mine are oval, because, as you can see from the oven photo, that's the only way I could get these two big guys into my oven.

"Poilâne is most famous for a round, two-kilogram sourdough country bread referred to as a miche or pain Poilâne. This bread is often referred to as wholewheat but in fact is not: the flour used is mostly so-called grey flour of 85% extraction (meaning that some but not all of the wheat bran is retained). According to Poilâne's own website, the dough also contains 30% spelt, an ancestor of wheat." [Wikipedia]

After a number of iterations I've come up with a mix of flours that I like and, for my taste, has good flavor.  I also incorporated a soaker in this version.  Anyway, here's the latest iteration. 

This recipe uses a double levain build, a total 14-18 hrs. total build, depending on room temperature (I used a tablespoon of mature culture, equal amounts all-purpose flour and water for each build (8 oz. water, 7 oz. flour)).

Final Dough

All the levain - 29 oz.

White all-purpose flour - 34 oz.

White whole wheat flour - 16 oz.

light rye flour - 7 oz.

Water -  35 oz.

Salt - 1.5 oz (2 Tb.)

Soaker (optional) 2 cups cracked rye

Total water = 51 oz (including levain)

Total flour = 71 oz (including levain)

Hydration = 71%

Note: Give the dough three (3) stretch and folds at 20 minute intervals.  Then retard it in fridge overnight or for up to 20 hours before removing and bringing to room temp. After the dough reaches room temp. (approx. 2 hrs.) divide, shape and place in bannetons seam side up.  Allow to nearly double in volume (finger poke test) and turn out of bannetons onto parchment lined baking pans sprinkled heavily with semolina flour.  Score the loaves and bake in preheated (475 deg. over) with steam.  After 10 minutes reduce heat to 450 deg.  Bake for 40-50 min. Check for an internal temp. of [EDIT] 205-210 deg.

Cool on wire racks.

holds99's picture
holds99

I really like Hamelman's light rye bread (from his book "Bread", page 197).  I bake it fairly frequently and use it mostly for sandwiches and toast. I prefer a little tighter crumb so I don't use his 6 fold French method (page 249) nor Bertinet's slap and fold method when making this bread.  I simply use my Kitchen Aid and give it a couple of stretch and folds during bulk fermentation.  Anyway, for my taste this is a great bread, as is his Vermont Sourdough with Whole Wheat (on page 154).  For those who haven't made this bread, it's a winner and fairly easy to make.

Note: I doubled the recipe and these boules are approximately 3 pounds each. 

Howard

In the oven


Cooling rack


holds99's picture
holds99

Sorry to belatedly report that Dunwoody Baking School has closed its doors.  I'm making inquiries as to the status of future class reunions...I'll keep you posted.

Howard

Article from: Star Tribune (Minneapolis, MN) : Rick Nelson; Staff Writer

The National Baking Center at Dunwoody Institute in Minneapolis has closed its doors, possibly for good. The center, a kind of elite graduate school for bread and pastry makers, has trained more than 2,000 professionals from around the world since it opened in 1996. It also operated a popular Saturday series for baking hobbyists. The center was founded by Bread Bakers Guild of America and the Retailers Bakery Association, two trade groups.

holds99's picture
holds99


In the recent past a number of TFL bakers have asked me for the recipe for Bernard Clayton’s S.S. France Petite Pain rolls. I sent the recipe to all who requested. The requests got me to thinking. Mr. Clayton’s rolls are baked using the direct method, using only yeast for leavening. Recently I began thinking how this recipe might be improved, or at least made differently, with the addition of a poolish. With that in mind I began experimenting and testing the recipe and have come up with what I believe are rolls with a somewhat better flavor than a direct method baking.  The added flavor is, I believe, a result of using an overnight starter (poolish). Above are some photos and below is the recipe for anyone who may be interested in what I believe are really good breakfast or dinner rolls.

Note: This recipe can be halved.

Howard


Petite Pain – Howard’s Formula

Starter Dough Mixture (Poolish)Ingredients

Unbleached all-purpose flour………………………………………………… 10.4 ounces
Instant yeast………………………………………………………………………….... 1/4 teaspoon
Malt powder (optional)…………………………………………………………..... 2 teaspoons
Water, at room temperature (70-90 deg. F.)…………….…..... 8 ounces

Total Starter Dough Mixture……………………………….. 18.8 ounces

Six hours or up to 2 days ahead, make the starter dough (poolish). In a medium bowl or 2 quart plastic container, combine all the ingredients for the poolish and stir the mixture with a wooden spoon for 3 to 5 minutes or until it is smooth and comes away from the side of the bowl/container. It will be slightly sticky to the touch.

Cover the bowl/container tightly with a lid or oiled plastic wrap (or place the poolish in a 2 quart food storage container with a lid) and set it aside until tripled in volume and filled with bubbles. Note: when the poolish has reached its peak there should be lines and creases on the surface and the mixture should be bubbly/foamy-like and it should be beginning to fall back on itself but not collapsing entirely. At room temperature, this will take about 6 hours. Note: After 3 hours the poolish can be stored in the refrigerator for up to 2 days.

If refrigerated, remove it to room temperature for 1 hour before mixing the final dough.

To proceed with the rolls add the water from the Final Dough Mixture (below) to the poolish container, stir it down and proceed with mixing the Final Dough per the instructions below.

Final Dough Mixture Ingredients

Unbleached all-purpose flour………………………………………………… 25.0 ounces
Instant yeast………………………………………………………………………....….. 1 teaspoon
Salt……………………………………………………………………………………….......… 2 teaspoons
Water, at room temperature (70-90 deg. F.)………………….. 16 ounces
Poolish (from above)……………………………………………….……………….18.8 ounces

Total Final Dough Mixture……………………….......…….. 65.36 ounces

Mix the Final Dough.

In the mixer bowl (I use a KitchenAid), whisk together the flour and yeast. Then whisk in the salt (this keeps the yeast from coming into direct contact with the salt, which could affect the yeast’s leavening properties). If you haven’t done so, add the Final Dough water to the container with the poolish and loosen the poolish from the container with a rubber spatula or wooden spoon, loosely mixing it with the water.

Add the water/poolish mixture to the mixing bowl. Using the paddle attachment, mix on low speed for a couple of minutes (#1 speed if using a KitchenAid) adding the flour/yeast/salt mixture ½ cup at a time, until the flour is moistened into a shaggy mass. Turn off the mixer and cover the top of the mixer bowl with plastic wrap or a clean kitchen towel and allow dough to autolyse (rest) for 20-30 minutes.

Remove the film/towel and turn the mixer on to speed #2 and continue for about 5 minutes until it starts to develop gluten has strands. After 5 minutes increase the speed to # 6 for about 30-60 seconds, or until the dough pulls away from the sides of the mixer bowl. If the dough hasn’t pulled away after about a minute, scrape down the sides of the bowl and beat on medium-high (#6 Kitchen Aid) for another 2 minutes. If it still doesn’t pull away from the bowl, beat in a little flour, 1 teaspoon at a time, on low speed (#2 KitchenAid). The dough should cling to your fingers when touched.

Let the dough rise.
Using an oiled spatula or dough scraper, scrape the dough from the paddle and container into a 4 quart food storage container, light oiled with cooking spray or oil. (The Final Dough will weigh 65.3 ounces and be 62.5% hydration) Push down the dough and lightly spray or oil the top with cooking oil. Cover the container with a lid or plastic wrap. With a piece of tape, mark the side of the container at approximately where triple the height of the dough would be. Allow the dough to rise (ideally at 75 deg. F) until tripled in volume, 1 ¼ to 2 hours.

Note: At 20 minute intervals, during the first hour of bulk fermentation, empty the dough onto a slightly wet work surface (not floured but lightly misted with water) and stretch the dough, folding it into thirds, like a business letter.  Turn it a quarter turn and fold it into thirds again. Then place it back into the container seam side down.

Do a total of 3 stretch and folds at 20 minute intervals during the first hour of bulk fermentation.

Divide and shape the dough and let it rise.
Distribute a moderate amount of flour onto your work surface in a square 16” X 16”. Using an oiled spatula, gently scrape the dough onto the floured work surface. Lightly dust the top of the dough with flour. Handle the dough gently at all times to maintain as much gas in the dough as possible. Using a sharp knife or the edge of a dough scraper and a kitchen scale, divide the dough into 4 ounce pieces. You should end up with approximately 16 pieces of dough, each weighing 4 ounces.

Divide the remaining piece of dough (1.3 ounces) into a half dozen, or so, pieces and spread it around, randomly adding a piece of it to the 4 ounce dough pieces. Shape the 4 ounce dough pieces into rolls, using the dry edge of the work surface to get traction in shaping.

Place the rolls on a parchment lined baking pan, cover your rolls lightly with a cloth, plastic wrap, sprayed with cooking oil (to keep it from sticking to the dough), or, as I do, with a rectangular plastic bin large enough to accommodate your baking pans. Let the rolls rise in a warm spot until doubled in volume, 1 ½ to 2 hours.
Use a floured finger to test the rolls to check for spring back.
Do not let them over proof.
Score the tops of each roll with 2 quick slashes made at a 90 degree angle and place them into a preheated 475 degree oven.
Add a cup of water to a preheated pan or skillet to product a large burst of steam.
After 5 minutes reduce the oven temperature to 450 degrees and bake for 20-25 minutes, turning the pans around midway through the baking cycle.
The internal temperature of the rolls, when done, should be 205-210 deg. F.

Notes:

Bobs Red Mill Flour – unbleached, unbromated
KAF instant yeast
Sea salt
KitchenAid Mixer and 5 minutes of hand mixing (Richard Bertinet's slap and fold method) 
3 stretch and folds at 20 minute intervals

holds99's picture
holds99


This is Michel Suas' recipe/formula for "Rotolo Di Natali" from his book "Advance Bread and Pastry".  In the summary at the beginning of the recipe Mr. Suas says: "This ring of dough is usually baked in Italy for Christmas celebrations.  The combination of soft enriched dough and crunchy filling creates an unusual texture, while the appealing presentation makes Rotolo Di Natali a festive centerpiece."

I tried to find the origin and story behind this lovely, deliciously filled sweet bread but was unable to do so.

However, years ago I was enrolled at the Dunwoody Institute's prestigious Professional Baking - Racker Certification Program.  That same year, through the generous endowment of the Lydia R. and Edgar P. Munnerlyn Charitable Trust, our graduating class was provided steerage tickets on the tramp freighter 'Honduran Gal", thus enabling the members of Dunwoody, class of '78, the opportunity to visit authentic artisan bakeries in Italy as part of Dunwoody's "Meet The Bakers" outreach program. 

The Dunwoody "Rackers" had been in Italy for a couple of weeks and our class trip was winding down.  It was my last evening in Italy and I was feeling a bit nostalgic about the time I had spent in this wonderful country.   The evening was balmy and as I was strolling through the downtown piazza I noticed an elderly man sitting alone on a bench reading his newspaper, the light blue smoke from his short black Pierogi cigar encircling his head, then drifting slowly away into the night air.  I decided to approach him, and after we exchanged greetings and made perfunctory small talk, I casually asked him where I could go on my last night in this beautiful city to find the true essence of Italy.  Slowly folding his newspaper, he glanced around, making certain we were not being observed, and that no one was within earshot of our conversation.  I couldn't help but notice the old man's eyes were misting a bit as he reached into his jacket pocket and pulled out an old and tattered, dog-eared color photo of a beautiful, golden crown shaped loaf of bread, the top liberally sprinkled with coarse sugar creating a golden crispy crust.  He proudly held up the photo for me to examine.  Grinning, I nodded approvingly and in my fluent Italian I said: "Momma mia, thatsa nice a loafa you gotta there ina you foto"'

Smiling broadly, the old man lightly kissed the photo and carefully tucked it back into his jacket pocket.  Then, he motioned me a bit closer and as he leaned forward, a faint smile crossed his lips.  The old man spoke very softly, measuring each word, the way Orson Welles had done in Citizen Kane when the camera, in the opening scene focused on his mouth, and his lips spoke the immortal word: "Rosebud".  The old man slowly stood up, placing one hand on my shoulder and leaning a bit closer to my ear, he softly whispered: "Rotolo Di Natali". 

Since that evening I have wondered about the true meaning of these words?  Then recently, after finding Michel Suas' recipe and baking this terrific sweet bread, I understand exactly what the old man meant that night in the piazza. 

OK, confession time.  There really wasn't any old man on the piazza bench that night in Italy.  I made it all up.  But seriously, this bread is a very nice European style holiday treat, filled with a mixture of nuts, sugar, cacao powder, raisins, rum and beaten egg whites. 

Howard


holds99's picture
holds99

GREAT USE FOR RIPE BANANAS

I had a couple of very ripe bananas that had begun accumulating brown spots on the skins and decided to look for a recipe where they could be used.  I found a great recipe for Banana Muffins in Rose Levy Beranbaum's "Bread Bible" on page 121.  Her recipe includes sour cream, butter, egg(s), grated lemon zest, vanilla extract, toasted and chopped walnuts, turbanado sugar and is made with cake flour. 

Although my photos don't look all that exciting, these muffins are delicious...light and moist, with a cake-like texture, and the recipe can be done quickly---and easily.  They're on the order of a quick bread.  She doesn't suggest it, but after tasting them I think they could be frosted with a simple white cake frosting using a small amount of lemon or orange zest incorporated into the frosting.  She suggests making large muffins.  In fact her recipe is called : "Big Banana Muffins".  However, I prefer smaller muffins so I doubled the recipe and made a dozen regular size and a half dozen mini muffins.  They freeze well.  Just let them completely cool on a wire rack, then bag them in a plastic bag and freeze them. They're terrific breakfast or snack muffins. 

Howard


Pages

Subscribe to RSS - holds99's blog