The Fresh Loaf

A Community of Amateur Bakers and Artisan Bread Enthusiasts.

lief's blog

lief's picture
lief

Here is the second recipe I've made from Amy's Bread, and my first pumpernickel ever! After having been burned by modifying the methods for the 100% spelt bread recipe (mine ended up VERY sour) in the same book and not knowing what to expect from pumpernickel flour I stayed very close to the original recipe. However, when I put together the final dough, it was absolutely nothing like the description! There is some sort of disconnect here and I'm not sure what it is. The recipe describes a dough that may need to have water added to it a tablespoon at a time if it is too difficult to knead. It describes a dough that should be very easy to handle when it comes time to shape it. My dough was very, very wet and although manageable I would not describe it as easy to handle. I thought that perhaps I measured something wrong, but the final dough weight was in the ballpark of what I expected it to it be after all ingredients were accounted for. My suspicion is that the course pumpernickel flour should have been put in a soaker the night before, as prescribed for the sunflower pumpernickel bread in BBA. My inclination was to make a soaker but I did not because it was not in the recipe as written and I was trying to stay close to the recipe.

These concerns aside, the bread tastes great! The recipe contains a good portion of sunflower seeds and it really seems to go well with the pumpernickel flour. It has a smooth and nutty flavor (duh!) with a pleasingly chewy crumb and a very crunchy crust. I felt like it would have been great with some butter, but I never actually ate it that way... instead preferring to eat the slices plain but lightly toasted. The crunchy crust was undoubtedly helped along because I brushed one loaf with oil and the other with melted butter because I could not fit both loaf pans under my foil pan. This was the suggestion given in Amy's Bread to achieve even coloration if insufficient steam was causing white streaks on your breads. It certainly worked to get a nice even color on top of the loaves, and I did enjoy the crunch imparted on the crust, but at the same time it made the bread a little "oily" like it had been lightly fried or something like that. I'm not sure I'm so keen on that, so I may not use that technique in the future. Perhaps I'll try an egg wash instead?

Also, the loaves were a bit flat because I over proofed them. It's been quite some time since I've made bread with commercial yeast, and being accustomed to sourdough time tables I wasn't keeping a proper eye on the dough. Before I knew it, they were ready for the oven... but it wasn't even pre-heated yet!! Oh well... the taste was still very nice and that is what is important. My next pumpernickel bread will be from BBA so I can compare the two recipes.


lief's picture
lief

Wow, I just just realized I've been on a bit of a roll kick lately :-) As the result of being busy, and being lazy about blogging when I actually do have the time, I am a bit behind. I would like to give more details on each of these bakes, but at this point I know that if I try to put in too much information I'll never get around to writing anything at all!

My daughter came for a visit, and she brought friends along, so I actually baked quite a bit. First up was a sourdough version of floydm's potato rosemary roll recipe. This is the second time I've made this recipe, both times with a levain rather than commercial yeast and the rolls are delicious. The first time I made them, I thought they would be good as hamburger buns. So that's what I used them for this time!

Unfortunately, I baked my first batch a little too long (28 minutes) and the crust was a little tough for a burger bun. The second batch, I cut down to 23 minutes, and it was better but still a tad tough.


Next I made some cheese rolls. Anyone familiar with the Cheeseboard in Berkeley, CA knows about these! Absolutely delicious! I used spelt flour instead of whole wheat and spread out the fermentation, shaping, and proofing of these rolls over 3 days due to a busy schedule and not wanting to bake at midnight. It was too much for the spelt. As you can see from the picture, the rolls collapsed and didn't really get any oven spring.


I also made a pizza using the Pizza Napoletana recipe from BBA for the crust. The BBA Pizza Napoletana recipe uses the same cold fermentation technique as the Pain a l'Ancienne recipe, so needless to say, it is fantastic. I've actually tried using a dough from the Pain a l'Ancienne recipe as a pizza dough, but the higher hydration makes it too difficult for me to shape into a pizza crust. This pizza had carmelized onions, figs, goat cheese, basil, and a balsalmic vinegar based sauce. Sorry, no pictures... everyone was hungry and the pizza was devoured in short order.

Last, but certainly not least, I baked up a batch of Trumer Rolls to bring to a friends house for dinner. This is my own recipe and something I bake on a regular basis. I'm sure I'll post the recipe at some point, but at a glance, the recipe is a sourdough (of course) with 40% spelt flour and the final dough is hydrated with Trumer Pils beer. Thus the name. Mmmmmmm... I wish I were eating one now as I write this ;-)

lief's picture
lief

I have to give a shout out to Dan Lepard for the inspiration on this bread. You see, I really like tamarind so I've been kicking around the idea in the back of my head that I would like to make some bread with tamarind in it. However, I wasn't taking the thought too seriously given the tartness of tamarind fruit. Then the other day, I happened to be randomly perusing Dan Lepard's website, danlepard.com, and I came across his recipe for a tamarind date cake. I thought, oooh, that sounds delicious... and then lightning struck! Of course! Dates are the perfect complement to tamarind, and I felt that the addition of dates would make my elusive tamarind bread idea reasonable. Dan Lepard's cake also included walnuts, and I thought that was a great idea, so I included them in my bread as well. Here are the results of my first formulation:


The boules were wrapped in floured cloth inside mixing bowls for proofing, so there is a bit of flour on the crust, but the crust is STILL being whitened due to insufficient steam. This is the second time I've baked bread and been aware of what the most probable cause of the whitening is. As such I made one final adjustment to my steaming method (on top of my adjustments from last week) and went for it. Usually, after shutting the oven door I immediately go and set the timer. This time I watched the oven and sure enough, as soon as I closed the door, I was able to see a bunch of steam rise out from the top of the "closed" door. Within 5 seconds it was gone. Argh!! BTW, I'm a renter, so short of buying a new oven for the landlord, my last hope rests in the covered "self-steaming" method.

But enough about crust whitening! This bread is delicious! It is fairly sweet with a wonderful taste and texture imparted by the walnuts. The taste of the tamarind is more subtle than I was going for, so I will be making adjustments to the recipe. Also, I wanted the bread to be a bit crustier, so I'll probably give it a longer bake next time. I was fooled by the gorgeous dark, reddish brown crust that I saw near the bottom of the boules (since the top was whitened) and took them out of the oven a little sooner than I should have. All in all, I'm fairly pleased with the results (whitening aside) given that it is my first attempt and I was not following a recipe.


lief's picture
lief

I got an awesome fathers day gift from my daughter this year. She is going to New York University so she has been running around the Big Apple for a couple of years now. One of her favorite spots to pick up bakery items is Amy's Bread, which sells a book with some of their recipes, and that was my gift :-)

I have been slowly going through it, reading about their general take on the art of baking bread and perusing the recipes trying to decide what to bake first. I've been on a bit of a spelt kick lately, so I decided to start out with the Organic Whole Grain Spelt with Flax and Sesame recipe.


Notice the white streaks on the crust? I have been having a problem with this for a very long time, but it has only shown up intermittently. I have made all sorts of adjustments to my methods, ingredients, and physical baking apparatus to try and figure out the source of the whitening of the crust to no avail. This book may have the answer!!!! In fact, at the end of this very recipe the book states that white streaks can occur due to INSUFFICIENT STEAM. Hallelujah! Definitely makes sense because the results were never consistent... perhaps I'm depending on how quickly I manage to close the oven door after applying the steam or how long my steaming apparatus was preheated? I got very excited after reading this and when I baked this bread, I made a number of adjustments to my steaming method to try and increase the amount of steam that I got. I definitely got more steam than usual, but the bread still has white streaks. Looks like I need to make further improvements. I also bought a large foil roasting pan to try the covered "self steaming" method, but it wouldn't work for this bake, which included two large loaf pans. Has anyone else had this issue? If so, how did you solve it?

Whitening aside, the crumb was quite dense, moist, and had a nice whole grain taste. However, it was also quite sour... almost too much. This is undoubtedly due to the modifications that I made to the recipe. The original recipe called for commercial yeast along with a levain. I've been spurning commercial yeast lately, so I decided to leave it out. However, I left everything else the same. This necessarily meant that the time tables would be stretched out by quite a bit. Also, in the original recipe, the bread is baked on the same day that the final dough is assembled. I said nuts to that! I'm sure that the long retarded proof that I gave it was the main reason for the kick that it had. It is 100% whole grain after all! If I were to do it over again, I would probably bake it on the same day. I may even add commercial yeast. I guess the recipe was written that way for a reason ;-)

lief's picture
lief

When I came across breadnik's Russian Coriander-Rye recipe, I knew I had to make it! However, I don't do much baking with commercial yeast these days, so I converted the recipe to one that uses a levain. Given my lack of experience with breads that use a large percentage of rye flour and the fact that that I didn't even attempt to make the recipe as stated first seemed a little risky, but I can be fairly adventurous when it comes to baking and cooking :-)

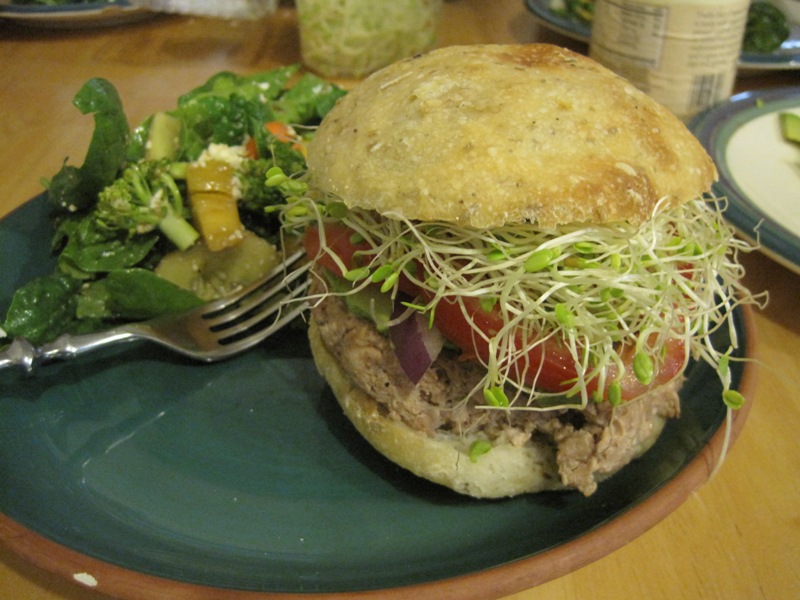
                                                                    The finished product, yum!


I made a few minor modifications to use the ingredients that I had on hand, but the overall amounts of flour and water are very similar to breadnik's recipe.  I should also note that the mother starter I used is a white bread flour starter, since I do not currently maintain a rye starter.

Starter build 1: (fermented for ~11.5 hours)
mother starter (bread flour based @55% hydration) 14g
dark rye flour 22g
water 12g

Starter build 2: (fermented for ~5 hours)
starter 1 (from first build) 48g
dark rye flour 50g
water 28g

Final dough: (fermented ~10.5 hours)
starter 2 (from second build) 126g
dark rye flour 194g
white bread flour 80g
spelt flour 80g
vital wheat gluten 80g
sea salt 12g
ground coriander seeds 4g
honey 60g
molasses 60g
canola oil 30g
water 234g

Method:
1) Bring the starter to maturity in 2 builds. Due to the lack of gluten in the rye flour, the starter doesn't really expand like I'm used to so it is difficult for me to gauge the starter maturity. The fermentation times I used were fairly similar to what I might use for a non-rye flour dough.

2) For the final dough, mix all the dry ingredients together with a whisk to ensure a good distribution. I was feeling too lazy to grind up coriander seeds, so I just used pre-ground coriander from the spice rack. Add the levain then the wet ingredients, with the water last, as specified in breadnik's original recipe.

3) Mix the dough until ingredients are combined and all flour is hydrated. Autolyse for 20 minutes. Strictly speaking, I'm not sure this step can be called an autolyse, because the levain and salt are both in the dough. However, it still helps to develop the gluten.

4) Knead the dough for 20 minutes. It will NOT pass the window pane test. Perhaps this is a useless test for high percentage rye breads? The dough should be a little tacky. It is also quite stiff and difficult to knead.

5) Let the dough ferment! I let the dough ferment for almost 10 hours after kneading. This seems on the long side to me, but as I mentioned earlier, it is difficult for me to tell when this dough has reached maturity. Any comments on good maturity indicators for high percentage rye breads?

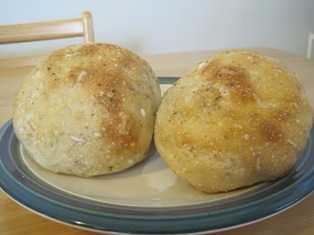
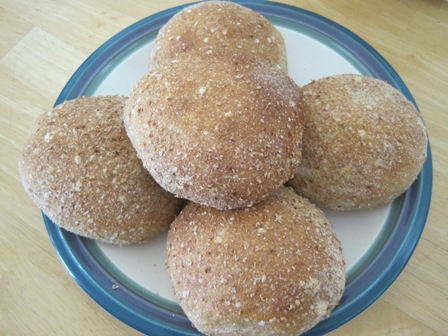
6) Shape the dough into two small batards and immediately refrigerate. I refrigerated for almost 8 hours.

7) Remove the batards from the refrigerator to let them warm and proof. In this case, I let it go for five hours! Again this seemed long to me, but I was able to apply the "poke test" to this dough and it didn't seem unreasonable from that perspective.

8) Spritz the batards with water and sprinkle them with slightly crushed coriander seeds. Then put them in the oven, preheated to 410-415F (my oven is not that accurate). I used a baking stone and steam, but the steam may not be necessary since the batards were spritzed with water. After 10 minutes, remove the steaming device and turn the oven down to 380F. Rotate the batards after another 10 minutes.

9) After 37 minutes of total bake time, remove the batards from the oven and allow them to cool (somewhat) before devouring ;-) This bake time may have been a little high as some parts of the bread seemed a bit darker and crustier than it should be.

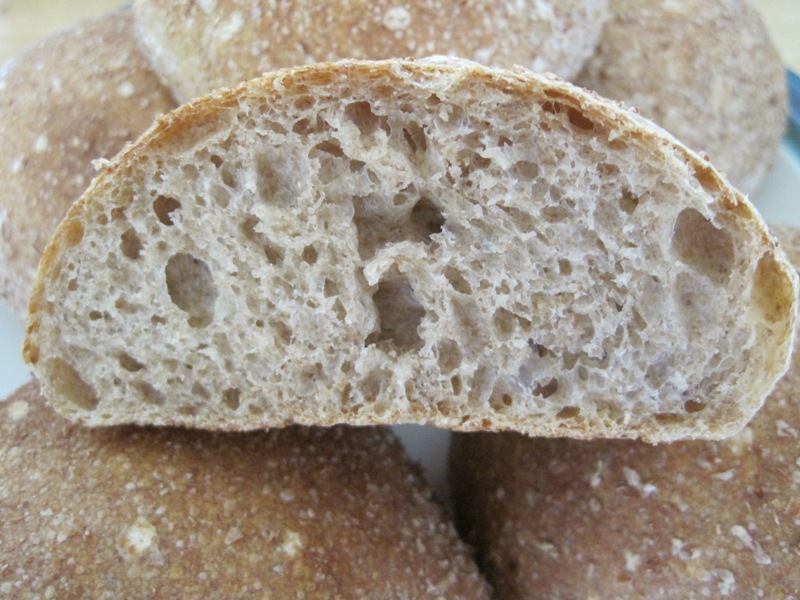
Despite all of the uncertainty I had around the timing of this bread, it turned out great. The taste is complex, somewhat sweet, and all delicious. Not much oven spring. The crumb is fairly dense (sorry, no photo), but not as dense as most rye breads I have had. This is the second time I've made this bread and I'm fairly certain it will be popping out of my oven very now and then for a long time to come.


The original recipe that breadnik posted can be found here:

http://www.thefreshloaf.com/keyword/russian-corianderrye

Subscribe to RSS - lief's blog