Inspired by the gorgeous rye breads hansjoakim has been showing us, I made Hamelman's 70% 3-Stage Rye Sourdough today.
I've made lots of light rye breads and enjoyed them, but I had not yet tackled a rye with over 50% rye flour. I had also never made a rye using the "Detmolder 3-Stage" method. It was time.
I'm glad this was not the first rye bread I attempted. My acquired comfort level with slack doughs and sticky rye dough helped immensely. Working this dough, which has so little gluten it never develops perceptibly, would have been discouraging and confusing without that experience. A 70% rye dough is a different critter from a 40% rye. The latter feels like a "normal" dough, except stickier. The former is like moulding clay. A light and quick touch is needed to successfully handle the dough, especially in shaping. I was pleased that, using this approach, almost no dough stuck to my hands.
The 3-Stage Detmolder method was developed by German bread scientists to optimize flavor and, particularly, the balance of yeast, lactic acid-producers and acetic acid-producers in the dough. This requires some advance planning. I started the whole process 3 days ago by activating my rye sour with two feedings prior to starting the first "stage" of the Detmolder process. The 3 Detmolder stages are rye sour elaborations that differ in hydration, fermentation temperature and length of fermentation. The final dough adds to the rye sour some high-gluten flour (I used KAF Sir Lancelot.), more water, salt and, optionally, instant yeast. It has a very short fermentation of 10-20 minutes and proofs in bannetons until expanded somewhat less than 100%. I proofed for 1 hr, 15 minutes. In hindsight, I could have proofed for another 15 minutes. (My kitchen was around 79F.)
The dough is divided into rounds which are "docked" rather than scored. Docking involves poking multiple holes in the crust before baking. There are toothed rollers that professional bakers use. I used a "Susan from San Diego Special Mixing Implement," otherwise known as "a chopstick."
The 1.5 lb loaves were baked in a "falling oven temperature," starting out at 490F for 10 minutes to maximize oven spring, then at 410F for another 30 minutes. I left the loaves in the oven, with the oven off and the door ajar, for another 10 minutes to dry the crust.
Steaming should be intense but brief. I poured some hot water over lava rocks in a pre-heated cast iron skillet 3 minutes or so before loading then poured some more water on the rocks just after loading. The skillet was removed after 5 minutes, and I left the oven door open for a few seconds to let some of the steam out before continuing the bake.
Hamelman says to delay slicing for at least 24 hours.

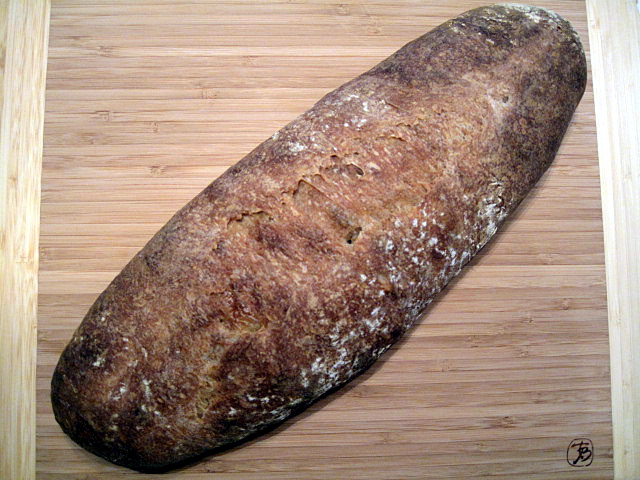
70% 3-Stage Rye Sourdough, with this afternoon's crop of cherry tomatoes.

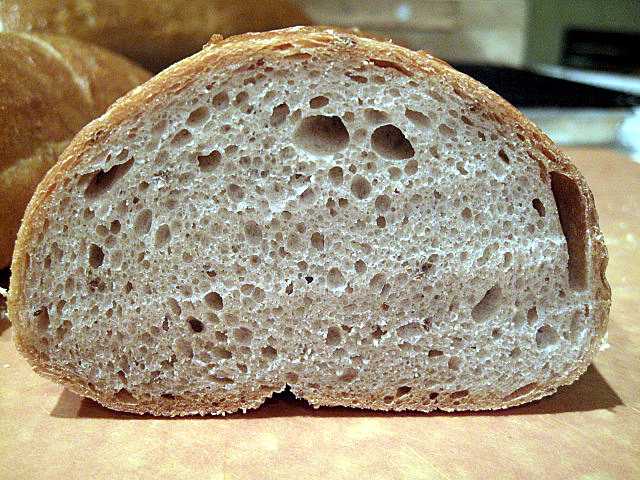
70% Rye profile
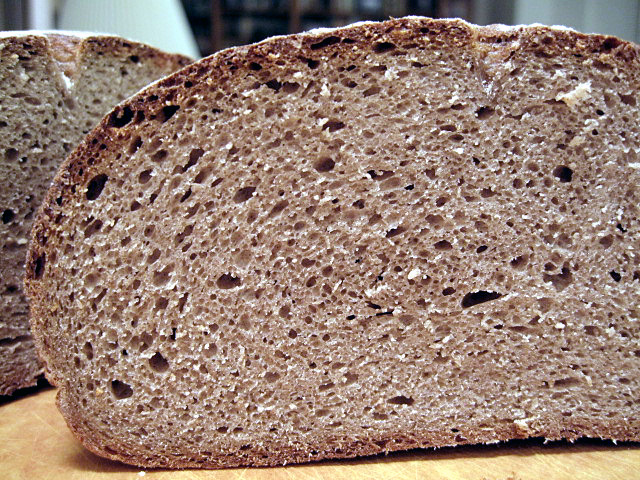
70% Rye crumb
Slicing the bread, one gets the sense that this is a heavy bread. However, in the mouth it doesn't feel dense or heavy. The crumb is quite tender. The first flavor hit is earthy rye with a very mild sourness. (The sourness may well increase over the next few days.) The surprise is the long-lasting aftertaste which is decidedly sweet!
I think this bread is made to eat with a hearty stew. Too bad it's way too warm for that. Smoked meats or smoked fish are more appealing. How about some Cotswold cheese? I'm off to go fishing for some smoked salmon.
David
Submitted to Yeast Spotting on Susan FNP's marvelous Wild Yeast blog