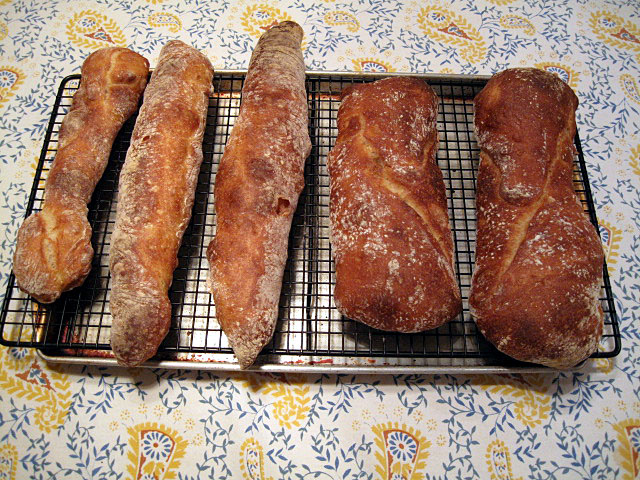
The Fresh Loaf

A Community of Amateur Bakers and Artisan Bread Enthusiasts.

dmsnyder's blog

dmsnyder's picture
dmsnyder

This weekend, I baked a couple sourdough baguettes and a bâtard using the mixing and fermentation methods described in the posts about Anis Bouabsa's baguettes. For these breads, I used 90% AP four, 5% WW and 5% rye. Interestingly enough, the flavor of the bâtard seemed much better to me.

These were nice, but the real star attraction was the Cherry Pecan Pain au Levain. I made it according to the formula and method recently posted by mountaindog. (http://www.thefreshloaf.com/node/10313/cherry-pecan-pain-au-levain)

This is a spectacular bread. The flavors are wonderful and, at this point when the first batch is just cooled (well, almost just cooled), the bread dough, the cherries and the pecans each sings its own sweet tune.

This bread would be good with butter, cream cheese or a fresh chevre. In fact, it is pretty darn good just by iteself.

My wife's verdict is: "This is wonderful bread!" Now, she says such things fairly often, but this afternoon, she said it twice, separated by a minute or so. In Susan Speak, this indicates "I want to be certain my judgement has gotten through to you.  You will make this bread for me again!" To which I say, Amen!


Happy baking!

David

dmsnyder's picture
dmsnyder

Ever since Jane prompted me to add levain to the Bouabsa baguettes, I've wondered what this bread would be like raised by wild yeast entirely, without the small amount of baker's yeast it calls for. And, more recently, I made the best tasting ever Miche with the first clear flour Norm sent. I wondered how much of its wonderfulness was the method, and how much was the flour.

So, today I explored both questions by baking a couple loaves with Norm's first clear as 100% of the flour and used Anis Bouabsa's technique of a long cold bulk fermentation. This is a 75% hydration dough, while the Hamelman Miche is 82% hydration.

The result was a really nice, moderately sour bread with the distinct flavor of first clear flour. The crust was crunchy, but it needed 10 extra minutes in the turned off oven to crisp up. The crumb was quite open with a lovely cool feeling and chewy texture.

I will use this technique again, but with the same AP/WW/Rye flour mix I have liked best with Bouabsa's baguettes.


David

dmsnyder's picture
dmsnyder

I made cinnamon rolls for the second time today. I used the recipe from SusanFNP's "Wild Yeast" blog, a wonderful site for bakers. The recipe is adapted from Michael Suas, with whom Susan has taken classes at the San Francisco Baking Institute, I believe. The link to Susan's recipe is:

http://www.wildyeastblog.com/2008/10/13/cinnamon-sticky-buns/

I modified the filling by using a "only add water" cinnamon bread/roll shmear from KAF and added some plumped up raisins and lightly toasted, coarsely chopped pecans.

The rolls were a pleasure to make. Susan's instructions are always so good. I'm sure these rolls would be a delight to any cinnamon roll lovers. Sad to say, I've decided I just don't like pastries this sweet. 


I must return to my quest for the Cheese Pockets of my Dreams.

David

Addendum (1/12/09): This recipe makes 16 rolls, which is a lot. In "Baking with Julia," the recipe for sticky buns says you can freeze the dough right after rolling it up, i.e., before cutting the rolls and proofing them. So, I divided my dough into two parts, filled and rolled up both, baked one and froze the other. Good to know. I'll probably not bake the frozen roll for at least a week. I'll let you all know how those turn out.

DMS

dmsnyder's picture
dmsnyder

I haven't blogged about this bread for a while. We have lots of new members, and they should be aware of this wonderful bread. The recipe is in Jeffrey Hamelman's "Bread." Like Poilâne's Miche, it is an attempt to replicate the bread of the common folk in the 17th and 18th century in France and Quebec. A "Miche" is a very large boule. This recipe makes 3.6 lbs of dough.

This is a pain au levain made with 100% high extraction flour. I used the first clear flour that Norm got in December and shared with some of us. This flour is more finely milled than KAF's First Clear. It is slightly gray in color and acts like a high-gluten flour.

This dough is higher in hydration than Reinhart's Miche in BBA. It is quite slack. It makes a very moist and open crumb. The taste is wonderful and gets better for several days after baking. The bread stays moist for nearly a week. 

Miche, Pointe-à-Callière


Miche, Pointe-à-Callière Crumb

David

dmsnyder's picture
dmsnyder

pain à l'ancienne

Rustic baguettes and ciabatta from Gosselin's formula (as described by Peter Reinhart)

pai

Pain à l'Ancienne baguette crumb

I made these baguettes and ciabatta from the formula Reinhart says he got directly from Phillipe Gosselin. The version in "Bread Baker's Apprentice" is a modification.

This is a very high hydration dough (about 80%), and I made my dough with KAF's "French Style Flour," which is their T55 clone. This is a low-gluten flour, by American standards. The dough started out like a batter once the additional water was added. I mixed it in my Bosch Universal Plus for something like 15 minutes before it was smooth and shiney. It still flowed like a batter. For the next hour, I did Hamelman's folding in the bowl. It then doubled over the next 90 minutes. (This technique was improvised. I thought about chucking the whole project as a lost cause at several points, but I'm glad I didn't. I learned a lot.)

The loaves were divided and stretched onto semolina-dusted parchment. The baguettes were baked without further proofing. The Ciabatti were folded in the usual manner and allowed to rise for about 30 minutes before baking.

Note: No attempt was made to score these loaves.

The baguettes had the sweet taste and cool, silky mouth-feel of ciabatta. I count them a success. Whew!

David

dmsnyder's picture
dmsnyder

 Please Note: This tutorial has been updated extensively with additional material and new and improved videos. Here is a link to the updated Bread Scoring Tutorial: Scoring Bread: An updated tutorial

Scoring Bread


What is scoring?

“Scoring” is the word used to describe the cuts made in a loaf of bread before it is baked. Some breads are not scored. For example many loaves baked in pans are not. However, almost all free-formed “hearth breads” are scored.

When is scoring done?

Scoring is generally performed just prior to loading the loaves in the oven.

Why are breads scored?

The purpose of scoring is primarily to control the direction in which the bread will expand during “oven spring.” Intentionally creating a weak spot on the surface of the loaf prevents the loaf from bursting at weak spots created during shaping.

The pattern of cuts made, the angle at which they are made and the depth of the cuts also influence the rate of expansion and the formation of an “ear” - a raised flap of crust at the edge of a cut.

The pattern of cuts also can create a pleasing visual pattern on the surface of the loaf. While there are some very traditional patterns, for example for baguettes, the baker can use the scoring pattern to identify the type of bread or to create an unique pattern that identifies the loaf as coming from his or her oven.

The effects of scoring on loaf shape are discussed in more detail below.

How are breads scored?

Breads are scored with very sharp cutting implements. These may be straight or curved razor blades, which may be held in the hand or mounted on a handle. Scoring may be performed with other sharp, straight blades, even with a straight razor. Some bakers prefer serrated blades. Some examples are pictured below:

Lame

This is a “lame,” the French term for a razor blade used to score bread. This one is permanently mounted on a handle. Others are made with replaceable blades.

This lame holds the blade in a curved position. Others hold the blade straight. The curved lames are generally used for long breads like baguettes which are scored with cuts parallel to the long axis of the loaf. The cuts are made with the blade held at a shallow angle to the surface of the loaf, about 20-30 degrees or so. The blade is held with the concave surface facing up (away from the loaf). A flap of dough is created that will lift up to create an “ear” as the loaf expands and, by lifting gradually, slows the expansion of the loaf. This prolongs the time during which new areas of dough are exposed to the direct heat of the oven and results in greater overall expansion – a larger “bloom.”

Serrated knife

Serrated knife

Tomato knife

Tomato knife

These are examples of serrated, straight bladed knives. The first one is made expressly for scoring breads. The second one is manufactured as a “tomato knife,” but it is very sharp, holds its edge well and has been found to work very well for scoring bread.

Straight bladed knives are preferred for cuts made with the blade held perpendicular to the loaf's surface. This sort of cut is generally used for round loaves (“boules”). However, they can be used for the same kinds of cuts described above as well.

The angle the blade of the knife makes with the surface of the loaf is important in determining how the cut will open up. If you want the cuts to spread equally from the cut and to open quickly, the knife should be held vertically – at 90 degrees to the surface of the loaf. This type of cut is usually made ¼ to ½ inch deep.

Wrong lame position


If you want the cuts to spread more slowly and create an “ear,” the knife blade should be held at a shallow angle with the surface of the loaf, like this:

Correct lame position

This type of cut should be shallower than the cuts made with the blade vertical to the loaf – about ¼ inch deep. A deeper cut will result in the flap closing from its own weight rather than separating from the surface of the loaf to form an “ear.”

The scoring stroke should be firm, rapid, smooth and decisive. For the beginner, it may help to take “practice swings” or to visualize the movements and totally focus one's attention before making the cuts. Understanding the functions of scoring and the effects of the variables described can help, but there is no substitute for experience. In this respect, scoring bread is no different from an athletic skill or any other art or craft. (Tourist: “Please, sir, can you tell me how to get to Carnegie Hall?” New Yorker: “Practice, practice, practice.”)


The effect of scoring on loaf shape

Michael Suas, in his book "Advanced Bread & Pastry," provides some information about how scoring patterns influence loaf shape. Scoring is not just to make a visually pretty design on the top of a loaf. It is also how the baker controls the direction in which the loaf expands. This impacts the shape of the loaf cross section (rounder or more oval), the height of the loaf and, for a boule, whether it stays round or ends up more oblong.

According to Suas, long loaves like bâtards and baguettes are traditionally scored parallel to their long axis. This may be a single long cut or multiple cuts that are almost parallel and overlap somewhat (for ¼ to 1/3 of their length, generally).

Classic cuts

Classic Cut – Single and multiple cuts

However, for breads with high-rye content which have lower gluten and less oven spring, the traditional objective is to encourage a higher rise in the oven spring resulting in a rounder cross section. This is achieved by "sausage" or "chevron" cuts.

Sausage cut (on the left) and Chevron cut (on the right)

Sausage cut (on the left) and Chevron cut (on the right)

Boules are scored in a variety of patterns, again with differing effects on how the loaf expands. The common "tic-tac-toe" pattern and a simple cross will direct the expansion upward. More complex patterns like diamonds result in a relatively flatter loaf.

Boule with tic tac toe

Boule scored with “tic-tac-toe” pattern

One of most interesting effects is that scoring a boule with multiple parallel cuts encourages expansion at a right angle to the cuts. This results in an oblong loaf shape.


What's the point of an ear? Controlled bloom!

This topic is not about the auricular anatomy of elves (or Vulcans). It's about scoring breads.

Scoring loaves creates a visually pleasing pattern, and it helps control the expansion of the loaf as it bakes.

These San Francisco Sourdough breads illustrate a more "advanced" aspect of scoring that is alluded to by both Hamelman (in "Bread") and Suas (in "Advanced Bread & Pastry.")

San Francisco Sourdough Breads (from Peter Reinhart's "Crust & Crumb")

Bloom

Detail of bâtard crust, with "ear," grigne" & "bloom."


What Suas called "the classic cut" is parallel to the long axis of a baguette or a bâtard. The cut is made with the blade at a shallow angle to the surface of the loaf. The cut should be shallow - about 1/4 inch deep. Paradoxically, this shallow cut results in the flap lifting better than a deeper cut would, thus forming a nice "ear." Hamelman (pg. 80) points out that "a deep cut will simply collapse from its own weight."

The angle is also important. "If the angle is not achieved and the cut is done with the blade vertical to the loaf, the two sides of the dough will spread very quickly during oven spring and expose an enormous surface area to the heat. The crust will begin to form too soon - sometimes before the end of oven spring - penalizing the development of the bread. If the cut is properly horizontal, the sides of the loaf will spread slower. The layer of dough created by the incision will partially and temporarily protect the surface from the heat and encourage a better oven spring and development." (Suas, pg. 116.)

The second photo, above, illustrates a fairly nice "ear," but it also shows that the bloom occurred slowly, as it should. Notice that the color of the crust in the opening has 3 distinct degrees of browning, decreasing from left to right. The darker part on the left obviously opened first and was exposed to the direct heat of the oven for longer. If the bloom occurred too rapidly, it would have a more even coloration.

This boule was slashed with the blade held at 90 degrees to the surface of the loaf. Note the even coloration of the bloomed crust.

In summary, in order to achieve an optimal bloom in baguettes and bâtards, one must attend to 3 variables when scoring them:

  1. The cuts should be almost parallel to the long axis of the loaf.

  2. The blade should be held at about a 30 degree angle to the surface of the loaf.

  3. The depth of the cut should be shallow - about 1/4 inch.

Variable shading of the bloomed crust confirms that the desired slow but prolonged opening of the cut during oven spring occurred.

Happy baking!

David

P.S. I have made a video version of this tutorial. It was my first attempt at editing a video. I am not delighted with the quality, but I hope I can show it and, maybe, get some help improving it. Here is the link:

http://video.google.com/videoplay?docid=-4381896920195658969&hl=en (for slow connections)

http://video.google.com/videoplay?docid=6866686363544546201&hl=en (for broadband, e.g., DSL or cable)


dmsnyder's picture
dmsnyder

On Decembeer 31, 2008 ...

Norm's Onion Rolls

Norm's Onion Rolls (and a lone kaiser roll)

and ...

Apple Crunch

Apple Crunch, from the Summer Shack Cookbook

And, on January 1, 2009, I baked ...

San Francisco Sourdough from Reinhart's "Crust&Crumb"

San Francisco Sourdough from Reinhart's "Crust & Crumb"

The sourdough was delicious with lentil soup and a salad.

David

dmsnyder's picture
dmsnyder

This topic is not about the auricular anatomy of elves (or Vulcans). It's about scoring breads.

Scoring loaves creates a visually pleasing pattern, and it helps control the expansion of the loaf as it bakes. This was discussed not long ago in this topic:

http://www.thefreshloaf.com/node/9046/effect-scoring-loaf-shape

The San Francisco Sourdough breads I baked today illustrate a more "advanced" aspect of scoring that is alluded to by both Hamelman (in "Bread") and Suas (in "Advanced Bread & Pastry.")

San Francisco Sourdough Breads (from Peter Reinhart's "Crust & Crumb")

Detail of bâtard crust, with "ear," grigne" & "bloom."

So, what is the point of an ear?

What Suas called "the classic cut" is parallel to the long axis of a baguette or a bâtard. The cut is made with the blade at a shallow angle to the surface of the loaf. The cut should be shallow - about 1/4 inch deep. Paradoxically, this shallow cut results in the flap lifting better than a deeper cut would, thus forming a nice "ear." Hamelman (pg. 80) points out that "a deep cut will simply collapse from its own weight."

The angle is also important. "If the angle is not achieved and the cut is done with the blade vertical to the loaf, the two sides of the dough will spread very quickly during oven spring and expose an enormous surface area to the heat. The crust will begin to form too soon - sometimes before the end of oven spring - penalizing the development of the bread. If the cut is properly horizontal, the sides of the loaf will spread slower. The layer of dough created by the incision will partially and temporarily protect the surface from the heat and encourage a better oven spring and development." (Suas, pg. 116.) 

The second photo, above, illustrates a fairly nice "ear," but it also shows that the bloom occured slowly, as it should. Notice that the color of the crust in the opening has 3 distinct degrees of browning, decreasing from left to right. The darker part on the left obviously opened first and was exposed to the direct heat of the oven for longer. If the bloom occured too rapidly, it would have a more even coloration. For example, see the photo of the boule, which was slashed with the blade held at 90 degrees to the surface of the loaf:

Boule scored with the blade held vertical to the loaf surface. Note the even coloration of the bloomed crust.

In summary, in order to achieve an optimal bloom in baguettes and bâtards, one must attend to 3 variables when scoring them:

  1. The cuts should be almost parallel to the long axis of the loaf.
  2. The blade should be held at about a 30 degree angle to the surface of the loaf.
  3. The depth of the cut should be shallow - about 1/4 inch.

Variable shading of the bloomed crust confirms that the desired slow but prolonged opening of the cut during oven spring occured.

Cool, isn't it?

 David

dmsnyder's picture
dmsnyder

I've tried an awful lot of toys and tweaks in my quest for better bread. But Eric's (ehanner) claim that he doesn't see any benefit to using a baking stone and the recent post asking about La Cloche versus a Dutch oven got me thinking: Each new trick I've learned about has been added on top of all the other tricks I've adopted. It sounds like what happens with government programs - If the one we have isn't doing the job, we don't trash it or improve it. We just create a new one to run beside the old one. I call it "Planning by Acretion."

Sooooo ... I made a batch of Anis Bouabsa baguettes. I made them more highly hydrated than usual - about 80% hydration, rather than 75%. I used the same method of mixing and fermentation as usual. They proofed for 45 minutes. They were so slack, I didn't even try scoring them.

Now, here's the big difference: I did not use a baking stone. I did not humidify the oven. I baked on a heavy sheet with parchment, and I covered the loaves with a cheapo aluminum foil baking pan for 10 minutes at 500F, then baked at 480F for another 15 minutes.

Like this ...

Fully Proofed


Covered and ready to go in the oven

Baked and cooling

I'll add a crumb photo later.

Pretty nice results, I'd say. Certainly worth more trials with different breads.

On the other hand, there are other things that I would never want to make without my 7 quart Le Creuset enameled cast iron pot. For example, tonight's dinner.

Chicken & Dumplings

David

dmsnyder's picture
dmsnyder

Above are pictured three loaves of San Francisco Sourdough made from the recipe in Peter Reinhart's "Crust and Crumb." They each turned out with subtle differences that are instructive regarding the variables that affect the appearance of our loaves. I thought it might be useful to describe these differences and what produced them.

I'm not going to describe the formula or method, because these were according to the recipe and were identical for all 3 boules. They were proofed in identical coiled reed brotformen. The two loaves on the right were baked together. The one on the left was baked 45 minutes later, and was left in the refrigerator, where all had been cold retarded overnight, 45 minutes longer than the other two. As you can see, they were scored with the same checkerboard pattern. Both bakes started in a 500F oven. The temperature was lowered to 450F when the loaves had been loaded. They baked for 30 minutes then were left in the oven for another 10 minutes with the oven turned off and the door ajar.

What were the differences in my procedures, then?

For the first bake (the two loaves on the right): 5 minutes before loading the first loaf (the one in the middle). a handful of ice cubes were put in a pre-heated metal loaf pan on the lowest shelf. Then, I dumped the boule on a peel, scored it and loaded it. The oven door was closed. I scored the second loaf (the one on the far right) and loaded it. I then poured a cup of boiling water into a pre-heated cast iron skillet on the bottom shelf and closed the door. The loaf pan and the skillet were removed after 10 minutes.

For the second bake, the loaf on the far left was scored and spritzed with water, loaded and then covered with a stainless steel bowl. The bowl was removed after 10 minutes.

What were the differences in outcome?

Comparing the two loaves baked together, the first one loaded had better oven spring and better bloom. I think it got the benefit of a slightly higher initial oven temperature. The second loaf was loaded within 2-3 minutes of the first. I have seen this difference between 2 loaves loaded sequentially in this manner repeatedly. I think the differences are "real."

The third loaf and the first (the one on the far left and the middle one) had about the same oven spring and bloom. If anything, the loaf in the middle had more. They were both, of course, the "first" loaf loaded. However, the one baked under a bowl for 10 minutes had a much shinier crust due, I think, to dissolved and gelatinized starch on the surface.  The difference "in person" was more dramatic than what I see in the photo. This shininess is an effect I've seen only with breads baked covered. The longer the loaf is covered, the stronger the effect.

These differences may be of little significance. All three boules are quite satisfactory. But the differences do elucidate the effects of minor changes in temperature and humidification and might answer questions other have about how to achieve desired improvements in their breads.

FYI, we had part of the loaf on the left with dinner (Onion soup and Dungeness crab cakes with an Anderson Valley Sauvignon Blanc). The bread had a crunchy crust, typical chewy crumb and lovely complex soudough flavor. This is still a fabulous version of SF Sourdough.

Any comments about the observed differences would be welcome.

David

Pages

Subscribe to RSS - dmsnyder's blog