The Fresh Loaf

A Community of Amateur Bakers and Artisan Bread Enthusiasts.

dmsnyder's blog

dmsnyder's picture
dmsnyder


Today's sourdough bread is a continuation of the experiment from last week with my modified steaming method of pouring hot water over pre-heated lava rocks in a cast iron skillet both before and after loading the loaves in the oven.

I had two new goals: In addition to trying to replicate last weeks good results, I wanted to increase the sourness of the bread and I wanted to see if I could get a “crackly” crust.

In the interest of increased sourness, I elaborated a firmer levain than what I customarily use. I fed the levain two days before mixing the dough, fermented it overnight and then refrigerated it for 18 hours. I also doubled the percentage of the levain in the formula.

I have read that lower protein flour will produce a more crackly crust, while higher protein flour produces a more crunchy, harder crust. Therefore, I used AP flour (11.7% protein) rather than the high-gluten flour (14.2% protein) I had used last week.

Since I was using a lower protein flour, I reduced the hydration of the dough to 70%. Note that the effective hydration is even a bit lower, since the levain was less hydrated also. I used the same procedures as last week except I baked the loaves slightly longer, since they were slightly larger (because of the additional levain).


Ingredients

Amount

Baker's percentage

Giusto's Baker's Choice flour

450 gms

90

Whole rye flour

50 gms

10

Water

350 gms

70

Salt

10 gms

2

Levain (50% hydration)

200 gms

40

Total

972 gms

212

Procedures

  1. Mix the flours and water to a shaggy mass. Cover and let rest for 20-60 minutes.

  2. Add the salt and levain and mix to moderate gluten development.

  3. Transfer to the bench and do a couple of folds, then transfer the dough to an oiled bowl and cover it. Note the volume the dough will achieve when doubled.

  4. After 45 minutes, do another stretch and fold, then allow the dough to double in volume.

  5. Divide the dough into two equal pieces and pre-shape into rounds. Let the pieces rest, covered, for 10-20 minutes.

  6. Shape each piece into a boule and transfer to well-floured bannetons, seam side up. Place each in a food-grade plastic bag, seal the openings.

  7. Allow to proof for 30-60 minutes (less in a warmer environment), then refrigerate for 8-14 hours.

  8. Remove the loaves from the refrigerator 2-4 hours before baking (depending on how risen they are and how warm the room is). Allow to warm up and expand to 1.5 times the loaves original volume.

  9. 45-60 minutes before baking, pre-heat the oven to 500F with a baking stone on the middle shelf and a cast iron skillet filled with lava rocks on the bottom shelf. (I suggest moving the stone ove to within one inch of the oven wall on your non-dominant side. Place the skillet next to the wall on your dominant side.)

  10. When the loaves are ready to bake, pour 1/3 cup of boiling water over the lava rocks and close the oven door fast. (Strongly suggest holding the kettle wearing an oven mitt!)

  11. Transfer the loaves to a peel or to parchment paper on a peel, and load them onto your baking stone.

  12. Immediately pour ½ cup of boiling water over the lava stones and quickly close the oven door.

  13. Turn the oven temperature down to 460F and set a timer for 12 minutes.

  14. After 12 minutes, remove the skillet. Reset the timer for 20 minutes.

  15. The loaves are done when nicely colored, thumping their bottoms gives a “hollow” sound and their internal temperature is at least 205F.

  16. When the loaves are done, turn off the oven but leave the loaves in the oven with the door ajar for 7-10 minutes to dry the crust.

  17. Cool thoroughly (2 hours) before slicing and serving.

Comments:

I autolysed the flours and water for about 30 minutes. I then added the levain and salt and mixed with the paddle in my KitchenAid for about 2 minutes. As I was switching to the dough hook, I was surprised how much gluten development had already occurred. I mixed with dough with the dough hook at Speed 2 for just a couple minutes more and already had moderate gluten development.

To what could I attribute this? The only possibilities were the increased percentage of levain and the different flour. My hypothesis is it was mostly the flour. We hear that higher-gluten flours require more mixing to develop the gluten. I was using a lower gluten flour than usual for this type of bread.

The dough consistency (Thank you, MC for this useful distinction from the SFBI!) was almost identical to that of last week's dough, so my guesstimated hydration adjustment seemed spot on.

These boules were proofed for a bit over an hour before they were refrigerated. The next morning, they sat at room temperature for about 2 hours before baking. When I transferred them to the peel, they spread some. This could be because of the lower gluten flour effects, slight over-proofing or a combination of factors.

The loaves had reasonable but not great oven spring, and they had less bloom than the previous bake. This suggests they were probably over-proofed a bit. I baked them for 22 minutes at 460F. They then sat in the turned off oven for 7 minutes to dry the crust.

The crust was not as shiny as the last ones, but by no means “dull.” They were singing already when I took them out of the oven. It seemed to me, that the “tune” was higher pitched than the song my boules generally sing. Could this be because of the lower gluten flour? Thinner crust? And … Woohoo! Cracks began to appear in the crust as the bread cooled!

The crust has a crunchy bite. As can be seen from the crumb shot, below, it is relatively thick. I think that, to get a thin  crackly crust like a classic baguette, one must have a shorter bake at a lower temperature.

The crumb appearance was typical for my sourdoughs of this type. However, it was chewier than I expected. Very nice. The flavor was indeed more sour than last week's sourdough, as expected. I would still categorize it as mild to moderate sourness. It is not as sour as the "San Francisco Sourdough" in Reinhart's "Crust and Crumb," which uses an extremely firm levain in even higher proportions.


Conclusions:

  • Increased sour flavor with firmer levain and increased levain percentage: As expected, this loaf was more sour but not dramatically so. To get a super-sour flavor, the techniques used must be pushed further.
  • Crackled crust with lower protein flour: Today's bake seems to support this hypothesis. Is this effect desirable? That's a matter of taste, but, for me, it's at least nice to know how to get the effect when I want it.
  • The benefits of the double steaming technique: Today's results were certainly satisfactory, but they also demonstrate that steaming is just one among several variables that contribute to oven spring and bloom.


David

Submitted to Yeast Spotting


dmsnyder's picture
dmsnyder


Last week, hansjoakim's blog included a gorgeous rye bread that he referred to as his “favorite 70% rye.” I asked him for his formula, and he generously provided it. I baked “hansjoakim's favorite 70% rye” today.

I grew up eating rye bread, but it was what is commonly called “Jewish Light Rye” or “Jewish Sour Rye.” We just called it “rye bread.” I had no exposure to breads made with whole rye flour or those made with a preponderance of rye flour. I was aware that there were countries where rye breads had a long history and an important place in the culture – Russia, Poland, Germany, Switzerland, Austria, and the Scandinavian countries. But I had no experience with these breads. It was only when I started baking rye bread myself and started reading bread baking books – notably Hamelman's “Bread” and Leader's “Local Breads” - that I began to appreciate the rich diversity of rye breads and the technical differences between making great mostly-wheat flour sourdoughs and great mostly-rye flour breads. I'm also just starting to get a sense of the cultural differences in taste that determine “what is great rye bread” to some one who grew up eating these rye breads.

So, being endlessly curious about culture and values, including the aesthetics of food, how could I not want to see what hansjoakim, a man with quite evident refined aesthetic sensibilities, judged to be his “favorite 70% rye?”

The following formula is that provided by hansjoakim. The procedures are also his but with additional details. Any errors introduced by my extrapolations are, obviously, mine.


Total formula

Amount

Baker's percentage

Medium rye flour

436 gms

70

All purpose flour

187 gms

30

Water

467 gms

75

Salt

11 gms

1.8


Rye sour final build

Amount

Baker's percentage

Medium rye flour

218 gms

100

Water

218 gms

100

Ripe rye sour

11 gms

5


Final dough

Amount

Baker's percentage

Medium rye flour

218 gms

54

All purpose flour

187 gms

46

Water

249 gms

61.5

Salt

11 gms

2.7

Rye sour (all of the above)

447 gms

110

Note: 35% of the total flour is from the rye sour.

Procedures:

  1. The day before baking, mix the final rye sour build. This should ferment at room temperature for 14-16 hours, so figure backwards from when you want to mix the the dough. For example, I wanted to mix the dough at around 2 pm today, so I mixed the final rye sour build at 8 pm yesterday evening. In fact, I started the process two days ago by activating my white rye sour by feeding it, fermenting it 8 hours and refrigerating it for a day.

  2. I used a KitchenAid stand mixer, but these procedures could be done by “hand.” Mix all the ingredients in the final dough in a large bowl. If using a stand mixer, mix for 3 minutes with the paddle at Speed 1. Switch to the dough hook and mix for 2-3 minutes more at Speed 2. The dough at this point is a thick paste with little strength (gluten development providing extensibility and elasticity). Optionally, after mixing, you can knead briefly on a floured board with well-floured hands.

  3. Transfer the dough to an oiled bowl, cover it tightly, and ferment for 1 hour.

  4. Transfer the dough to a floured board and pre-shape it into a single round. Cover with plasti-crap or a damp kitchen towel and rest for 5 minutes.

  5. Shape the dough into a boule and transfer to a well-floured brotform or banneton.

  6. Cover the boule with plasti-crap or a damp towel and proof for two hours. (My loaf was fully proofed in 1 hr and 45 min.)

  7. One hour before baking, pre-heat the oven to 250C/480F with a baking stone and your steaming method of choice in place.

  8. When ready to bake the bread, pre-steam the oven. Then transfer the boule to a peel. Score or dock it. (hansjoakim proofed his boule seam-side down and did not score or dock it, resulting in a lovely chaotic pattern of cracks on the loaf surface. I proofed my boule seam-side up and docked it using a bamboo chop stick.) Transfer the boule to the baking stone. Steam the oven.

  9. After 10 minutes, remove your source of steam from the oven.

  10. After 15 minutes, turn the oven down to 225C/440F.

  11. Bake another 45 minutes. Monitor the loaf color, and, if it is darkening too quickly, turn the oven temperature down further. It would be well within the rye baking tradition to do this planfully in steps, ending up as low as 205C/400F for the last 10-15 minutes.

  12. The loaf is done when the crust feels firm, it gives a “hollow sound” when the bottom is thumped and the internal temperature is 205F or greater.

  13. When the loaf is done, turn off the oven, but leave the loaf in it with the door ajar for an additional 10 minutes.

  14. Transfer the loaf to a cooling rack and cool thoroughly before slicing. It will be best to leave it 24 hours, loosely wrapped in linen, before slicing.

Comments:

I baked this loaf at 460f convection-bake for 15 minutes, then 440F bake for 30 minutes, then 400F bake for 10 minutes. I believe I should have turned down the temperature from 440F sooner.

I got less oven spring than hansjoakim. I believe this is due to over-proofing. In hindsight, I should have baked 15-30 minutes sooner. I suspect my kitchen environment was near 80F which accelerated the proofing.

The bread smells lovely while cooling – a characteristic, earthy rye aroma.

The profile of the cut loaf was better than I had expected, although I didn't get the oven spring hansjoakim did.

hansjoakim's Favorite 70% Rye crumb

The crust was substantial and crunchy-chewy. The crumb was tender. This bread is very similar to the Detmolder 70% Rye from Hamelman I made a few weeks ago. It has a very nice hearty rye flavor with a touch of sweetness and a touch of sour when tasted about 20 hours after baking. I expect the flavor to evolve over the next several days.

Because hansjoakim's procedures are so straightforward and the bread is quick to make, I would recommend it to anyone, but especially those wanting to make a high percentage rye bread but not ready to tackle the time and temperature rigors of the Detmolder 3-stage method.

This is a wonderful rye bread! Thanks, hansjoakim!

David


dmsnyder's picture
dmsnyder

This bread is a rye with 66 percent rye flour and the remainder high-gluten flour. A rye sour is elaborated using whole rye. The sour is 80% hydration, which ends up being a very thick paste, due to how much water the whole rye absorbs. This is fermented for 14-16 hours and is then mixed with Medium rye flour, high-gluten flour, more water, salt and instant yeast.

The resulting dough is very loose. Hamelman says to mix it (in a professional spiral mixer) for only 3 minutes at first speed and 2 minutes on second speed. He says you should have "a bit of gluten strength, but ... not much." I aimed for "a bit" of gluten development but had to mix for 16 minutes in my KitchenAid. The dough was extremely sticky and still rough and pasty. It had enough elasticity after fermenting to form into loaves, using more flour dusting on the bench and my hands than is necessary with lower-percentage rye doughs.

Fermentation was only 45 minutes and proofing was 50 minutes. Proofing is tricky with this type of rye. Under-proofing contributes to excessive oven spring and blow-outs. Over-proofing leads to the loaf collapsing when it is scored or when it is loaded into the oven. I think I hit it about right. <whew!>

I wasn't sure about scoring a bread like this. I considered not scoring at all or making rounds and docking them. In the end, I decided to make oval loaves and score one in the "sausage" cut and the other in the "chevron" cut.

Hamelman prescribes a 24 hour rest after baking before slicing. I wrapped the loaves in linen and left them on the counter overnight.

When sliced, this rye has a fairly thick, chewy (but not hard) crust. The crumb is fairly dense and quite moist. It is tender to chew. The aroma is assertively rye, as is the flavor with a mild sourdough tang.

The taste is good when eaten plain. It is strong enough to come through when eaten with a slice of aged gruyère cheese. Just as a light rye seems to call for corned beef, this rye calls for stronger cheeses and fatty fish such as herring or salmon. I wish I could get some smoked sable. 

David

dmsnyder's picture
dmsnyder


I made a couple of sourdough boules today. I'm quite happy with them. I used a slightly different formula, but the exciting thing to me was the effect of a modification of my oven steaming method I've been meaning to try for some time.


Ingredients

Amount

Baker's percentage

High-gluten flour

450 gms

90

Whole rye flour

50 gms

10

Water

362 gms

72

Salt

10 gms

2

Levain (1:3:4 - S:W:F)

100 gms

20

Total

972 gms


194


I used KAF Sir Lancelot flour and Bob's Red Mill “Dark Rye” flour.

Procedures

  1. Mix the flours and water to a shaggy mass. Cover and let rest for 20-60 minutes.

  2. Add the salt and levain and mix to moderate gluten development.

  3. Transfer to the bench and do a couple of folds, then transfer the dough to an oiled bowl and cover it. Note the volume the dough will achieve when doubled.

  4. After 45 minutes, do another stretch and fold, then allow the dough to double in volume.

  5. Divide the dough into two equal pieces and pre-shape into rounds. Let the pieces rest, covered, for 10-20 minutes.

  6. Shape each piece into a boule and transfer to well-floured bannetons, seam side up. Place each in a food-grade plastic bag, seal the openings.

  7. Allow to proof for 30-60 minutes (less in a warmer environment), then refrigerate for 8-14 hours.

  8. Remove the loaves from the refrigerator 2-4 hours before baking (depending on how risen they are and how warm the room is). Allow to warm up and expand to 1.5 times the loaves original volume.

  9. 45-60 minutes before baking, pre-heat the oven to 500F with a baking stone on the middle shelf and a cast iron skillet filled with lava rocks on the bottom shelf. (I suggest moving the stone ove to within one inch of the oven wall on your non-dominant side. Place the skillet next to the wall on your dominant side.)

  10. When the loaves are ready to bake, pour 1/3 cup of boiling water over the lava rocks and close the oven door fast. (Strongly suggest holding the kettle wearing an oven mitt!)

  11. Transfer the loaves to a peel or to parchment paper on a peel, and load them onto your baking stone.

  12. Immediately pour ½ cup of boiling water over the lava stones and quickly close the oven door.

  13. Turn the oven temperature down to 460F and set a timer for 10 minutes.

  14. After 10 minutes, remove the skillet. Reset the timer for 20 minutes.

  15. The loaves are done when nicely colored, thumping their bottoms gives a “hollow” sound and their internal temperature is at least 205F.

  16. When the loaves are done, turn off the oven but leave the loaves in the oven with the door ajar for 7-10 minutes to dry the crust.

  17. Cool thoroughly (2 hours) before slicing and serving.

The crust was remarkably shiny when it came out of the oven. This effect, due to starch that is gelatinized early in the bake, I have only achieved before with breads baked under a stainless steel bowl for the first half of the bake. I also got quite satisfactory oven spring and bloom in these loaves which I had feared were a bit over-proofed.

It is evident that using the skillet with lava rocks for both pre- and post-loading steaming is superior to either a) pre-steaming by throwing ice cubes in a hot metal loaf pan or b) compensating for insufficient pre-loading steam by over-steaming post-loading. Some methods of steaming, when used to excess, actually interfere with the cuts opening and produce pale-colored loaves.

The bread I tasted has a delightfully crunchy crust and a chewy crumb with what I would regard as medium-strong sourness – just how I like it best.

As far as I'm concerned, this experiment was a success.

David

Submitted to Yeast Spotting


dmsnyder's picture
dmsnyder

Getting home an hour earlier than expected + The best blueberries I've had in years in the fridge = 

The recipe is from "The Best Recipe" by the "Cooks Illustrated" folks. These are "Lemon-Blueberry Muffins." I made 3/4 of a recipe. (That's the real "math.")

And for the rest of the "crumb shot" obsessed:

It was hard to decide what to have for dessert - fresh out of the oven muffin or a slice of ....

My wife's Plum Cake (inspired by the recent postings about this).

I went with the muffin. There's always bedtime snack.

David

dmsnyder's picture
dmsnyder


The “Miche, Pointe-à-Callière” from Jeffrey Hamelman's “Bread” is one of my favorite breads. I've made it a great many times. But I have a confession to make: I've never made it with the proper hydration level.

It started out by my finding one of the very rare errors in this marvelous book. Hamelman's ingredient list in the “Home” version of the Final Dough calls for “1 lb., 6.4 oz (2 ¼ cups)” of water. Now, 2 ¼ cups of water weighs less than this. I initially assumed the volume measurement was correct, and I used 1 lb., 2 oz. of water. You know, this made an outstanding bread. It did have more oven spring and a higher profile than expected, but the crumb was nice and open with large holes, and it tasted great, so I kept using my “corrected” formula.

Now, “Bread” has been such a reliable book, I always doubted my solution. Finally, I compared the ingredient quantities in the 3 listings Hamelman gives with the baker's percentages he gives. It turns out that the error was really in the volume measurement, not the weight. The home recipe should call for 2 ¾ cups of water, which is 1 lb., 6.4 oz.

So, today, for the first time, I made the Miche at the 82% hydration called for in Hamelman's formula.

At the higher hydration level, this dough is not just slack. It is truly gloppy. Hamelman says to mix it 2 to 2 ½ minutes (in a professional spiral mixer) to get “moderate gluten development.” I mixed it in a Bosch Universal Plus for 17 minutes to get something less than “moderate” gluten development. Hamelman then calls for 2 or 3 folds during a 2 ½ hour bulk fermentation. I implemented the “stretch and fold in the bowl” approach and did 30 folds at 30 minute intervals over 2 hours, then I let the dough proof for another 45 minutes. (This is much like the method McGuire uses in his “Pain de Tradition,” as Shiao-Ping has shared with us. Since the Miche, Pointe-à-Callière is also a McGuire bread, according to Hamelman, using this method seemed entirely reasonable.)

I “shaped” the miche by dumping the dough onto a heavily floured board and folding the edges to the center. I made 6-8 folds. The loaf was then transferred to a linen-lined, floured banneton and proofed for 2 hours and baked with steam.


I am cooling the miche overnight before slicing. 

Miche profile

This miche still has a higher profile than those pictured in Hamelman.

Miche crumb

The crumb is about right, but, interestingly, I've gotten more open crumbs on previous bakes using somewhat lower hydration. My hunch is that the difference is related to how I did the bulk fermentation.

David


dmsnyder's picture
dmsnyder


George Greenstein's “Secrets of a Jewish Baker” is a wonderful source for traditional New York-style Jewish baked goods. It has been criticized for giving ingredients in volume measurements only, though. I have previously provided Greenstein's formula for Jewish Sour Rye with ingredient weights, but I realized today that I had never done this for another of my favorite Greenstein breads – Pumpernickel. So, here is Greenstein's pumpernickel formula converted to weights.

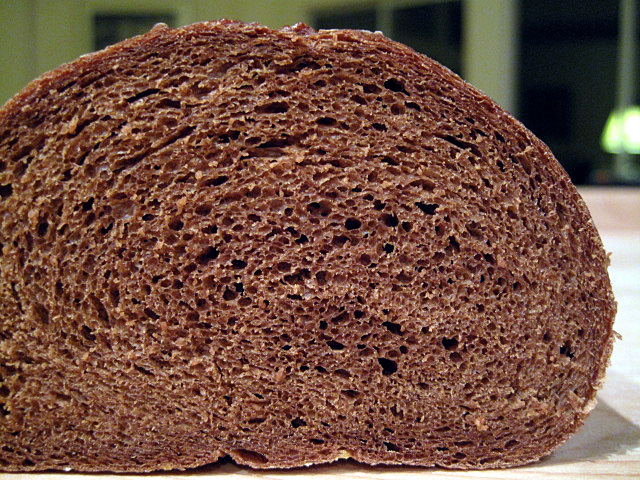
This is Jewish pumpernickel. It is moist and chewy. It is not the dry, dense German-style pumpernickel. I make it generally as long loaves, as pictured. However, you can also make it as round loaves, in which case you should "dock" the loaves by making 6-10 holes in the top with a skewer or ice pick, rather than scoring them across with 3 slashes. You can also make this bread in loaf pans, in which case I would score them with a single slash along the center of the long axis.


The recipe that follows is taken from Secrets of a Jewish Baker, by George Greenstein. The ingredient amounts are both those Greenstein specifies and the ingredient weights I actually used. The procedures are adapted from Greenstein's.

Ingredients

Volume (per Greenstein)

Amount (per dmsnyder)

Warm water

1 cup

240 gms

Yeast

1 pkg active dry

7.5 gms instant

Rye sour

1 cup

250 gms

Altus (optional)

1 cup

1 cup

Pumpernickel color

4 tablespoons

1 tablespoon caramel color

Common (First Clear) flour

2 ½ to 3 ½ cups

350-400 gms

Pumpernickel flour

1 cup

115 gms

Salt

1 tablespoon

8 gms

Caraway seeds (optional)

1 tablespoon

Not used

Cornstarch solution

(see below)


Notes on ingredients:

1. Rye sour: This is a rye sourdough starter. You can make it from scratch. You also can easily convert a wheat flour sourdough starter to a rye sour by feeding a small amount of your existing starter with rye flour and refreshing it a couple of times.

2. Altus: This is “old” rye bread cut into small pieces, soaked in water until saturated and wrung out. It was originally a way for bakers to re-use bread they hadn’t sold. "Waste not. Want not." However, it does make for a more tender and flavorful bread and has become traditional. It is optional. I keep hunks of leftover rye bread in a plastic bag in my freezer to use as altus.

3. Pumpernickel color: This is really optional but is necessary to give the "black" color expected of pumpernickel. It also gives the bread a subtle bitter undertone without which it just doesn't taste "right." You can use 1 tablespoon of powdered caramel color, instant espresso cof

fee or cocoa powder. I use powdered caramel coloring from King Arthur’s Baker’s Catalogue.

4. Pumpernickel flour: This is whole grain, coarsely ground rye flour. You can use dark rye flour, but it won’t be quite the same. I get pumpernickel flour from King Arthur’s Baker’s Catalogue. Like other whole grains, it will spoil in time. I keep it in my freezer in a 1 gallon Ziploc bag.


5. Common flour: This is also known as first clear flour. Its definition gets into esoteric grain milling stuff, but it is necessary for authentic Jewish rye breads, including pumpernickel. It also makes wonderful sourdough breads as a substitute for bread flour or a mix of white and whole wheat flours. I get First Clear flour from King Arthur’s Baker’s Catalogue.


6. Cornstarch solution: Mix 1 ½ tablespoons of cornstarch in 1/4 cup cold water. Pour this into 1 cup of gently boiling water in a sauce pan, whisking constantly. Boil until slightly thickened. Set aside. It can be kept refrigerated for a few days in a sealed jar or covered bowl.


7. Caraway seeds: I don’t use them in pumpernickel, myself. You can add other things to pumpernickel, though, such as flax seeds (soaked overnight), sunflower seeds, raisins, minced onion.


Procedures


Mixing (by hand. See Note below for mixing with a stand mixer.)


In a large bowl, sprinkle the yeast over the warm water to soften; stir to dissolve. (If using instant yeast, mix it with the flour, don’t dissolve it. Add the water to the rye sour and mix.) Add the rye sour, altus (if desired), pumpernickel color, pumpernickel flour, 2 ½ cups of common flour, and salt. Mix thoroughly until the dough pulls away from the sides of the bowl.


Turn out the dough onto a floured work surface and knead, adding small amounts of flour as needed. Make the dough a bit stiffer than normal, since this dough softens as it is kneaded. Knead the dough until it feels smooth and silky (5-8 minutes).


Note: I mix in a KitchenAid mixer. I put all the ingredients in the bowl and, using the paddle, mix well at Speed 1. Scrape the dough off the paddle and replace it with the dough hook. Knead at Speed 2 for about 8-10 minutes. If you do not use altus, the dough should form a ball on the hook and clean the sides of the bowl. With altus, even when an additional 50 gms of flour is added, the dough does not clean the bowl. I then hand knead until the dough is smooth and silky.


Fermenting


Shape the dough into a ball, place in a large oiled bowl, and turn to coat. Cover and let rise until doubled in size.


Shaping & Proofing


Punch out all the air, cut in half and shape into rounds, and let rest for 10 minutes.


Shape into round loaves, long loaves or pan loaves. If baking free form, place the two loaves on a baking sheet sprinkled with coarse cornmeal. (Or on parchment paper if baking on a stone, which I prefer.) Cover and proof until doubled in size. (About 90 minutes, or more depending on room temperature). Brush with cornstarch solution. Score the loaves across if long dock them if round. If using caraway, sprinkle seeds on the top of the loaves.


Baking


Bake with steam in a preheated 375F oven until tapping the bottom of the loaf produces a hollow sound (30-45 minutes). The internal temperature should be at least 190F. If the crust seems soft, bake 5-10 minutes more. (The crust should be very firm when you take the loaves out of the oven. It will soften as the bread cools.)


Note: I use a pizza stone for baking free form loaves. I heat it at least 1 hour before baking. I produce steam by preheating a cast iron skillet filled with lava rocks in the oven along with the stone and, right after putting my loaves in, pouring 1 cup of boiling water into the skillet. Be careful you don’t scald yourself with the steam!


Cooling


After baking, place on a rack to cool and brush again with the cornstarch solution. Let cool thoroughly before slicing and eating.


This type of pumpernickel is one of the breads we always had in the house when I was a child. I usually ate it un-toasted, spread with cream cheese. My grandmother ate it spread with sourcream. I think this pumpernickel is especially good with smoked fish or herring, and it is my favorite bread to eat with scrambled eggs.


Unfortunately, my wife isn't as fond of pumpernickel as I am, so I also made one of her favorites – the Cinnamon-Raisin-Walnut Bread from BBA.


David


Submitted to Yeastspotting 


dmsnyder's picture
dmsnyder

A bowl of cherries

Hi, loafers!

I just returned from a week on the Oregon coast vacationing with our sons and their families. <sigh> It always seems too short.

I took along some previously baked breads - a Miche, Pointe-à-Callière, a Susan from San Diego's Ultimate Sourdough and Salome's Sourdough Potato-Walnut Bread. I also baked a couple loaves of San Joaquin Sourdough while there, again hazarding an unfamiliar oven and no baking stone. The breads I baked there suffered most from the scoring not opening up well. One I baked under a stainless steel bowl to steam. The other loaf was steamed by pouring boiling water into a heated skillet. The magic bowl technique worked better, I think.

I believe my older (3 years old) granddaughter ate the lioness' share of this loaf as PB&J sandwiches!

I also made AnnieT's Sourdough Pancakes with local blueberries twice. One time, I made some with roasted pecans. Yum! Highly recommended.

I took along starter in two forms: I dried some starter, and I made a very firm ball of starter about the size of a golf ball. I only ended up using the latter. It traveled for two days at room temperature without appreciable expansion. (No problems with Homeland Security.) I cut it up into very small pieces and soaked them in water for a while, then mixed the slurry well and added enough water to make an intermediate starter of about the consistency of my usual 1:3:4 (S:W:F) starter. This fermented overnight and was reasonably happy the next morning.

The other essential equipment I took along included a large Silpat mat for stretching and folding and forming loaves, an instant read thermometer, a plastic scraper and some instant yeast. I purchased a couple of large stainless steel bowls and a large cookie sheet in Oregon before heading to the beach. 

There was nothing I didn't take along that I wished I had. I think this is a good, minimal equipment list for bread baking on vacation.

My only regret is that my vacation coincided with Shiao-Ping's SFBI adventure. It would have been so neat to have met her face-to-face while she was in California! And tomorrow, I start Jury Duty. Not my choice for how to ease back into the real world after a wonderful vacation.

David

dmsnyder's picture
dmsnyder


There has been quite a bit of discussion on TFL regarding cold retardation of late. This is a recurring issue, as a site search on “retardation” will reveal. My overall conclusion has to be that, particularly for sourdough breads, there is no hard and fast rule. This is not surprising, since review of several highly-regarding bread books reveals considerable variation in how this subject is approached.

Most home bakers are fundamentally pragmatic. Some groove on the science and want to understand each process in detail, but most just want to make really good bread. Retardation is mostly a matter of convenience – to fit bread baking into a busy schedule – for both the home baker and the professional. For some, retardation during bulk fermentation works better. For others, retardation of the formed loaves is more convenient. But does the choice effect the quality of the bread?

I have generally made my own choice according to the procedures specified in the formula I was using. I've made breads that call for retardation in bulk, like Nury's Light Rye and Anis Bouabsa's baguettes, and I've made breads that are retarded after the loaves are formed, like most San Francisco-style sourdoughs. But I've never switched a recipe from one to the other, until today.

The bread I chose to make was Susan from San Diego's “Ultimate Sourdough.” I have made it several times before. I have made it without any cold retardation and with cold retardation of the formed loaves. I decided to see how it would turn out with overnight cold retardation in bulk.

Susan's formula makes one smallish boule. I generally double the recipe to make 2 small boules. This time, I tripled it to make two somewhat larger (22.5 oz) loaves. For your interest, I have included a table of ingredient quantities for one, two and three small loaves.


Ingredients


1 loaf

2 loaves

3 loaves

Active starter

12 gms

24 gms

36 gms

Water

175 gms

350 gms

525 gms

Whole Wheat Flour

25 gms

50 gms

75 gms

Hi-Gluten Flour

225 gms

450 gms

675 gms

Salt

5 gms

10 gms

15 gms

For this bake, I used KAF White Whole Wheat and Bob's Red Mill Organic Unbleached flours.

Procedures


  1. I dissolved the starter in the water in a large bowl
  2. Both flours were added to the water and mixed thoroughly.
  3. The bowl was covered tightly and the dough was allowed to rest (autolyse) for 20 minutes.
  4. The salt was then added and folded into the dough using a flexible dough scraper.
  5. After a 20 minutes rest, the dough was stretched and folded in the bowl for 20 strokes. This was repeated twice more at 20 minute intervals.
  6. The dough was then transferred to a lightly oiled 2 liter glass measuring “cup” with a tightly fitting plastic cover and refrigerated (10 hours, overnight).
  7. The next morning, the dough had expanded very little. I took it out of the refrigerator and left it at room temperature. After 3 hours, it had expanded only slightly, and I was concerned how little gas formation was occurring. I transferred the dough to a lightly floured bench and did a single stretch and fold. The dough was then returned to the bowl. From that point, it became more active and doubled in another 2.5 to 3 hours.
  8. I then divided the dough into 2 equal parts. One was preshaped into a round and the other into a rectangle. After a 10 minute rest, I shaped one boule and one bâtard, each of which was placed in a floured banneton and then in a plastic bag to proof.
  9. I proofed the loaves until they were expanded by 75% or so. They were then transferred to a peel, slashed and transferred to a pre-heated baking stone. The oven was then steamed.
  10. The loaves were baked at 480F with steam for 10 minutes, then another 17 minutes at 460F without steam. They were left to dry for another 10 minutes in the turned off oven with the door ajar.


The dough did not become too extensible during cold retardation. This may have been due to the very strong flour I used. However, I did find the crumb less chewy than expected. The crumb structure, on the other hand, was not appreciably different from what I got when I retarded formed loaves of this bread. There was no significant difference in the flavor. You might note, however, the absence of the "birds eyes" - the little bubbles of CO2 under the crust surface. 

I would not hesitate to cold retard this bread in bulk again. When I do the cold retardation would be governed by my scheduling needs. The end result is about the same: Really good sourdough bread.

David

David


dmsnyder's picture
dmsnyder

Almost all the breads I bake are sourdoughs, but there are two non-sourdough breads I really like – Cinnamon-Raisin-Walnut bread and a hearty 100% Whole Wheat sandwich bread. Whole wheat bread is my bread of choice for tuna salad or egg salad sandwiches and for nut butter and jam sandwiches. It's one of my favorites, toasted, to accompany eggs, although it has stiff competition from San Francisco-style Sourdough bread and un-toasted Jewish Sourdough Pumpernickel (with cream cheese).

My favorite whole wheat bread has been the “100% Whole Wheat Bread” from Peter Reinhart's “The Bread Baker's Apprentice.” It uses both a poolish and a soaker and is essentially identical to what Reinhart calls the “foundational bread” in his later-published “Whole Grain Baking” book. It incorporates what Reinhart calls “the epoxy method” in the later book.

These books are widely available, so I will not duplicate the formulas here. However, Reinhart offers a number of options, and I will tell you which I used for this bake.

The Poolish in Reinhart's BBA formula isn't really a poolish in the classic sense of a 100% hydration mix of flour and water with a little yeast. In the WGB book, he calls it a “barm,” and it's not really a barm either, as I understand the strict definition. I suppose you could call it a “sponge.”

The Soaker calls for “coarse whole wheat flour or other coarsely ground whole grains.” In the past, I've used bulghur (medium size). This time, I did have some coarse ground whole wheat flour on hand. I used 2 oz of the coarse whole wheat and 2.25 oz of bulghur, soaked overnight in 6 oz of buttermilk (One of Reinhart's options), rather than the water I had used before.

The final dough uses fine ground whole wheat flour, salt, honey and instant yeast. No additional water is added in the formula. An egg and 1 T of vegetable oil are optional. I used the egg but not the oil. The honey I used was Orange Blossom honey.

Using these ingredients, the dough was considerably drier than it had been when I had used water (rather than buttermilk) and all bulghur (rather than coarse ground WW and bulghur). I ended up adding about 3 T of additional water during mixing and still ended up with a rather stiff, barely tacky dough.

Fermentation to doubling and proofing to almost doubled took about 75% as long as the recipe specified. This was because my kitchen was 80F yesterday.

The dough made two 17 oz pan loaves which baked at 350F for 45 minutes.


This is a very flavorful, somewhat dense yet tender bread. The flavor of red whole wheat predominated, but the Orange Blossom honey flavor was very much “there,” too. If you pay attention, I think you can also taste a tangy overtone from the buttermilk. I tasted some just after it cooled and had more toasted with almond butter and strawberry jam for breakfast. It's still a favorite.

I am curious how I would like this bread made with white whole wheat, and I'll probably make it that way next time.

David

Submitted to YeastSpotting

Pages

Subscribe to RSS - dmsnyder's blog