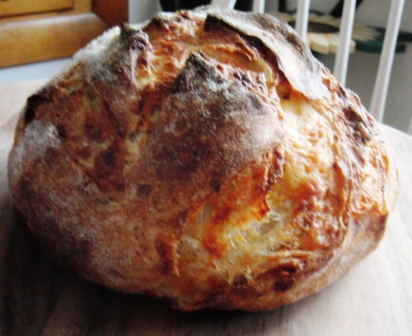
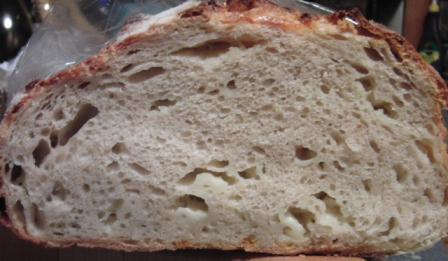
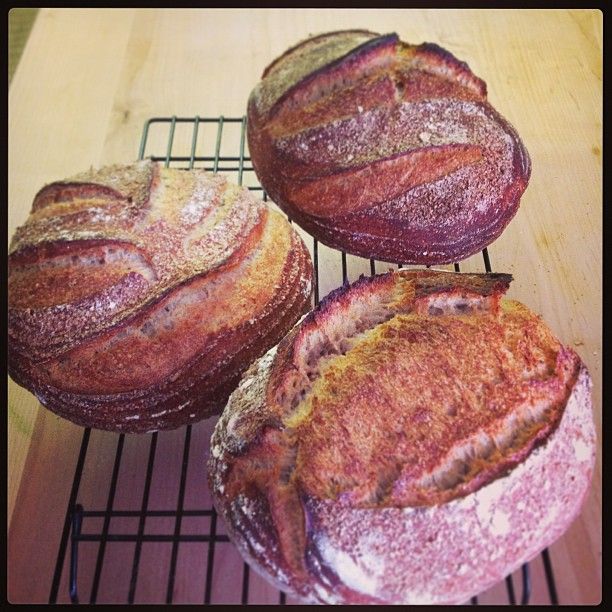
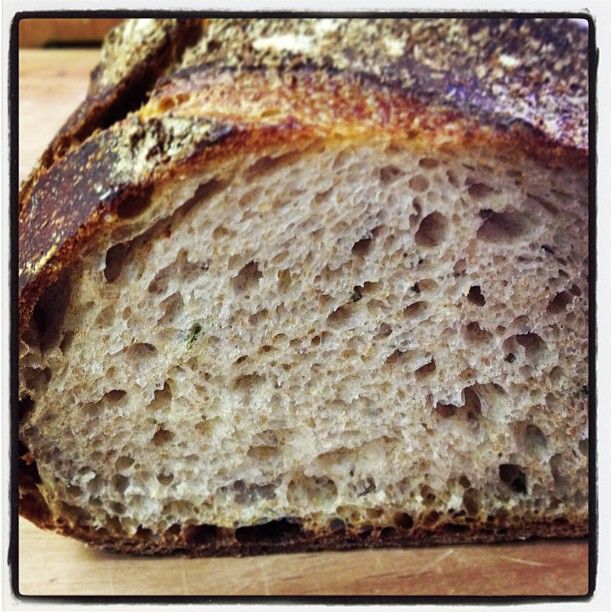
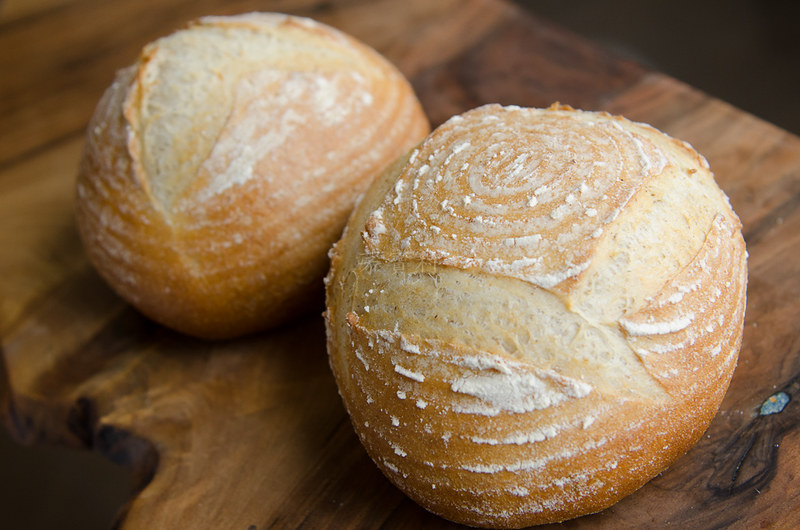
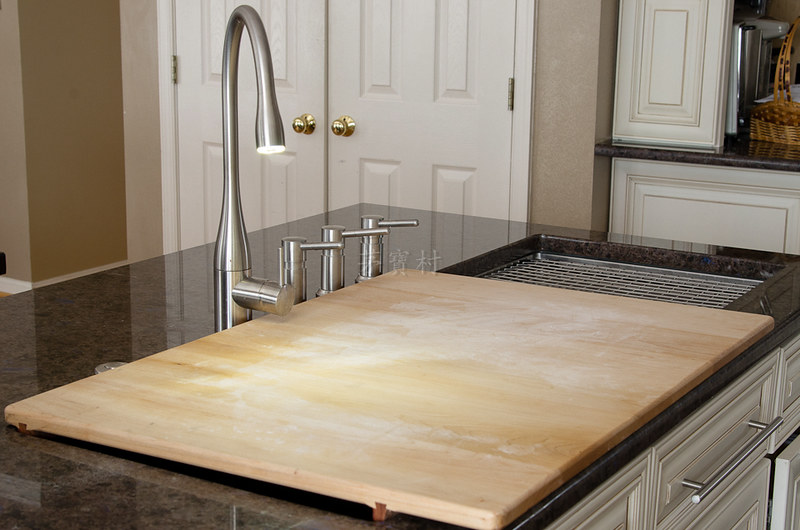
The Fresh Loaf

A Community of Amateur Bakers and Artisan Bread Enthusiasts.

Blogs

Justkneadit's picture
Justkneadit

So off I go... I have completed my 1st attempt at one of two recipes I will fervently try to "perfect" over the course of the next year.

Today, I baked cranbo's sourdough recipe which I shaped into a boule. I did however incorporate some different techniques that I wish to "master". (I put quotations because I can already see this will be a life long endeavor to perfect my loafs and techniques). I used the 36 hour method for this boule and will continue to do so making slight changes one at a time to see how I can improve my loaf with the conditions I am given. This might get lengthy because I want to keep accurate review of each bake so that I may improve my loafs.


Furthermore, as long as my situation allows, I will start the sourdough boule on Thursdays and the baguette a l'ancienne on Sundays and finishing the loaves on Saturday and Tuesdays, respectively.


Ok, here is the process:

Recipe:

  • 550g KAF Bread Flour
  • 308g water (38.2 F)
  • 110g 100% hydration starter (AP Flour)
  • 12g Pink Himalayan Salt
Simple enough...Process:
  • Mix flour and cold water into a rough mass. Dough temp was 66.2 F going into the fridge, which was at 36 F +/- .5 F. Hung out in my fridge for 14 hours.
  • Saved the flour/water mix from the depths of my fridge and kneaded in the starter first, then the salt. It was cold! Kneaded approx. 15-18 mins with a 10 min rest at 8 mins. (Was very difficult to knead at first. I'm sure the lower hydration and the temp didn't help much. Also I believe my starter was a bit past prime usage because it had become more liquidy than a dough consistency. So that also made it more difficult to knead into the dough. In the end this, in my opinion, was the best dough I had kneaded. Very supple and slightly tacky but not sticky.)
  • Once I kneaded it into submission I began 4 S&F's at 30 min intervals. After the last S&F I let the dough relax for 20 min then shaped and placed into ze brotform. Slid the brotform into a plastic bag and back into the fridge for 19 1/2 hours at 40 F.
  • After the dough's cat nap I let it proof for 6 1/4 hours at 75 F.
  • Set the temp of the oven to 525 F, for heat loss when I open the door, and placed the boule onto the baking stone and poured 1 cup of boiling water in a pan below with lav rocks, shut the door and reduced the temp to 450 F for 25 mins, rotated the boule 180 degrees, then reduced temp to 400 F for 15 more mins. The boule out of the oven was at 208.5 F internally.

Overall, very pleased. Taste was delicious with a smooth and creamy texture with a subtle tang. Open to advice or critques please.

One more thing, for aesthic reasons only I'm concerned with the major center bloom. I think I need a better choice for scoring.


foodslut's picture
foodslut

Tried a batch of croissants a la Bertinet "Crust" formula, with one change - replaced 1/3 of the white flour with stone-ground whole wheat to make them a weeeee bit more healthy.

Found the dough just a bit harder to roll out, but I was quite pleased with the results

Maybe it's the cooler weather, but this is also the first batch I've made where there was ZERO butter leakage from the croissants during baking.

Not any noticeable change in the flakiness, and they taste good, so I'm going to count this one as a success.

Gotta work on keeping more of the chocolat in the pain, though - any ideas on that one very much welcome.

Isand66's picture
Isand66

Here on Long Island, New York we have a ever-growing wine country on the East End of the Island.  My wife and I like to go visit a few different wineries and enjoy sampling the different varieties of wine available.  There is nothing more relaxing than to sit down with some good wine, cheese and bread and enjoy the cooler autumn air.

Last weekend we visited a few wineries we like after picking some pumpkins and it inspired me to try to incorporate one of the chardonnay from Mattebella vineyards into my next bake.

I decided to make a variation on my multi-grain soaker bread and also incorporated some roasted sweet potatoes in the mix along with freshly ground spelt flour and soft white wheat flour.

The soaker was made up of rolled oats, bulgur, millet and malted flakes.

I also decided to try being a little stylish with these loaves and used a snow flake cookie cutter to create an interesting effect.  On one loaf I brushed it with an egg white mixed with water and sprinkled on some chia seeds.

AP Starter

227 grams AP Flour

71 grams AP Seed Starter

151 grams Water at Room Temperature (80-90 degrees F.)

Mix ingredients in a bowl until thoroughly combined.  Cover the bowl and let it sit at room temperature for around 8 hours.  The starter should almost double when ready to proceed.  You can either mix in final dough or put in refrigerator for at most 1 day before using.  If your kitchen is warmer than mine which is usually about 70-72 degrees with my air-conditioning you can proceed sooner.

Soaker

70 grams Rolled Oats

50 grams Bulgar Wheat

30 grams Millet

25 grams Malted Wheat Flakes

275 grams Boiling Water

Mix ingredients together in a bowl and cover.  Let rest for 30 minutes or longer until ready to use.

Drain the liquid before mixing in the final dough.  (Note: most of the liquid will get absorbed by the soaker ingredients which will help make this a fairly wet dough)

Main Dough Ingredients

425 grams Refreshed AP Starter (65% hydration) from above

All of the Soaker from above with water drained

50 grams Rye Chops

141 Freshly Ground and Sifted Spelt Flour

50 grams Wheat Germ

225 European Style Flour from KAF (can substitute Bread Flour)

130 grams Freshly Ground Soft Wheat Flour

160 grams Roasted and Mashed Sweet Potatoes

14 grams Sea Salt or Table Salt

268 grams White Wine (I used a Dry Chardonnay)

Procedure

Mix the flours with the wine and starter leaving 50 grams of wine for later in your mixer or by hand for 1 minute.    Let the dough autolyse for one hour in your bowl and make sure to cover it.  Next add in the salt, potatoes and the soaker with the balance of the wind and mix by hand for 2 minutes until everything is well incorporated.  Mix on speed #1 for 2 minutes and speed #2 for 2 minutes or by hand for 5 minutes.

Next take the dough out of the bowl and place it on your work surface.  Do a stretch and fold and rest the dough uncovered for 10 minutes.  After the rest do another stretch and fold and cover the dough and let it rest for 10 minutes.  Do one more stretch and fold and put the dough into a lightly oiled bowl and let it sit at room temperature covered for 2 hours.  After 2 hours you can put the dough into the refrigerator for 24 hours or up to 2 days before baking.  Feel free to do some additional S & F's if you feel it is necessary.  I baked the bread about 24 hours later.

The next day (or when ready to bake) let the dough sit out at room temperature for  2  hours.

Next, form the dough into your desired shape and put them in floured bannetons, bowls or on a baking sheet and let them rise covered for 2 hours or until they pass the poke test.  If you want to make the pattern on top, press your cookie cutter into the dough and place it good side up in a floured basket to rise.  When ready to bake, make an egg wash or use some milk and brush on to the top of the loaf you want to add seeds to.  Sprinkle the seeds on and then proceed to score the loaves as desired and prepare your oven for baking with steam.

Set your oven for 500 degrees F. at least 30 minutes before ready to bake.  When ready to bake place the loaves into your on  your oven stone with steam and lower the temperature immediately to 450 degrees.   The total baking time was around 45 minutes.  When both loaves are golden brown and reached an internal temperature of 200 degrees F. you can remove them from the oven.

Let the loaves cool down for at least an 6 hours or so before eating as desired.

Since there are so many different grains and flours in this bread the wine flavor is not very apparent. The final bread did come out very nice with a nice moist crumb and thick crust.  This is a hearty bread and if you don't like whole grains you will not like this one.  I just ate some for breakfast with some nice Havarti style cheese.

Please feel free to visit my other blog at www.mookielovesbread.wordpress.com for all my recipes.

dmsnyder's picture
dmsnyder

I am gradually aclimating to retirement. I still get twinges Sunday nights in anticipation of a non-existant Monday patient schedule. But this week I broke the thought habit of baking being exclusively a weekend activity. Maybe I over-compensated, but I don't think so.

Tuesday evening, I activated my starter and I put up a bulgar soaker and a whole wheat poolish in preparation for a Wednesday bake of my favorite 100% Whole Wheat Bread, the one in BBA.

100% Whole Wheat Bread 

100% Whole Wheat Bread crumb

This is probably my favorite bread for almond butter on toast, BLT's and Tuna Salad sandwiches. We had all of these this week.

Wednesday evening, I fed the starter at 100% hydration for Thursday's bake of San Joaquin Sourdoughs and started on txfarmer's 36+ hour baguettes for a Friday bake.

San Joaquin Sourdough Breads

This bread is good with everything. We had some with almond butter, more with penne with butternut squash, sage and hazelnuts and more with a salad lunch.

Thursday evening, I mixed a firm levain for Hamelman's Pain au Levain with Whole Wheat. Txfarmer's baguette dough was mixed, fermented and refrigerated.

We were invited to some friends' home for dinner Friday. The response to "What can we bring?" was not hard to guess. This morning, the baguettes and Pain au Levain for dinner tonight got baked.

Baguette Crust

Pain au Levain with Whole Wheat crust

Pain au Levain with Whole Wheat Crumb

 I have the walnuts toasted for Cinnamon-Raisin-Walnut Bread.

To top off the week, my son, Joel, sent me a photo of the latest bagels he and 3-year old Sasha made this week, and he expressed some interest in "trying" to bake sourdough breads. I'll take him some starter when we visit in November. What fun!

It's just that I can't figure how I ever had time to "work."

David

mwilson's picture
mwilson

I've always been intrigued by the yeast water method of raising bread.

Although yeast water is started with fruits I did something (just can't help it) different...

I created yeast water from sourdough!

I took my mature Italian style sourdough and let it float in water (a standard procedure), forgot about it and eventually it sank. I threw some sugar in there and gave it a stir. The dough had all but dissolved by then. I left it overnight and in the morning the mixture had separated into a white starchy bottom and a watery top which I poured off and kept, discarding the starch. To this collected water I added honey and left it for a couple of days, aerating often.

I now have a yeast water solution that fizzes and smells just like champagne! See this video I made..
http://youtu.be/a8IdY4mHvps


With this yeasty winey water I made a sponge and left for 14hrs.

  • 37.5% Flour
  • 25.25% yeast water

The next day I completed the dough

  • - fermented sponge
  • 62.5% flour
  • 43.75% water
  • 2% salt

So here is my first yeast water loaf...

and the shreddy crumb...
 

-Michael

dabrownman's picture
dabrownman

We have made banana bread a couple of times the last 2 weeks.  One we made cupcakes with cream cheese icing and this time as a bare loaf.  Ours isn't the normal BNB.  We add chocolate chips and chopped dark bar chocolate, pumpkin seeds, sunflower seeds, bourbon re-hydrated dried, sultanas, raisins, cranberries, prunes, and apricots.  The nuts include, walnuts, almonds and cashews with a splash of walnut oil.  iced or no - these are some seriously good  cupcakes or plain slices of sweet BNB.


Our recipe today was too big for a loaf pan so we made 6 cupcakes too.

Brownman’s Banana Bread or Cupcakes

Preheat oven to 350 degrees.

Dry Mix:

1 ½ C plus 2 T flour

¼ tsp salt

1/8 tsp each ginger, cloves, allspice

1 tsp each cinnamon and nutmeg

1 tsp baking soda

¼ tsp baking powder

1 C chopped walnuts, almonds, pumpkin and sunflower seeds

1 C chopped chocolate chips

Bourbon Fruit – add bourbon to below dried fruits in a Pyrex 1 cup measuring cup covered with plastic wrap.  Microwave on high for 30 seconds and set aside 15 minutes to plump up fruits.

 2 T bourbon

¼ C raisins and sultanas

¼ C dried cranberries

¼ C dried apricots cut into raisin size pieces

1/4 C prunes - chopped

 Wet Mix:

 3 mashed up ripe bananas

1/8 cup sour cream

1 tsp vanilla

2 eggs

½ C vegetable oil

½ C each brown and white sugar

1 T walnut oil

 Add ½ C sugar, ½ C brown sugar and Bourbon fruits to wet mix and stir until sugar is dissolved.  Mix the wet into the dry and stir 50 times with spatula until the flour is incorporated.

Bake cupcakes for about 12-16 minutes until wooden toothpick comes out clean.  Loaves will take 45 minutes or more for wooden skewer to come out clean. 

After 20 minutes remove from pans and let cool completely on wire racks.  Ice both with cream cheese vanilla icing and put sprinkles on each to decorate per the holiday or special occasion.  Makes about 21 cupcakes or 1 large bread loaf pan.

Cream Cheese Frosting for Cupcakes or 9x13 Cake

Ingredients

1/2 C butter, softened

1 (8-oz.) package cream cheese, softened

1 (16-oz.) package powdered sugar

1 tsp vanilla extract

Preparation

Beat butter and cream cheese at medium speed with an electric mixer until creamy. Gradually add powdered sugar, beating at low speed until blended; stir in vanilla.

Cut recipe in half for 20 Cupcakes or 9x13 sheet cake .


dabrownman's picture
dabrownman

We ran out of English muffins and once again used a variation fop the one at KAF.  We use YW in conjunction with a SD Desem starter to make EM;s that are very similar to Wofferman’s but 16% whole wheat.  They are light, fluffy, airy and just plain delicious.  We make them all the time and never want to run out of them in the freezer


After 8 hours the dough had more than doubled and stuck to the plastic cover to reveal the airy structure beneath. 

The method is simple enough.  Build the SD and YW levains over 6 hours in one stage each.  After the levains have doubled, mix everything except the salt, sugar and baking soda together and let sit out overnight or for 8 hours on the counter.  Make sure the bowl is covered in plastic and well oiled and at least 3 times the size of the dough ball.


See the 2 free form ones made after cutting out 7 on the first pass?

After the overnight proofing add the remaining salt, sugar and BP and knead on a floured work surface for 4-5 minutes.  Let rest for 10 minutes and then press out into a circle that is ¾ “ thick.  No need for a rolling pin.  Use a cutter to make 3”-4” rounds – I used a plastic drinking cup.  Move to a corn meal or semolina sprinkled parchment paper covered cookie sheet and cover with plastic to final proof 45 minutes on the counter.


We managed 9 large ones but you could get a dozen smaller ones.  Dry fry in a seasoned cast iron skillet on medium low heat about 4-5 minutes per side until golden brown.  Move to a cooling rack.  Eat while warm with butter and jam.  Yummy!


SD YW English Muffins - 16% Whole Wheat


Mixed Starter

Build 1

Total

%

SD Starter

10

10

2.46%

Yeast Water

31

31

9.39%

WW

31

31

9.39%

AP

41

41

12.42%

Water

41

41

12.42%

Total Starter

154

154

46.67%


Sd YW Starter Totals


Hydration

100.00%


Levain % of Total

21.12%


Dough Flour


%


Whole Wheat

30

9.09%


AP

300

90.91%


Dough Flour

330

100.00%


Salt

7

2.12%


Milk

238

72.12%


Dough Hydration

72.12%


Total Flour

407


Milk & Water

315


T. Dough Hydration

77.40%


Whole Grain %

16.22%


Total Weight

729


Additional Ingredients


1 T Sugar


1 tsp Baking Soda


dabrownman's picture
dabrownman


Here we go with the second attempt to make baggies inspired by Ian but using Phil’s ingredients and method.  We also didn’t want to slash the dough like Pierre Nury doesn’t with his Rustic style.  But we did slash it, quite poorly, in the end.  If you don’t practice you won’t get any better right?


This bread rose nicely in the fridge and in the oven.  It baked up nice and brown and crunchy and went softer as the bread cooled on the rack.   The crumb was nice and open, and glossy.  I don’t think we will ever get Phil’s holes but we keep trying.  Not as many blisters this time since we were not baking in the mini oven where blisters are cheap and easy.


We like the taste of this bread very much, even though it is more ‘Guedo” than Brownmen usually like  better.   But, it tastes so good I just keep putting butter on it and wolfing it down.  A little variety isn’t all bad now and again.    


Method

We more closely followed Phil’s recipe and method using Desem SD starter only built over 6 hours – no yeast water this time.  We used white whole wheat flour and AP since we can’t get Lauche Wallaby unless we swim very far and we are totally out of spelt.  Still we kept the sifted whole wheat to 15% of the flour and we reduced the levain to 10% instead of using 20% like last time.  The hydration was kept at 75%.  We autolysed the flours and water, less 30 g, for nearly 6 hours.


We love doing slap and folds and enjoyed kneading the dough this way for 3 minutes.  We held back 30 g of water and diluted the salt in it before adding it into the dough before the 2nd set of French slap and folds also lasting 3 minutes.  The extra water and salt were worked into the dough by squeezing the dough through the fingers until the dough came back together.  We rested the dough for 4 hours on the counter.

The dough was still quite sticky but we resisted adding any flour.  We pre-shaped and final shaped 10 minutes later into a 16” long ‘Fat Bag’ shape as best we could manage. The shaped dough was put into a rice floured and cloth lined  ‘fat baguette’ basket to proof for another 1 1.2 hours before being retarded in the fridge in a plastic trash bag.


12 hours later we took it out of the fridge and noticed that it had risen nicely while resting at 38F.  The hour that the dough took to come to room temperature we used to fire up Old Betsy and get her up to 500 F with (2) of Sylvia’s steaming pans half full of water with kitchen towels rolled up in them.   We also put our 12” cast iron skillet in the bottom as well to throw some water in when we loaded the ‘Fat Bag’ which sounds pretty kinky.


We streamed bread for 10 minutes at 482 F (250C) and removed the steaming apparatus and baked at 392 F convection this time until the bread registered 205 F inside.  We rotated the loaves 90 degrees every 5 minutes to ensure even browning.  In 15 minutes (25 minutes total) the bread was done and we turned off the oven and left the door ajar with the bread on the stone for an additional 10 minutes to crisp the crust.


15% WWW Fat Bag with DesemSD Starter ala Ian and Phil


Mixed Starter

Build 1

Build 2

 Build 3

Total

%


SD Starter

8

0

0

8

1.80%


AP

41

0

0

41

10.25%


Water

35

0

0

35

8.75%


Total Starter

84

0

0

84

21.00%


Starter


Hydration

86.67%


Levain % of Total

10.67%


Dough Flour


%


AP

335

83.75%


White Whole Wheat

65

16.25%


Dough Flour

400

100.00%


Salt

8

2.00%


Water

295

73.75%


Dough Hydration

73.75%


Total Flour

445


Water

334


T. Dough Hydration

75.06%


Whole Grain %

15.51%


Total Weight

787


Elagins's picture
Elagins

Last week, my wife's cousins from Styria, in eastern Austria, came to stay with us and brought us some dark green pumpkinseed oil, which is a regional specialty. They also brought a recipe for a chiffon cake made with the oil. The recipe couldn't be simpler (and it's also an amazing taste when accompanied by a good beer):1. Grease and flour a bundt or gugelhupf pan and sprinkle the bottom with toasted pumpkinseeds.
2. In a bowl combine 4 egg yolks, 100ml of water, 100ml of pumpkinseed oil, 100g of vanilla sugar, 150g of powdered sugar and beat for at least one minute until fully emulsified.
3. Combine 100g of granulated sugar with the 4 egg whites and whip to soft peaks. Add about 1/3 of the eggwhites to the oil mixture and stir gently until blended.
4. Sift together 250g of all-purpose flour and 5g of baking powder and add slowly to the oil mixture, stirring gently until smooth, then fold in the remaining eggwhites.
5. Bake at 350F/170C for 55-60 minutes, until a tester comes out clean.

The oil isn't easy to come by, but it's absolutely a great find when you do. It's also fantastic (believe it or not) on vanilla ice cream!

Justkneadit's picture
Justkneadit

    I only recently delved into the world of bread, and before I overwhelm myself with the plethora of recipes I am going to hone in on the basics with 2 recipes. I have been reading Peter Reinhart's The Bread Baker's Apprentice and obtaining the "feel" for the dough is my end goal. Instead of relying on timers, I want to depend on my senses.

   My hope for this year long bread baking journey is to be able to bake an excellent sourdough boule and baguette. That is not to say I wont bake a few odd recipes here and there, but my main focus will be on the basic sourdough recipe posted by cranbo which I will use for my boule and the Baguettes a l'Ancienne recipe posted by DonD for my baguettes. Gaining experience using a sourdough starter and instant yeast will be invaulable. Already, I can see the subtle and sometimes obvious differences in the way each type of yeast acts on the dough. As I gain experience hopefully it will lead to better tasting bread.

   I must be honest, I will be posting rookie questions for quite some time, but I have noticed already how helpful the TFL community is and hopefully you all can guide me through my trials and errors. Well here goes a year of enjoyment.

Lane


Pages

Subscribe to RSS - blogs