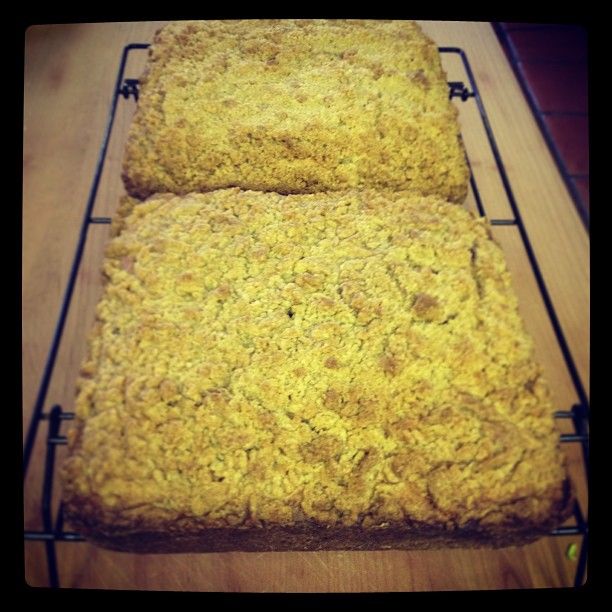
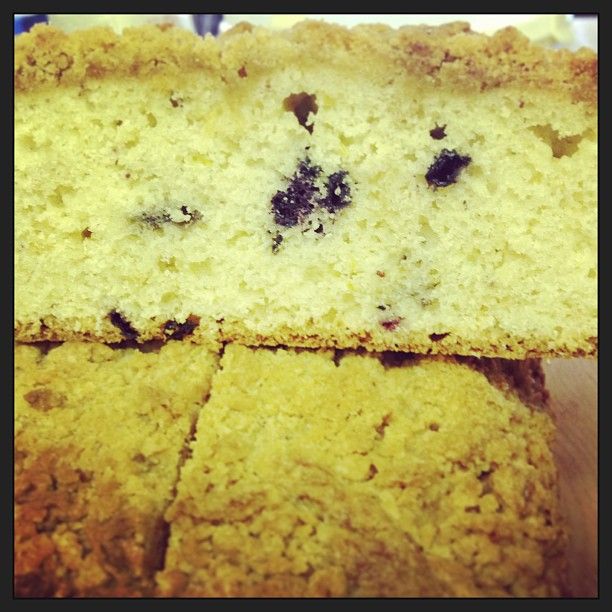
The Fresh Loaf

A Community of Amateur Bakers and Artisan Bread Enthusiasts.

Blogs

Justkneadit's picture
Justkneadit

Yeah, those are the best two words to describe this weekend's sourdough boule. I prefer to embarrass myself on accident, hence no pictures. I guess every baker is entitled to a few mishaps here and there. I'll get to the points of where I went wrong.

Same recipe as before except:

  • Instead of 4 S&F w/30 min in between, I felt bold and thought 2 S&F w/ 45 in between would be enough and it might have had I not waited 30 min to shape after final S&F, which caused a lot of bubbles at the surface, which then caused burns spots. Well almost burned.
  • Then in final proof it didnt seem like the dough was rising so I proofed for 8hr, and then 1 hour in the microwave with a cup of hot water at 90F.
  • The what would be bottom seemed to develop a thicker skin this time, so maybe that hindered proper rising.
  • To top it all of the son-of-a-wheatfield stuck to the brotform and ripped and deflated a good amount by the time I was ready for the oven. I like the flour lines but jeez, I wont spare any flour next time and just brush it off once out of the brotform. I really don't feel like wasting another 48 hours of work. Oh and 1/2 cup of steam instead of 1 cup.

So because of the brotform fiasco and the tougher bottom skin the loaf baked like a giant popover almost. Scoring needed to be deeper too. All-in-all it turned out to be a good learning what-not-to-do experience. Since the ingredients were right, and even though the bread was dense, it was soft and still tasty. 

I challenge you to yet another duel you boule!

BurntMyFingers's picture
BurntMyFingers

For my second miche taste test I wanted to do two things: compare King Arthur High-Extraction flour against Central Milling Type 85 Malted, and experiment with a smaller loaf after the comment from one of my tasters that the first loaf was "gummy" (though he ended up liking that loaf the best.) Above is a closeup of the result, with the Central Milling loaf on the left.

As you can see, the King Arthur flour has higher ash content which led to a difference in taste that I found distracting (it actually did taste like ash, or chalk, but to a very subtle degree) while others didn't mind it. The crumb turned out great and this 75% formula (producing a loaf that's a bit over 3 lbs vs the 2 Kg full-size miche) is an ideal size for a 5 qt dutch oven if you're using that method.

The complete results of the 2nd miche test are available here: http://wp.me/p1S3Ig-lp . The first taste test is at http://wp.me/p1S3Ig-kY and my TFL post about it is at http://www.thefreshloaf.com/node/30470/threeway-miche-taste-test-results . Thanks for reading... and commenting!

Otis

BobS's picture
BobS

I've been a little behind on my blogging; will try and fix that. In the meantime here's an olive levain. Pretty much Hamelman's formula.

Tuirgin's picture
Tuirgin

On my last two bakes I’ve used the 3-stage Detmolder process from Hamelman’s Bread. I decided I would try to use it with a white sourdough.

3-stage build Stage 1—Freshening

5 hours at ~78ºF. Room temperature in SW Florida.

IngredientsWeightPercentage1
KA ap flour.3 oz100%
water.4 oz150%
mature starter.1 oz50%
 Stage 2—Basic Sour

15 hours at ~78ºF.

IngredientsWeightPercentage
KA ap flour3.2 oz100%
Water2.4 oz76%
stage 1 starter.8 oz24%
 Stage 3—Full Sour

3 hours at ~85ºF. This was achieved using 2 large plastic bins in a stack, with the bottom stack containing 5 inches of water and a submersible aquarium heater.

IngredientsWeightPercentage
KA ap flour7.7 oz100.0%
water7.7 oz100.0%
stage 2 starter6.4 oz82.6%

I mixed the Basic Sour at 10:30 P.M. on Friday and by 9:30 A.M. on Saturday it had already fallen. I stirred the starter and watched it closely until I found that it was rising again. It continued rising for the full 15 hours.

The directions call for an autolyse with all ingredients but the salt. In the past I’ve had problems integrating the salt into the dough by hand, so I held back an amount of flour and water from the autolyse. I disolved the salt in the retained water, then made a second dough with just the water, flour, and salt. After the autolyse, the two doughs were incorporated.

AutolyseAutolyse dough

62.5% hydration (figuring on the levain being 100% for 5.5 oz each flour and water)

IngredientsWeight
KA ap flour19.0 oz
whole rye4.8 oz
water12.8 oz
levain11.1 oz
 Salt dough

64% hydration

IngredientsWeight
KA ap flour5.0 oz
water3.2 oz
salt.6 oz
Bulk Fermentation

2.5 hours at 78ºF with a single fold at 1:15.

Shaping

I made use of my new bench board from New York Bakers. What an improvement over my hideous counter top! I think far less extra flour was incorporated into my dough, and it was far easier to work with.

I made a concerted effort to not over-work the dough during the pre-shaping and shaping stages. I have a bad tendency to work the dough too much and I think the end result may be a crumb that’s more dense than it should be.

With the loaves shaped into boules, they went into bannetons floured with a mixture of rice flour and ap, into a large plastic bag, and into the refrigerator.

Final Fermentation

The entire final fermentation was conducted in the refrigerator. At 14 hours the loaf closer to the front of the fridge seemed fully proofed, or close to it. The loaf toward the back of the fridge still felt somewhat dense, but I decided to go ahead and start the bake as I’ve never gone straight from fridge to oven before. My concern was that perhaps the proofed loaf was overproofed. I knew one of the two loaves would not be ideal, but hoped that one of them would be good and that I would learn something from the difference between them.

I scored the lesser proofed loaf with straight slashes radiating from aproximately 2–3 inches from center. The more fully proofed loaf was scored with arcing slashes radiating from the center. I’ve used this cut before on boules, but it proved to be an unfortunate choice.

Bake

The target bake temperature is 460ºF, so I headted the oven to 500ºF, with my new cordierite bake stone (also from New York Bakers), and my trusty rusty cast iron skillet on the bottom.

I steamed the oven with boiling water, misted the loaves, and loaded them. 30 seconds later I poured more boiling water into the cast iron skillet and found that the oven was already below 460ºF so I turned it up to 550ºF. The under-proofed bool shaped up nicely, but with insufficient rise. The fully proofed loaf’s poor slashing caused structural weakness in the top of the loaf, and it erupted into a volcano shape. I withdrew the cast iron skillet after 10 minutes and tended the oven until it caught back up to 460ºF.

In the past, I’ve cranked the temp up to 550ºF because my oven loses heat so quickly, but I’ve always ended up with a crust that’s too thick. Starting at a lower temp seemed to work better even though I was fighting with the oven to keep the temperature up.

At 43 minutes the lesser proofed boule registered an internal temperature of 208ºF. I gave the bread 5 more minutes of bake time, then turned off the oven, opened the door, and left the bread for another 10 minutes in the cooling oven. When I removed the loaves, they were both at 214ºF. The crust was quite dark brown, with the edges of the arced cuts appearing black. The less proofed loaf was convex on the bottom, while the fully proofed loaf was more flat. Both crackled as they cooled.

I was concerned about the density of the lesser-proofed loaf, because it sounded solid when thumped. The proofed loaf had a nice hollow sound.

Introverted boule, crust:

Volcanic boule, crust:

Cracklin’ crust:

Cutting and Eating

3 hours later, I found that the under-proofed loaf had a more hollow sound to it—this gave me hope. I cut into both loaves to compare. I was successful in getting a less-thick crust, though they could perhaps be even thinner. On cutting, both loaves sent crumbs everywhere.

The crumb from the under-proofed loaf was too tight, but not as tight as I had feared it would be:

The volcanic loaf’s crumb showed the poorly channeled energy caused by the inappropriate scoring. You can see how the dough gasses were straining to make an escape:

A closer view, showing the translucent, glossy holes from the long ferment:

Both loaves are delicious. On the first day, there was little sense of sour. A nutty, earthy scent and flavor is predominant, with just the slightest tang beneath it. The mouth feel, even on the denser loaf, isn’t bad, and rather enjoyably chewy. The crust is a tad thick, but dark and full of flavor and crunchy rather than tough—at least for the first day.

Conclusion

I suspect that had I scored the proofed loaf with the straight radiating cuts I gave the under-proofed loaf, I would have had a nearly perfect loaf. I could be wrong, but will enjoy the one and only way of finding out.

I’m curious to see how the sour taste develops. On the first day I don’t notice much difference in the 3-stage build and the 1-stage build called for in the formula.

Questions

There are two things I’d like to learn more about—the autolyse and the bulk ferment. The purpose of the autolyse is to enhance extensibility. The instructions call for 20–60 minutes. How do I know how long to leave it? When is the autolyse done, and how will the dough feel at that time? And for the bulk ferment, I admit I slavishly follow the times given—how do I know when to shorten or prolong the bulk ferment time? How do I know when the dough has reached its maximum benefit from the bulk ferment?

[The Flickr photo gallery of this bake can be found here: http://www.flickr.com/photos/tuirgin/sets/72157631716753259/]

  1. Percentages as printed in Bread, which do not quite work out for the amounts here.

PiPs's picture
PiPs

For the most important years in a young boy’s life I had the good fortune of living next door to my grandparents—perched high on a hill at the very edge of town. I have so many fond memories of these years—watching storm clouds build in the west, a school holiday spent watercolour painting with my grandfather, piano lessons with my grandmother, summer days spent picking grapes, kippers on toast for breakfast, fig jam and fresh grapefruit.

Surrounding their house was a large garden that was not only beautiful but also plentiful. Grapevines across the road, almond trees, stone fruits, a vegetable garden, rhubarb, chokos (chayote … yuk!) fig trees and lining their back fence were citrus and grapefruit trees.

These grapefruit trees are simply incredible. After all these years they still produce a constant stream of fruit and every trip up to my family sees me bringing home large bags brimming with grapefruit and lemons. And to top this off is the fruit from my parents own burgeoning citrus trees.

Back in Brisbane, we hand on as many grapefruit as possible to Nat’s parents and some of our friends but this still leaves us with extra fruit using up valuable fridge space—my first instinct with excess fruit is always to make jam.

You see, I grew up with jam makers—my grandparents always had a steady supply of cumquat marmalade and fig jam topped with wax seals, and I remember many afternoons spent making apricot jam with my mum from boxes of fruit picked out of an orchard behind our house.

My method for grapefruit and lemon marmalade is pretty high-touch. Six grapefruit and six lemons are covered with water in a large pot and boiled until the skin is easily pierced with a skewer. After being taken off the heat the fruit is then left to soak overnight.

The following morning I half the fruit and scoop out the flesh which I place in a muslin cloth to separate out the liquid. The peel is sliced thinly and I combine it with the extracted liquid in a large pot before adding the same weight in sugar. (… or up to one and a half times the weight depending on the sweetness required) I then cook out the marmalade until it wrinkles in a set-test. It is then bottled in sterilized jars and finished with a boiling water bath.

I just adore the play between the sweet and tartness combined with the texture of the peel. Toasted pain au levain and marmalade—breakfast has never tasted better!

We were bringing a treat to morning tea with friends the following day so a few grapefruit and lemons were kept aside. On top of a flaky sweet shortcrust pastry from the Bourke Street Bakery cookbook I put together a citrus tart using lemons and grapefruits. My skill with shortcrust pastry is improving and each result brings further encouragement.

Rest the dough! Work quick! (it’s getting warm in our kitchen) Rest the dough! … and did I mention rest the dough?

Zest from grapefruit and lemons are combined with their juice plus cream, sugar and egg yolks. This filling was a bright delight and I found the grapefruit added an element of interest and to a well-known favourite. Flaky pastry covered the quickly emptied plate.

And amongst all this kitchen activity some bread found its way to the oven—as it does every weekend—and yet again it is my take on Gerard Rubaud’s pain au levain. I am continuing to retard the shaped loaves overnight and then start the next morning with the aroma of fresh baked bread.

A loaf is left out on the bench wrapped snugly in a tea-towel and the remainder are sliced and frozen for use during the week. mmm … marmalade on toast perhaps?

With the kitchen wiped down and clean we relax into the late afternoon. Perhaps a treat?

Cheers,
Phil

joyfulbaker's picture
joyfulbaker

This wonderful bread, pain au levain with mixed sourdough starters, from Jeffrey Hamelman's Bread, brought me a first prize at the Sonoma County Harvest Fair.  This was the first time I ever entered anything in the fair.  I love this bread, and it has become a regular around our house.  It can't be beat for flavor.  My only tweak is to add a mix of seeds on the dough exterior before baking and to borrow 1 oz from the bread flour and give it to the whole wheat flour.  Here are some pictures, the first being the levain, then the first place exhibit tag (blurry, sorry), then yours truly, pretty excited.  Thank you, Jeffrey Hamelman, for this wonderful bread! 


Isand66's picture
Isand66

I have wanted to try my hand at a Challah made with a Yeast Water starter for a while so I decided to give it a try this weekend.  Naturally I needed to change it up a bit more and added some shredded coconut and used coconut water in place of the liquid.

I figured since today really finally feels like Fall it warranted using a nice fall themed cake pan for this bread.  This is the first time I successfully used a cake pan/bundt pan for a bread.  I was planning on removing the dough from the pan before baking, but the dough was very moist so I was afraid I would ruin it if I tried to un-mold it before baking.

I was very happy with the way this bread turned out.  It has nice sweet flavor from the honey and coconut and the mold worked perfectly as the bread easily popped out after it was finished baking.

Procedure

I used a combination of my white sourdough starter which I keep at 66% hydration and did a 3 stage build with my fruit flavored yeast water starter.

Yeast Water Starter Build 1

60 grams AP Flour (KAF)

60 grams Yeast Water Starter

Mix the flour and Yeast Water in a bowl until thoroughly combined.  Cover the bowl and let it sit at room temperature for around 4 hours.  The starter should almost double when ready to proceed to build 2.

Build 2

Add ingredients below to starter from above and mix until incorporated.  Cover with plastic wrap and let sit at room temperature for 4 hours.

60 grams AP Flour (KAF)

60 grams Yeast Water Starter

Main Dough Ingredients

240 grams  Yeast Water Starter (all of the starter from above)

844 grams European Style Flour (KAF)  (You can substitute Bread Flour with a little White Whole Wheat)

35 Grams Shredded Coconut

170 grams Egg Yolks

71 grams Vegetable Oil

21 grams Pure Vanilla Extract

19 grams Salt (Sea Salt or Table Salt)

66 grams Honey

390 grams Coconut Water at Room Temperature

Procedure

Mix the flour with the egg yolks, starter,  and 340 grams of the coconut water for about 1 minute.   Let the dough autolyse for 30 minutes to an hour in your bowl covered with a cloth or plastic wrap.  Next add in the salt, oil and honey, rest of the coconut water and mix on speed #1 for 3 minutes and #2 for 2 minutes or by hand.  This dough is very wet but it should start to come together after mixing but will still be very wet.

Next take the dough out of the bowl and place it on your work surface.  Do a stretch and fold and rest the dough uncovered for 10 minutes.  Place the dough in an oiled bowl after the rest and do another stretch and fold and cover the dough in the bowl and let it rest for 10 minutes.  Do one more stretch and fold and put the dough into a lightly oiled bowl and let it sit at room temperature covered for 2 hours.  (If the dough is still too lose, you can do several more stretch and folds until you are ready to put in the refrigerator). After 2 hours you can put the dough into the refrigerator for 24 hours or up to 2 days before baking.  (Note: this dough is very moist and you may want to add more flour, but try to resist or you will make it too dry.  It will firm up while in the refrigerator overnight.)

The next day (or when ready to bake) let the dough sit out at room temperature for 2 hours.  After 2 hours form the dough into your desired shape and put them in floured bannetons, bowls or you can braid and make a traditional style Challah.  I decided to use a cake pan which I sprayed heavily with baking spray and after forming the dough into a rough oval I placed the dough in the pan and covered it with a moist towel.

Set your oven for 450 degrees F. at least 30 minutes before ready to bake.  When ready to bake place the loaves into your on  your oven stone with steam and lower the temperature immediately to 350 degrees.  Bake until the loaf reaches an internal temperature of 200 degrees F. which in this case took about 1 hour and 10 minutes.  If you make it as a free-from loaf it will probably take  a lot less time.

Let the loaves cool down for at least an hour or so before eating as desired.

Please visit my other blog at www.mookielovesbread.wordpress.com for all of my recipes.

hanseata's picture
hanseata

When I made my wonderful rose hip jam a month ago, temperatures were in the eighties, t-shirt weather for weeks, and we even used the air condition in our bedroom - in Maine!

The glasses were sitting on the kitchen counter, waiting to be properly tagged before going into the basement. But my husband, immobilized by a broken foot, needed special attention, and, between baking twice a week for our local natural food store, answering student questions online, and taking care of our undeserving critters, I didn't get to it for quite a while.

After a week or so, I noticed that one of the glasses showed ominous signs of frothy activity. Obviously I didn't fill it quite high enough to establish a vacuum, and, with the prevailing heat as incubator, my rose hip jam had started to ferment.

I was pretty annoyed with myself. Why didn't I pay more attention, and place the compromised glass into the fridge, before it could turn itself into booze?

No help for it, this was a goner, and had to be thrown out..... Or not? Suddenly I remembered my experiences with apple yeast water two years ago. Made from fermenting apples, the yeast water had proved to be a powerful leaven, my bread even grew a horn!

But in the end the apple yeast water died a slow death from starvation in a dark corner of my fridge, all but forgotten, since we preferred the tangier taste of sourdough.

Wouldn't it be worth a try to experiment a bit, and see what would happen if I fed the tipsy jam with  flour?

I measured a teaspoon of jam in a little bowl and added equal amounts of water....

....and whole wheat flour to the bowl: 

5 g fermented rose hip jam + 25 g water + 25 g whole wheat flour.

Eleven hours later the reddish mixture had become bubbly and spongy, and emitted a wonderful fruity-sour smell.

I fed it two times more, aways with 25 g flour and 25 g water. It ripened faster each time, first after 3, then even only after 2 1/2 hours.

   Fully developed rose hip mother

I was very pleased and contemplated my next move.

I wanted to make a fairly simple levain, with a bit of whole grain, but not too much. I expected a rather mild taste, but I didn't want the blandness of an all-white bread, nor a too hearty loaf that overwhelmed more subtle nuances.

So I adapted a recipe for Pain au Levain, made with apple yeast leaven, from Jan Hedh's "Swedish Breads and Pastries". I had made this bread before, with apple yeast water, it had been nice, but rather mild.

Hedh's book is gorgeous, with wonderful recipes, though not without some pesky errata - my first attempt of an attractive looking Levain with Bran and Vinegar had ended in a dense, compact brick - thanks to one erroneous Zero too many in the bran department.

Even though it was already evening, I didn't want to wait, and started with 16 g of my newborn rose hip mother - mother, chef and levain are the classic French terms for the 3 steps to make a leaven - to make the second stage: the chef.

 Chef after kneading

I woke up at midnight, went downstairs, eager to see how my starter was doing, and found a nicely grown chef, wide awake, and hungry for more.

  Fully developed chef

After feeding the little guy with more flour and water, I tottered back to bed. The next morning my levain was fully ripened and ready to go!

 Fully developed rose hip levain

PAIN AU LEVAIN  (adapted from Jan Hedh: "Swedish Breads and Pastries")

CHEF
21 g mother starter (it doesn't have to be rose hip, an ordinary mature wheat or rye starter will do)
   8 g water
21 g bread flour

LEVAIN
  50 g chef (all)
  50 g water
100 g bread flour

FINAL DOUGH
200 g levain (all)
 16 g spelt flour
 16 g rye meal
282 g bread flour
219 g water
    6 g salt

DAY 1:
1. Mix together all ingredients for chef. Knead for 2 minutes, then let rest for 5 minutes. Resume kneading for 1 more minute. (Dough should be stiff, but not hard, moisten your hands to incorporate more water, if needed.) Cover, and let sit for 4 hours, or until doubled in size.

2. Mix together all ingredients for levain. Knead for 2 minutes, then let rest for 5 minutes. Resume kneading for 1 minute more. (Dough should be stiff, but not hard, moisten your hands to incorporate more water, if needed.) Cover, and let ripen for 5 - 6 hours, or until doubled in size. Knead briefly to degas, and refrigerate overnight.

DAY 2:
3. Remove levain from refrigerator 2 hours before using, to warm up. Cut into smaller pieces and place with flour and water in mixer bowl. Knead for 3 minutes at low speed, then let dough rest for 5 minutes.

4. Add salt and continue kneading for 7 more minutes at medium-low speed. Stretch and fold 1 x, gather dough into a ball, place it in lightly oiled bowl, turn it around to coat with oil, cover, and let rest for 90 minutes.

5. Transfer dough to lightly floured work surface, place hands in the middle and push out the air, stretch and fold 1 x, gather dough into a ball, return it to the bowl, and leave it for another 80 minutes.

6. Push out air again, and let dough relax for 10 more minutes. Shape into a round, place in banneton (seam side up), or on parchment lined baking sheet (seam side down).

7. Sprinkle bread with flour, mist with baking spray, cover, and proof for 60 - 90 minutes (in a warm place), until it has grown 1 3/4 times its original size.

8. Preheat oven to 250º C/482º F, including steam pan. Score bread.

9. Bake bread for 5 minutes, reduce heat to 200º C/400º F, and continue baking for another 15 minutes. Rotate bread 180 degrees, remove steam pan, and bake for 20 minutes more, venting the oven once to let out steam in between.

10. Leave bread in switched-off oven with door slightly ajar for another 10 minutes. Transfer to wire rack and let cool completely.

  Rose Hip Levain crumb

I changed Jan Hedh's recipe a bit. Instead of long kneading, I added a period of rest (autolyse) while mixing the dough, thereby shaving off some hands-on time.

A total baking time of 60 minutes, as stated in the recipe, was not necessary, my bread was already done after 40 minutes. And leaving it a while longer in the switched-off oven with the door a bit ajar guaranteed a nice crisp crust that didn't soften soon after baking.

Did it taste like rose hips? No. But is was delicious! And not only that: The best of all husbands found it "the crustiest bread you ever made". 

One question remains: what was it exactly that gave the bread its marvelous lift? The rose hips? The apples? Or the red wine the jam was made with?

Bar Harbor Shore Path - where Rugosa roses grow in abundance
Justkneadit's picture
Justkneadit

With all that discard starter I just couldn't help but send it to the griddle.

Just a little closer...

I followed kjknits recipe, except I let it sit out for 14 hours and in the fridge for 2 hr. I had to make a trip the farmers market. My palate couldn't complain.

Justkneadit's picture
Justkneadit

So amidst my Baguette a l'Ancienne and Sourdough Boule baking frenzy I began feeling a little wheaty. I decided to bake again, 3rd time, Peter Reinhart's Whole Wheat recipe in The Bread Baker's Apprentice.

First two attempts were...eh...not so good. Basically negative rise accompanied by an Adamantium-like density. So being a little discourage I did what anyone would do, I tried again. Forgive me for switching back and forth between ounces and gram, but I have no second decimal for ounces.

Results weren't half bad...

Le Pain

And ze crumb...

and...

The Way I Baked:

  • Soaker
    • 120g Bob Red Mills 10 Grain Cereal (No 10 Grain flour)
    • 6 oz. Water (Room Temp)
    • Set for 23 hr
  • Poolish
    • 191g Gold Medal Whole Wheat
    • 6oz Water (Room Temp)
    • 1/2 t Instant Yeast
    • Sat out for 41/2, then in the fridge for 21hr 40min. Sat out for hour to take off chill.
  • Dough
    • 9oz Gold Medal Whole Wheat
    • .33oz Sea Salt
    • 1t Instant yeast
    • 1,5oz Honey
    • .5oz Vegetable Oil
    • 1 Large Egg
    • Poolish & Soaker

Notes:

Dough temp was at 78.1F after kneading. Bulk fermented for 75 mins, shaped into sandwich loaf via Khalid's method, then final proof for 45 min. Preheated to 400F, then placed loaf in (9x5 loaf pan) oven and reduced to 350F for 30min, rotated 180 degrees, bake for another 15min. Cooled for approx. 2 hrs. Turned out great in my opinion. No grassy after taste and soft inside.

Anybody want to critique feel free please!

Pages

Subscribe to RSS - blogs