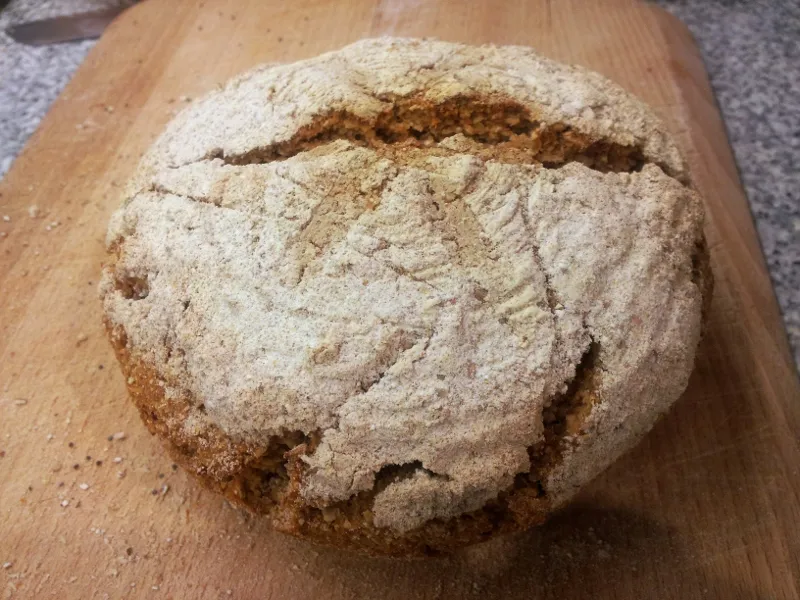
The Fresh Loaf

A Community of Amateur Bakers and Artisan Bread Enthusiasts.

Juergen Krauss's blog

Juergen Krauss's picture
Juergen Krauss

Tailrunner's recent post 

http://www.thefreshloaf.com/node/35029/40-rye-60-spelt-ryw-and-whey

brought my attention back to a bread I posted about here

http://www.thefreshloaf.com/node/28855/spelt-beach

and which I hadn't made for a while.

This made myfingers itch, and I made a 1000g loaf using spelt biga with a tiny amount instant dry yeast, instead of adding the yeast to the final mix.

The result is a very fragrant, pleasing bread that goes especially well with cheeses.

The dough was less difficult to handle than I expected / remembered.

The formula on the second tab of  the Google sheet

https://docs.google.com/spreadsheet/ccc?key=0AkcYHhPxccKtdFhkY1ZNMlR4VVc3ZmdwZGRWQjl1a2c&usp=sharing

and will also be published at the end of this post.

The process follows the single step detmolder published here:

http://www.thefreshloaf.com/node/23830/german-baking-day

Here some pictures and notes about the process:

The two preferments, rye sour (100%HL) and spelt biga (60%HL)

The rye sour ripened for 16 hours, the biga for 5 hours.

The dough, withsome gluten development, after 2 minutes of slap-and-fold. Ready for the bulk proof:

The bulk proof takes about 1 hour at 26C, I stretched and folded twice.

The dough is a bit sticky and fragile, after shaping with a light hand left to proof in a basket:

The final proof takes about 50 minutes.

After this I turn the loaf out onto a peel sprinkled with semolina, and slash:

Baked with steam in a hot oven, starting at 240C, turned down after 15 minutes to 210C and baked for 20 more minutes, voila:

The crumb is quite closed, as usual with detmolder style breads.

And here the formula:


Bakers %

Weight (g)

Straight Dough


Wholegrain Rye flour

20

115

Light Rye flour

20

115

Light Spelt flour

60

345

Water

72

414

Salt

1.8

10.35

Yeast (IDY)

0.1

0.58

Yield

173.9

1,000


Rye Sour


Wholegrain Rye flour

20

115

Water

20

115

Mature Sour

2

12


Spelt Biga


Light Spelt Flour

20

115

Water

12

69

Yeast (IDY)

0.1

1


Final Dough


Light Rye flour

20

115

Light Spelt flour

40

230

Water

40

230

Salt

1.8

10.35

Spelt Biga

32.1

184.59

Rye Sour

40

230

Yield

173.9

1000


Juergen Krauss's picture
Juergen Krauss

The other evening I was watching the sweet dough episode of The Great British Bakeoff and when it got to the technical challenge (a product which the contestants don't know in advance and only basic directions are given) - Paul Hollywood's Apricot Couronne - my wife said: I WANT THAT.

This morning I downloaded the recipe

 http://thegreatbritishbakeoff.co.uk/paul-hollywoods-apricot-couronne-technical-challenge/

and made it.

A fairly easy enriched dough, an interesting filling and a stunning result.

Highly recommended.

Notably is the absence of sugar in the dough, all the sweetness comes from the filling, balancing texture and fruity taste very nicely.

Here some more pics:


Happy Baking,

Juergen

Juergen Krauss's picture
Juergen Krauss

Here are some more photos of my 2Kg loaf:

Details of the challenge are here:

http://www.thefreshloaf.com/node/34915/challenge-all-multigrain-breads-fans

and my formula and process description are here:

http://www.thefreshloaf.com/node/34915/challenge-all-multigrain-breads-fans?page=1#comment-268885

Happy Baking,

Juergen

Juergen Krauss's picture
Juergen Krauss

Quite often - especially during holiday times - spending time with my family can interfere with the optimal sourdough build schedules.

If we then run out of bread I usually make some improvisations based on Dan DiMuzio's Pain De Campagne (90% bread flour, 10% medium rye, 68% water, 2% salt, 0.3% instant yeast, from memory).

These breads are quick because they are same-day breads; but they still take about 5 hours from start to finish.

Two of these variations have been especially popular with my family:

The one pictured in the title photo is made using bread flour, medium rye and wholegrain wheat flours, plus toasted sesame oil.

This results in a very rich flavour and a moist crumb with a very light feel.

 The other bread uses a brown rice flour scald and high extraction wheat.

Both formulas use a bit more yeast than in the original formula, bulk proof for about 2 hours.

Here the formulas:

1. Sesame Mixed Flour Campagne (Ugh...)

 WeightBakers %
Bread Flour35070
Light Rye Flour5010
Wholegrain Wheat Flour10020
Salt102
Instant Yeast30.6
Water32064
Toasted Sesame Oil408
Yield873174.6


2. Rice Campagne

 Weight (g)Percent
Rice Scald  
Brown Rice Flour10020
Boiling Water30060
   
Final Dough  
High Extraction Wheat40080
Water10020
Salt102
Instant Yeast30.6
Rice Scald40080
Yield913182.6

Here a crumb shot of the Sesame Campagne


And here a picture of the Rice Campagne


Enjoy,


Juergen

Juergen Krauss's picture
Juergen Krauss

Last Saturday was the "Treasure Island" summer fair at my son Benjanin's school, "Lewes New School", and as reported previously he volunteered me for a bread stall. The idea was that the children should make a major contribution to the fair, and I came to the conclusion, that I would let them bake bread from the Treasure Island times, and sell it at the fair.

By the way, the title photo is not "period bread", but my special take on Bo Friberg's Vanilla Butter Biscuits.

Back to the bread making.

After much research and some help from Ananda I settled for three kinds of breads, with slightly adapted formulas to fit the schedule.

You can find the formulas here, I added Ships Biscuits, of which I baked a daily sailor's ration to show at the fair.

https://docs.google.com/document/d/1RotlIxZvaL634QLINCnPRWO5kqFKZrgkEzLYjKxIHU0/edit?usp=sharing

The three breads are:

1. Pease Bread, a soured version of Horse Bread, my version uses equal parts of ground yellow split peas, barley and oats, and a tiny bit of sourdough starter of the same mixture. Probably the easiest sourdough to make, peas ferment like crazy. And there is no kneading or sophisticated shaping involved. The taste is quite strong and the crumb a bit crumbly. Excellent with some smoked meats, or with stews.

2. Maslin Bread, this is a bread similar to a German "Feinbrot", usually a mix of wholegrain rye with another grain, depending on the region. In Sussex it probably was wheat, but I used spelt instead because many of the folks at the school try to avoid wheat, for various reasons. I based the proportions on a 50:50 rye:spelt detmolder, with the addition of Ale Barm - now there is a special ingredient.

3. Manchet Bread, this was the posh white loaf of the day, made with Ale Barm and heavily worked, to get a fine, white crumb. I used old dough, with 50% of the final build being old dough. This made a soft, dense but creamy crumb. Delicious. And those hop notes from the barm coming through. Great.

How we did it: 

This is Benjamin with all the materials for the bake, on the way to school on Thursday Morning:

The Star Trek box contains his lunch... the other boxes flours and starters, Spock, ... It's life as we know it ...

Then I gave a little taster of the three breads Benjamin's class (15 kids, 1 teacher and 2 assistants) would make, and a little talk about the specifics of each of them.

This was my Manchet sample:

 We then set off to Harvey's Brewery

http://www.harveys.org.uk/

where our most kind hosts gave us a great tour around the brewery, with many insights into the process.

We sampled some malt and yeast, and smelled hops, and saw steam engines, mills, many different tanks and vessels, piped wort, and - what we came for - yeast! Ale Barm.

Here swimming on top of a few thousand litres of great ale to be:

We got our barm and carried it back to school, where the kids had other duties.

I stayed on, and mixed the preferments: Ale Barm dough with wheat and spelt for Manchet (I provided for 5 loaves of spelt manchet), rye sour for maslin, and the full dough for pease bread.

Here is the pyramid of preferments:


I was a bit worried about the size of the second container from the top, 

and I guess I was lucky - not too much spillage the next morning:

First thing on Friday Morning each child and adult decided on a slashing pattern so we could recognise or loaves after the bake.

Then we mixed the Manchet bread. Opening the box with the preferment set free great scents of hops and yeast, and the honeycomb structure created many "Aah.."s.

Kneading the dough and beating it with rolling pins was great fun. The kids didn't need much help, but the noise level in the classroom  was enormous. 

While the manchet was proofing we shaped the Pease Bread, slashed it right away, and I carried it to the kitchen, where the hot oven was waiting.

Next was shaping the manchets, everybody did really well.

Then the Pease breads came out of the oven. The colour here is influenced by the pink of the box:

Next was mixing the maslin. A rye dough. Great stickiness. 

Again, everybody was absolutely great, what I had to do most was scraping dough off little hands ....

The bowls are testimony to the stickiness of a rye rich dough:

After we put the maslin bread to rest it was time to slash the manchet and get it into the oven:

After that, and just before lunch, it was time to shape the maslin breads, another sticky experience,

Most of the young bakers understood well that swift and gentle handling of the dough was required at this stage.

I got a bunch of cheap wicker baskets (at Nesbits on Shaftesbury Avenue near Leicester Square, for the Londoners)  for the proofing.

During lunch I got the manchets out of the oven:

This oven is a gas oven with two shelves and no stones. It heats up to 250C, but with a load of 20 loaves it goes down below 150C and takes ages to recover.

Unfortunately I hadn't quite figured out how to make the best use of it, some breads got rather dark as a result. 

But the smell in the school kitchen was absolutely amazing and won me some customers and helpers for the fair.

Once the kids had their lunch and runaround and the teachers had their cup of tea we went on to turn out the maslins and slash them.

There was already an air of routine in the classroom.

These are the maslins in the oven:

By that time I had figured out how to juggle the heat, and the bake was slightly more even:

All that was left to do now was to tidy up and pack my tools.

Saturday was Treasure Island fair day, and a certain member of our family was so excited that we all had an early start ...

Lots of pirates started to gather, from far and near ...

... to - among various other things - buy Treasure Island Bread at my stall:

The manchet (white bread!) sold out first, but we managed to sell all our 56 loaves!

A great experience, all in all.

 Thanks again to Edmund Jenner and colleagues from Harvey's Brewery in Lewes for all their support (and a cask of ale), 

and to the Head and the teachers at Lewes New School to support this whole project wih lots of enthusiasm.

Cheers,

Juergen


Juergen Krauss's picture
Juergen Krauss

Yay, That's It! Or so.

/* Update: Photos of the finished panned loaf at the end */

This is the crumb I am looking for! Quinoa sourdough bread, gluten free!

Unfortunately -

closer to the centre of the bread I get this crumb:

The gummy bit near the bottom tells me that something is wrong with my baking. Right now I have another Quinoa loaf in the oven, panned, on a lower heat. We'll see what happens.

But first about the bread above.

The formula is on this Google spreadsheet:

https://docs.google.com/spreadsheet/ccc?key=0AkcYHhPxccKtdEVQSXJJUWt4ZVdQa044dlkyQzhNZ2c&usp=sharing

or here in cleartext:

Quinoa Sourdough #1
   
Expected Yield600 
Factor2.521008403 
   
 Bakers %Weight
Straight Dough  
Quinoa60151.26
Tapioca2050.42
Potato Starch2050.42
Psyllium615.13
Salt25.04
Water130327.73
Yield238600.00
   
Psyllium Soaker  
Psyllium615.13
Water100252.10
   
Quinoa Sour  
Quinoa3075.63
Water3075.63
Mature Quinoa Sour615.13
   
Final Dough  
Quinoa3075.63
Tapioca2050.42
Potato Starch2050.42
Salt25.04
Psyllium Soaker106267.23
Water00.00
Quinoa Sour60151.26
Yield238600.00

The quinoa sour ripened for about 8 hours at room temperature. The mix is quite quick, once the ingredients (photo below) are well incorporated and the mass gets smoother we're done.

Shaping works best with wet hands. I wanted to proof and bake this loaf freestanding - maybe not the greatest idea. 

The bread proofed on a baking sheet for about 1.5 hours.

It then baked in a preheated oven (240C) on a baking stone, the oven was turned down to 210C immediately. Baking time 50 minutes.

Here a photo of the finished loaf (1100g), glazed with potato starch roux just before and after the bake:

It spread considerably, turned out tobe quite flat and sank even more in the middle while cooling. You saw the crumb in the photos above.

I had similar issues with the Black Bread from ITJB, which makes me now believe that the fault is in my baking process.

I think that this very wet bread drains my baking stone of heat faster than my oven manages to replenish it, with the net effect of undercooked bottoms. I don't have this issue with drier, well aired breads.

Therefore I started another bake, same formula.

This time I took the quinoa sour a bit earlier, after 5 hours. It tasted and smelled more fruity at that point.

This time I panned the loaf (500g) and proofed at 26C for 2.5 hours, see the following photos.

The panned loaf:

And here the proofed loaf:

This loaf is in the oven right now, starting at 210C. After 30 minutes I turned it down to 175C. I intend to bake well over one hour.

Stay tuned.

Juergen

/* Update */

Almost there. 

I baked this loaf, starting at 210C, finishing at 175C, fot about 80 minutes. After 60 minutes I unpanned the loaf.

After torning off the oven I let it cool in the oven for another hour.

The crust was very beautifully brown and crisp

but for Quinoa almost at the burnt side.

After unpanning the sides of the loaf started to cave in. You will notice it in the crumb shot, where there are some gummy patches.


All in all I am very pleased with my progress. For Quinua I will try baking longer at even lower temperatures. I might also try reducing hydration a bit. 130% seemed to be OK for the yeasted variant, but the sourdough feels quite different.


Juergen Krauss's picture
Juergen Krauss

In my quest to make nice Gluten Free bread I was able to take another few steps forward.

I concentrated on developing a good starter and had some interesting experiences along the way.

The flours of choice were Sorghum, Buckwheat, Brown Rice and Qinoa.

The starters were set up from scratch. With Quinoa I also used Rye sour for inoculation.

Sorghum: This starter turned out to be very lively. Having never had a Sorghum starter beore I couldn't quite assess the smell. I baked a loaf of Sorghum bread with this, and the horrible smell made it very clear: I had tended a leuconostoc colony.


The texture was not bad - I learned something about handling along the way, and the potato starch glaze worked well.

Tried pineapple juice with the starter, but lost my patience. I will try with freshly milled Sorghum at a later date.

Rice: I had some experiences with rice before, and my findings were similar: easy to start, but hard to maintain.

Buckwheat: I found that buckwheat ferments to something quite acidic while not producing a great deal of gas.

Quinoa: That's the one. A stable culture developed very rapidly. 12 hours after refreshment (100% Quinoa 100% Water 20% Quinoa Sour) the pH is at 3.9. It tastes fruity and sour, with a bit  of the taste of raw legumes.

This starter also works very well to inoculate other grain starters.

With this starter I made a bread to test its powers (see main picture):

Bread flour 70%

Quinoa 30% (from Quinoa Sour 100% HL)

Salt 2%

Water 66%

The dough was very sloppy, it was hard to develop any gluten. The Quinoa sour seems to have a lot of enzymes.

I left it to proof for 90 minutes, which was clearly too long. Then I shaped it into a log, panned it and rested it for 40 minutes.

The resulting bread has a beautiful color, regular pleasent crumb and a rich taste.

Great with peanut butter, but also toasted with butter, egg, honey.

Tomorrow I will attempt a GF Quinoa bread.

Cheers,

Juergen

Juergen Krauss's picture
Juergen Krauss

Warning - this contains lots of photos

I outlined the experiments I wanted to undertake with regards to GF baking  in a previous post and here is a brief personal log of the first steps.

I baked gluten free breads with a mix of tapioca flour, potato flour and five other flours using instant yeast as rising agent and psyllium husk as gelling agent.

The psyllium husks have been soaked with 20g water per g Psyllium.

For each of the "main" flours (making up 60% of the total flour, the rest are the starches) the amount of psyllium has been varied and hydration has been adjusted to give the doughs a similar feel as far as possible.

The details of the bakes are in a google sheet here:

https://docs.google.com/spreadsheet/ccc?key=0AkcYHhPxccKtdG5aRV96RVY3TUkzdWM1R0tWcndmaXc&usp=sharing

The sorghum was a flour from TRS, the millet was a GF certified flour from Infinity Foods and the others were freshly milled.

The breads were baked at 210C for about 40 minutes.

Now to the results:

Quinoa gets the best marks in terms of color, Sorghum in terms of handling, consistency and crumb. Rice bread was surprisingly light and tasty.

The amount of psyllium has a great influence on the handling qualities of the dough, there is a fine line between yielding a pliable and a dough that feels more like jelly.

Because Psyllium attracts so much water the amount of Psyllium also hugely determines the final hydratiuon of the dough.

1. Buckwheat:

With 2% Psyllium / 90% Hydration and 4%Psyllium / 110% Hydration the crumb was pleasant and the taste strong but not overpowering. Above 110% Hydration the taste became watery.

The batch after "shaping":

After baking (the same labels apply):

And here the crumb:

2. A batch with brown rice, sorghum and quinoa, after shaping:

After proofing (the same labels apply):

After baking:

And here the crumb:


3. Millet

This was the first of the batches, and I might have overproofed a bit.

The shaped batch:

After proofing

After baking

And here the crumb:

The 4% Psyllium Millet loaf is agreeable. I might repeat this with less hydration, although I must say that for me millet is the clear looser in terms of texture, taste and handling.


Juergen Krauss's picture
Juergen Krauss

At the moment I am pursuing two totally different themes in my baking: Gluten Free bread and bread for a school summer fair themed "Treasure Island".

This blog post is intended as a journal for my thoughts and ideas, nothing is final yet.

The photo above is my take on "Pease Bread", the 18th century wheat-free alternative. See below.

Let's start with Gluten Free (GF) bread:

After my initial success with a Buckwheat-Millet Sourdough I am aiming to understand more indepth how GF flours behave. I will be using Psyllium husks as a gelling agent, avoiding all processed ingredients like gums etc.

My plan is:

  1. To determine the optimum amount of Psyllium needed for several GF flours. I will use a 60:40 flour:starch mix and instant yeast for these experiments. I will aim to adjust hydration in a way that makes the doughs feel similar. 
  2. To determine the fermentability of the individual flours Plus Psyllium  using Raisin Yeast Water, Rye Sourdough and Yeast.
  3. To develop a reliable GF Starter
  4. To work on flour combinations and taste

This is a lot of work, but i am really excited to do this.

My spreadsheet (work in progress) is here:

https://docs.google.com/spreadsheet/ccc?key=0AkcYHhPxccKtdG5aRV96RVY3TUkzdWM1R0tWcndmaXc&usp=sharing

/*  UPDATE */

Posted some photos of step 1 above: http://www.thefreshloaf.com/node/33651/some-gf-experiments

/* ************ */

Having spoken to several people with food allergies it is clear to me that it might be necessary to design a bread for an individual person and their specific sensitivities. 

A big Thank You to Gluten Free Gourmand and Laura T. for your inspirations:

http://www.thefreshloaf.com/node/32708/glutenfree-sourdough-progress

"Treasure Island" baking:

My son kindly volunteered me to have a bread stall at their school's summer fair. 

This fair is meant to be organised by the children, and the theme is "Treasure Island". 

It took me a few days to figure out what I could do within this frame of reference, and the pieces are starting to come together.

I looked into 18th century baking, and Andy (ananda) generously pointed me to an article about the history of flour usage in Britain.

I will have a group of children do most of the work on the day before the fair, using the school kitchen.

And this is what I intend to bake with them:

  1. Ships Biskets (Hardtack): the staple food of the sailors; this will be more for curiosity. Wholegrain Wheat flour 100%, Water 50%, Salt 2%, Mix until evenly hydrated, rest for 1 hour or so, shape flat palm-size biscuits 4oz each, dock, bake until completely dry, but not brown (I have to figure that one out). 4 of these was a sailor's daily ration.
  2. Pease Bread (see the picture at the top): The staple food of the very poor, or in times of bad wheat harvests.This is my take, quite tasty: Ground Haricot Beans: 30%, Ground Pearl Barley: 30%, Oatmeal 30%, Water 80%, Salt 2%, Rye Sour (100% HL) 20%. DT 28C. Bulk fermentation 2 hours, proof in basket 1 hour, long bake in falling oven.
  3. Maslin Bread: This would have been the staple bread of the lower classes in south England. My take on this: Wholegrain Rye: 50%, High Extraction Wheat: 50%, Water 75%, Salt 2% Rye Sour 20%. DT 28C. Bulk fermentation 2 hours, proof in basket 1 hour. Bake in falling oven starting hot.
  4. Manchet Bread: This is what the Squire, Doctor and Captain would have eaten. There are several historical recipes about, this is my first take. Everybody loved it: Stoneground White Strong flour: 100%, Water 54%, Salt 2%, Instant Yeast 0.7%. Mix, knead and beat the living daylights out of it with a rolling pin, until very silky. Get those carotenoids oxidized. They want WHITE bread!  Proof 2 hours. Shape into batard. Proof 40 minutes. Bake at 210C.

I will try out some other recipes for Manchet, and I intend to use ale barm - this afternoon I will pick up some from the brewery.

Here is a picture of Manchet and Maslin breads:

And here is a crumb shot of Maslin, Manchet and Pease Breads:

I am off to my kitchen now...

Cheers,

Juergen

Juergen Krauss's picture
Juergen Krauss

I shouldn't be baking when I am too tired, especially not something new:

I did only enough turns for croissants, getting 32 layers. Butter everywhere!

The next try was much better, with 256 layers:

But this time I think the problem is the oven. Fan only, and the door seems to loose a lot of heat.

I rotated the baking sheet every 10 minutes during the bake.

Cheers,

Juergen


Pages

Subscribe to RSS - Juergen Krauss's blog