Submitted by gaaarp on February 28, 2010 - 1:45pm

PR's Potato, Cheddar,and Chive Torpedoes


I made Peter's Potato, Cheddar, and Chive Torpedoes today from BBA. If you haven't tried this recipe, you owe it to yourself! Man, these are good!!

http://wp.me/pwL3l-8A

Submitted by jgrill on January 21, 2010 - 10:41am

BBA Bread: Potato, cheddar and Chive Torpedos

As I was paging through BBA to find the various sourdough and other rye bread recipes, I discovered two recipes, with great photos, that I had somehow missed in my many, many trips through that wonderful bread book—Potato Cheddar, and Chives Torpedos, and Roasted Onion and Asiago Miche. Both recipes are from bakeries in Sonoma County, CA, one of my favorite places, home to great wineries, and great wines, and home to some astounding artists, among them, Ginny Stanford, whose portraits of Senator Hillary Rodham Clinton, and the late, wonderful food writer, M.F.K. Fisher can be found in the Smithsonian Portrait Gallery.

In fact, my first exposure to Sonoma County, in 1981, was under the guidance of Ginny Stanford, who led me on a day tour of some of Sonoma County's wineries, including what immediately became my favorite, Kenwood Winery. To this day, the 1978 Kenwood Zinfandel remains one of the best wines I have ever tasted. After the tour, I baked some baguettes at the home of one of Ginny's friends, to accompany a fine dinner of lemon chicken and pasta with pesto. And, though I'd love to be counted among the fine Sonoma County bread bakers, I can at least say I have baked bread in that county that is loaded with all kinds of talent—in art, food, wine, and more.

But, I digress—let's get back to today's bake.

I knew when I saw the two recipes and the accompanying photos, that I would soon bake both—it was just a matter of deciding which one to bake first. My wife, Linda, solved my dilemma. She suggested saving the miche, a three-pound wonder that should be presented on as pictured in BBA, on a pedestal, for a festive occasion (and the recipe yields two of these hefty loaves).

Of course, that festive occasion will be here soon. As I'm sure you know, Mardi Gras originated here in Mobile, AL, and we'll begin the two weeks of parties and parades in the city on January 29. So, yesterday I tried the Potato, Cheddar, and Chive Torpedos, reserving the miche for sometime in the next few weeks. And the results were just great—so great that I will submit this bread to Susan at her wonderful blog, Wild Yeast, for her regular Friday feature, Yeast Spotting.The recipe, slightly abridged, follows. Immediately following the recipe, you'll see what I did, some of which digressed from the recipe (mostly because of my ability to carefully read and then to follow directions).


Potato, Cheddar, and Chive Torpedos from Bread Baker's Apprentice


Ingredients

For two 1.5 pound loaves


8 oz. un-peeled potatoes, coarsely chopped, boiled in 3 cups water until soft, and cooled.

4 to 8 oz. potato water, lukewarm (from above)

10.5 oz. barm

18 oz. unbleached bread flour

.22 oz (2 tsp.) instant yeast

.5 oz. (2 tsp.) salt

1 oz (one-fourth cup) chopped fresh chives

6 thin slices (about 4 oz.) sharp Cheddar cheese


Directions

1. Prepare potatoes in advance and allow time for potatoes and cooking water to cool. Remove barm from fridge about one hour before making bread, to take off the chill.


2. In a 4-qt. bowl or the bowl of an electric mixer, stir together the barm, half of the flour, the yeast, the cooked potatoes, and one half cup of the potato water (or, use paddle attachment with the mixer). Let this sit uncovered for 30 minutes.


3. Add remaining flour and the salt, and mix until ingredients form a ball adding as much or remaining water as needed.


4. Sprinkle some flour on counter, transfer the dough to the counter and knead the dough for about 6 minutes (or mix on low speed with the dough hook). Add flour or water as needed. Add the chives and continue kneading until they are evenly distributed (about two minutes). In a mixer, the dough should clear the sides and bottom of the bowl. The dough should pass the window pane test, and be very tacky, but not sticky, and should be about 77° to 81°F. Lightly oil a large bowl, and transfer the dough to the bowl, rolling it to coat all sides with oil. Cover the bowl with plastic wrap.


5. Ferment art room temp for about 90 minutes or until the dough doubles in size.


6. Transfer the dough to the counter and cut it into two equal pieces. Press each piece into a rectangle about 6 inches wide by 8 inches long. Lay three slices of cheese on each rectangle, covering the surface, but leaving about a half inch border uncovered around the edges. Tightly roll up the dough from bottom to top, jelly-roll style, creating a spiral with the cheese. Seal the ends of the rolled dough, which should look like a log , into points by rolling them more forcefully with your hands. this will give the dough a torpedo look, plump in the middle and tapered at the ends. As you roll down the ends, be sure to squeeze out all the trapped air pockets to avoid separation of the layers. Seal the bottom seam closed with the edge of your hand.


7. Line a sheet pan with parchment, mist the parchment lightly with spray oil, then dust with cornmeal or semolina flour. Lay the two loaves across the width of the pan, mist the tops lightly with spray oil, and cover loosely with plastic wrap.


8. Proof at room temp. for about one hour or until the dough nearly doubles in size.


9. Prepare the oven for hearth baking (i.e., have your stone in place) and be sure to have an empty steam pan in place. Pre-heat the oven to 500°F. Score the the top of each loaf with two diagonal slashes, making sure to cut through the first layer of cheese.


10. Generously dust a peel or the back of a sheet pan with semolina flour or corn meal and very gently transfer the loaves, with or without the parchment to the peel or the pan. Slide the loaves onto the baking stone, or bake directly on the pan. Pour one cup of hot water into the steam pan and shut the door. After 30 seconds, spray the oven walls with water and close the door again. Repeat twice more at 30 second intervals. After the final spray, lower the oven temp. to 450°F and bake for 35 to 40 minutes. After 15 minutes, rotate the loaves 180 degrees, if necessary for even baking. The loaves should register 200°F in the center, be nicely browned all over, and sound hollow when thumped on the bottom. the cheese will bubble up out of the cuts, crisp up, and also brown.


11. Transfer the finished loaves to a wire rack for cooling for at least 45 minutes before slicing and serving.


As I said, I didn't follow the recipe exactly as presented in BBA, but I am happy with the results.


I have learned the value of mis en place and adhere to this basic principle at every bake.


As it happened, I didn't need to take my barm from the fridge, as I had refreshed it twice over the past two days, and it was already en place in a covered bowl on the counter.


I had also previously (about 45 minutes earlier) cooked the potatoes and saved and measured out the cooking water.


Next, I mixed half the flour with the yeast (and it appears that I was about a tenth of an ounce over, on my flour)


I mixed the barm, flour, yeast, potatoes, and a half cup of the potato water…


and added the remaining flour, and the chives (which were to be added just a bit later, according to the recipe)


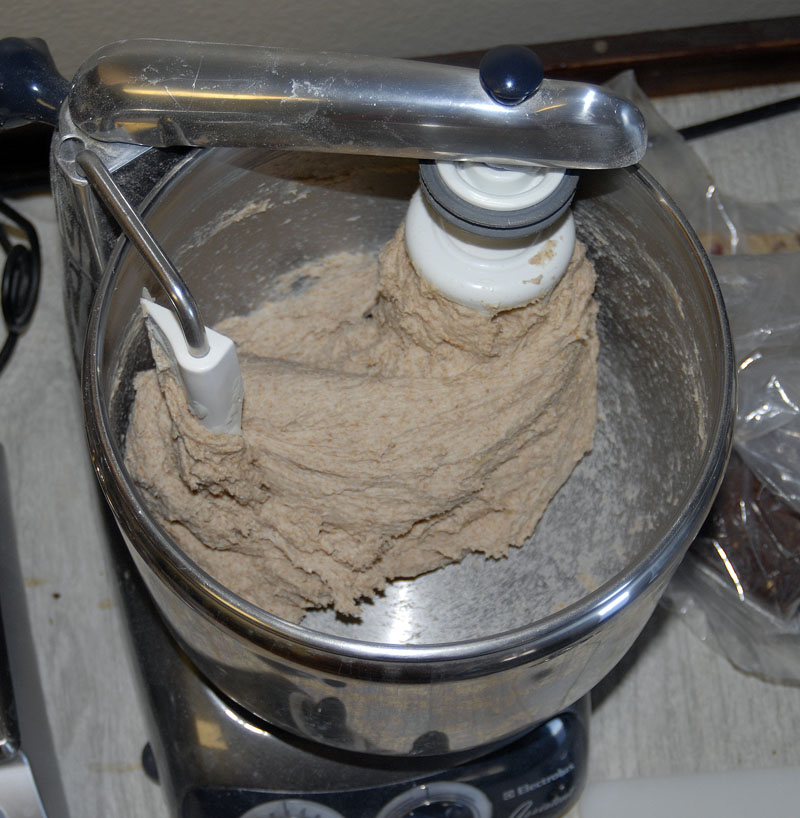
and a bit more water. Then I kneaded the dough with the dough hook until it cleared the sides of the bowl.

I then, transferred the dough to an oiled bowl, and covered it with its own lid.


It seems I have a tendency to use a bit more oil than what might be considered "lightly oiling a bowl."


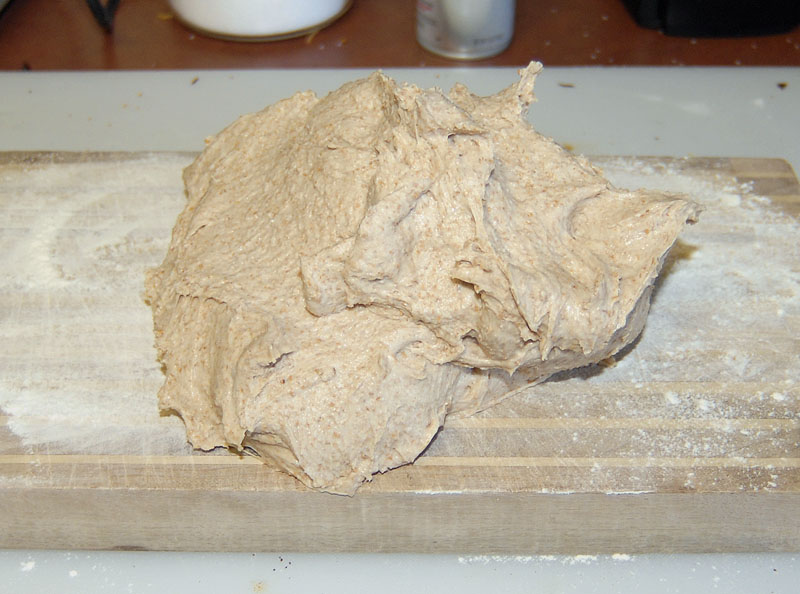
After the dough had fermented for about 90 minutes,


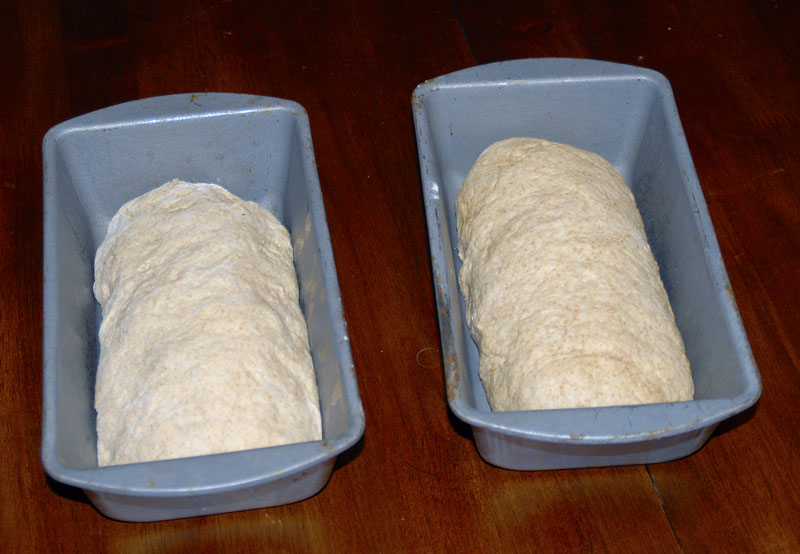
I divided it into two rectangular pieces, and placed the cheese strips as directed. However, I had a narrow brick of white sharp cheddar cheese, and so, I used about 10 strips for each rectangle, and then, because I didn't carefully read the directions, I rolled the dough up on the eight inch side, making for rather longish torpedos that would not fit across the pan, but would only fit lengthwise.


I realized that it seemed silly to proof the loaves on a half-sheet pan, and then transfer them to a peel or to the back of another pan,so I quickly pulled out my new SuperpPeel™ (again without the cloth conveyor belt) and gently moved the loaves, on the parchment to the peel for proofing. that worked really well and the loaves on the parchment slipped perfectly onto the stone when it was time to bake. I much prefer the SuperPeel™ to my aluminum peel—it's bigger, and can easily accommodate loaves crosswise, which helps getting them into the right position on the stone. Now I use the aluminum peel mostly for removing loaves, one at a time from the oven when they are finished baking.

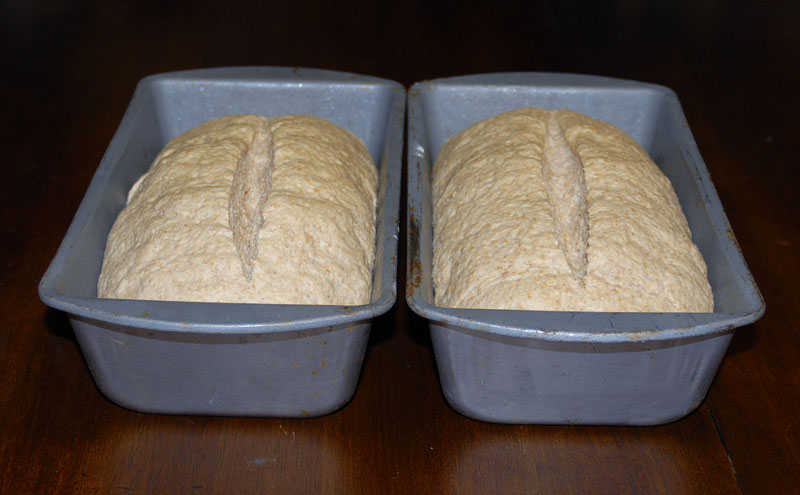
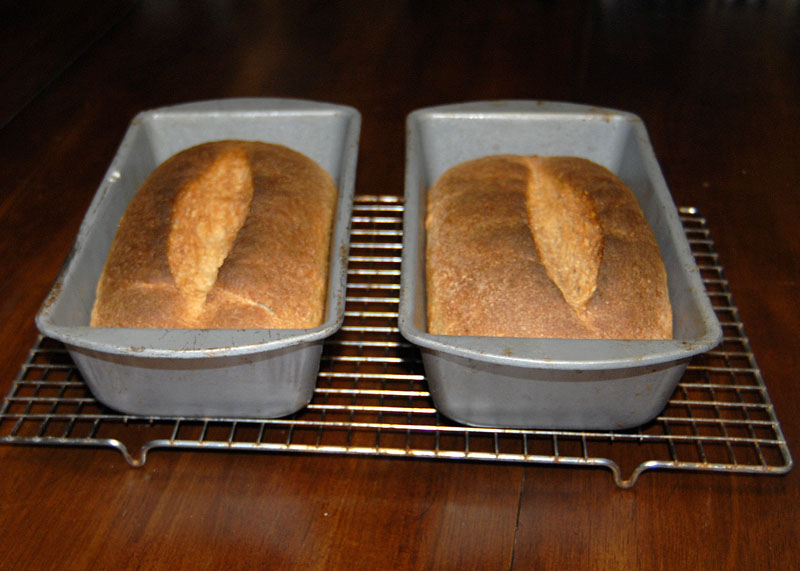
After proofing for a bit more than an hour, I scored the loaves (at this point on parchment on the Super Peel)…


but, as you can see, I scored the front loaf three times instead of two (because my placement of the first score was too near the end of the loaf).


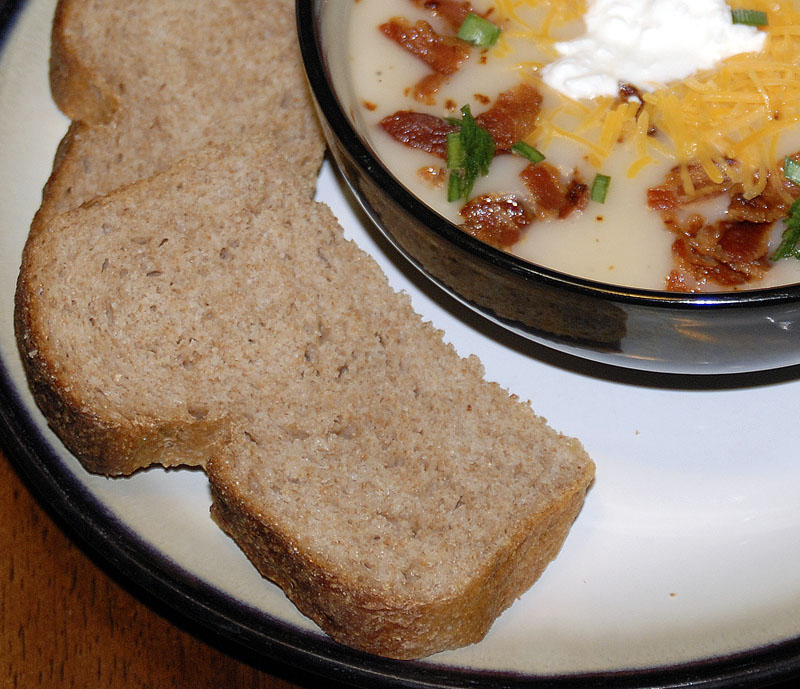
Nonetheless, and despite my mis-steps, the loaves turned out well, with a soft crumb, an astounding aroma and flavor, and a pretty decent crust.


My guess is that I didn't roll the dough tightly enough, and that caused the holes you see (and that is where the cheese is).

All in all, this was bread that was fun to bake, and once again, I learned a great deal (especially about reading directions).

I can tell you that after the requisite cooling period, the first slice was not enough, and my wife and I happily (but with some guilt) ate about a third of that loaf.


Submitted by dmsnyder on July 11, 2009 - 8:53pm

Potato-Nut Bread from South Tyrol (Thanks, Salome!)


This recipe was contributed by Salome, who recently joined TFL. She is Swiss, and the breads she bakes represent a bread tradition which is new to me. The Southern Tyrolean Potato-Nut Bread (Südtiroler Kartoffel- Nussbrot) particularly appealed to me, since I have made potato breads a couple of times and really enjoyed them, and I like sourdough bread with nuts. It seemed to me that the combination of the potato and nut flavors would be delicious.


Ingredients

Potatoes (steamed, roasted or boiled)

400 gms

Active 100% hydration sourdough starter

200 gms

Bread flour

500 gms

Water

250 gms

Salt

10 gms

Ground coriander

1-2 tsp

Walnuts (Lightly toasted)

100 gms

Hazelnuts

150 gms


Notes: Salome's recipe calls for a mix of hazelnuts and walnuts. My usual source of hazelnuts has very poor quality stock at present, but their walnuts are very good. So I just used walnuts.


Procedure

  1. Prepare the sourdough starter by mixing 50 gms of starter with 100 gms AP or Bread Flour and 100 gms of water. Cover and let ripen until it has expanded somewhat and is actively bubbling. (8-12 hours)

  2. Cook and peel the potatoes. Mash them or put them through a potato ricer. (Salome says she usually steams the potatoes for this bread, but I decided to roast mine, thinking I would get a more intense flavor. I used Yukon Gold potatoes and roasted them in a covered pot at 375F for about 35-40 minutes. I peeled them and put them through a ricer, directly into the mixer bowl on top of the flour.)

  3. Place 200 gms of the sourdough starter in a large bowl or the bowl of your mixer. Add the water and dissolve the starter in the water.

  4. Add the bread flour and potatoes to the dissolved starter and mix to a shaggy mass with all the flour moistened. Cover this tightly and allow it to rest for 30 minutes. (This “autolyse” allows the flour to get fully and evenly hydrated and the gluten to start to develop.)

  5. Add the coriander and salt and mix them into the dough. I then mixed in a KitchenAid Accolade using the dough hook for 13 minutes at Speed 2. There was some gluten development, but the dough was very loose. It never cleaned the side of the bowl

  6. Transfer the dough to a floured board and, with well-floured hands, stretch it into a 14 inch square. Distribute the nuts over the dough, roll it up and knead for a couple minutes to get the nuts evenly distributed in the dough.

  7. Gather the dough into a ball and place it in a large, lightly oiled bowl. Cover the bowl.

  8. Ferment the dough until it has doubled, with stretch and folds at 40 and 80 minutes. (I think a third stretch and fold wouldn't have hurt.)

  9. Transfer the dough to a well-floured bench. Divide it into 2 equal pieces. Pre-shape into logs. Dust with flour and cover with plasti-crap. Let the dough rest for 10-20 minutes.

  10. Form the pieces into bâtards and place them on lightly floured parchment paper. Dust again with flour and cover with plasti-crap.

  11. Proof the loaves until they are about 1.5 times their original size. (1.5-2 hours)

  12. 45-60 minutes before baking, place a baking stone in the oven and make pr

    eparations for

    your oven steaming method of choice. Pre-heat the oven to 450F.

  13. Bake with steam for 10 minutes, then in a dry oven for another 20 minutes. If the loaves seem to be getting dark too fast (and they  probably will), turn the oven down 10-20 degrees.

  14. Bake until the internal temperature is 205F. Remove the loaves to a cooling rack.

  15. Cool completely before slicing.

Potato-Nut Bread from the South Tyrol

Potato-Nut Bread crumb

This is a very enjoyable bread eaten without any spread or addition. It has a mildly chewy crust, once cool. The crumb is tender, as expected, and has a cool mouth feel, like many high-hydration breads. There is a mildly sour under-tone, but the predominant flavor is from the toasted walnuts. The walnuts also gave up some of their oil into the crumb, so the crumb feels like it is oiled.

I thought this bread might be good with a blue cheese, so I tried it with some Point Reyes Blue. This is a rather strong-tasting cheese, and it overpowered the bread. Maybe a fresh Chevre? A nutty Compté?

David

Submitted to Yeast Spotting on Susan FNP's  Wild Yeast blog (This week, hosted by Nick at imafoodblog)

Submitted by dmsnyder on May 30, 2009 - 9:41pm

Sourdough Potato Bread


I baked Hamelman's Roasted Potato Bread a few months ago (http://www.thefreshloaf.com/node/10934/roasted-potato-bread-hamelman039s-quotbreadquot). Floyd commented that he had used leftover mashed potatoes to make bread. That sounded interesting. And I had admired the sourdough roasted potato bread about which SusanFNP had written in February of this year. See: http://www.wildyeastblog.com/2009/02/23/roasted-potato-bread-two-ways/.

So, today I made Sourdough Potato Bread with mashed potatoes left over from last night's dinner. (No seconds on potatoes for dmsnyder! <whine>)

Sourdough Potato Bread, shaped in the "Fendu" style.


Mashed potatoes

Boil 750 gms of yukon gold potatoes in their skins until a knife goes into them without resistance. Peel the potatoes and put them through a potato ricer. Mix with 1/3 cup of chopped shallots sautéed in 4 T good olive oil. Add salt (just a few dashes from a shaker) and fresh-ground pepper (12 twists of a mill) and mix thoroughly. Add more olive oil to taste. Reheat in a sauce pan over a low fire, turning frequently to minimize sticking. (I have also heated them in a covered enameled cast iron casserole in the oven.) Serve and enjoy, but set some aside to make bread the next day!


Ingredients


Bread flour

400 gms

Whole wheat flour

166 gms

Water

215 gms

Salt

12 gms

Mashed potatoes with shallots

157 gms

Active levain (100% hydration)

200 gms

Procedures

  1. In a large bowl, dissolve the levain in the water.

  2. Add the mashed potatoes and mix. The potatoes can have some clumps, but they should be cherry-sized or smaller.

  3. Add the two flours and mix to a shaggy mass.

  4. Cover the bowl tightly and let the dough rest for 20-60 minutes to hydrate the flour and allow gluten to start developing.

  5. After the autolyse, sprinkle the salt over the dough and mix it into the dough using the method of your choice. I used the “stretch and fold in the bowl” technique. See http://www.thefreshloaf.com/node/10682/mystery-page-249-solved&rdquo;

  6. Let the dough rest, covered, for 20 minutes, then repeat the “stretch and fold in the bowl.” Repeat the rest and stretch and fold twice more at 20 minute intervals.

  7. Transfer the dough to a clean, lightly oiled glass container. (I use an 8 cup glass measuring pitcher.) Cover tightly.

  8. Bulk ferment until double in volume. Stretch and fold on the counter at 50 and 100 minutes. Then allow fermentation to continue until the dough has doubled. (About another 50 minutes.)

  9. Divide the dough into two equal pieces. Gently pre-shape into rounds. Cover with plasti-crap and allow to rest for 10-20 minutes to relax the gluten.

  10. Shape the pieces into boules, batârds or, if you want to be traditional with the potato bread, into fendu shapes.

  11. Proof the loaves in bannetons or en couche, covered with plastic to prevent drying of the surface. If you shaped fendus, proof with what will be the top of the loaf down. Allow the loaves to expand to 1.5 to 1.75 times their original volume.

  12. About 45-60 minutes before baking, preheat the oven to 500F with a baking stone in place and prepared for your oven steaming method of choice. (I currently place a metal loaf pan and a cast iron skillet, heaping full of lava rocks, on the bottom rack of the oven. About 3 minutes before loading the loaves, I dump a handful of ice cubes into the loaf pan and shut the oven door. Just after loading the loaves in the oven, I pour ¾ to 1 cup of boiling water over the lava rocks and shut the oven door fast. I remove the containers 10-12 minutes into the bake. This process also “vents” the steam, so the loaves finish baking in a dry oven.)

  13. Score the loaves as desired. (You don't score fendus, of course.) Load into the oven. Steam the oven immediately. Turn the oven down to 460F, and set a timer for 10 minutes.

  14. After 10 minutes, remove your steaming hardware.

  15. Turn down the oven to 440F. Continue baking until the loaves are done – internal temperature of 205F and the loaves give a hollow sound when thumped on the bottom. This should be about 20 minutes more. Monitor the loaves frequently for the last 20 minutes. The oil in the potatoes and, maybe, the sugar in the potatoes will cause the bread to brown more than a lean bread.

  16. Cool the loaves completely before slicing.

Enjoy!

David

Submitted to YeastSpotting

Submitted by dmsnyder on March 1, 2009 - 9:09pm

Roasted Potato Bread from Hamelman's "Bread"


The Roasted Potato Bread from Jeffrey Hamelman's "Bread" is another bread that has been on my "to bake list" for a long, long time. It is a yeasted, lean bread made with pâte fermentée. It uses a mix of bread and whole wheat flour, and, of course, roasted potatoes.

I made these in the recommended, traditional "pain fendu" (split bread) shape. It looked cool in the pictures and gave me an excuse to buy yet another wooden rolling pin, because my others are too thick, and the dowling I have is too thin. I'm sure you all understand.

This is a very good bread, considering it's not a sourdough. The crumb is cool and tender, yet a little chewy. It has a lovely, straight ahead wheaty flavor. There is no potato taste per se. It would make a wonderful sandwich bread or toast. Hmmm ... or bread to soak up sauce.

David

potato bread interior

The inside of the loaf was VERY tender, and very yummy! It is a favorite of my 5 year old. (she is not a fan of crust!)

Submitted by audra36274 on January 22, 2008 - 9:00pm

Potato Bread...no Rosemary (it was raining too hard!)


 Boy do I wish I knew how to do more than one photo at the time. I&#39;m sorry you guy&#39;s.

Potato Bread...no Rosemary (it was raining too hard!)

Boy do I wish I knew how to do more than one photo at the time. I'm sorry you guy's.