The Fresh Loaf

A Community of Amateur Bakers and Artisan Bread Enthusiasts.
hmcinorganic's picture
hmcinorganic

I made the blueberry cheese braid (http://www.thefreshloaf.com/recipes/blueberrycreamcheesebraid) today.  Wow, was that good.  here's a pic:

_

I also started the rye-starter (http://www.thefreshloaf.com/node/10251/starting-starter-sourdough-101-tutorial) and it is doing very well.  So much bread to make!


txfarmer's picture
txfarmer


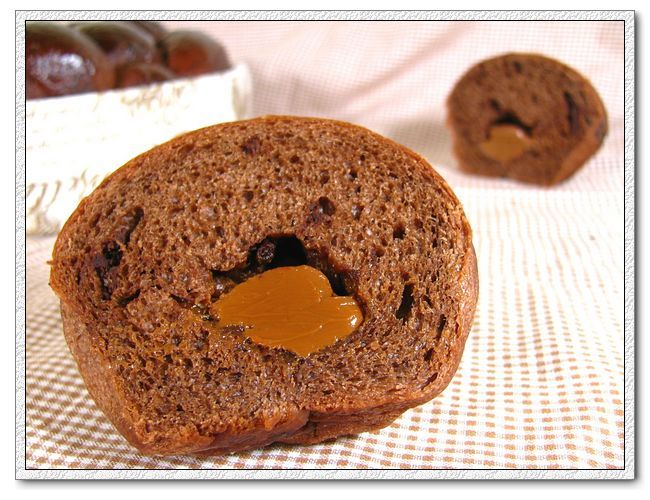
I made this decadent bread last Thursday to take to my parents in Seattle for the long weekend. The dough has cocoa powder, melted bittersweet chocolate, coffee, bittersweet chocolate chunks in it, and of course being a brioche, lots of butter (~25%). As if it's not indulging enough, I put some homemade Dulche de leche in each bun. It was a last minute experiment, and OMG, it's perfect!!!! The bread itself is not sweet at all, fragrant with the mocha flavor from coffee and chocolate, which goes so well with the sweet and rich Dulce de leche. I knew it'd be delicious, but it went way beyond my expectations, you must try this mocha+Dulce de leche combo, pure heaven.


For those who are not familiar with Dulce de leche, see this intro: http://en.wikipedia.org/wiki/Dulce_de_leche - basically it's a rich milk caramel. Even though you can buy it in cans, it's very simple to make at home. I use the slowcooker method: put cans of condensed milk (unopened, paper label peeled off) in slowcooker, add enough water to have the cans completely  submerged, cook on low for 8 hours, then you get perfectly brown and rich Dulce de leche. You can also boil the cans on stove top, but then you MUST take care to add enough water so the cans are completely submerged the whole time, otherwise you risk them exploding! If you don't like to cook it in the cans, you can use this method: http://www.davidlebovitz.com/archives/2005/11/dulce_de_lechec.html - I tried it before as well, slightly more work than the slowcooker method, but still a breeze. Once made, you can use it in breads, cakes, cookies, spread like PB or jam, or eat it with a spoon!


Now back to the bread, the dough formula is adapted from the book "The secrets of Baking" by Sherry Yard.

Chocolate Brioche (makes 2lbs of dough)

-chocolate butter

bittersweet chocolate, 2oz, finely chopped

butter, 1 stick, 4oz, softened

cocoa powder, 1/4cup

1. melt the chocolate and keep warm

2. beat butter until smooth, add cocoa powder and chocolate, beat until well incorporated. keep aside at room temperature.

-sponge

instant yeast, 2tsp

coffee, 1 cup (80F) (I used 1tbsp of espresso powder mixed with 1 cup of boiling water, cooled to 80F)

bread flour, 60g

sugar, 1/3cup

1. mix everything together into a very thin batter, cover and let rest at room temperature for 30 minues until bubbles form

-main dough

bread flour, 390g

salt, 1.75tsp

egg yolk, 4, lightly beaten

bittersweet chocolate, 4oz, chopped

1. shift flour and salt into sponge, add yolks, mix with paddle attachment on low speed for 2 minutes, until yolks are absorbed. Increase to medium speed, knead for 5 minutes. The dough is not that wet, so it cleans the bowl and wrapped around the paddle attachment the whole time.

2. on medium low speed, add chocolate butter one tbsp at a time. switch to dough hook, knead until ver well developed, smooth and stretchy. Add chocolate, mix on low until incorporated. 

3. cover and bulk rise for 2 hours until double. punch down and rise again until double, about 45 to 60 minutes (or refrigerator for 4hours or overnight).

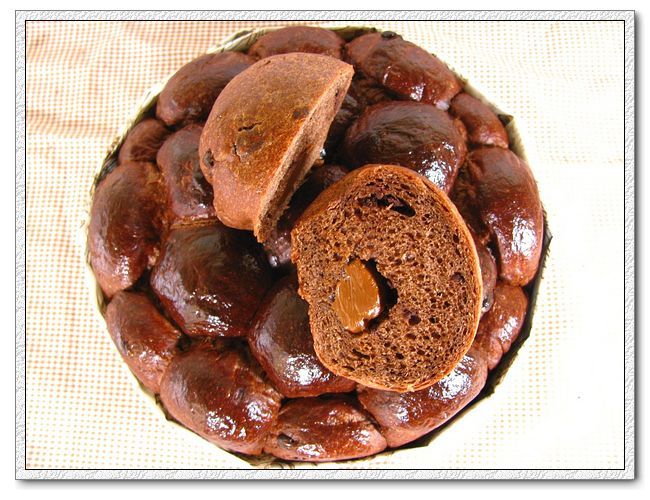
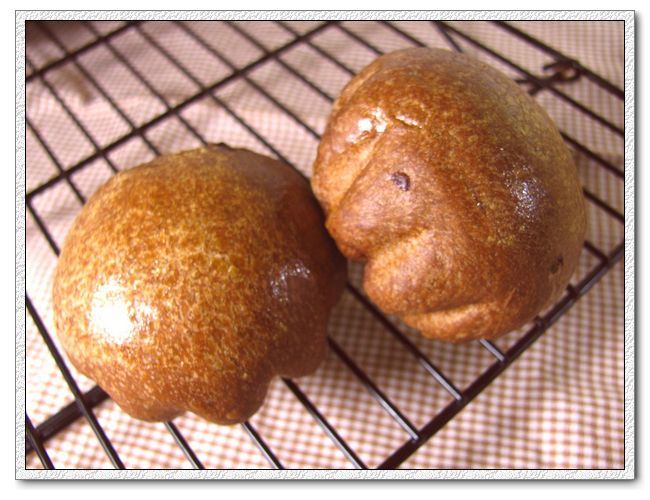
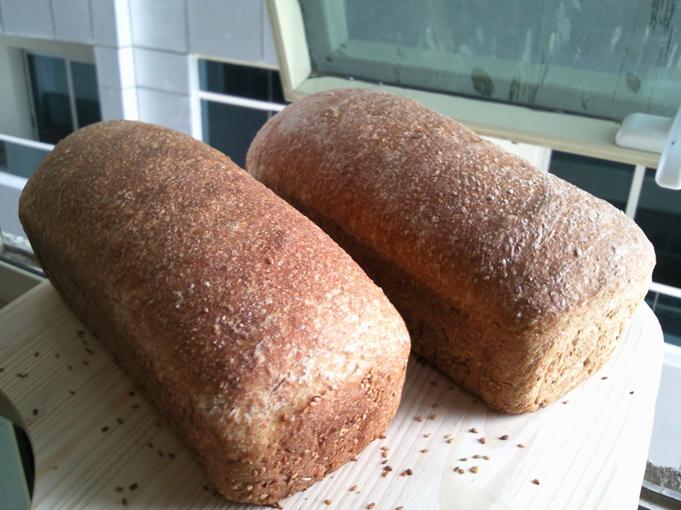
4. divide and shape. I divided into 50g dough balls and some 25g balls. the 8 inch cake mold wiht removable bottom took one 50g ball in the center, 6 50g balls in the middle layer, 6 50g balls and 6 25g balls in the outside layer. Still had 5X50g balls left for individual rolls. Of course I did put 1tsp of Dulce de leche in each ball. You can shape in other ways of course. The book says this amount of dough is enough for 2 9X5 loaf pans.

5. proof until double, 30min for me, if you refridgerator the dough, it will take 1.5 to 2 hours.

6. brush with egg wash (1 egg yolk + 1 tbsp heavy cream), bake at 350 until center reaches 180F. Rolls took 20min, the large cake mold took 48min.

Sinfully delicious, bread doesn't get more decadent than this. I highly recommentd the dulce de leche filling, but if you don't use it, the bread is till delicious.

sharonk's picture
sharonk

Part 1:

I thought I was ordering Teff Whole Grain but I obviously made a mistake somewhere along the line because when my order arrived I opened a 25 lb. bag of Teff Flour! I went back to my original order slip and saw that, indeed, I had ordered 25 lbs. of flour. I just looked at this massive amount of flour and wondered how long will it take to use this up. Ugh.

I usually buy whole grain teff and grind it up as I need it. Teff is a potent high protein seed grain and has been a blessing after learning I had to go off gluten. I also use whole grain teff for a power breakfast. I soak the teff grain the night before, 1 cup teff to 3 cups water, add a little water kefir to boost the enzyme activity, cover and let it sit overnight. The next morning I simmer it for about 15 minutes to cook. Mixed with chia gel, flax seed oil and soaked nuts, I'm off and running. I'll often pour the leftovers into a loaf pan where it becomes like polenta. I'll slice it and toast or saute it. Using spices and herbs it could be made sweet or savory.

Since I was missing my teff breakfasts I ordered some more whole grain, this time only 10 lbs. To my horror, I opened a box of 10 lbs. of teff flour, again! I really must slow down, I'm making way too many mistakes.

Anyway, what to do with my 35 lbs. of teff flour?
My book, The Art of Gluten Free Sourdough Baking, is based on brown rice flour starters. I'd begun to experiment with buckwheat sorghum starters and have had some great results. I figured I better move on to Teff starters so I wouldn't have pounds and pounds of teff flour either stuffed into the freezer or sprouting critters with legs.

I began a new starter using only teff flour and water in a ratio of 1 to 1. I chose this because teff absorbs a lot of water. I usually use teff to thicken and give structure to some bread recipes. I was surprised that this starter was actually very soupy but I continued along with my 1 to 1 experiment, feeding it every 8 hours or so for a couple of days.

I used the bubbly starter to make Teff pancakes and was pleasantly surprised that they were as good as or even better than the rice pancakes! They were naturally slightly sweet with a great cake-like texture. The leftovers were great toasted the next day. Since I can't eat sweet stuff I used them as an accompaniment to a bean stew. I'm sure they would be great with maple syrup or fruit.

Starter Recipe:
Make a starter by mixing equal amounts of teff flour and water. Add a tablespoon of water kefir or other fermented liquid.
Feed every 8 hours or so with equal amounts of teff flour and water.
After 2 days it should be ready to use.

Pancake Recipe:
One cup of starter makes about 4 pancakes.
Add a pinch of salt, 1 tablespoons of any oil or fat and 1 tablespoons ground flax seeds.
Mix let it sit about 10 minutes and cook.
The pancakes will not show bubbles so flip it when it starts to dry out around the outer third.
Sometimes I cover it while it's cooking. It cooks faster and more thoroughly.

My next experiment will be making breads using this teff starter. I'll keep you posted.

Part 2:

After last week’s fabulous teff pancakes I continued building the starter even though I sorely needed a break from bread baking. I was busy and thought it would be a good opportunity to practice growing starter in the fridge as this would cut the feedings from 3 times a day to twice. 


The starter grew beautifully with a mild aroma. I would take it out for about an hour in the morning, feed it, let it sit another hour or so and put it back in the fridge for 12 hours. I’d repeat the sequence at night before bed. I noticed some thickening and some small bubbles but nothing dramatic.


I had been thinking about creating bread that was mildly sweet without any sweetener beyond 1 teaspoon of stevia powder. I used small amounts of carob and maca (a malty flavored root) and used buckwheat flour for one loaf and shredded coconut for the other. I also used coconut oil for the fat. The batters were rich looking, like cake batter. The aroma in the kitchen was heavenly and the resulting breads were fabulous. Sweet without any added sugars, no blood sugar spikes and no yeasty itching.


My daughter, who named Sourdough Bread #1 “Mommybread” said this Teff Carob bread was the best ever and I should make it exclusively. Forever.


Newfieguy's picture

Garlic friends Garlic! Lets talk about Garlic!

May 31, 2010 - 3:42pm -- Newfieguy
Forums: 

Question ohh sage bakers! 


If you want to make something with a garlic flare like that kick butt ciabatta bread recipe that is floating around, what is the best way to do it?


Chop up a few cloves of garlic and mince it and throw it in as you mix it up or go for powder?


Has anyone every experimented with raw garlic in bread and does it throw any of the rising or process?


Thanks all!


NG

Mebake's picture
Mebake

This is a 50% Wholewheat Loaf, Which involves a BIGA (Preferment/sponge) around 30% of total Flour Weight.

I love the final taste of the bread, it was the best sandwich loaf i ever made so far! Soft, Airy, Light, Tastey, and Nutritious.

"Hey don't mind the background, my appartment is not bright enough"

My wife said: i could snack on toasted slices of this bread all day.

Mebake


pmccool's picture

Ghee, what if

May 31, 2010 - 3:26am -- pmccool
Forums: 

I've been following the discussions about croissants and butter content and moisture levels in butter.  And then I saw a container of ghee at the supermarket and said "Hmmm." 

Ghee is something that I have never used.  Since it is clarified butter, I suspect it's moisture content would be much lower than ordinary butter but have no clue what the analysis might be.  Nor do I know how the melting, followed by separation of the solids, would affect flavor or handling characteristics.

Josh Khoo's picture

Bulk retardation vs retarding shaped loaves

May 31, 2010 - 12:10am -- Josh Khoo

Dear All 

I have been working on a simple sourdough recipe based on the following ratio:

100% : 53% : 52% : 1.3%

flour:100% hydrated active starter:water:salt

After initial mixing, autolyse and a further mix I let the dough bulk prove for 2 hrs with 2 folds.  The recipe I'm using then calls for the dough to be divided, pre-shaped, rested and then shaped and then retarded in the fridge in bannetons for about 12 hours.

SylviaH's picture
SylviaH

Today I fired up my wfo oven to make pizza and this morning I made the recipe for my 'Sandwich Buns'.  I needed hot dog buns for Mondays cookout and since the wfo was hot I retarded the shaped hot dog buns in the refrigerator until tonight when the oven had reached a temperature of apx. 400F and falling.  I removed them for about one hour to finish proofing and placed them into the wfo for 20 minutes to bake.  I wanted to get them into the oven right away because they had proofed a little more than I wanted, so as I brushed them with an egg yolk glaze and asked my husband to sprinkle on the seeds..I think he actually enjoyed it and I enjoyed watching him enjoying it ;)  I will post a crumb shot later. 


                                                     Beginning to brown


                                                   20 minutes baked


                                                         Added crumb photo   

                                                      Ready for tomorrows hot dogs...I haven't had a hot in ages and looking forward to toasting these on the grill!


             Sylvia


Pages

Subscribe to The Fresh Loaf RSS