The Fresh Loaf

A Community of Amateur Bakers and Artisan Bread Enthusiasts.

Recent Blog Entries

hansjoakim's picture
hansjoakim

The cover of "Bread" and plate 21 "Assorted Rye Breads from Chapter 6" depict a delicious, rustic looking rye bread that's not slashed. I love the look of this dark, "lava rock" with deep fissures running in random lines along the top of the bread. I wanted to bake a loaf with similar cracks on top, so I prepared the dough for my favourite 70% rye. I'm using medium rye flour, and pre-ferment half of the rye in a sourdough. The remaining 30% is AP flour. I do not put any commercial yeast in this one, so it's important that the rye sourdough is ripe before mixing the final dough. I try to keep this one pretty wet, and usually aim for a hydration around 75%. I mix it very gently in the mixer, approx. 3 mins. on 1st speed followed by 1.5 mins. to 2 mins. on 2nd speed. The dough has some strength to it, although it's more like a thick paste than a "proper" dough at this stage.

Without commercial yeast, I've found 1hr. bulk and 2 hr. final proof to work well for this dough. You know your sour best, however, so these times might be too long or too short for your culture. So: Poke before loading :)

To get the fissures on top, I did the final proof with the seam side down in the brotform. Here's the dough just after final shaping:

70 percent rye

And here are two snaps of the final loaf after 60 mins. in the oven - first 15 mins @ 250dC then 45 mins at temperature gradually falling to 205dC.

70 percent rye

I really like the way the loaf turned out. There's some rustic, unique look to it that I love. As I mentioned, this is probably my favourite rye formula as well - a very simple recipe that has a clean taste and a notable sour due to the longer proofing time, and a loaf that keeps very well with the relatively high hydration. It's a bit tricky to work with, but the crumb and flavour make it worth the extra effort.

70 percent rye

Added Sep. 13th:

Craving more, yesterday I baked the sourdough rye with walnuts from "Bread". This is a 50% whole-rye flour recipe with a substantial amount of walnuts - the walnuts weigh in at 25% of the overall flour weight. I had some lovely chevre already in the fridge, so there was really no excuse not to bake the walnut rye. Five minutes prior to mixing, however, I realised that I was just slightly short on walnuts. I added some pine nuts to get the desired 25% weight. The nuts were lightly toasted, and I followed the procedure for the 70% rye loaf above: a) AP flour instead of high-gluten flour, b) made away with the commercial yeast and increased final proof to 2 hrs., and c) increased the overall hydration from 68% to 75%. Initially I thought 68% would be terribly dry for this kind of dough, so I aimed at 72% at first. Even that didn't cut it, so I gradually mixed in more water until I reached 75% hydration and the desired stickiness. Once again, baked seams side up:

Sourdough rye with walnuts

The crumb was nice and tender, and the whole-rye flour provides a more notable rye taste than if medium rye would've been used.

pmccool's picture
pmccool

I had the pleasure of spending a week working as a baking intern for Mark Sinclair at his The Back Home Bakery in Kalispell, Montana.  Other than the sleep deprivation, it was a thoroughly enjoyable week of measuring ingredients, washing dishes, mixing bigas and doughs, washing dishes, stretching and folding dough, washing dishes, pre-shaping and shaping loaves, washing dishes, making pastries and fillings, washing dishes, scraping the workbench, washing dishes, packaging the finished breads/pastries, building friendships with Mark and Sharon (his wife), and washing dishes.

A typical day would start at 2:00 or 2:30 in the morning.  We'd begin by pulling bigas from the refrigerator (they had been mixed the previous afternoon or evening) and measuring the ingredients for each bread.  Most of the breads were mixed in a 20-quart mixer, except for the baguettes, which were a larger batch that was mixed in the 60-quart mixer.  The other exception was on Saturday morning, when about half of the breads were mixed in the 60-quart mixer because of the larger batches being prepared for the Kalispell farmers' market later that morning.  Mark also pulled 2 or 3 frozen pastry doughs from the freezer at about the same time so that they could be thawed and ready for sheeting and shaping during a lull in the bread production.

After mixing, the bread doughs were placed in a proofer.  Most were given 3 stretch and folds at 45-minute intervals.  After proofing, the doughs were shaped and placed on sheet pans, then put back in the proofer for their final proof prior to slashing and baking.  The baguettes, again, were an exception to this general practice; they received a pre-shape, then a ferment at room temperature, followed by a final shaping and final room-temperature ferment before slashing and loading into the oven.  Mark uses two convection ovens; one is electric and the other is gas fired.  All of the baking is done on sheet pans, rather than on a deck or stone.  Neither oven is steam-injected, so Mark throws a can of water on a cast-iron griddle sitting in the bottom of the oven when a bread requires steaming.  

What I haven't conveyed well is the overall planning that Mark does in deciding which doughs are mixed first and which are mixed last.  Based on experienced he has gained and on the particular day's product roster (it varies from day to day), Mark sequences the production steps so that he can maintain a steady flow of bread or pastries in and out of the ovens without creating bottlenecks or gaps.  And it's all subject to change, depending on the activity of the doughs.  There are anywhere from 1 to 4 timers in use at any given point and each step of the process for each bread or pastry is noted on a sheet of paper.  If it didn't get written down, it would get lost in the ever-changing flow of the work.  A couple of examples may help to illustrate just how important time management is in a bakery.  One: "If you have time to stand around, you've probably missed something."  Two: Mark muttering "That timer rules my life" as he leaves the dinner table to put the rye starter in the refrigerator for the night.

I encountered several surprises during my week at The Back Home Bakery:

- Mark produces a variety of pastries, using both croissant dough and puff pastry dough.  I had preconceived that he was primarily making breads, but that was a misconception on my part.

- Mark uses Wheat Montana's AP flour, which most other milling companies would label as a high-protein bread flour.  Still, he produces incredibly tender and flaky pastries and robust breads using that same flour.  The man knows what he's doing.

- Aforesaid pastries, still warm from the oven, make a spectacular breakfast.  My wife ran out of adjectives by Thursday.

- Mark is something of a Renaissance man: teacher, coach, log home builder and baker.  And very patient with a well-meaning but sometimes-addled assistant.  I'm sticking with the sleep deprivation defense as long as I can.  

Saturday was the biggest production day of the week because of the Kalispell farmers market, so we were up at 1:00 a.m.  Sharon also pitched in, so there were three of us banging around in the bakery, trying not to trip over each other.  That morning we produced and packaged:

- palmiers

- bear claws

- croissants

- cherry croissants

- blueberry croissants

- cheese danish

- pain au chocolat

- apple strudel

- ham and cheese croissants

- sticky buns

- sour rye bread (based on Eric's Fav Rye)

- rustic white bread

- buckwheat-flax bread

- baguettes

- Sal's rolls (torpedo shaped, made from baguette dough)

- Portuguese sweet bread (shaped as rolls)

- Kalamata jack bread

All of the above was loaded in the van, along with the booth and display fixtures, and ready to roll by 7:30.

Here are a couple of pictures from that morning:

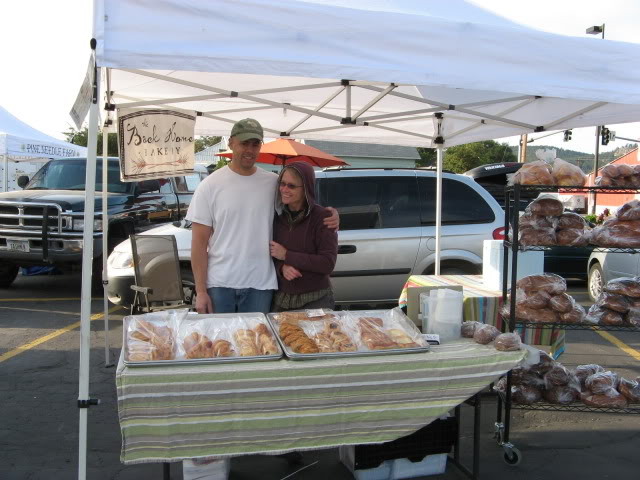
Sharon, wisely, bundled up for the chilly morning.  Mark's concession to the cold was to change from shorts to jeans and put on a cap.

Sharon waiting on early customers.

Mark's commitment to putting out a high-quality product is paying off.  He has loyal customers who come looking for their favorites and who are very disappointed if they arrive too late and find that item has sold out.

I'm very grateful to have had a week working with Mark and getting to know both he and Sharon.  Should you have the opportunity to pursue a future internship, I can highly recommend it.

Paul

Jw's picture
Jw

as promised a picture of the proofing baskets 'in progres'. I fill them up for about two thirds, then let it rise (in about two hours) before I put them in the oven.


Scoring about 30 minutes before they go in the oven. you can see that the direction of the cut has quite an influence on the final shape.

These JW breads are more "W" breads, came out nicely.

and these I just named 'pain michelle', after the person that got me the bannotons. I just tried a different way of scoring and like the result.

No complaints here. One of my best bakes so far, really made my (satur)day.  


BTW: I have two starters in the fridge, 'out of the air', I build them up in 3x times 8 hours, then build a biga overnight, then finish in the morning, mix, rest for 2.5 hours, a couple of stretch and folds, final rise. I split up the dough in three parts, added flax, sunflower and some sourdough extra taste I once bought in a store (it is finished now, not too bad, but you really don't need it). I did notice less holes in the middle of the bread, but not a realy issue. Half an hour of extra wait should do it for next time.

Happy baking!

Cheers,
Jw.

ChrisH's picture
ChrisH

Well, I have officially baked my first loaf of bread.


I used the recipe in Lesson two here on TFL, substituting a cup of whole wheat flour for the bread flour. It was a thick-crusted, brown bread with holes about the size found in store-bought sandwhich bread. I would post a picture, but, uh, we kinda ate it all before I could take one!


Now, I guess I could use some advice. The bread tasted great, loked and smelled amazing, and I feel like I did well on this loaf. I've been looking at different recipes on here, and I've found some things which fit what I'm looking to do next, but the recipes are all too big for me. I want to do a honey or honey-nut bread, but a small one, about the same size as the loaves in the lessons for beginners.


I'm also still quite new to using this site, and I'm nto sure if I should request for a recipe or some help here, or if I should take it somewhere else. So, I guess I'll statr here. Anyone have a good, small, honey and wheat loaf recipe to share? Or know someone who already has? In the meantime, I'm going to go experiment with a few things I can put into my mix.


loafgirl's picture
loafgirl

I have a new oven that I used for the first time this past weekend for baking.  I did french baguettes following Reinhart's recipe.  They turned out "OK" but I am not sure what I need to adjust.  They failed to get the nice golden brown color to them, although they were the perfect temp inside.  I did the steam method once first in the oven and followed all steps accordingly.  I am ready to do some sourdough tonight but would like some input. 

Here are the mode descriptions from the manual.  I used the BAKE mode for the baguettes.  I'm thinking for all breads I should probably go for the True Aero? 

TRUE AERO: fan plus fan element

A concealed heating element surrounding the fan in the rear of the oven heats air,

which is then blown into the cavity. The consistent temperature ensures baking is

well risen and evenly colored. Cookies are crisp on the outside and chewy in the

middle, meat and poultry are deliciously browned and sizzling while remaining

juicy and tender. Casseroles are cooked to perfection and reheating is quick and

efficient. TRUE AERO is the function to choose for multi-shelf cooking and complete

oven meals. TRUE AERO is excellent for baking angel food cake.

AERO BAKE: fan plus upper and lower elements

The oven fan circulates hot air from the top outer and the lower concealed

elements and distributes it around the oven cavity. Food cooked using the AERO

BAKE function tends to brown more quickly than foods cooked on the traditional

BAKE function. Use AERO BAKE at a low temperature -125 °F (50°C)- for drying fruit,

vegetables and herbs.

BAKE: upper and lower elements

Heat comes from the top outer and lower concealed elements. BAKE is the

traditional baking function, ideal for cakes. If baking on two shelves, arrange dishes

so no item is directly over another. BAKE is ideal for foods that require baking for a

long time or at low temperatures, like meringues and rich fruitcakes.

AERO PASTRY: fan plus lower element

The fan circulates heat from the lower concealed element throughout the oven.

Excellent for sweet and savory pastry foods, for moist breads and brownies and

cookies that you want extra chewy.

PASTRY BAKE: lower element

Heat comes from the lower element only. This is a traditional baking function,

suitable for recipes that were developed in older ovens. For best results, bake on

only one shelf at a time. It is perfect for foods that require delicate baking and have

a pastry base, like custard tarts, pies, quiches and cheesecake or anything that does

not require direct heat and browning on the top.


I know this is a lot of info, but any help would be appreciated. 


THanks,

Loafgirl


DonD's picture
DonD

Background

When I first saw the twisted shaped baguettes posted by Shiao-Ping on her blog, I was intrigued. Then I read the posting by Chouette22 on the Pain Paillasse by Aime Pouly and found out that it is an Artisanal Bread made in Switzerland, I was fascinated and wanted to know more about the man and his breads. I purchased Pouly's book 'Le Pain' and studied it thoroughly.

Having spent one year of college in Geneva in the late sixties, I have always had a soft spot for the beautiful country of Switzerland. Although, the Pain Paillasse was not around when I was there, I was determined to try to duplicate it. Problem is the recipe is a closely guarded secret that Aime Pouly only shared with two of his most trusted friends.

From the description and photographs of the basic Pain Paillasse, I understood it to be a Levain and White Flour based Baguette where the high hydration dough is twisted like a wringed towel before proofing and baking without any scoring. Although Pouly refers to his preferment as Levain, his formula for Levain is a mixture of Flour, Water and Yeast at 100% hydration so my guess is that it is really a Poolish instead. However for my first attempt, I decided to use a Poolish preferment made with a mature Liquid Levain instead of the Instant Yeast (similar to the Whole Wheat Levain that Hamelman described in his book). I chose the Liquid Levain to control the sourness from the production of Acetic Acid. To balance the sourness of the Levain, I used the principles of the Gosselin Pain a l'Ancienne formulation first published by David Snyder to extract extra sweetness from the dough.

Formulation

Flour Mix

300 Gms AP Flour

150 Gms Bread Flour

30 Gms WW Flour

20 Gms Dark Rye Flour

Levain Poolish

125 Gms Flour Mix

125 Gms Water

25 Gms Mature Liquid White Flour Levain (100% Hydration)

Dough

375 Gms Flour Mix

200 Gms Ice Cold Water + 50 Gms Water

9 Gms Atlantic Grey Sea Salt

1/8 Tsp Instant Yeast

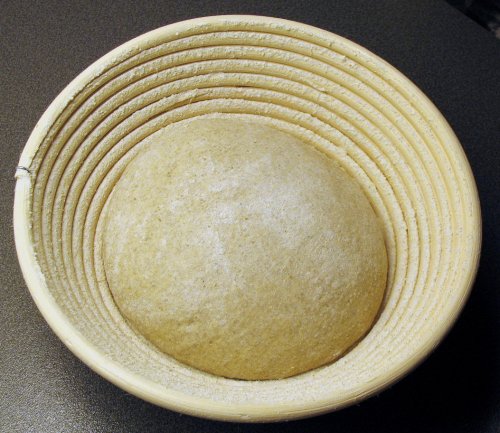
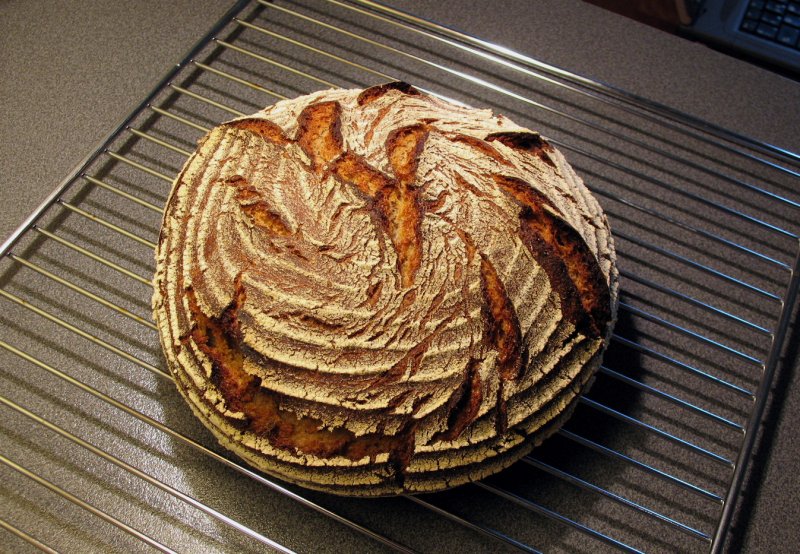
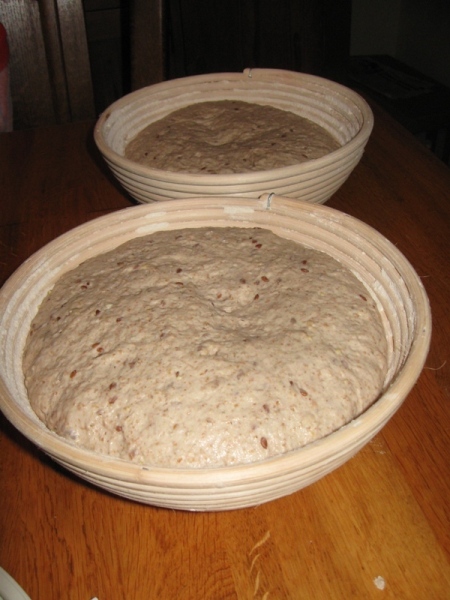
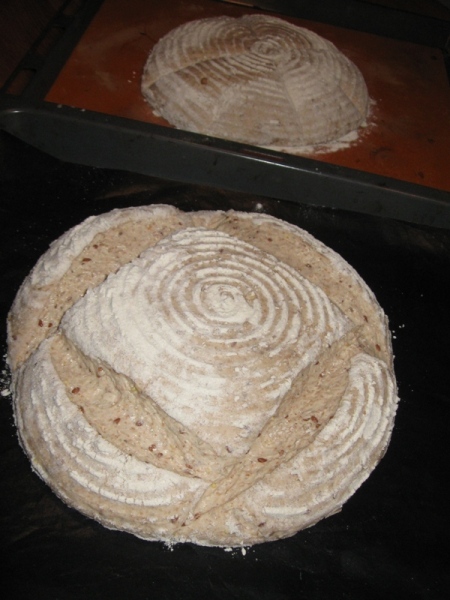
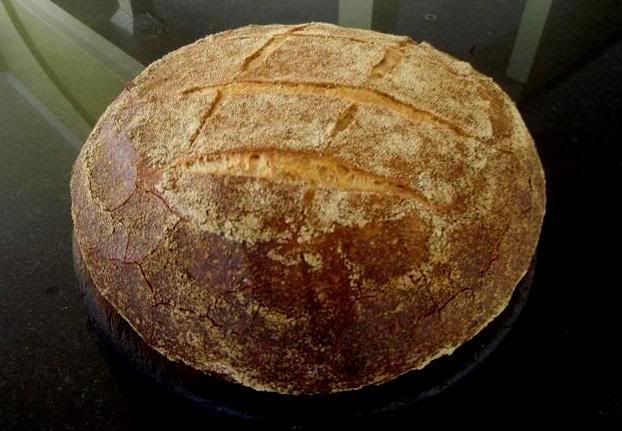
 Pains Paillasse Proofing
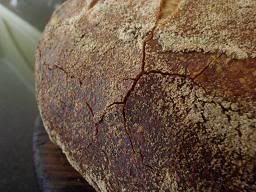
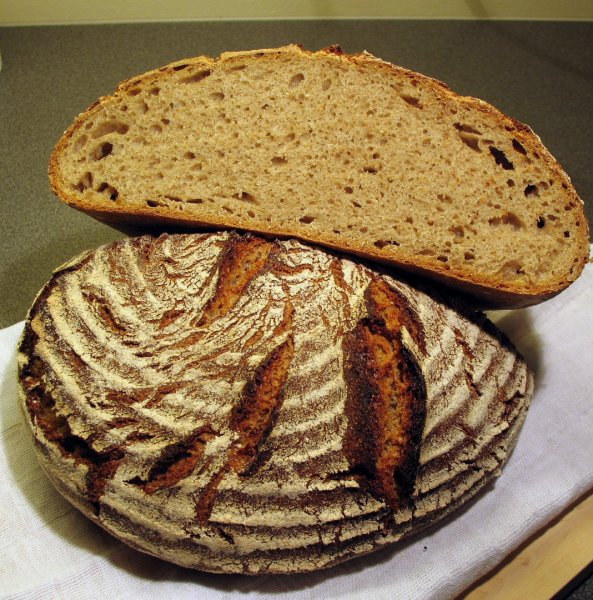
 Pains Paillasse

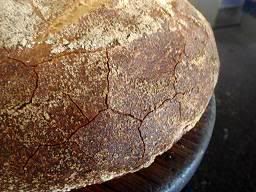
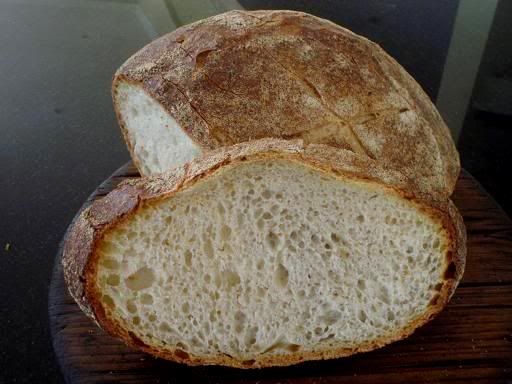
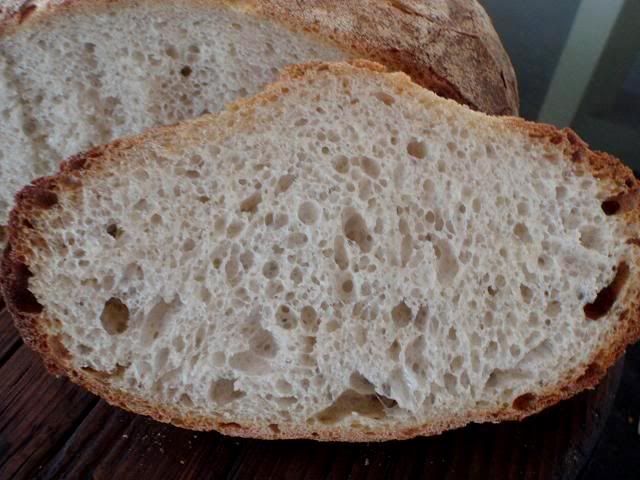
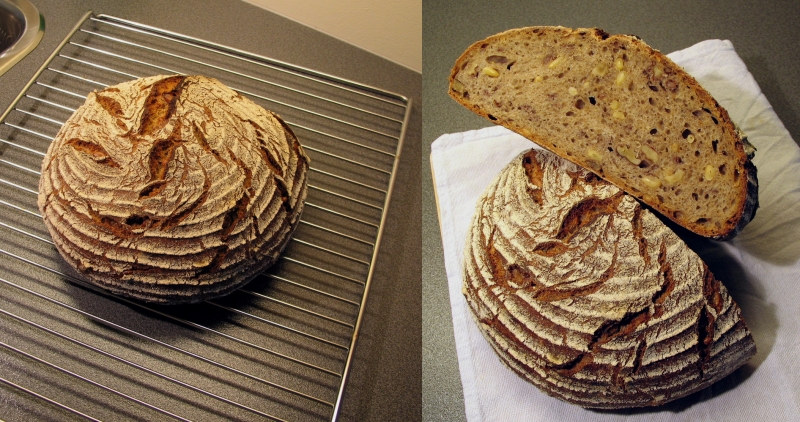
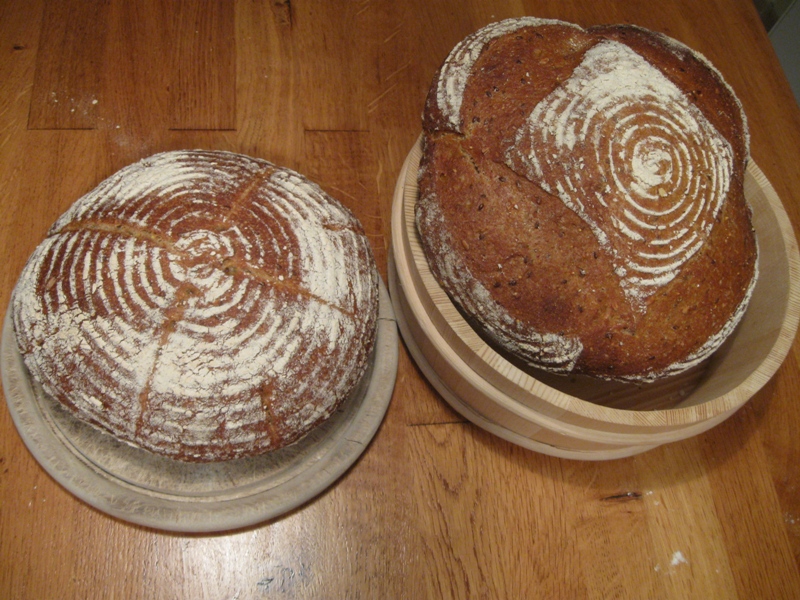
 Pain Paillasse Crumb

Procedures

1- Make Levain Poolish and ferment overnight for 8 hrs until tripled in volume.

2- Mix remaining Flour Mix with the Ice Water for 1 min. at low speed w/ flat beater and autolyse overnight for 8 hrs.

3- Mix Levain Poolish, Dough, Salt and Yeast with remaining water using flat beater on low speed for 1 min. Switch to dough hook and knead at low speed for another minute. Let rest for 30 mins.

4- Stretch and fold in the bowl using the James MacGuire method 4 times at 1 hr interval.

5- Dough should have nearly doubled in volume by the 4th fold. Divide dough in 3 and preshape into rounds and let rest 15 mins.

6- Shape into long baguettes, flour generously and twist baguettes before proofing for 45 mins.

7- Bake in preheated oven at 460 degrees with steam for 10 mins.

9- Continue baking without steam for another 12 mins at 430 degrees.

10- Turn off oven and let rest in oven with door ajar for 10 mins.

11- Remove baguettes and cool on rack.

Conclusion

The dough developed nicely during fermantation and was quite extensible but at 75% Hydration was not easy to handle. Generous flouring during shaping helped.

Oven spring was good, the crust had deep golden color and was quite crunchy. The crumb was cream color, fairly open with medium softness and a slight chewiness. The taste had a hint of toastiness and a slight tang balanced with a sweet creamyness (which is the trademark of the Gosselin Pain a l'Ancienne). Overall, I was quite pleased with the results. Next time, I will try using all AP Flour with a touch of Rye and a true Poolish which I think will be closer to Pouly's formulation. I would be curious to hear the detailed description from someone who has tasted the authentic Pain Paillasse.

Don 


SylviaH's picture
SylviaH

I hope everyone had a relaxing and fun Labor Day weekend!  I had just picked up some fresh peaches, raspberries and blueberries so I decided to make a favorite deep dish rustic pie of mine with all three fruits for after the bar b que.  This was one loaded pie 4 large peaches a cup each of raspberries and blueberries, this combination of fruits makes the most delicious pie.  Not overly sweet and a half butter half crisco very tender crust.  My husband ate 2 large slices.  His comment was 'Ohhh the flavor'.

Sylvia

tssaweber's picture
tssaweber


One of my favorite bread is the "Basler Brot" or bread of Basel. It is a Swiss cantonal bread and as I was born in Basel of course I favor this over other cantonal breads like the bread of St. Gall, or of the Ticino. An exception is the rye bread from the Valais, the Walliser Brot, as I spent the other half of my younger years in this region.

If you belief the history than this bread was the first time mentioned in 1792 in a bread book. And still as of today it is the runner in many bakeries in Switzerland.

The shape is longish oval and it is always baked as two loafs sticking together at the front. For all of you who have difficulties with scoring, this is the bread to go, because it has none. I also like the dark rather thick crust which gives it the wonderful taste.

The oven temperatures from the old days with the wood fired ovens are not attainable in a private household environment, but I was able to get good results with 550˚F during the steam period and finishing the bake with 450˚F.


 TFL Crumb Shot

Unfortunately I was not able to copy paste the adapted recipe as it is in table form and TFL doesn't allow to import published spreadsheets/*.xps files. But for those who are interested I have a printable version and an Excel version on my blog. Due to the higher ash content of European flour I have adapted the recipe to American flour and reduced the hydration to 68% instead of the 80%. The Excel spreadsheet let's you change the final dough amount, default is 1500 grams.

Thomas

http://tssaweber.com/WP/thomas-bread-secrets/bread-of-basel/

ChrisH's picture
ChrisH

Well, I'm new - if you can't tell. I just found this page and was absolutely impressed at how much it helped me start expanding my cooking abilities into baking - which has always been a favorite of mine. I'm a 20 year old college junior studying historical interpretation - which has nothing to do with cooking - but I've always enjoyed throwing random things in a pan or pot and seeing what happens when put to heat and stirred.


My big thing has always been cookies, though I wanted ot learn how to make brads and such for a long time. So, when i stumbled across this, I was immensley pleased. All i have to say is I more than welcome any advice on...well....everything to do with baking bread! I'm off now to use the lessons here to make my first loaf! Wish me luck!

Shiao-Ping's picture
Shiao-Ping

I came back to Brisbane to the first day of spring (1st September).  I had neglected my back yard garden for over a month.  There had been very good rain going into winter after a prolonged drought and no name flowers are sprouting every where.  Even my one and only lemon tree is loaded with clusters of dainty little pink and white flowers.  Any my wisteria!  It welcomes me back with such vivid purple (or blue):


                                                                  I waited three seasons for this to flower. 

As I was going round the garden pruning and liquid-fertilizing, I marveled at how time could not be rushed, how waiting was paying off, and how often my energy was misused in being inpatient. 


                                     no name flower 1                                                                      no name flower 2


                                                                                 and other no name flowers

Since I came back from my baking classes in San Francisco, I had made 6 less than satisfactory breads; three on my Kitchen Aid Artisan stand mixer (which has a C hook, not the spiral hook which comes with the Kitchen Aid Pro stand mixer), two on my Panasonic bread machine (dough mixing function only) and one by hand.  I find it hard to adapt the techniques I learned in the baking school to home set-up - our equipment are different, our starters are different, and our dough temperatures are perhaps different too, etc. etc.  Our instructors foresaw these problems, and they emphasized the need for us to learn to "read" the dough rather than mechanically following instructions or formulas.  We were asked constantly during the mixing process to check gluten development by window paning and by simply tugging at the dough to feel its strength.  But all this is easier said than done.

All that I can do is to keep trying.  The idea of this 7th bread came indirectly from Safa, our instructor at the Artisan I course.  It was my last Saturday in San Francisco; I was on my way to Ferry Plaza market and I ran into him on the train; we chatted all the way.  He said he recently made a bread and he called it 30/30, not that there is anything magic about the number 30, but it's just that it is easier to remember since it has 30% soaker and 30% levain (in relation to final dough flours).  So here I experimented with my 50/50 - 50% Poolish and 50% Levain.

The purpose was to see how this would vary sourdough's flavor profile. I have learnt that the acidity you get from poolish as well as levain that is fed more frequently than just once a day is lactic acidity (e.g. yogurt) as opposed to acidic acidity (e.g. pickles).  A classmate at the Artisan course who had done the bakery tour at Boudin bakery museum in San Francisco told me he saw a baker there use the starter straight out of the refrigerator.  Their San Francisco Sourdough is famous for its sourness which is not to my taste.  I imagine if the starter is fed only once a day and is kept in the refrigerator for part of the feeding cycle such that it stays in the anaerobic condition for a long time the acidity can be developed quite strongly.  I am a fan of Chad Robertson's rustic sourdoughs.  I was reading about him in "A Day in the Life at the Bay Village Bakery" in the Bread Builders and Alain Ducasse's Harvesting Excellence; and interestingly it is mentioned that he uses a brief two-hour final stage of levain expansion before he mixes up his doughs.  I imagine this "levain expansion" would be the aerobic stage of levain build-up where the little beasties are in rapid reproduction (rather than fermentation).  I don't know for sure but I imagine too his levain would be fed more than once a day and would most likely sit in room temperature.


Formula for my 50/50

Early morning - prepare Levain and Poolish, allow for 6 to 8 hours to ferment, depending on your room temp

Levain

  • 80 g bread flour
  • 24 g medium rye flour
  • 78 g water
  • 52 g starter @75% hydration

(Note: this starter is on a two feeding a day cycle and stays in my room temperature of around 18 - 21C / 65 - 70F)

Poolish

  • 117 g bread flour
  • 117 g water
  • A very small pinch of dry instant yeast (or 1/4 of a 1/3 tsp)

Late afternoon - prepare the final dough

  • 400 g bread flour (Australia's Laucke Wallaby unbleached bakers' flour, protein 11.9%)
  • 34 g whole wheat flour
  • 34 g rye flour
  • 275 g water
  • 14 g salt
  • 234 g Levain (all from above), which is 50% of final flours
  • 234 g Poolish (all from above), which is 50% of final flours
  • Extra medium rye flour for dusting

Total dough weight 1.2 kg and total dough hydration 68%

  1. I mixed all ingredients in my Kitchen Aid for 4 min at the first speed then another 6 min at the 4th speed, at which point the dough did not feel very strong.  I pulled it out of the mixer any way because I planned to supplement by stretch and folds during bulk fermentation.
  2. I placed the dough in an oiled container and gave it two letter folds. After the first letter fold, the dough was rotated 90 degrees then letter-folded again, and then the dough was turned upside down so that the folds faced downwards (ie, right side was up).
  3. Bulk fermentation was 2 hours with a set of two letter folds (as above) every 30 minutes.  I turned the dough over first (so the right side was down) before I did the letter folds and when I finished the folds, I turned the dough over so that the folds faced downwards (the purpose was so that the dough stayed tight.).
  4. After 2 hours, I pre-shaped the dough into a tight ball, and while it was resting, I dusted a linen-lined basket with medium rye flour.  After a rest of 20 minutes, the dough was shaped into a boule and placed in the basket and covered with a plastic bag.  I placed it into the refrigerator to retard (for 13 hours).
  5. The next morning the dough was baked cold at 220C / 440 F for 50 minutes with steam for the first 10 minutes.


This sourdough has the flavor profile that I like: the lactic acidity from the Poolish and the levain, the sweetness from the bread flour, and the richness from rye and whole wheat.  All round the flavor is complex and the after taste is long lasting.  It is mildly chewy, very pleasant.

I'd like to work on my scoring.  Also I am finding it tough to apply what I learned on the mixer I have at home.  Perhaps I need to mix my dough to stronger gluten development in order to have a bloom.  Or perhaps the blind faith in a perfect mixer is a sign of no faith in one's self.  Whatever it is, for now, this:


with a view of this:


is what I need.

Shiao-Ping

Pages

Subscribe to Recent Blog Entries