Submitted by PiPs on December 17, 2011 - 4:31pm

Sunflower Sesame Wholesome Wholemeal + Roasted Malt Grains


It is 4:45am on a quiet and cool Sunday morning.  I am taking my time … a cup of tea while listening to the birds. I can smell mangos on the table next to me.

Nat and I packed a lot of effort into yesterday. The yard work is done, and in between all the mowing and trimming necessary after summer rain I managed to put a few loaves of bread through the oven.

Have you ever stopped to think about a grain of wheat? I am slowly learning the scientific terms and descriptions … but my brain is not really wired that way. What I am slowly starting to appreciate is that these little grains are really packets of life. I don’t stop and take the time to think about this enough. They hold all that is required to germinate … just needed is the right balance of moisture and warmth.

For the baking this weekend I wanted to take a step beyond sprouting into the world of malting. During the week I sprouted wheat, rye and barley grains. After drying (kilning), I gently roasted the grains in search of flavour and colouring, not diastatic power or enzyme content. The house smelt amazing during this process …

… I now wanted to try them freshly milled in bread … and it turned out Nat’s parents were staying with us – to offer them bread is the perfect excuse to bake.

I decided upon the sourdough formula from Richard Bertinets book Crust. This formula was probably the first I knew off the top of my head. I have made it so many times in all sorts of weather with every flour combination imaginable. It is a 75% hydration dough with 25% of the total flour being pre-fermented in a stiff levain. With this amount of pre-fermented flour you need to pay attention to the ripeness of the levain builds as they have a big impact on the final dough.

Included in this I combined roasted wheat and barley malt flour at 5% of the total flour. I have been racking my thoughts on a way to best describe the aroma and taste of the roasted malt flours. I can’t. There is malt flavour in the roasted barley but also stronger rich dark toasted overtones, especially when combined with the malted wheat.

The difference was apparent as soon as I combined the ingredients. You could smell the malted flours and see them streaked throughout the autolysing dough.

On Saturday morning I took the risen bread from the fridge and allowed it to come to room temperature before filling the waking house with the aromas of fresh bread.

In the end I think the roasted malt flours did more for the colouring than flavour. The blistered crust is packed with colour and caramelized flavour while the crumb is a little darker but I find it hard to pick a noticeable difference in the overall flavour. I thought this strange after the difference I had sensed in the mixing stages but with a crumb so soft that we struggled to cut it without serious squashing and squeezing – it was deemed a delicious success.


Sunflower and Sesame wholesome wholemeal

I have noticed how much I missed using the mill after last weeks bake of ciabattas and brioche. I somehow felt disconnected from the bread I was making. It all tasted great but it wasn’t ‘wriggling with life’. I missed the planning and preparation, the smell of freshly milled grains … oh and the eventual endless cleaning I seemingly produced. The vacuum and I are getting very well acquainted.

I pictured bread with freshly milled grains and roasted malt flour packed with seeds. Instead of an endless variety of seeds I paired two - sesame and sunflower. The aromas of these lightly toasted seeds complimented the roasted malt wheat flour bringing a richness and depth to this wholesome bread.

Formula

Overview

Weight

%

Total dough weight (minus mix-ins)

2000g


Total flour

1081g

100%

Total water

919g

85%

Total salt

20g

2%

Prefermented flour

270g

25%

Desired dough temperature 24°C


Levain build – 8 hrs 18-20°C


Starter (not included in final dough)

135g

50%

Flour (I use a flour mix of 70% AP flour, 18% fresh milled wheat, 9% fresh milled spelt and 3% fresh milled rye)

270g

100%

Water

135g

50%


Final dough


Levain

405g

50%

Freshly milled wheat flour (Four Leaf biodynamic grains)

761g

94%

Roasted malted wheat flour

50g

6%

Water

784g

96%

Salt

20g

2%

Mix-ins


Sesame seeds lightly toasted

50g

6%

Sunflower seeds lightly toasted

210g

25%

+ Sunflower seeds for coating


Method

  1. Autolyse flour and for one hour. (hold back 50 grams of water)
  2. Meanwhile lightly toast sunflower and sesame seeds until golden and allow to cool.
  3. Add levain to autolyse then knead (French fold) 5 mins. Return the dough to a bowl and add salt and 50 grams of water and squeeze through bread to incorporate (dough will separate then come back together smoothly) then knead a further 10 mins.
  4. Gently mix in seeds until combined.
  5. Bulk ferment two hours with one stretch-and-fold after the first hour.
  6. Preshape. Bench rest 20 mins. Shape. Spray the outside lightly with water and roll in untoasted sunflower seeds.
  7. Final proof was one hour at room temperature (25°).
  8. Bake in dutch oven for 10 mins at 250°C then 10 mins at 200°C. Remove loaf from dutch oven and bake a further 20 mins at 200°C.


After a day of mowing and raking, it was magic to stop and savor a slice of this while still warm. To top it off ­– a scraping butter. Sigh …

The Four Leaf milling grains lend their typical golden hue to a soft crumb packed with seeds. The sesame is subtle and appears in the background on occasions to remind you of their presence while sunflower seeds are the champions – from the tender bite in the crumb to the roasted crunch on the crust to the final enjoyment of picking at fallen seeds on the plate.

All the best,
Phil 

Submitted by hanseata on October 30, 2011 - 11:16am

SIMIT - TURKISH SESAME BREAD


Ring shaped sesame simit is very common in Turkey, as well as in other Middle Eastern countries and the Balkans. It comes in larger and smaller sizes, and, also varies in crunchiness and chewiness, depending on the region. Some are softer, made with apple syrup and olive oil, and some are crisp and lean.

After having my first simit from a fabulous Turkish bakery in Delmenhorst/Germany (http://www.thefreshloaf.com/node/25706/turkish-delight), I was eager to try my hand in it.

I studied a lot of recipes - fortunately many Turkish women post in German cooking websites. Some of those descriptions were a bit too vague for a newbie (like Grandmother's: "Take a handful of flour, some olive oil, and then put in some eggs"), and others more specific. They varied greatly, so I decided on a lean version, like the simit I had in Delmenhorst, but I made it a little smaller, bagel size. 

The result was really nice - my husband and I loved the sesame crunch!

Dough:
500 g Italian 00 flour (or unbleached pastry flour)
5 g instant yeast
165 g water, lukewarm
125 g yogurt, lukewarm

7 g salt

Topping:
1 egg white, mixed with 1 tbsp. water, for brushing
sesame seeds, for sprinkling

DAY 1:
1. Mix together yogurt and water, and stir in instant yeast, until dissolved. Add all other dough ingredients, and mix at low speed (or with wooden spoon) until all flour is hydrated. Let dough rest for 5 minutes.

2. Knead at medium-low speed (or with hands) for 2 more minutes, adjusting with a little more water or flour, if needed. Dough should be supple and very tacky, bordering on sticky. Resume kneading for another 4 minutes. Dough should still be quite tacky.

3. Transfer to a lightly floured work surface. With wet or oiled hands, gently extend into a rough square. Stretch and fold back and front side like a business envelope, then, also left and right side.

4. Pick up dough package, tuck sides under to form a ball, and place, seamside down, into an oiled bowl. Cover, and let rest for 10 minutes.

5. Repeat these stretches and folds 3 more times, at 10 minute intervals. After last fold, place dough into oiled container with lid, and refrigerate overnight.

DAY 2:
4. Remove dough from refrigerator 2 hours before using.

5. Divide dough into 8 equal pieces. First shape into rolls, then, with your hands, roll into 12"/30 cm strands (if dough resists, let rest for 5 minutes, before continuing). Shape strands into rings, pressing ends together well to seal. Place on parchment lined baking sheet.

6. Preheat oven to 490 F/225 C, including steam pan. Brush dough rings with egg white, and sprinkle with sesame seeds. Spray with oil spray, cover with plastic wrap. Let rise for ca. 1 hour, or until they have grown to almost double in size.

7. Bake simits for 7 minutes, steaming with 1 cup boiling water. Rotate baking sheet 180 degrees, remove steam pan, and continue baking for another 8 minutes, until breads are golden brown.

8. Let cool on wire rack.

It is necessary to use a low protein flour, like the German type 450 or Italian 00. Unbleached pastry flour is a good substitute - all-purpose flour has too much gluten. Even though this bread can be made in one day, the taste definitely improves with overnight cold fermentation.

Recipe adapted from Merosh's recipe in www.kochbar.de

Submitted by em120392 on January 15, 2011 - 8:21pm

BBA Challenge Bagels/High School Project

Hey guys! I just wanted to thank you again for your encouraging comments on my bread-baking-project for school. I appreciate your thoughts very much! =]

I made bagels the other day, and wanted to share my post with you guys.

Here it is!

(my brother and i share a blog: http://bakingacrosscountry.wordpress.com/ )Originating in Poland in the 1600s, Bagels came along with Jewish immigrants to Ellis Island. Since many people of Jewish descent settled in New York, bagels have since been a tradition in the City.

The word bagel is derived from the German word for "to bend," symbolizing the round shape of the bread. Bagels were thought to bring good luck to the receiver of the bread. Usually, women who just gave birth received them for good luck as well as a symbol representing the cycle of life due to their circular shape.

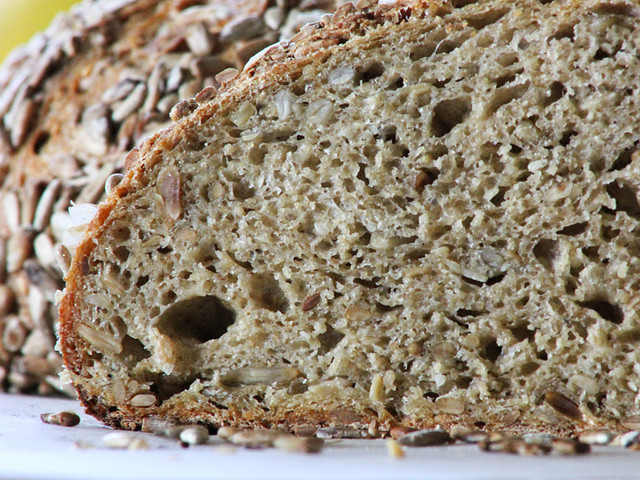
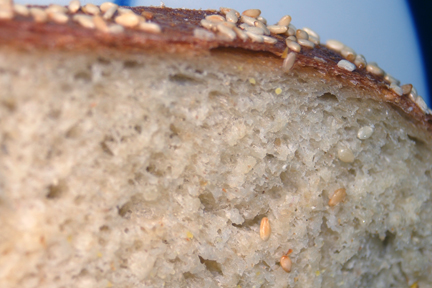
The bagel gains its distinct chewiness from being first boiled, and then baked at a rather high temperature. A prolonged, cool second rise contributes to the bagels developed flavor, as well as the "fish eyes" on the crust. "Fish eyes" are raised bumps on the surface of the bread.

The first time I made bagels a few years ago, I was foolish and used whole wheat, no-knead dough from Artisan Bread in Five Minutes a Day. Although this dough made fine boules, the bagels dissolved in the boiling water, leaving broken lumps of chewy dough. Nevertheless, I was determined to find the perfect bagel recipe.

My brother, Evan, has been baking his own bagels weekly for about a year now. Out in California, each bagel costs over a buck, and they're spongy rolls. Out here in New Jersey, we sometimes get good bagels-but mostly, they're doughy and the size of your face.

Reinhart begins his recipe with a sponge, combining water, yeast, and flour into a thick-pancake like batter. After about two hours, I added more yeast, flour, salt and honey. I tried to mix the ingredients together, but flour flew out everywhere, making a giant mess. I tried to knead the dough in the Kitchen Aid, but the dough was so stiff, I could smell the motor straining.

That's why we have hands, I guess. For about ten minutes, I kneaded the stiff dough until my arms hurt, and the dough passed the window pane test. I measured out the dough into twelve even pieces (thank goodness for a scale). However, 4.5 ounce bagels were a bit too large for breakfast, and I think making about 16 would be a better portion.

After letting the dough rest for a little bit, I shaped them into bagels. I tried both ways, by sticking my finger through the dough and stretching the hole out, and also by forming them from a coil. I found that by poking my finger through, the shape of the bagel was more consistent, but I'm sure with more practice, I could get better at the coil-method.

I let the bagels rest again for about twenty minutes. Reinhart suggests a test for readiness: I placed one piece of shaped bagel dough in a bowl of water and saw it immediately floated.

After the test, I placed them on baking sheets, covered them with plastic wrap, and put them in the fridge for two nights.

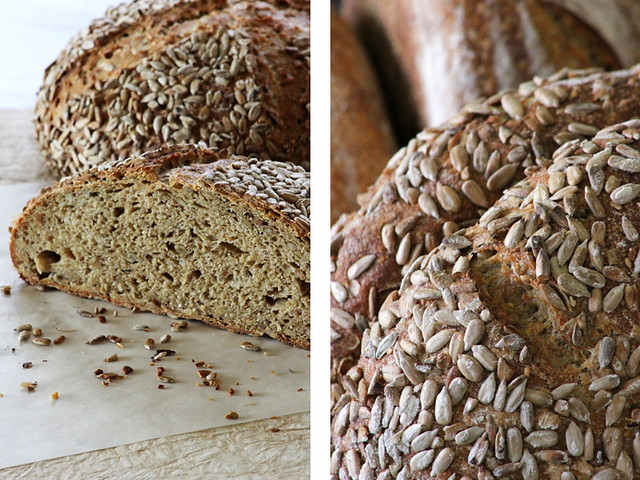
On the second night, I brought a pot of water to a boil with an added tablespoon of baking soda. I didn't want to crowd my pot, so I only boiled four bagels at a time, for about a minute per each side. Immediately after boiling, I put them on a cooling-rack to drain, and sprinkled over a combination of sesame and poppy seeds, as well as some sea salt.

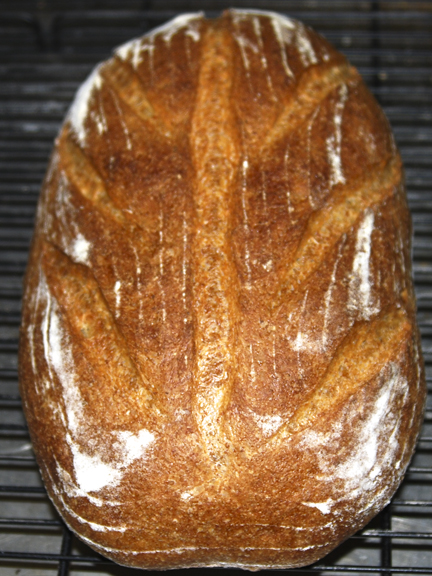
After boiling all 12 bagels, I baked them in a 500 degree oven for 5 minutes, rotated the pans, and baked them about 7 minutes more at 450, or until they were deep golden brown.

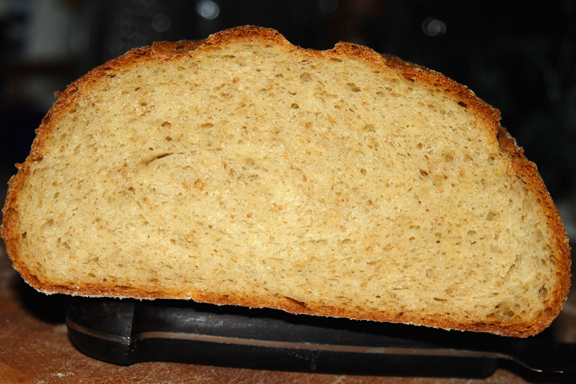
The next morning, I had a bagel with cream cheese for breakfast. Wow. They beat any one of the partially-cooked ones I get from the bakeries in my town. Since there are only three of us living in my house right now, we froze half of the bagels for future use. I also gave my mentor, Mr. Esteban a handful of bagels to share with his family. I hope he enjoyed them!

Besides my finicky mixer, this recipe was super simple and didn't require all that much effort (but more utensils than normal to clean). Rather than spending 12 bucks for 12 bagels on Sunday, I can bake these (better) bagels for a fraction of the cost. Next time, I'll try to find malt barley to make more authentic bagels, but for now, these are awesome!

Olver, Lynne. "Breads." Food Timeline (2011): n. pag. Web. 14 Jan 2011. <http://www.foodtimeline.org>.


Submitted by ehanner on September 10, 2010 - 5:52am

The taste of Tahini


A few Months ago, SteveB posted his work using Tahini in a bread to improve the flavor of sesame. His post on Breadcetra can be found here. As usual Steve does a great job detailing the procedure and makes a wonderful bread.

Steves formula calls for about 6% by bakers percent Tahini. My loaf was 400 grams of a combination of 5% WW and 10% Rye and 85% AP, to which I added 10% (40g) tahini paste. I used 2% milk for the liquid, warmed to arrive at a dough temperature of 76F. The IDY was added with the flours (1/2 tsp) and the 8 grams of sea salt was held until the dough had absorbed the liquid for 30 minutes. Mixing and folding was done by hand.

This dough was mixed to 70% hydration but with the whole grain flours it felt like a 65% mix. I was shooting for a soft crumb sandwich bread with a hint of sesame. I decided to leave the seeds off this first time so I could tell if the amount of tahini had any appreciable effect on its own. The oil in the tahini paste plus the use of milk made for a very nice soft crumb with just a hint of sesame aroma. Next time, I'll use seeds on the crust and get the full effect. I think I'll switch to using water instead of milk also as the crumb is softened by the oil in the paste.

Eric

Submitted by SteveB on July 4, 2010 - 6:04am

Tahini Bread


For any who might be interested, I've described the baking of tahini bread here.


SteveB

www.breadcetera.com


Submitted by ehanner on January 23, 2010 - 11:37pm

My Take on DSnyder's Improved Greek Bread


I've never had really good Greek bread. But, I have heard enough about how great it is that I've been interested in working on it for some time. When dsnyder and I were discussing the formula a while back, he let on he has a daughter-in-law from Greece and maybe she would help tune this up to a respectable loaf.

Here is Davids posting of the improved version, after experimenting with his DIL.

I followed Davids suggestions except for the mixing and folding. I mixed in my DLX after a 30 minute rest, for a total of 3 minutes, using the roller. Then I folded it 3 times in a bowl over the next 3 hours as it fermented. It was a silky smooth dough, very nice to handle. After dividing in two and pre shaping, I tightened the boules and placed them in linen lined baskets for proofing. It took 1-1/2 hours for the proof and the dough temp was 74F.

I also added a few drops of toasted sesame oil to the dough, hoping to get some of that great aroma and boost the lightly toasted seeds on the surface. I'm afraid I would say the desired effect of the oil was not realized. There is a definate sesame aroma but I think it's from the seeds.

After reading Davids comments about his oven temperature and the brown color he got, I thought I would start with 430F and reduce to 410 when I rotated the loaves. The crust color isn't as dark as it appears. I like the color but I also think it could be a little more golden and less orange/brown. A lower and slower bake perhaps.

There is a little bitterness in the taste I'm not sure about. I don't have a lot of experience with Durum flour. Does anyone know if that is normal with Durum?  My daughter was bugging me to cut it so after 20 minutes I relented and had her carve it up. There isn't a hint of sweetness, with 2 T of honey, I'm a little surprised.

Eric

Submitted by thewat on January 4, 2010 - 2:45pm

Italian sesame / olive oil flat bread / cracker?

A year or two ago I spent a week in Marche, Italy, and at two separate bakeries - one in Ancona and one just South - I bought a flat bread / cracker, 1/2 to 3/4 inch thick, loaded with olive oil & sesame & sunflower seeds. It was thick & crunchy but not dry tasting (because of all the olive oil). I could see the sunflower seeds & taste the sesame. It looked like it had been a really wet dough, cooked in a rectangular pan. The second place I got it said it was called "Pizza Seca." I can't find anything like it, either in my books or on the web. Anyone know? I found it slightly addictive. 

Submitted by Susan on December 6, 2009 - 10:45am

Seedy Triangle SD


Just yesterday's bread...

100g starter (100% hyd.), 315g water, ~1/4 cup mixed sesame seeds, 9g salt, 1 tsp toasted sesame oil, 400g All Trumps high-gluten flour, 50g coarse whole wheat flour

Keep your dough close to 76F throughout mixing and fermentation.

Mix starter and water.  Add seeds, salt and oil, mix.  Add flours, mix just until flour is wet, rest 30 min, fold 3x at 30 min intervals.  Let rise until near doubled.  Shape, put in triangle brotform, and deposit in fridge for overnight.  Bake at 500->460F after an hour out of fridge, under cover for first 20 minutes.  It's a little lopsided 'cause I swiped the loaf with the edge of the roaster as I covered it.  C'est la vie!

Susan from San Diego

Submitted by subfuscpersona on June 18, 2009 - 12:26pm

Sourdough Sesame Seed Spelt Batards


For over 3 years I've been baking artisan style breads in my (really lousy) gas oven without a baking stone but was never quite satisfied with the result. I finally purchased a good baking stone. This is my first effort with the baking stone...

Sourdough Sesame Seed Batards with Spelt Flour

The height of each of these batards is about 4 inches (compared to the 3-1/4 inch height I got without a stone) for a similar type of dough and prebaking dough weight.

The recipe (one of my own devising) uses a white flour 100% hydration sourdough starter. About 20% of the total flour weight is spelt flour (home milled from organic spelt). In an attempt to add sesame flavor to the bread without compromising rising, I use 8% sesame seed meal, which is ground from whole sesame seeds using a small electric coffee mill. Additional sesame seeds are on the outside of the dough. Dough hydration is 68%

I am pleased with this first effort using my new baking stone, although I obviously need to become familiar with this newest addition to my bread baking equipment arsenal.

Onwards and upwards - SF

==========================

For those who are interested, this stone is a Dacor baking stone. It is 1/2 inch thick and measures 15" x 20". This was a good size for my oven, as my oven rack measures 17" x 25". I believe that smaller size baking stones from Dacor are marketed under the brand name Old Stone Oven; these smaller stones are widely available.

The stone was purchased from fantes.com for $50 USD plus shipping. The packaging was excellent and shipping was prompt.

I am including two images of this baking stone from the fantes.com site in this post to give an idea of what the baking stone looks like...


Submitted by SteveB on March 7, 2009 - 2:10pm

Scali


For those who might be interested, I've detailed my baking of Scali here:

http://www.breadcetera.com/?p=164

SteveB