The Fresh Loaf

A Community of Amateur Bakers and Artisan Bread Enthusiasts.

Blogs

aptk's picture
aptk

Perfect on this winter stormy night!

dmsnyder's picture
dmsnyder

Last week, my breads had a more or less "command performance" in the Italian language class my wife and I are taking. I've been a bit uncomfortable taking food since the class meets in  a deli/cafe/wine bar. Anyway, I decided to let it be on the teacher's head. I took a large wicker basket with half slices of 3 breads - a seeded sourdough Italian bread with 20% durum flour, a walnut-dried fig bread based on my San Francisco-style sourdough and a "Overnight Country Brown" from Ken Forkish.

Everyone seemed to enjoy all the breads. I was most delighted by the reactions of a fellow student who is a professor of art at the local State University. He was munching on the Forkish bread and carrying on about how even the local "French Bakery" (which is pretty good) puts "too much air" in their breads. He was talking, I'm sure, about the fluffiness you get when you spike sourdough breads with yeast. He thought the Country Brown was a lot like the breads he had had in France. (It is very similar to some pain de compagne I've had in the Dordogne Valley.  And we had a "guest" sitting in, which we often do. Clara is a native Italian -  an older woman who was the cook/owner of an Italian Restaurant/Pizzaria that is now closed. I understand she still has her old commercial mixer at home and bakes her own bread and makes pizzas and calzones. Her compliments meant a lot to me. 

Speaking of Forkish's breads, Fresno is now in our version of "Fall." My kitchen temperature is running right around 70 dF. I've made a couple FWSY formulas in the past 2 weeks - one is fermenting now - and they are keeping to the timings in the book more closely. I'm still not able to let an "overnight" dough bulk ferment at room temperature overnight.  I'm not too unhappy about this. The cold retardation makes the breads more sour, which i don't mind.

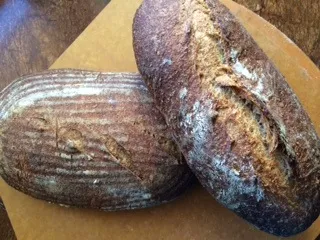
The breads at the head of this blog entry are some San Joaquin Sourdough baguettes and San Francisco-style Sourdoughs with 20% whole wheat I baked yesterday. 

We're having Thanksgiving at our house for the first time in several years. Our sons and their families and one of my sisters and her son will be with us.  I'm looking forward to it. It's time to start planning baking for the holiday weekend. Some breads for stuffing, some for morning toast and sandwich rolls for sure. 

David

Floydm's picture
Floydm

So yesterday around 11am we decided on a meal that a loaf of fresh bread would be good with.  I didn't have a refreshed starter or preferment going, but I quickly mixed up a cup of AP flour, a cup of luke warm water, and about a third of a teaspoon of yeast and let it sit while I figured out what I wanted to do with it.

About two hours later I took a look.  It wasn't even close to ripe and had just a few bubbles, but it was better than nothing, so I mixed it is with around 600 more grams AP flour, 400 or so grams water, and 15 grams kosher salt.  Oh yeah, and another 2/3 teaspoon yeast.  Mixed it up real well until I could see good gluten development and then let it sit.

Folded an hour or so later, around 2pm, then again around 3pm.  I split and shaped it around 4 and baked it around 5.

It came out really nice.  The crumb is lovely, I think, about as nice as I've ever gotten from a dough without a meaningful preferment and with such a short rise time.  I guess that is the sign of the better gluten development?

The flavour is a bit plain, as one would expect, but not bad at all.  It is also staling slower than I typically expect a straight dough to stale.  I'm not sure what to make of that, but I'll have to try this again.

Grandpa Larry's picture
Grandpa Larry

I found this recipe today while going over some old recipe cards that appeared in the back of a kitchen drawer. I'm certain I copied it out of a paperback book on sourdough breads, years ago. I can't find the book nor do I remember its' title or author. I've never tried the recipe, though I'll likely give it a go soon.

Does anyone here know anything more about it?

BUTTERMILK YEAST

 2 Cups Buttermilk

3 Cups corn meal

1pkg dry yeast

½ tsp salt

¼ C warm water

Sterilized corn meal

white flour


Scald 2 C buttermilk with 3 C corn meal over low fire, stirring until a smooth mush is achieved.

 When cooled to warm, add yeast dissolved in ¼ cup warm water. Let stand. When it rises, stir it down and let rise again 3 times.

 Add enough sterilized corn meal and white flour in equal amounts to make very stiff dough. Use a rounded teaspoon to make each cake.

 Dip in corn meal. Lay on trays of absorbent paper and dry at room temp. Turn often and change paper as needed.

Store in fridge. 1 cake=1 pack dry yeast in starters and overnight sponges.

 Sterilize corn meal in oven at low temp for 1 hour.. Stir often. Do not allow to burn.

Floydm's picture
Floydm

The first was with chanterelle mushrooms on a white sauce.  My wife's all time favourite.

The second BBQ chicken with red onion and cilantro. The kids got to it before I got my camera out.

The third chicken, red onion, and pesto.

All came out well.  I was playing with Reinhart's American style pizza dough.  It is good too and makes a thicker, stiffer slice than his neo-Neapolitan dough does, one that is easier to pick up with your fingers rather than eat with a fork and knife.  It is a good option to consider for a setting where you want people to be able to grab a slice and wander off. 

Isand66's picture
Isand66

Today it's snowing.  Not enough to bring out the snow-blower but enough to enjoy a nice cup of soup with a sandwich made with my hearty multi-grain bread.  I've made similar breads before and I followed the basic procedure but I varied the soaker/scald ingredients and the combination of flours in the main dough.

I used some Vermont maple syrup infused with vanilla to add a touch of sweetness to offset some of the bitterness from all the whole grains used in the recipe.

I cooked the whole grains with 290 grams of water on my stove top and let it come to a boil for about 5 minutes.  I then transferred the scald to a bowl and let it sit overnight covered.  The scald absorbed all of the water so I adjusted my final water amount accordingly.  I still ended up with a very moist dough but one that was manageable.

I really like the way the crust and crumb came out on this bake.  A nice dark thick crust with a chewy interior, perfect for the cold days and nights ahead.

I have to say I've bought multi-grain breads from the supermarket in the past and there is just no comparison to this healthy and tasty bread.

Closeup1

Multigrain-SD-withSoaker-1

Closeup2

Main Dough Procedure

Mix the flours with the water and honey in your mixer or by hand for 1 minute leaving 50 grams of water to add later.   Let the dough autolyse for 20 minutes to an hour in your bowl and make sure to cover it.  Next add in the salt, olive oil and the soaker and mix for 2 minutes.  Add the balance of the water as needed and mix for an additional 4 minutes.  The dough should have come together in a ball and be tacky but not too sticky.

Next take the dough out of the bowl and place it on your work surface or a clean dough rising bucket sprayed with cooking spray.  Do a stretch and fold and rest the dough uncovered for 10 minutes.  After the rest do another stretch and fold and cover the dough and let it rest for 10 minutes.  Do one more stretch and fold and put the dough into a lightly oiled bowl and let it sit at room temperature covered for 2 hours.  After 2 hours you can put the dough into the refrigerator for 24 hours or up to 2 days before baking.  Feel free to do some additional S & F's if you feel it is necessary.  I baked the bread about 24 hours later.

The next day (or when ready to bake) let the dough sit out at room temperature for 1.5 - 2  hours.

basket

Next, form the dough into your desired shape and put them in floured bannetons, bowls or on a baking sheet and let them rise covered for 2 hours or until they pass the poke test.  Score the loaves as desired and prepare your oven for baking with steam.  I made one large miche for this bake.  I also added some organic oat bran to the bottom of the basket which adds a nice texture to the outside of the bread.

Scored

Set your oven for 525 degrees F. at least 30 minutes before ready to bake.  When ready to bake place the loaves into your on  your oven stone with steam and let it bake for about 5 minutes.  Next lower the temperature to 500 degrees for about 2 minutes and then lower to 450 degrees.   Since I baked this as a miche I then lowered the temperature to 425 degrees about half way through the bake until it was finished.  When you have a nice dark crust and the internal temperature reaches at least 210 degrees you can take it out of the oven and place it on a cooling rack.

Let the loaves cool down for at least an 6 hours or so before eating as desired.

Crumb

CrumbCloseup


trailrunner's picture
trailrunner

Latest attempt at a spelt bread was more what I was after. I still let it proof for one hour before retarding. Since reading Josh's post after I had made this I will move the shaped loaves into the fridge posthaste and not give them any bench time and see what happens. As you can see this has a lovely open crumb and I even got ears :) I attribute this to gentle handling. I incorporated John's sealing during shaping and then proofing the shaped loaf with the sealed side down and then scoring over the sealed area. Pictures show the result. Taste is creamy and crumb is tender.Raisin yeast water at work. Stored overnight in a brown paper bag and the crust is still amazing this AM. Made great toast and I am about to make an aged cheddar grilled cheese. 


just out of fridge : spelt and rye with RYW photo IMG_6707_zps6fdaef10.jpg crust :  photo IMG_6711_zpse8795872.jpg crumb shots: Spelt and rye crumb photo IMG_6712_zps717d048d.jpg  photo IMG_6713_zpsefd0a49e.jpg  photo IMG_6715_zpsac35a1db.jpg

Casey_Powers's picture
Casey_Powers

Well, this was fun!  It is nice to bake and have something to show for it in the same day!  The house smelled wonderful.  My boys and my husband's work benefitted from my labor of cinnamon roll love.  Notice that one giant end spiral. I knew it would not be mine but I hoped.  I think my oldest son or husband got that one fairly early. 

The slurry looked a little too thick so I added some heavy whipping cream.  Instead of lemon zest, oil or other I opted for the maple syrup in the fridge,    Overall, I liked that these made 2 batches of cinnamon rolls/sticky buns. 

vimalalakshmi's picture
vimalalakshmi

It is my first try to make a biscotti.I tried it with a fear whether it'll comeout well or not.My cousin came to help me,i added the ingredients and she mixed it and we baked them.......oh...well well well......the result was sooo good.I never expected that my first try would be a big sucess.I took American style vanilla biscotti and done my variations.I think u all would like it.


Ingredients:

Flour- 2 cups

butter-6 tbsps

vanilla extract-1/2 tsp(i used vanilla pod it gave a good texture in the dough)

baking powder-11/2 tsp

pineapple essence-few drops(don't use more)

salt-1/2 tsp

sugar-2/3 cup

pineapple pieces-1 tbsp(can use tinned,fresh or boiled with sugarsyrup)

dried apricots-1 tbsp(soak in hot water for 10 mins and cut into pieces)

chopped nuts(not finely chopped)-2 tbsp(i used walnuts,badam&cashew,can use dates also)

method:

preheat oven at 350 degrees

1. Beat butter and sugar till creamy.

2. Add in baking pr,vanilla extract,pineapple essence,salt beat well.

3.Add the flour mix well with hands or with paddle attachment then mix in dried apricots,pineapple pieces,chopped nuts mix well till the dough rolls to a ball.

4.seperate the dough into 3 quarters place on part on the floured surface and roll rectangular slightly flatten thesurface and place on the baking sheet.

5.Bake for about 25-35 mins.remove from oven and cool for 15 mins.


6.Cut the bread into diagonals and arrange in the baking tray bake again for 15 mins flip and bake for abt 5 mins.

Cool and store in an airtight container.


Skibum's picture
Skibum

Total flour 300 grams, strong bread flour

Total water 231 grams

Sweet levain @ 100% hydration 25 grams

Yeast water levain @ 100% hydration 25 grams

Salt, 1 tsp or about 7 - 8 grams, should have spent the extra five bucks on the digi scale that gives me the decimal. .  I once again took extra care when pre-folding and folding the boule, making sure the full length of the fold was tucked in nicely.

the dough was proofed seam side down and baked seam side up.

I scored a crescent across the seam I thought most likely to bloom.

The crumb.


So I refreshed my yeast water yesterday and as bake s per dabrownman's directions and made some YW pancakes today with the 'spent' YW,  I also refreshed my sweet levain at the same time and left it on the counter also. 

YW pancakes

100 grams spent YW

100 grams bread flour

I left it on the counter overnight for yesterdays's mix and today's bake and had a massive amount of bubbling dough! This morning I added 1 egg beaten and mixed with 2 Tbs maple syrup adn 2 Tbs melted butter, 1/4 tsp baking powder and mixed it with the flour and YW. The mix took some doing, but when done I mixed in some fresh blueberries, fried it up in the same pan that fried my hone cured/ smoked bacon and YOWSER, some fine breakfast to celebrate myu first day skiing at Lake Louise!

Ahhh, topped with melted butter and real maple syrup.

I discarded the fruit this time. Next tie I will do something with the spent fruit

Pages

Subscribe to RSS - blogs