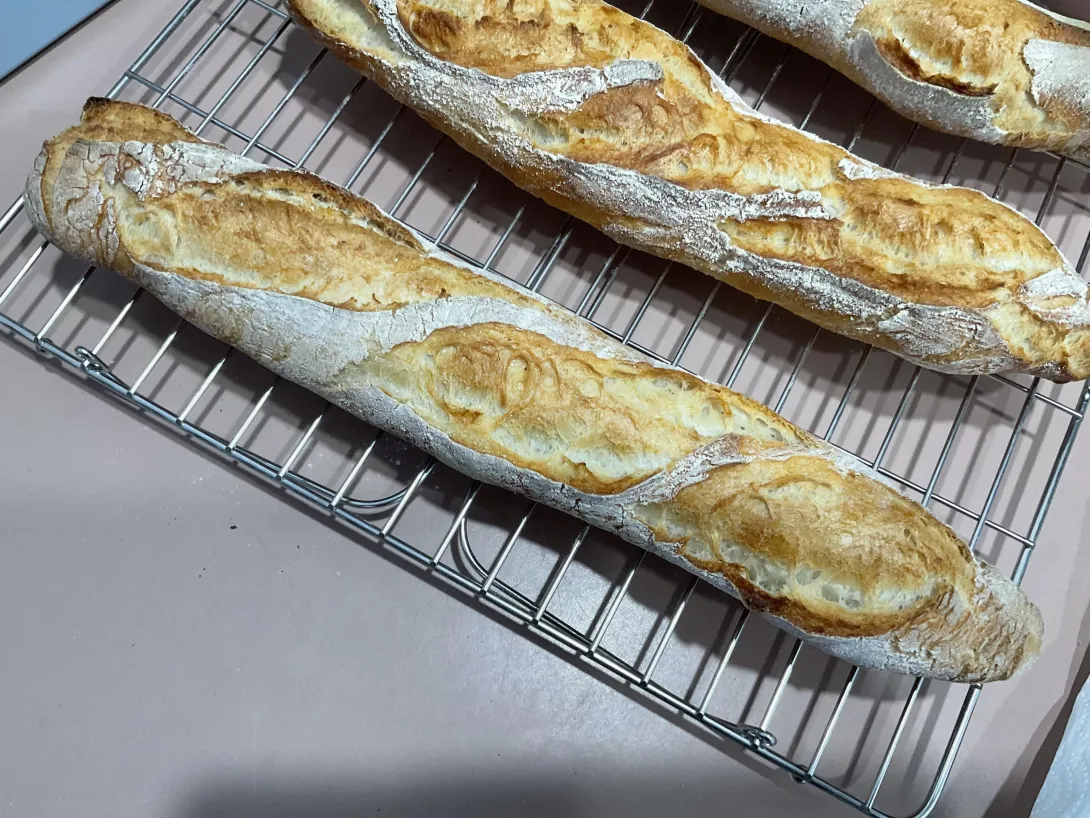
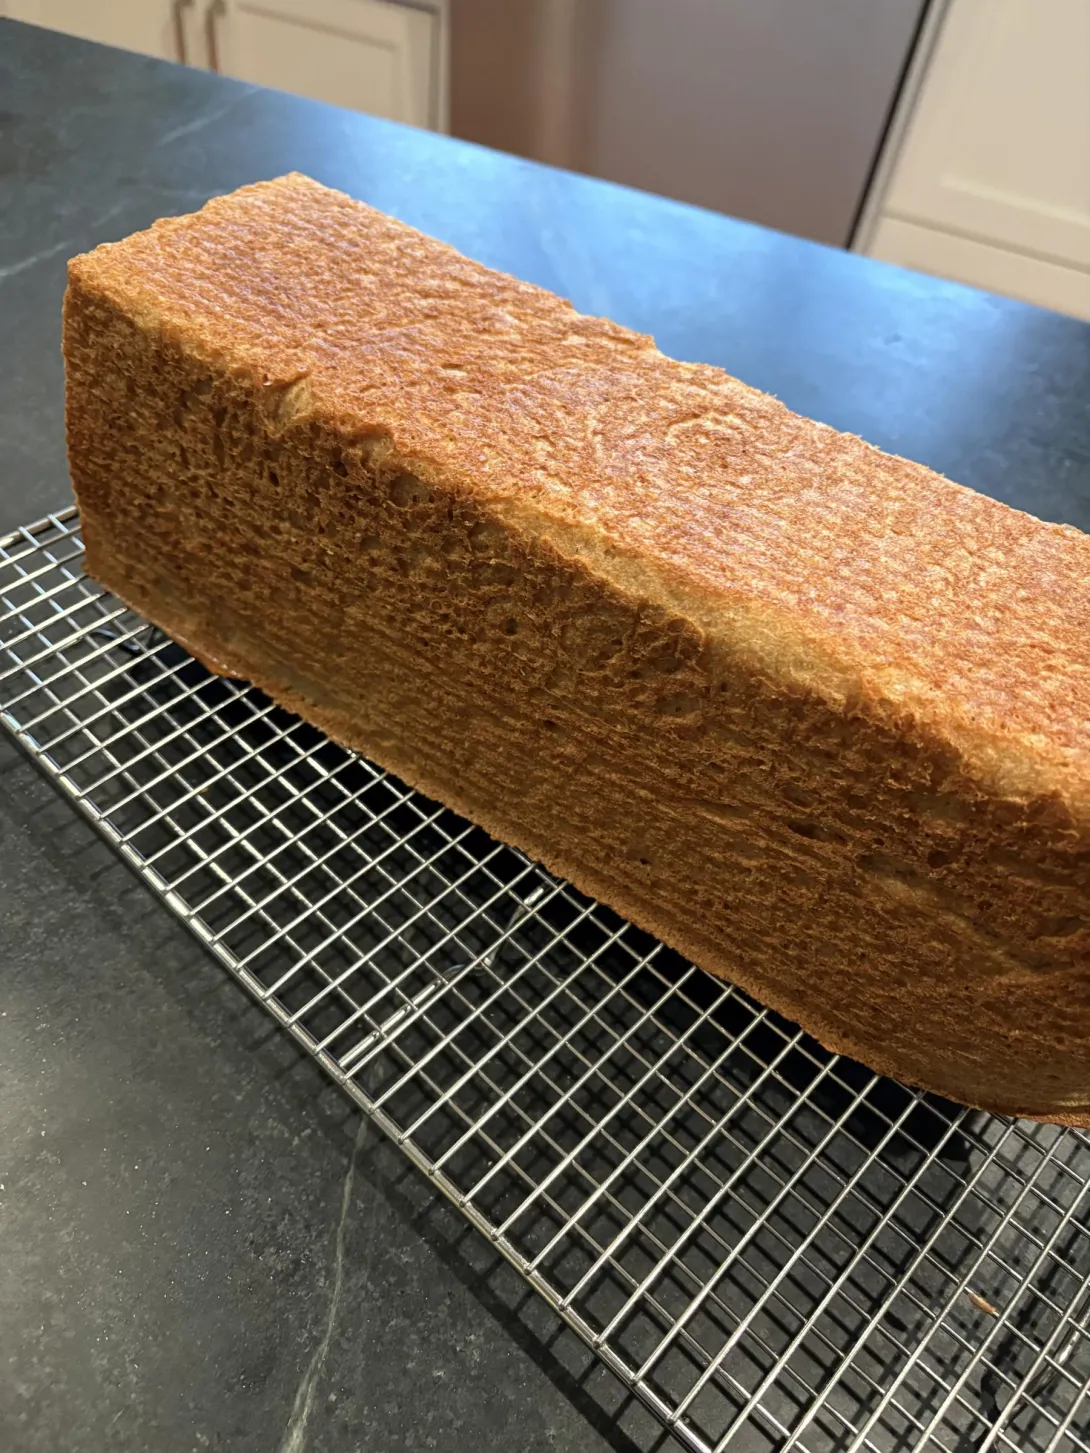
Today's exercise, will begin a two day odyssey.
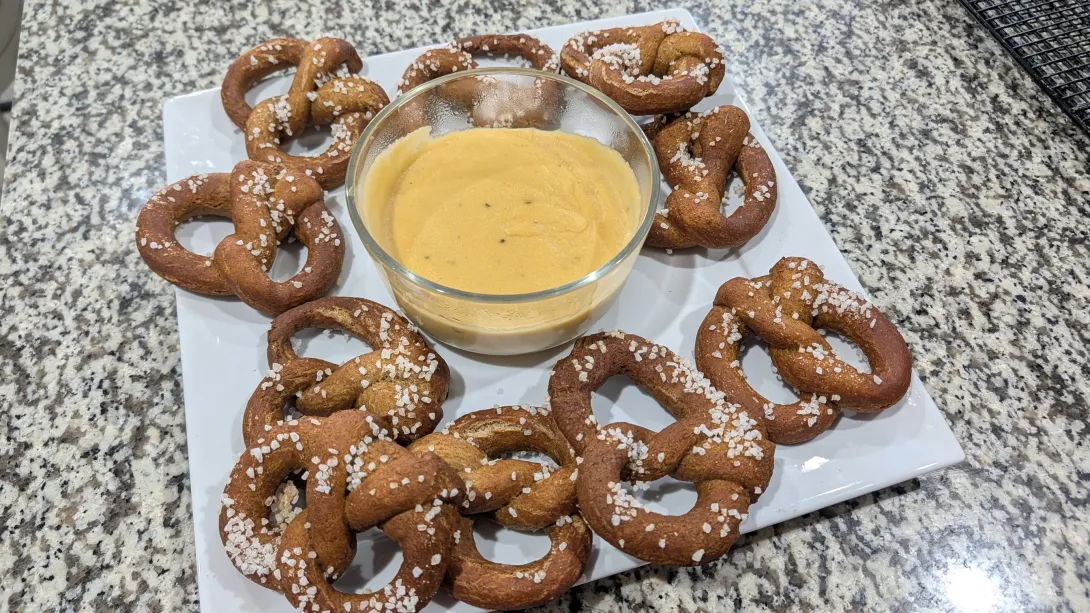
We will travel, (virtually) to the, Macgillycuddy's Reeks in Ireland, where we will source the world renowned stout. From there we trek east, to the Bayerische Alpen in Germany. At it's highest peak we find, the rarest heirloom rye grain. On our way down we visit the reclusive monk sanctuary, where we will endeavor to acquire the closely guarded secret formula. I submit my interpretation of...
Bayerische Brezeln
- Log in or register to post comments
- 11 comments
- View post
- The Roadside Pie King's Blog