Central Florida Sourdough
Hello all,
This is my second bread post on TFL and I'm loving this site!
- Log in or register to post comments
- 4 comments
- View post
- Arbyg's Blog
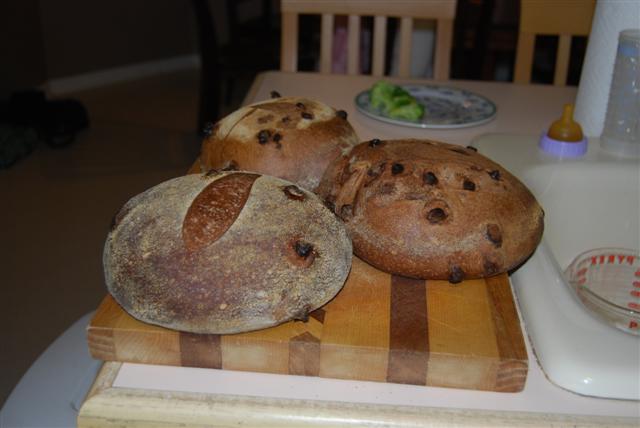
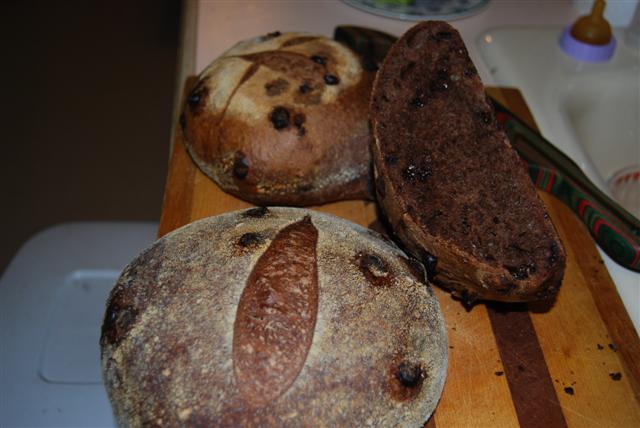
Hello all,
This is my second bread post on TFL and I'm loving this site!
I recently baked Pain au Levain from Hammelman's book 'Bread..." This is the second formula I've tried from this book, following two fairly sucessful attempts at Vermont Sourdough. There are a few differences between the two. Vermont SD starts with a liquid levain while PaL starts with a stiff levain. Hammelman calls for whole rye in Vermont SD while calling for medium rye flour in PaL. Also, a long final ferment is called for with Vermont SD while it is recommended not to go for the long ferment with PaL. I didn't vary from the formula and had pretty sat

My first try at chocolate sourdough was a success! Chewy, not too sweet, the kids loved it, the crust was perfect! Oh, the joy! And the calories and the treadmill to come...he, he, he. Thanks for a great recipe SP!
I have just made my first successful sourdough loaves and I am excited.
Also my first blog entry and first post ever. Been lurkin for a while but I decided to post today's bake. I think they turned out pretty well. Crumb is amazing but I still have more work to do on my shaping and scoring. Thanks to everyone who made this recipe happen.
Crumb

Shape

I want to purchase Brotforms and/or Bannetons and need some advice.
Lined or unlined, that is the question ? I'd hoped to stop at that one question, since I could use the Shakespeare ending, I will anyway :)
I want to get one round and one oval, what sizes should they be ?
There were no loaves in my previous blog post, so I guess it's time to make things right again.
The Roscón de Reyes is the traditional breakfast in Spain for the Epiphany day. It's also found in many Latin American countries and it's very similar to the Gâteau des Rois from the Provence.
I don't have a mixer, and don't really miss it... except when I make this bread. Kneading this dough is hard work, by far the hardest of all the doughs I make.
Fortunately, it's the traditional breakfast for the Epiphany day, and not the traditional breakfast for Saturdays :-)
Welcome to my second blog.
I have posted some details below regarding production of English Hot Cross Buns.
HOT CROSS BUNS
Makes: a, 45 buns @ 65g each; b, 12 buns @ 80g each
Material | Formula [% of flour] | Recipe a [grams] | Recipe b [grams] |
1. FERMENT |
|
|
|
Strong White Bread Flour | 30 | 300 | 100 |
Hi All,
I just wanted to share with you my final bakes of 2009. I was unable to post them earlier as I went to Japan for Christmas and New Years... This was a year of much improvement for me, perfecting my version of baguettes, getting the hang of sourdough, refrigerated bulk fermentation, baking very large loaves, making pizza dough, and kneading large quantities (7-8kg) of dough by hand successfully.
Wishing all of you much baking success in 2010. Now I'm off to do my first bake of the 2010.
Cheers,
Tim