The Fresh Loaf

A Community of Amateur Bakers and Artisan Bread Enthusiasts.

Blogs

dmsnyder's picture
dmsnyder

After last week's 70% rye bread, which I thoroughly enjoyed, I wanted to return to the first rye I had made – Jewish Sour Rye – to see if my tastes had shifted. I made the Jewish Sour Rye from “Secrets of a Jewish Baker,” by George Greenstein.

This is a classic “deli rye,” or “light rye.” It is made with a white rye sour. Rye snobs (who will remain nameless) turn up their noses at white rye because it has so little rye flavor. In fact, most of the time, I make this bread with whole rye. But, this time I made it “by the book.”

Well, not exactly by the book. Greenstein's book provides volume measurements for all ingredients. It has been criticized for this. Last year, I worked out the ingredient weights for the Sour Rye recipe, and these are provided below.


Ingredients


Rye Sour

750 gms

First Clear Flour

480 gms

Warm Water (80-100F)

240 gms

Sea Salt

12 gms

Instant Yeast

7 gms

Altus (optional but recommended)

½ cup

Caraway Seeds

1 Tablespoon

Cornmeal for dusting the parchment or peel.

Cornstarch glaze for brushing the breads before and after baking.


Method

  1. If you have a white rye sour, build it up to a volume of 4 cups or so the day before mixing the dough. If you do not have a rye sour but do have a wheat-based sourdough starter, you can easily convert it to a white rye starter by feeding it 2-3 times with white rye flour over 2-3 days.

  2. In a large bowl or the bowl of an electric mixer, dissolve the yeast in the water, then add the rye sour and mix thoroughly with your hands, a spoon or, if using a mixer, with the paddle.

  3. Stir the salt into the flour and add this to the bowl and mix well.

  4. Dump the dough onto the lightly floured board and knead until smooth. If using a mixer, switch to the dough hook and knead at Speed 2 until the dough begins to clear the sides of the bowl (8-12 minutes). Add the Caraway Seeds about 1 minute before finished kneading. Even if using a mixer, I transfer the dough to the board and continue kneading for a couple minutes. The dough should be smooth but a bit sticky.

  5. Form the dough into a ball and transfer it to a lightly oiled bowl. Cover the bowl and let it rest for 15-20 minutes.

  6. Transfer the dough back to the board and divide it into two equal pieces.

  7. Form each piece into a pan loaf, free-standing long loaf or boule.

  8. Dust a piece of parchment paper or a baking pan liberally with cornmeal, and transfer the loaves to the parchment, keeping them at least 3 inches apart so they do not join when risen.

  9. Cover the loaves and let them rise until double in size. (About 60 minutes.)

  10. Pre-heat the oven to 375F with a baking stone in place optionally. Prepare your oven steaming method of choice.

  11. Prepare the cornstarch glaze. Whisk 1-1/2 to 2 Tablespoons of cornstarch in ¼ cup of water. Pour this slowly into a sauce pan containing 1 cup of gently boiling water, whisking constantly. Continue cooking and stirring until slightly thickened (a few seconds, only!) and remove the pan from heat. Set it aside.

  12. When the loaves are fully proofed, uncover them. Brush them with the cornstarch glaze. Score them. (3 cuts across the long axis of the loaves would be typical.) Transfer the loaves to the oven, and steam the oven.

  13. After 5 minutes, remove any container with water from the oven and continue baking for 30-40 minutes more.

  14. The loaves are done when the crust is very firm, the internal temperature is at least 205 d

    egrees and the loaves give a “hollow” sound when thumped on the bottom. When they are done, leave them in the oven with the heat turned off and the door cracked open a couple of inches for another 5-10 minutes.


  15. After the loaves are out of the oven, brush them again with the cornstarch solution.


  16. Cool completely before slicing.


Jewish Sour Rye


Jewish Sour Rye crumb


Well, the verdict is: I like rye bread – white rye, dark rye, whatever. Each has it's place. The Jewish Sour Rye I had toasted for breakfast with Salami and Eggs was just right. The 70% Sourdough Rye I had for lunch with slices of Smoked Gouda and Cotswold cheese was perfect.


It's not such a hardship, having to make these choices.


David


Submitted to Yeast Spotting on Susan FNP's  Wild Yeast blog (This week, hosted by Nick at imafoodblog)


Jw's picture
Jw

here is an update on some of my recent baking. I started to experiment with a few new shapes.


I don't know what to call it, tubeshape?


On this picture are just a couple of fastbreads, put in the fridge late in the evening, baked early in the morning. Brought them over to a friend for lunch. Made a BIG impression, a lot more then the effort I put in.


Do you know this kind of bread? it is called frysian rye bread. This is from a store, I'll try making it someday. It tastes real good.


Next is a zopf, but also in a different form. Just looks nicer, not easier to cut.


A couply of these will be gone in no time, great with home grown marmalade.


Since my yeast is 'back online', I am making the standard overnight bread again. Biga late at night, started finishing it early in the morning.


This is my bread in ten (hours). Starting a biga as late as possible, then finishing it early in the morning after the sun's salutation, in a couple of hours. I let it rest for 2.5 hours and then do a 2x 30 minutes wake-up before final shaping. Sometimes the scoring looks much better then on this picture, no effect on the taste.

I am actually in San Diego this week, hoping my order from sfbi has arrived... 

Happy baking!

Cheers,
Jw.

hansjoakim's picture
hansjoakim

After rye, I think spelt is my favourite flour to work and bake with. Even though it's closely related to wheat, spelt behaves remarkably different in baking. Whenever I bake mostly white spelt loaves, I opt for a 30 minute autolyse before mixing the final dough. After the autolyse, salt, levain and yeast (if using) are quickly incorporated in the dough. The mixing times tend to be extremely short - just a couple of minutes on first speed is often all that's required. I usually do two or sometimes three folds during bulk fermentation. As the dough ferments, it tends to "sweat", and it appears to release some of the water that was first mixed into it, so well floured hands, speed and a good dough scraper are essential.

Earlier today I baked one of my very favourite spelt loaves. This is a "pain de campagne"-style loaf, slightly rustic with 20% whole spelt, and a stiff spelt levain. I usually take 15% of the total flour from the ripe spelt sourdough. Many bakers have commented that spelt tends to bake to a very dry crumb. I've never really encountered that myself, but that's perhaps because I've stuck with roughly 67 - 68% hydration for these rustic loaves. And with my spelt flours, that translates to a significantly wetter dough than an equivalent 67% wheat-based dough. In this loaf, I also included lightly toasted pine nuts - these nuts lend a complex, pleasing flavour note to all-spelt loaves.

Spelt loaf

I've tried baking these in brotforms before, but I always end up having trouble getting the loaves out in one piece when it's time to put them in the oven. No matter how well I flour the brotforms, it seems that the shaped loaves "sweat" so much, that they're bound to get stuck to them. After several disappointments, I've settled on shaping them into rectangles on top of parchment that I put on the peel. Two to three folds during bulk and a moderately tight shape contribute some strength, and make them stand up pretty well, although I'm proofing them for over an hour.

Spelt loaf crumb

Notice how brown the crumb is - and this is merely 20% whole flour. You can also see that the crust tends to be very thin, but definitely crackly and it packs a most wonderful flavour. Pair that with some toasted pine nuts, and this is a most rewarding loaf! Both spelt flour and pine nuts are costly items in my pantry, but I usually think the flavour of these loaves justify the extra $$$. If you're looking to try something new, definitely give spelt a try. It's not just hippie-loaves, y'know!

As some of you might know, I do have a particularly weak spot for rye. There is admittedly a steep learning curve when one is approaching high ratio ryes, but the rewards are great, and once familiar with how's and why's, it's a lovely (albeit sticky) grain to work with (in my opinion). I was thrilled when Nils, whose ye olde bread blogge is a source of constant inspiration and great knowledge, posted a link to a co-op (?) called Bäko Gruppe Nord in his latest entry. Several most interesting recipes are published at their site, and a couple of them I have bookmarked as "top priority". To start off, I've baked their Herbstzauber - a 60/40 dough that's mixed with rum-soaked dried fruit.

Thinking that a substantial blend-in of fruits would bog down a whole rye dough, I opted for medium rye flour in the 60/40 dough. Here's what I got right after mixing was over:

Herbstzauber dough

Once again, I went for a 1 kg boule, and here's the finished loaf:

Herbstzauber

I think the oven spring was surprisingly good, in spite of all the fruit and raisins in there. I rather generously doused the dried fruit in Cuban rum, so the booze that was not absorbed by the fruit went into the final dough. Terrific! Crumb:

Herbstzauber crumb

I had also fixed my sight plainly on one of Bo Friberg's creations; this time a cake with the humble title of "raspberry cake". Simple as that! Well, it proved to take me the better part of a day to get it all together...

Starting from the bottom, the cake is made with a disc of baked short dough (I used some pâte sucrée leftover dough from the freezer) that's slathered with raspberry jam. Then, make a genoise base and split it in two - put one part directly on top of the raspberry jam, drench in syrup and place a healthy dose of fresh raspberries on top. Pour a (most heavenly tasting) gelatine-based raspberry cream over that, and put final genoise part on top. Once the cream is chilled and set, ice with Italian buttercream and decorate! Here's a shot from roughly half way through assembly: The raspberry cream is just poured over raspberries. Quickly slide on second genoise layer and put in fridge to set.

Raspberry cake

"... you know it balances on your head just like a mattress balances on a bottle of wine - your brand new leopard-skin pillbox hat..." Well, I'm doing the best I can ;) Below is the cake iced with the Italian buttercream. Not exactly pillbox-ed, but it'll have to do. (Need to work on corners, need to work on corners, need to work ...)

Iced raspberry cake

And here's how it came out in the end, with almonds pressed in on the sides, a layer of marzipan on top, and chocolate shavings in the middle:

Raspberry cake

Raspberry cake


Raspberry cake

sharonk's picture
sharonk

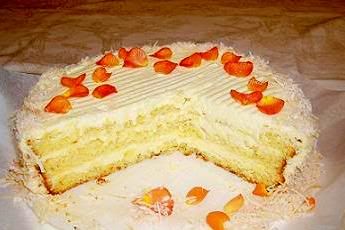
This is an article I wrote for the journal, Wise Traditions, that teaches traditional cooking techniques, including sourdough, for better health.It's a long article detailing my journey from rye sourdough to gluten free sourdough.


After a number of years of building Weston A. Price principles into my daily life I learned I had multiple food sensitivities and had to let go of some beloved foods, namely butter and homemade sourdough rye bread. Unable to find suitable store bought gluten free and allergen free breads I began a journey of culinary discovery that taught me more about gluten free sourdough baking than I ever could have imagined . I coupled Weston A Price principles with modern gluten free baking principles and came up with some lovely breads, muffins and pancakes that have become nutrient dense, highly digestible comfort food for me and my family.


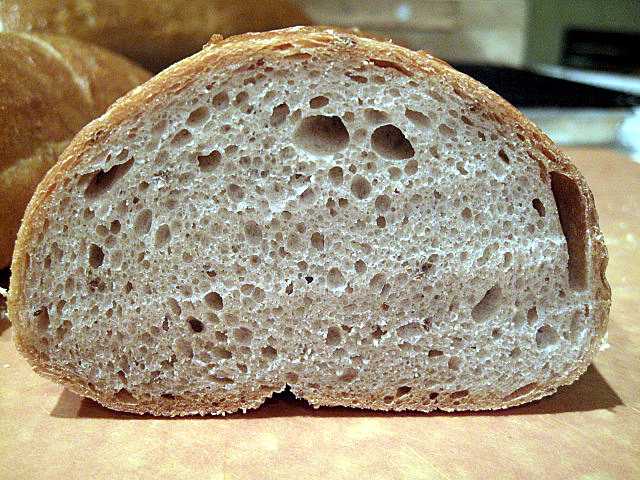
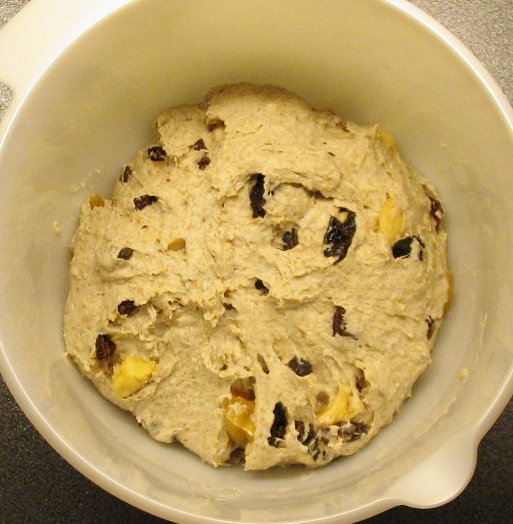
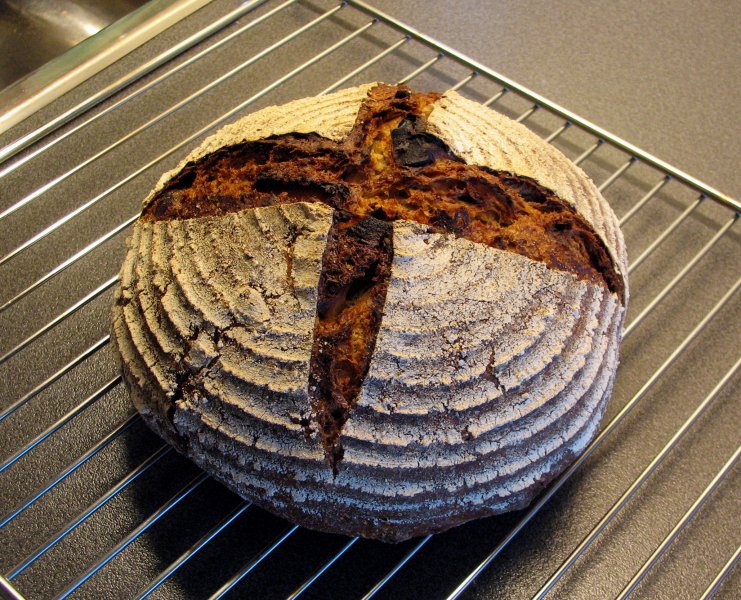
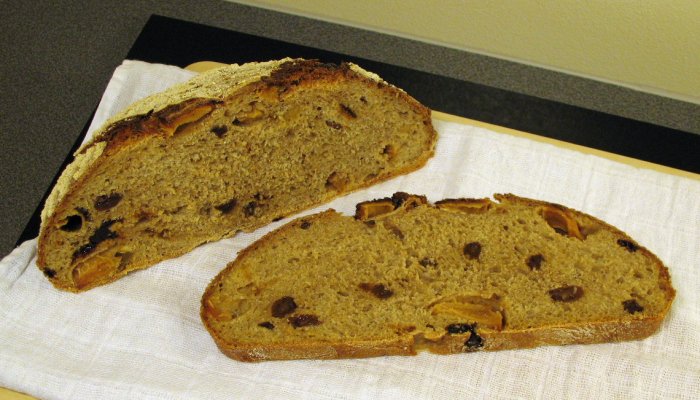
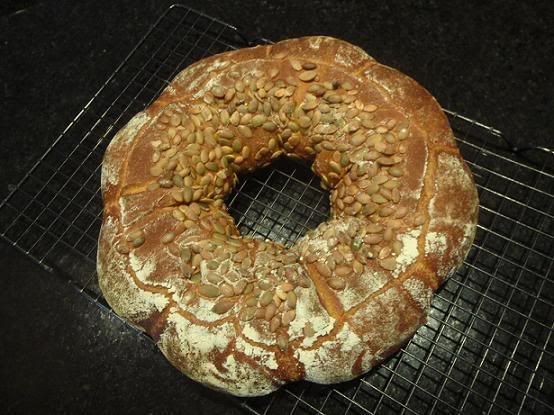
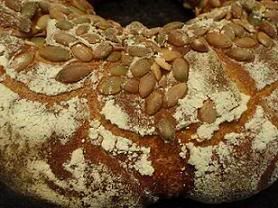
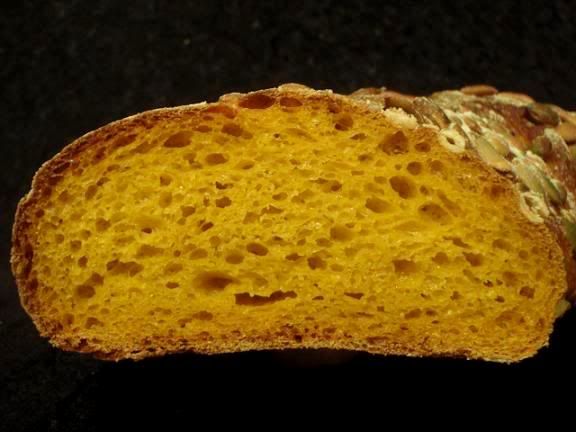
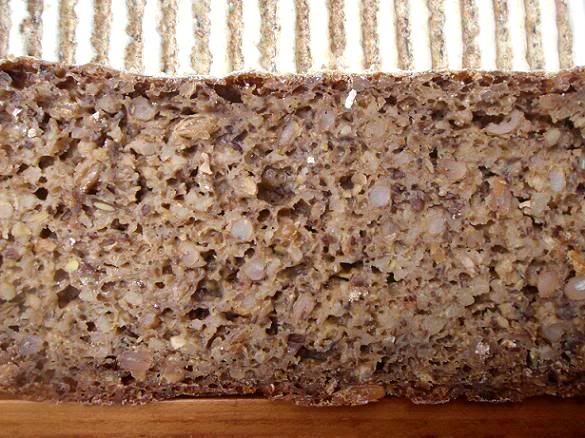
It took me one year to perfect a 7-day Sourdough Rye bread. It required an easy starter: equal amounts of rye flour and water whisked smooth. The starter had to be fed additional amounts of flour and water every day for the next six days. I watched in awe as the starter bubbled and took on the appearance of a sponge. The recipe said the dough should be like goop, and it was! Kneading was not necessary or even possible. I wasn’t sure this heavy goop would rise but it nearly doubled in size in 12 hours. As it baked it filled the house with a beautiful malty aroma. The first warm slices out of the oven were flavorful and dense without being heavy. I began to regularly bake this lovely bread. At first I bought bagged rye flour but soon I purchased the grain mill attachment for my Kitchen Aid mixer and bought 25 pounds of organic whole rye berries. I believed that my bread had its nutrients still alive in the freshly ground flour.  


My family enjoyed the bread toasted with butter, jam, and nut butter. While some people couldn’t appreciate the bread because of its density, others really loved it. Some people commented that the bread reminded them of bread their grandparents used to make. My daughter brought home a Serbian friend on college break. I watched them cut thick slabs of the bread, toast it, slather humus on it and top it off with my home made sauerkraut. These two kids were in heaven, especially after all that dorm food. The friend proclaimed with wonderment that this bread was just like the “Serbian bread” his grandmother made and could they please take some back to college along with some “Serbian sauerkraut?”


I happily packed them off with a few loaves. I hesitated on the sauerkraut, though. I had visions of it blowing up in their backpacks.


I was flattered and deeply satisfied to feed people this wonderfully healthy food. I was also very pleased to have my food fondly remind people of their traditional ethnic foods. 


I started making this bread to improve my health. I had been on a long journey of recovery from various illnesses and a friend gave me “Nourishing Traditions” as a gift. Each new food or technique I tried seemed to boost my health to another level. Some symptoms, however, persisted. I went to a Holistic MD who tested me for food allergies. It turned out I had an extreme gluten sensitivity as well as sensitivities to cow and goat’s milk, eggs, and soy. I was deeply distressed that in order to feel better I had to give up my sourdough rye bread. I was already off of all milk products except butter so that meant just letting go of the butter.  I wasn’t happy about giving up eggs but was willing. I had already stopped eating soy months before after reading about it in “Nourishing Traditions”. Back then, I had muscle tested myself for it and having registered an extreme loss of strength, dropped it out of my diet and lost 1 pound a week for 8 weeks without dieting!


But my beloved bread! I discussed it all with a friend over tea and unexpectedly put my head on the table and started sobbing. When I finished crying I resolved that I would figure out a way to make a Gluten Free Sourdough bread.


I had my last slice of rye bread that night, perfectly toasted, sweetly aromatic, soaked with warm organic butter. I expressed my gratitude for this wonderful nourishing bread and butter, both of which had fed me well. I said my goodbyes and moved forward. Within 48 hours all the persisting symptoms I had up until that point disappeared! I began to understand the significance of the gluten allergy and how gluten was damaging my intestines and consequently my overall health.  


I took a break from bread baking while I adjusted to my new diet.  I looked at different store bought gluten free breads.  Some of them used white rice flour and I wanted whole grain flour in my bread. Most of them contained milk or eggs for leavening. Just what I needed to avoid. The ones that didn’t use milk and eggs used commercial yeast for leavening, which, from previous experience, I did better without. In addition, many of the breads contained added sweetener, something I was trying to stay away from. I became frustrated looking at all these gluten free breads and still not being able to eat them.


There was also the issue of digestibility.  I was not convinced these breads were highly digestible given that they were essentially “quick breads”.  Dry flour mixed with wet ingredients, mixed with commercial yeast and risen for a few hours at most. According to Weston A. Price principles, soaking grains and flours neutralizes the antinutrients, generates lactobacillus and enzymes, gives a full bodied taste that increases with age and has a long shelf life.  These were the qualities of my beloved rye bread and I was ready to have that again. I wanted a bread free from the foods I was sensitive to, free of commercial yeast and sweetener in any form, complete with great taste and high digestibility.


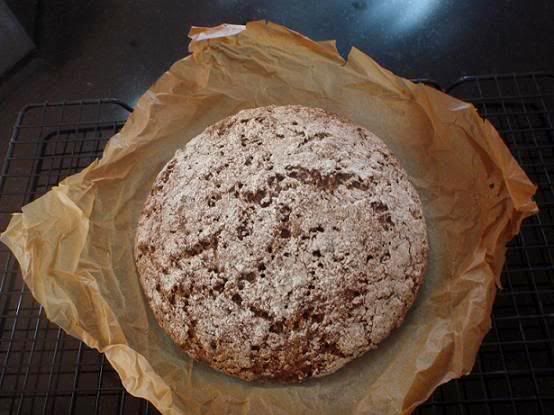
I began to experiment with Gluten Free sourdough, using the same sourdough guidelines substituting brown rice flour for the rye. My first attempt seemed to be spoiled. The starter harbored a greenish tinge towards the end of the 7 days. The finished bread smelled awful and I spit out the little bit that I tasted. Besides seeming spoiled, the bread was dense, compact because it had hardly risen!


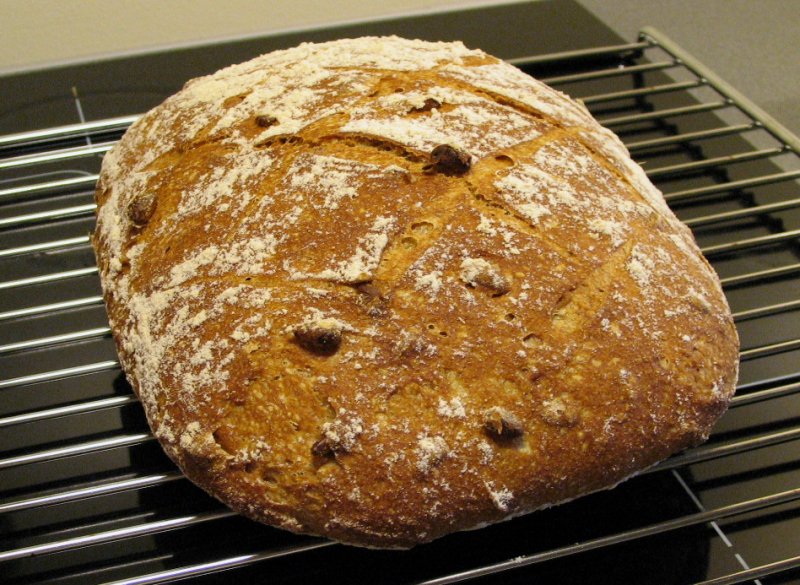
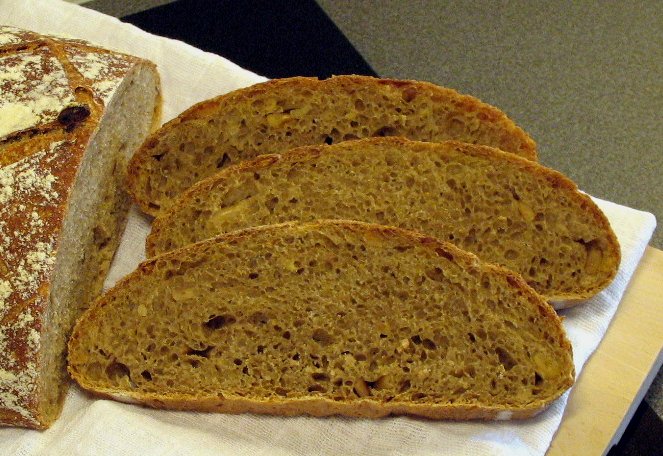
I continued to experiment by trying different combinations of flours and different ways of working with the starter. During this time I had been trying water kefir as a morning tonic. It was nicely potent but really too alcoholic for me to drink. I continued making it to boost the soaking water for beans and grains. One morning as I was taking my daily walk, an activity that generates problem solving as well as new ideas, I wondered if the water kefir, being too alcoholic for me to drink, might be strong enough to leaven bread? I emailed an experienced fermenter from Australia, who said that he and his family often used water kefir to leaven their sourdough products. He gave me some tips for the starter as well as the bread and I started to have success. I continued to experiment with different combinations of store bought gluten free flours until I came up with a really tasty and dependable one. This whole process from the first spoiled bread to the successful, dependable bread took one whole year!


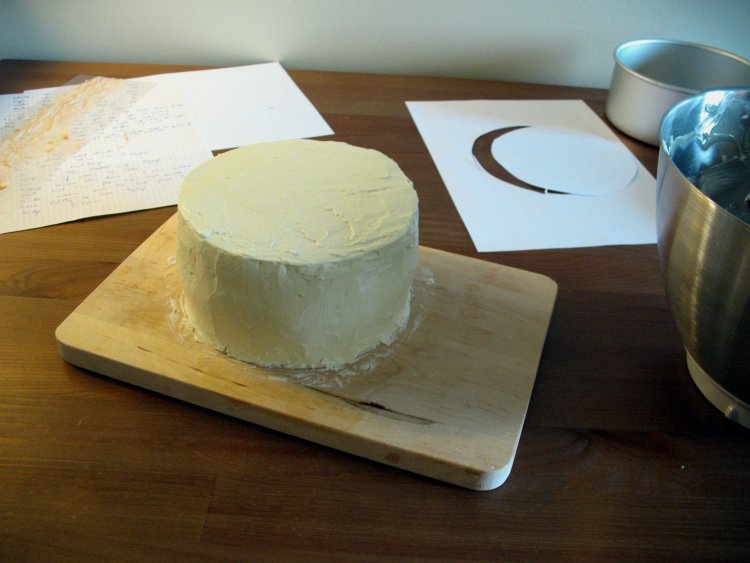
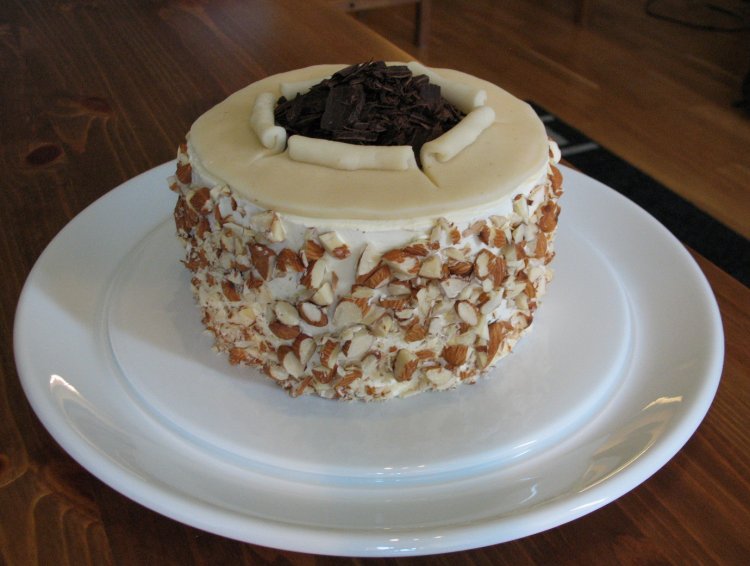
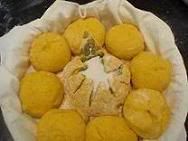
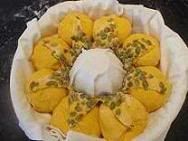
I began to bake four loaves at a time and freeze some. The bread was excellent even after 4 months in the freezer! I could toast a piece in the morning, pack it in a lunch container and eat it right out of the box six hours later. It still had a freshness about it even after all those hours. I used the bread for toast with nut butters. I used it in soup, stew and bean bowls where it nicely soaked up the juices. At the winter holidays I even used the starter for a chocolate cake. I didn’t let it rise long enough so it became a gluten free brownie! My crew ate the entire tray in five minutes…


I shared the bread with people on gluten free diets and watched their reactions. Their eyes closed, inhaling the aroma right out of the oven or toaster. I think I even saw someone swoon. Some people wanted to buy it! They said “this is what I’ve been looking for. Gluten Free, good taste, beautiful texture, long shelf life, and even freezes well”. I wasn’t ready to begin baking full time but I began to teach bread baking classes.


I was ready to branch out. I researched gluten free muffin recipes and cobbled together a recipe using the same rice starter for leavening. The results were exciting. The muffins were great and were a nice change from the bread. There was a little starter left over so I tried some sourdough pancakes. I was careful to make sure the batter fermented for at least 7 hours before cooking so any fresh flour I added was properly soaked. They were quite good. I still had a little starter leftover so I dropped spoonfuls of it into soup and got rather amorphous looking but great tasting dumplings!


After two years of euphoric bread eating I started to show symptoms of sensitivity again. One of the principles of healthy eating is to eat a variety of foods. This ensures a mix of nutrients, micronutrients and enzymes. One of the challenges of having multiple food sensitivities is that it becomes difficult to eat a wide variety of foods because we must avoid so many foods and food products. Undiagnosed gluten sensitivity impairs the intestinal system thus making us that much more sensitive to foods we consume often.


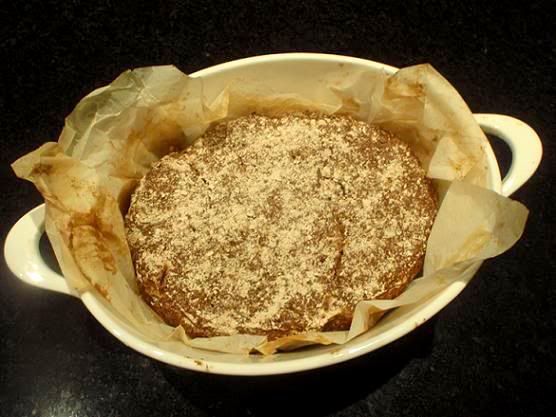
I muscle tested for all the ingredients in my beloved bread and found I was sensitive to three of the five flour ingredients! The two I was most sensitive to were highly processed flours, chick pea flour and tapioca flour. I was less sensitive to the third ingredient, sorghum, something I had never eaten before using in my bread. I tested fine for the fourth ingredient, potato flour although it is also highly processed. Thankfully, I tested well for the organic brown rice flour which I ground in small batches in my grain mill and refrigerate for short periods of time to preserve the nutrients.


 I started to think again about the Weston A. Price principles around using organic ingredients with as little processing as possible. I felt sure I had to begin experimenting again using only organic grains I could grind in my grain mill. I was happy to grind as much of the bread ingredients as I could ensuring a “nutrient alive” bread. As much as I loved my bread I had never been completely comfortable using flours that were not organically grown.

I was also concerned about the length of time the flour may have sat on the market shelf. My ingredient options were not exactly what I preferred but I worked with what was available and the knowledge I had at the time.


Again I took a break from bread baking to ponder. During that time I attended a Gluten Free Culinary conference taught by professional chefs, pastry chefs and cookbook writers. Through the information they shared I got a clearer understanding of general baking principles as well as gluten free baking principles. I started to understand that each gluten free flour had a specific property to give to the finished product. The chick pea flour gave the bread a nice buoyancy. The tapioca flour gave it lightness. The sorghum flour gave it a spongy texture. The potato flour binds it.


Now the challenge would be to substitute new flours for the flours that the Gluten Free Baking movement has grown to depend on. My question became “Which fresh ground flours would give me the properties needed to make an excellent product?” I decided to experiment with small batches of pancakes rather than bread in the hopes that in the event of failure the losses would be minimized.


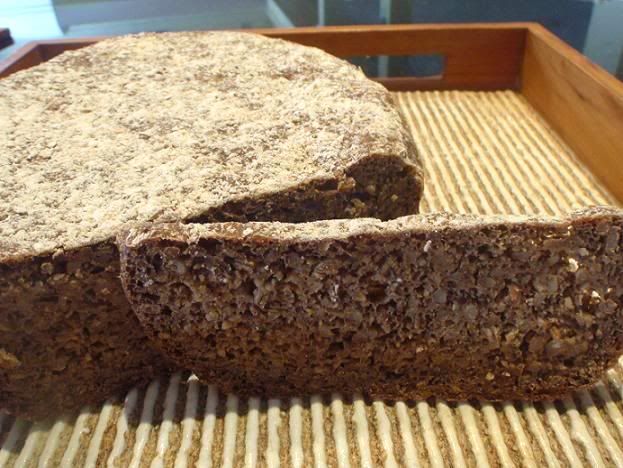
I made a new starter with brown rice flour and made a few batches of pancakes using teff, amaranth and buckwheat flour. The teff and amaranth grains were too small to be ground in my mill so I used a coffee grinder which worked very well. With each new batch I saved some rice starter for the next batch. Each batch had very different qualities. The teff pancakes had a very dense texture. The amaranth pancakes were light and delicate. The buckwheat pancakes were thick and cakelike. I even tried some ground up gluten free steel cut oats which nicely fluffed them. I went one week feeding the starter twice daily, making pancakes every 2-3 days with no sign of diminished freshness in the starter. Previously, I would begin each batch of bread baking with a new starter as the old starters seemed to die in the refrigerator between batches. I assumed this was a characteristic of gluten free starters.


Looking to experiment a bit more, I decided to try adding different flours directly to the starter. With the addition of each new flour I watched the starter change texture and density. I learned not to use the same flour more than twice in a row because the pancakes would be too cakey or too dense or even too light! After a few more batches the pancakes themselves seemed to take on a melding of characteristics from this mix of grainy genetic material. They became more full bodied and, perhaps, more satisfying. By this time my starter had been alive for 3 weeks.


I was scheduled to teach an upcoming bread making class and began new rice starters. Since I hadn’t baked for 3 months I decided to make extra starter to experiment with after class. I would teach my tried and true original recipe even though I would no longer eat it.


Bread class was a success and everyone took home a loaf to rise overnight and bake the next day. I gave everyone ¼ cup of rice starter with instructions to sit it on the counter and feed it twice a day with equal amounts of flour and water, changing the bowl every 2-3 days. I hoped that with this starter they could begin baking soon while class was fresh in their minds.


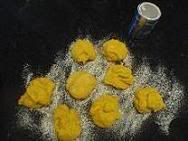
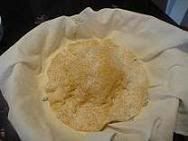
The day after class I was ready to experiment. I ground more buckwheat, amaranth and sweet brown rice flour. I had some leftover potato flour but only enough for 3 loaves. I put those loaves together and was happy to see the dough had a spongy texture similar to the original recipe. I decided to try a fourth loaf without potato flour. The dough was as thin as cake batter so I added more sweet brown rice flour. It thickened but it was still thinner than I had ever worked with. I didn’t think it would rise properly but to my surprise it rose beautifully, baked well and was the best loaf of the four!!!


Later that week my students let me know that their breads rose beautifully, and baked well. They said the good taste seemed to get better with age. In addition, they were dutifully feeding their starters twice a day.


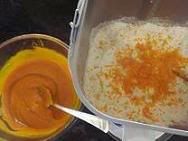
I continue along with my experiments. I tried mini muffin tins because they are a better size for a snack than standard size tins. Using the rice starter I will try another chocolate cake for the holidays. It will be gluten free, dairy free, egg free, sweetener free, yeast, baking soda and baking powder free using stevia rather than sugar. Next, I’d like to try rolls and scones, maybe a holiday fruit and nut bread and after that, maybe an onion bread.


Two and a half years after giving up gluten I have achieved what I had hoped. I have successfully created my own nutrient-dense, allergy-free bread products using a combination of ancient sourdough technique and an ancient fermented drink. It is encouraging and comforting to me that as we move into the future and have to deal with some of the very difficult challenges of our day, we can fall back on the wisdom of the ancients to strengthen and nourish us.


Sharon A. Kane


Mebake's picture
Mebake

Yesterday, I decided to venture into batards. I shaped one, and a loaf. Both were Sourdoughs with a 24 hr old liquid preferment. The final dough undergone its first proofing in a refreigerator for 24 hours (i was out). Yesterday, i deflated the cold proofed dough, and knead it until it became somewhat warm.

I left the dough to rise for 3-4 hours, and cut it into equal halves. I shaped one as a batard. and the other into a loaf.

However, this time i had bought an oven thermometer! When i preheated the oven, i was striked by the misconception i had about my oven temperature. It turned out that i often baked at lower temperature than recommended for Home-made artisan breads, i.e. 425 - 470F.

Therefore, i swung the dial into no.7 or 400F and waited. The breads cooked well, crackled when done, and had an eye pleasing golden finish to them.

THAT IS WHAT I WANTED and have missed all along in my previous loaves. THANK GOD.

The crust is the best i have ever achieved so far.

Next target... 70% Rye bread adventure.. be on the lookout. :P

Mebake

Shiao-Ping's picture
Shiao-Ping

My daughter will be away for her 17th birthday at the end of this month.  She and four other Year-12 students are representing Australia in an International Young Physicists Tournament in China and are leaving this Saturday.  My husband had asked if I wanted to go along and help with the language translation.  I said No because I think the kids can do with a bit of freedom (and excitement) in a foreign country.  And, sure enough, because the mummy doesn't want to go, the daddy had conveniently engineered a business trip to be up there at the same time - the daddy and the daughter are leaving together on the same flight.

The mummy is not unhappy with all that.  She made an Orange Infused Sponge Cake with Coconut & Orange Cream Icing for the daughter's 17th birthday in advance.  The cake was decorated with orange roses, the petals of which were lightly coated with egg white before icing sugar was dusted.  The birthday was celebrated two weeks ahead of time. 

Here is the birthday cake:


                Orange Infused Sponge Cake with Coconut & Orange Cream Icing


Shiao-Ping

Yippee's picture
Yippee

A big thank you to Susan for this simple and delicious formula.  My kids loved these loaves tremendously.  They had it for breakfast with a spread of butter; at dinner clam chowder in a bread bowl.  For me, it's another great lesson in sourdough.  A few new things I tried in this project: 

  1. Baking with high gluten flour (Giusto's organic high gluten whole wheat)
  2. Using a firm starter (refreshed at 1:2:3)
  3. Experimenting EXTENDED retardation at bulk fermentation (12 days) and at final proof (2 days).  There was no basis of practicing these extended retardations, I simply just did not have a chance tending the dough after I mixed it up. It gave me an opportunity to find out how well the method of preserving a premixed dough in the fridge for later use, as suggested in AB in 5, would work. As you will see, there's no negative impact on the final product and the flavor was greatly enhanced.

This project turned out wonderfully.  Susan, I'm looking forward to trying your bread again.


http://www.flickr.com/photos/33569048@N05/sets/72157621242247616/

This will be submitted to Nick's imafoodblog.

SylviaH's picture
SylviaH

Almond-Scented Cinnamon Rolls- I know more cinnamon rolls..but these are a little different and a delicious Italian version!  My husband has been begging for cinnamon rolls and it has been a while...so I thought I would make some with an bit of an Italian flare..this is my adaptation from a recipe on the http://www.rusticocooking.com.  The dough is easy and comes together so fast in the food processor.  This is the first time I have made dough in a food processor..I have to say I was amazed.  I also liked the fact that they added the butter before the liquid ingredients because I think this does make a difference! You get a more tender crumb by discouraging the onset of the gluten formation.  I think this definately makes a difference even with little bit of butter that goes into this dough!  No eggs are in the recipe!  I used King Arthur All-Purpose flour.  I mixed the dough the night before and without shaping the rolls, placed the dough in a lightly buttered bowl.  Placed in the refrigerator overnight and the next morning let it warm up to room temperature and then rolled out the dough and formed the rolls.   I doubled the filling replacing half of the flour with Almond Meal and adding a little brown with the granulated sugar.  I used only buttermilk in this recipe.  When the rolls were glazed I kept the glaze thin...not a thick glaze like my cinnamon rolls usually have and just before baking I added a very light sprinkling of King Arthurs expresso powder on the proofed rolls.  When the rolls where finished baking I removed them right away from the pan...I would suggest parchment lined pans instead of just buttering the pans.  I glazed the rolls and made double the recipe and used it all...topping the glaze with slivered almonds.

These rolls definately had a very tender, delicious crumb and the overall almond flavor the light sprinkling of expresso powder was only noticable if you knew it was there... topped off with a cup of espresso was absolutely wonderful! 


Sylvia


Shiao-Ping's picture
Shiao-Ping

I love pumpkin, but when my husband came home with three huge pumpkins, I worried.  What am going to do with all these pumpkins, I asked. I got no reply.   He had gone camping with our son and our son's friend at our farm, two hours north west of Brisbane.  The caretaker's wife keeps a small patch of vegetable garden and every now and then she gives me something from her vege garden.  My favorite are cherry tomatoes and silverbeets.   These pumpkins are from her garden too.     

It's school holiday and we were driving west, in-land, to somewhere.   I was bouncing off ideas with my daughter; I said how about Pumpkin Sourdough with Roasted Pumpkin Soup, or how about Grilled Pumpkin & Chinese deep-fried Onion Sourdough.  All of a sudden, my daughter said, how about Triple Pumpkin Sourdough with pumpkin seeds, pumpkin puree, and shredded raw pumpkin; she is catching on.  As we were talking, my husband is mumbling, give me a gun! and my son was unavailable for comment, totally absorbed in the video that he's watching in the back seat.      

My local organic shop which I visited the other day has got  "coconut flour" now, a very fine desiccated coconut.   I bought some without any clue how to use it because I love anything and everything to do with coconut ... hmmm ... Thai green curry with coconut cream ... yumm!   

The French bread books that Flo Makanai ordered for me had arrived last week, one of which is "Le Pain, l'envers du decor," or Bread, Behind the Scenes, by Frederic Lalos who is one of the youngest bakers to have been awarded Meilleur Ouvrier of France, at the age of 26.  (Sorry, my Google translator does not recognise "Meilleur Ouvrier.")  On page 168 is La couronne bordelaise (the Bordeaux Crown), one of the French regional breads that are featured in the book.    I find the shape really interesting, and finally a reason for my experiment on pumpkin! 

 Here we go.    


My formula  

246 g starter @75% hydration

202 g Sir Lancelot flour

60 g white flour

40 g coconut flour (or fine desiccated coconut)

77 g water

232 g cooked pumpkin puree

9 g salt

very fine zest from one medium orange

pumpkin seeds for decorating    

(final dough weight 866 g and approx. dough hydration 70 - 72%) 


    Pumpkin Sourdough with Coconut & Orange


                                                                                               The crust 


                                    The crumb    


The orange and coconut is a combination that I always love.  The fragrance is beautiful.   But I'll probably not do coconut "flour" next time; it seems to have a "punctuating" effect, like grains and seeds, on bread.  I am not sure if I am using that word right, but I suspect it is making gluten network harder to form, or something like that.  Instead, coconut milk (or diluted coconut cream) would be a better choice. 

Shiao-Ping          

Shiao-Ping's picture
Shiao-Ping

1983, I was in my mid-20's in Boston doing my final year of post graduate studies under Rotary scholarship.  A memorable year as it was the first time ever in my life that I went overseas.  My host family, Bob, is from Armenia and Maria, Germany; both came to America in their late teens.  One day they drove me to New York to visit the Metropolitan Museum.  We had lunch at a posh side walk cafe; the waiter brought us curious black color bread rolls.  As Maria was eating, she couldn't stop raving about these dense looking bread rolls which had (I subsequently learnt) a faint caraways fragrance.  To this day I still remember how she was telling me that breads are supposed to be dense and flavorful, not like those fluffy, light stuff from supermarkets.   

As I've been baking a lot of sourdough breads lately, I think of Bob and Maria a lot.   It was sort of a fluke that I started reading about the story of Horst Bandel, a local minister who bought breads from Jeffrey Hamelman's bakery in Vermont years and years ago (page 221 of Hamelman's Bread: A Baker's Book of Technique and Recipes).  Horst Bandel's family owned a bakery for 150 years in Germany; he was going to take over the bakery but had to flee to America because of the 2nd World War.   He became a minister and had not baked since.... until he and Hamelman got together to bake this black pumpernickel of his youth.  

Horst's family used a wood-fired oven for all their baking; this Black Pumpernickel would go into the oven last of all when they finished baking the day's bread, and baked (in covered pan) overnight in the lingering heat of the oven.  "Next morning, we would pull it from the oven, dark, dense, and fragrant," as he described it to Hamelman.  

Well, I made this Black Pumpernickel in memory of Bob & Maria, and my Boston days.  


    Horst Bandel's Black Pumpernickel, baked as a normal sourdough bread     


                            Horst Bandel's  Black Pumpernickel, baked in covered casserole pan, in medium low heat as per Halmelman's instruction    


Formula was based on page 221 - 224 of Jeffrey Hamelman's Bread: A Baker's Book of Techniques and Recipes.   Total dough weight was 1.8 kg which I separated into two pieces and baked differently as the pictures above show.    


                                       The crumb


Shiao-Ping  

Pages

Subscribe to RSS - blogs