The Fresh Loaf

A Community of Amateur Bakers and Artisan Bread Enthusiasts.

Recent Blog Entries

mwilson's picture
mwilson

Flavoured Ciabatta made using traditional methods. Suitable for sandwiches.

Traditional Biga - left to ferment for approx 15hrs at cool room temp.
300g '00' Flour, medium strength
150g cold water
1.1g Instant yeast

Final Dough - kept warm at 28c.
420g Biga
70g '00' Flour, medium strength
4g Malt Powder
7g salt
140g water
28g good quality extra-virgin olive oil.
sun-dried tomatoes to taste

Method
Mix biga by hand using downward pressure to a smooth, dry dough. Leave at room temp overnight for about 15hrs.
Next day, cut the big into pieces add malt powder, flour and an equal amount of water. Mix until smooth. Continue mixing adding the remaining water in stages.  Add salt with the last of the water. Finally add the oil and mix to full gluten development before folding in the  tomatoes.

Place dough in a well oiled flat and wide container. Leave to rise at warm temp (~28C). Stretch and fold at 30 min intervals until the dough is strong enough to sit high. Wait until almost double in size (~3hrs) before dividing in two.

Leave pieces to rest for 20 mins before shaping like a business letter. Dust with more flour and proof until double with cracks in the flour (~2hrs)
Bake.

Proofed:

Total dough volume is approx 4 times that of the mixed dough.

Baked:

Oven spring was great as with any well made ciabatta, rising vertically, swelling like a balloon. 

Crumb:

Extremely soft and porous crumb.


Michael

Isand66's picture
Isand66

I get a kick out of trying new types of flours and grains in my bread baking.  I frequently shop on-line at King Arthur Flour and like to try new and different products when I can.  I've read many recipes on The Fresh Loaf using soakers and have tried a few recipes from Peter Reinhart's Whole Grain Bread book with mixed results.  I decided the other day to try my own formula using a multi grain soaker from my baking supply bin and also used some of my existing refreshed sourdough starter mixed with some rye, whole wheat and first clear flours.  The results were surprisingly good considering I had no idea what to expect.  The final bread had a great nutty sour flavor with a nice thick crust and moist crumb.

Ingredients

Soaker

2 oz. Rolled Oats

2 oz. Malted Rye Berries

2 oz. Barley Flakes

1 oz. English Malted Wheat Flakes

1 1/2 Cups Boiling Water

Final Dough

15 oz. White Starter recently refreshed

3.5 oz. Whole Wheat Flour

3.5 oz. Medium Rye Flour

4 oz. First Clear Flour (you can substitute bread flour or High Gluten Flour)

2.5 Tsp. Salt

6 oz. Water, 90 degrees F.

Directions

Mix all ingredients for soaker in a bowl and add boiling water.  Let it sit for 2-3 hours covered until the grains are soft.

After 2-3 hours add the soaked grains along with the remaining liquid in your mixing bowl and add the flours, salt and remaining water and mix for 2 minutes.  The dough should come together in a shaggy mess and should be relatively moist at this point.  Let it rest for 5 minutes and mix for 4 minutes more on medium low-speed.

Remove dough from mixing bowl to work surface and do a stretch and fold.  You may need to wet or oil your hands and the work surface since the dough will still be very sticky at this point. Form the dough into a ball and let it rest uncovered for 10 minutes.  Let the dough rest uncovered for 10 minutes.  After 10 minutes do another stretch and fold and cover the dough with a moist lint free towel or plastic wrap sprayed with non-stick cooking spray.  Do another stretch and fold two more times letting the dough rest 10 minutes each time.  After the last stretch and fold put the dough into an oiled bowl and cover it tightly.

Let the dough sit in your bowl for 2 hours at room temperature.  It should only rise slightly at this point.  After the 2 hours are up put in your refrigerator for at least 12 hours or up to 3 days.

When ready to bake the bread take your bowl out of the refrigerator and let it sit at room temperature for around 2 hours.  After 2 hours shape the dough as desired being careful not to handle the dough too roughly so you don't de-gas it.

Place it in your bowl, banneton or shape into baguettes.

Let it sit at room temperature for 2 hours covered with oiled plastic wrap or a moist cloth.

Pre-heat oven with baking stone (I use one on bottom and one on top shelf of my oven), to 500 degrees F.

Slash loaves as desired and place empty pan in bottom shelf of oven.

Pour 1 cup of very hot water into pan and place loaves into oven.

Lower oven to 450 Degrees and bake for 25 - 35 minutes until bread is golden brown and internal temperature reaches 200 degrees.

Shut the oven off and leave the bread inside with the door slightly open for 10 minutes.  This will help dry the loaves out and keep the crust crunchy.

Let cool on cooling rack and enjoy!

This post has been submitted to the Yeast Spotting Site here: http://www.wildyeastblog.com/category/yeastspotting

dabrownman's picture
dabrownman

This fancy French named bread is really a Rustic Country San Francisco Sourdough.  It originally started out as a Glenn Snyder Country SD bread minus the rustic and the sweetbird, that she is,  took the recipe and tweaked it some and came up with the most amazing crust on a bread I have ever seen.   I just had to try my hand at it and converted it further to more my liking by; using a rye sour starter,  grinding my own WW and rye, increasing the rye to equal the WW, reducing the AP accordingly and then adding 50 g of whole WW and rye berries that were boiled in water for 30 minutes and then drained.  The berries were put back into the pot with 1 tsp of olive oil and then sauteed until caramelized.  I was hoping for a bread that would be more rustic, have a deeper more flavorful taste, a deep brown crust and crumb that was soft, moist and still somewhat open.  Well, I think all but the somewhat open crumb was achieved.  I guess you can't have everything.  It is the one of the best textured and tasty breads I have ever eaten.  It, like most breads, is much better toasted with butter and I'm guessing the flavor will be better tomorrow as well.  I can't wait to try this on a new sandwich creation tomorrow.  Here are some pix's.  The recipe follows the pix's

 Rustique Pain Comté de San Francisco

Yield: Two 750g Loaves

Ingredients

Levain Build

86 g AP flour

25 g Whole Wheat flour

25 g Whole rye flour

175 g water, cool (60 F or so)

30 g active culture (72% hydration)


   Final Dough (68% hydration, including levain)

600 g AP flour (77.5%)

87 g whole wheat flour (11.25%)

87 g whole rye flour (11.25%)

440 g warm water (80 F or so) (57%)

14 g pink Himalayan sea salt (1.5%)

313 Levain (40%)

Scald and Caramelize: 50 grams of WW and rye berries boiled in twice as much water as berries by volume for 40 minutes.  Drain berries and return to pan with 1 tsp of olive oil and sauté until the berries caramelize and start to leave color on the bottom of the pan.  When color starts sticking to the pan they are done.

Directions

 1.  Levain : Make the final build 10-12 hours before the final mix.

2. Mix: Add all the ingredients to the mixing bowl, including the levain, but not the salt or the scalded berries. Mix just until the ingredients are incorporated into a shaggy mass. Correct the hydration as necessary. Cover the bowl and let stand for an autolyse phase of 60 minutes. At the end of the autolyse, sprinkle the salt over the surface of the dough, and knead 4 minutes with dough hook on KA 3. The dough should have a medium consistency.  Add the scalded and caramelized  berries and mix on KA 3 for 1 minute   

3. Ferment with S&F: 3 hours. Stretch and fold the dough in the bowl once 10 strokes at the 30minute mark. Stretch and fold again, 5 strokes, at the one hour mark folding it into a ball in lightly oiled bowl.  Leave to ferment 1-2 more hours until the dough is at least 75% larger than when you started the ferment.

4. Retard: do 1 S&F in the lightly oiled bowl forming the dough into a ball again.  Refrigerate 8-20 hours, depending on how much time you have and sour your taste.

5. Divide and Shape:  take dough out of refrigerator and let it come to room temperature about 1 ½ hours.   Divide the dough into what 2 pieces and pre-shape, then shape into boules or batards 20 minutes later.

6. Proof: Approximately 1.5 to 2.5 hours at 72° F. Ready when poke test dictates.

7. Pre-heat: oven to 500 with steam apparatus in place - 45 minutes minimum.  I use a loaf pan half full of water and a dry12”cast iron skillet that go in the bottom rack of the oven at the beginning of pre heat and the stone on the rack above.  When the loaves go in, I throw 1 cup of boiling water into the cast iron skillet right after loading the bread on the stone.

8. Bake:  Slash loaves. Bake with steam, on stone. Turn oven to 450 F when it hits 500 F after loading loaves. Remove steaming apparatus after 15 minutes. Bake for another 15 minutes more or 30 to 35 minutes total. Rotate loaves for evenness as necessary. When done (205 Finternal temp), leave loaves on stone with oven door ajar, oven off for 10 minutes.  Move to cooling rack until loaf is room temperature.


jamesjr54's picture
jamesjr54

Built off a "Country Semi-sourdough" yeasted bread, I made this bread on Saturday. 

Formula:

496G KAF AP

339g H2O

138g 100% Starter

31g Rye

31g Whole wheat

12 g salt

2.25 g active dry yeast

85g manchego cheese cubed

85g oz parmesan grated

50 sun-dried tomatoes

Mix H2O, starter and flours

Autolyse for 1 hour

Add salt and yeast

Knead for about 3-5 mins

Add in cheeses and tomatoes, adding flour as needed

knead for 10 mins

Bulk proof 1.5 hours with S&F @ 30 and 60 mins

pre-shape and rest for 15 mins

shape and into bannetons for 1 hour

Preheat to 500F

Sprinkle 1 oz grated manchego on top

Bake in dutch oven 20 mins covered at 475F, 25 mins uncovered @ 475 F

Loaf weighed 1.2 kilogram before baking. Crumb was finer than usual, but very soft and very flavorful. Great taste and texture. Start to finish in 4 hours.


breadsong's picture
breadsong

Hello,
These are two breads I've wanted to bake, for quite awhile. Really glad now that I have, as both of these breads are so delicious, each in their own way! With thanks to Shiao-Ping and Mr. Leader for their lovely recipes :^)

Shiao-Ping's Banana Pain au Levain <------>Mr. Leader's Whole Wheat Genzano Country Bread


I so enjoyed reading about Pane casareccio di Genzano in Mr. Leader’s book, Local Breads.
This was a really nice post, too, with great photos of that beautiful and dark crust:
http://www.thefreshloaf.com/node/24109/trip-genzano-and-forno-legna-da-sergio

This is a try of the whole wheat variation, Pane lariano, with some variations; I reduced the instant yeast to 1 gram, mixed by hand, divided the recipe amount into two loaves (instead of one large loaf),  and retarded the dough overnight (for convenience)…so this is not the bread Mr. Leader intended…but I am very pleased with the resulting flavor (it’s a delicious, delicious crust!).

The loaves were baked in a hot oven, preheated to 500F; then 475F for 15 minutes, 465F convection for 15 minutes, 450F convection for 7 minutes, then left in the oven (turned off/door ajar) for 10 minutes.
The loaves sang and crackled :^)

                                      The bran-flecked crust

  After cutting the end off of one loaf, 
                                                                                                                  I was nervous about the crumb, 
                                                                                                                  but really happy with the crust!

          The crumb, a little further into the loaf

The crust could be darker yet! (yearning for my own WFO :^)  )

The second bake today, Shiao-Ping's Banana Pain au Levain, makes a beautifully moist and fragrant loaf; I used a combination of fresh and frozen (defrosted) banana, ripe and sweet. The sweetness and flavor of the banana really carried through to the baked bread - great flavor!

I tried to score a 'banana' on the top of the loaf; here is the crumb (the gorgeous aroma of banana bread filling the kitchen at the moment this photo was taken!):


What wonderful discoveries these two breads were, today.

Happy baking everyone!
:^) from breadsong


Yippee's picture
Yippee


This bread was specially made for my kids' piano teacher, a German master pianist.  It was  also my first bread in many, many months.   I felt that a rye bread would be most appropriate for this occasion.  


Submitted to Susan's Yeastspotting!


dstroy's picture
dstroy

So this year my son turned 10, and he requested a cake that was all sorts of "half-and-half".

Half of his cake, he wanted "hockey" themed. The other half, he wanted "warrior cat" themed. (He's been reading a series of books about fighting cats)

And he wanted strawberry AND chocolate cake as well.

I wasn't up for making a layered cake, so I asked if he'd take a strawberry cake with chocolate chips in it - and then found myself having to make something up since I couldn't find anything that matched that description online. The boxed strawberry cake mixes from the store are pretty...meh.

So I found a bunch of strawberry cake recipes that called for a white cake mix and a package of Strawberry Jello, or I'd find ones that were totally from scratch that had crushed berries in them but which weren't pink, so I decided to go with something in between since I'm not fond of the boxed white cake mixes and wanted something in between.

I am very pleased with this one, because I've never messed with a cake recipe that much before.  It came out very strawberry flavored, not too sweet, with just the touch of chocolate.

Pink Strawberry Chocolate Cake:

This is the recipe I came up with when making a 9x13 "hockey rink" cake:

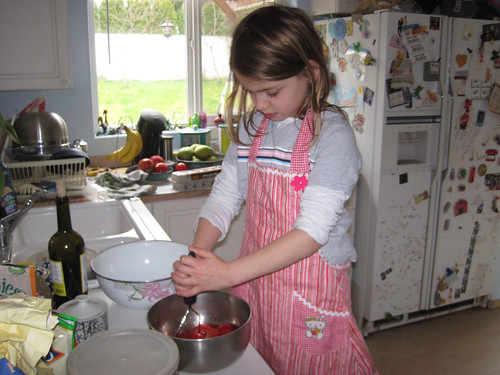
I put some frozen strawberries in a ziplock the day before I made the cake, so they'd thaw before I made it.  Then for the cake, the first thing we did was to mash up those berries. This was a great job for the littlest helper who was excited to help make her brother his special cake.  The leftover mashed berries can be thrown in a container and used for smoothies later - bonus!
cream together:

  • 1 3/4 cups white sugar
  • 2 sticks of butter (1 cup)

then add:

  • 4 eggs
  • about a Tablespoon vanilla extract

when this was all ready, dump in and mix gently:

  • 3/4 cup of the mashed strawberries

mix the dry ingredients FIRST, and add to the batter mix:

  • 3 cups all-purpose flour
  • 3 1/4 teaspoons baking powder
  • 1 small package of Strawberry Jello gelatin mix (this stuff basically gives it that ice cream parlor taste, along with the crazy color)

And finally, after youve mixed all that stuff together, add in

  • 3/4 cup of milk
  • 1/3- 1/2 cup mini-chocolate chips (the mini ones were perfect for this!)

Fold it together and you're going to have some pretty shockingly pink stuff to cook with.

 Pour it into your pan, having greased the sides with some butter beforehand.

Oh - and I discovered an awesome trick which is kind of a "duh" but which had never occurred to me until I ran across it searching for recipes - line the bottom of your pan with parchment paper and your cake will be a snap to pop out of the pan! 

Bake @ 350 for 1/2 hour and then start checking the cake with a toothpick to check when it's ready (toothpick won't come out mushy) - mine took about 40 minutes.

THAT'S A PINK CAKE! Your house should be smelling pretty "strawberry" now.

parchment paper, I love you!

Once the cake cools, it's time to frost:

Take

  • 2 packages 8 oz cream cheese  
  • 2 cups confectioners' powdered sugar in a mixing bowl, and whip with an electric beater until smooth. 

(*DONT DO THE NEXT PART UNTIL THE STUFF IS SMOOTH, or you'll end up having to "zamboni" your ice rink like I did and start a new batch because it'll end up all powdery )

Then add about 

  • 1 cup of heavy whipping cream and beat again until you have a spreadable consistency.

Decorate as desired, in my case, it was with a hockey rink and some printed card cut-outs of pictures of cats playing hockey. :)


Juergen Krauss's picture
Juergen Krauss

Hi,

I've made the Pane alla Cioccolata fron Carol Field's Italian Baker many times with great success, and I always wanted to try the Pane al Latte e Cioccolata, which brings milk bread and chocolate together.

However, I have some problems with the milk dough recipe from the first edition of the book.

/* UPDATE */

After input from lvbaker I recalculated the formula, and now I have a milk dough with the same hydration level as the chocolate dough. A charm to work with. My adjusted percentages are given below, here some new photos:

The bread on the rise:

The whole loaf:

Detail shot:

Pane alla Cioccolata:

"Sponge": Water 15%, Sugar 0.7%, Instant Yeast 1%

Dough: all of the "Sponge", Flour 100%, Water 47%, Egg Yolk 3%, Butter 3.8% Sugar 20%, Cocoa Powder 5%, Chocolate Chips 25%, Salt 1.6%, Total 222.1%

Pane al Latte

Sponge: Flour 25%, Milk 25%, Sugar 3%, Instant Yeast 0.6%

Dough: All of the sponge, Flour 75%, Milk 25%, Rum 3%, Egg 12%, Butter 10%, Salt 1%, Total 179.6%

/* OLD POST */

But first some photos of this spectacular bread:

The shaped loaves, resting:

After the bake:

Crumb of a third loaf, a braid:

This is very tasty, as you can imagine.

Now to my problem:

The recipe gives for the sponge of the milk dough the following quantities:

1 3/4 teaspoon dry yeast

1 tablespoon sugar

1/4 cup milk

1 cup less 1 tablespoon (135g) flour

Now, this is not enough liquid to hydrate the dough, and it definitely doesn't make the batter it should.

I am kind-of improvising,

but has anyone got the second edition of the Italian Baker? What quantities (% or g) are being used there?

Thanks a lot,

Juergen


sonia101's picture
sonia101

I needed a break from gluten free baking and felt like baking with REAL flour!!! lol I found this recipe a while back on the Internet somewhere but sadly no longer have the link.

500 grams wheat flour
280 ml water
7 grams dry yeast
15 grams baking malt
15 grams of salt

Lye solution
20 grams of sodium hydroxide (NaOH)  dissolved into 1 litre of cold water


Mix all ingredients until the dough forms a nice soft ball, I used my mixer with the dough attachment and then kneaded by hand because I haven't kneaded a dough in soooo long! Kneading is like free therapy :-)


Cover the dough and place in a warm spot for 1 hour or until it has doubled in size.


Remove the dough and knock it down and then divide the dough into 12 equal balls (66grams) let rest for 10 minutes and then form into pretzels and place on an oven tray lined in baking paper.


 Cover and let rise for 20 minutes in a warm place.

Then place the trays in the fridge for 1 hour (or longer if that suits you, I have left them overnight) this makes the pretzel firm and they will not fall apart when you dip them into the lye bath.

BTW this photo is NOT my food fridge, it's the beer fridge in the backyard!! lol

As you can see after 1 hour in the fridge you can easily pick them up without the pretzels bending. Leave the pretzels in the fridge until you are ready to dip them, they soften very quickly!

Next the Lye Bath:

USE EXTREME CAUTION: Caustic even a weak solution like this is considered corrosive. Always use gloves and use extreme care. Never use Aluminium with caustic soda, and always line your baking trays.

Add 1 litre of COLD water into a GLASS bowl and then add 20 grams of sodium hydroxide (NaOH) into the water and stir until dissolved. I used a stainless steel slotted spoon to stir the mixture.


Put the pretzel onto the stainless slotted spoon and then lower it into the lye bath for about 10 seconds.


 Drain the Pretzel and place back onto the lined baking tray, score (through the thick part of the pretzel horizontally) and  sprinkle with salt. Place in a preheated oven at 180 Degrees Celsius for 20 minutes. Once you have dipped them they need to go straight into the oven, so if you have a few trays leave the surplus trays in the fridge  and dip and bake them when the oven is free.


Now I'm off to eat these with a BBQ dinner that my husband is cooking :)

Cheers Sonia


bryoria's picture
bryoria

Thanks to the advice I received on my last post, I thought I'd try the Buttermilk Bread from the Laurel's Kitchen Bread Book.  What a difference from the oatmeal bread of the other day!

I made the dough exactly to formula, using the larger amount of butter (50 grams) and my own home-milled whole wheat flour which had been aged and stored in the freezer for the past 2 months.  The buttermilk was store-bought, whole buttermilk (3.25% fat).  I didn't amend any of the liquid or flour amounts.  The dough was beautifully soft and pliable, as-is. 

Instead of kneading for 20 minutes by hand (!), I mixed the dough in my stand mixer for about 8 minutes, give or take.  There was a short break in the middle where I had to help one of my kids tend to an injury, but it was only a few minutes.  I then kneaded the dough for another minute or so by hand, just because it was so lovely to work with and I had to get my hands into it.

After that, let it rise for about 2.5 hours in the oven with the lights on to make it warm, giving it a stretch and fold twice in that time. 

I decided to make dinner rolls instead of loaves, so divided the dough into two portions.  One of the portions I made into 12 rolls, and the other into 15 rolls.  I put the rolls into two 9x13 metal pans that I had greased lightly with solid butter.  I let the rolls rise for about 40 minutes in the microwave (trying to keep them out of drafts - we have a bit of a blizzard happening outside) until they were all touching nicely. 

I baked them for 15 minutes in a 400F oven.  I pulled the pan of 15 out right away, and let the pan of 12 bake for another 2 minutes.  The centre of the centre roll measured about 195 F when they came out and they were all beautifully browned: 

I brushed them with melted butter, just because the book suggested it and I'd never tried that before.  It made the rolls shiny and softened the tops:

I confess I didn't wait for full cooling to tear one open.  It was incredibly soft and tender.  This recipe was a huge difference from the previous Oatmeal Bread.  Can't wait until supper!

Pages

Subscribe to Recent Blog Entries