The Fresh Loaf

A Community of Amateur Bakers and Artisan Bread Enthusiasts.

Recent Blog Entries

jschoell's picture
jschoell

This is my second experiment with using beer brewing methods to make a bread.

This time I wanted to see how the flovor of hops would taste in a baked loaf. 

barley flour soaker. Leave at room temp overnight.


1 lb of malted barley of your choice... I used 90% special B and 10% chocolate malt. Place grains in a large pot and cover with water (no more than 2 cups) Slowly raise temp until it reaches 160F, then turn off heat, cover, and let sit for an hour. strain the liquid into a new pot. Save the spent grain for other fun stuff. 


add whole hops to the strained wort, and begin the boil. Boil for 30 minutes, keeping a loose cover on the pot to prevent evaporation. Allow to cool to room temp. Strain out the hops and your wort is ready to add to the dough!


Combine the flour, salt, sugar, and yeast. Whisk together. Tear up the soaker and add to the flour mixture. Add oil, wort and water. Mix until you get a ball, then transfer to stand mixer.

knead for 5 minutes, rest for 2 minutse and knead 2 minutes more.

Place dough in oiled bowl and refrigerate at overnight or longer if needed. 

On baking day: Remove dough from fridge and allow to reach room temp, about an hour. Stretch and fold and place back into bowl. After 30 minutes, do this again. ferment until dough reachews 1.5x original size. Divide into 2-3 pieces depending on size of loaves desired (I made two, but I think smaller loaves would be better for a more open crumb). Allow to proof for and hour. Preheat oven to 500F. Add water to steam pan, insert the loaves and reduce temp to 450. After 15 minutes, rotate and reduce temp to 350. Bake for 30 minutes or until center of dough reaches 200f. 

The finished bread had a moist, chewy sandwich bread texture. It is not very sweet. I does have a nice malt flavor and i can detect a little of the hop bitterness and flavor. I think I'll add more hops next time!

NOTE: all these amounts are approximate!

SOAKER

2 cups barley flour

a few grains of instant yeast

enough water to make a sticky paste (about a cup... I didn't take exact measurements.)

FINAL DOUGH

about 3 cups bread flour

2 tsp salt

3 tsp raw sugar

1 tsp instant yeast

1 tbsp canola oil

about 1 cup of cooled wort

about 3/4 cup water 


txfarmer's picture
txfarmer


Another winning recipe I adapted from "Laurel's Kitchen Bread Book" - my main change is to use SD starter instead of dry yeast, changed fermentation schedule accordingly, and used more water. This my first time baking with bulgur, why did I wait for so long? They are fragrant, full of flavor/nutrients, AND easy to work with. Do note that bulgur is different from cracked wheat, the former has been par-cooked, and the latter has not, which means they require different method of cooking. To make it more confusing, stores often label bulgur as "cracked wheat".


Sourdough 100% Whole Wheat Sandwich Bread with Bulgur(Adapted from "Laurel's Kitchen Bread Book")

Note: 15% of the flour is in levain

Note: total flour is 415g, fit a 8X4 loaf pan. For my Chinese small-ish pullman pan (shown in picture), I used 385g total flour. For mini loaf pans in the picture, I used 138g of flour each.


- levain

ww starter (100%), 17g

water, 29g

ww bread flour, 54g

1. Mix and let fermentation at room temp (73F) for 12 hours.


- soaker

bulgur, 64g

water, 90g

molasses, 17g

2. Mix and bring to boil, set aside before start mixing the dough. By the time it's incorporated into the dough, it would've been soaked for at least two hours.


- final dough

ww flour, 353g (I used KAF)

water, 121g

butter, 17g, softened

salt, 5g

milk, 150g

honey, 17g

all levain

all soaker

3. Mix together flour, water, milk, honey, butter, salt and all levain, autolyse for 40-60min. Knead until the gluten has just been developed. More kneading will be done later, so do not fully develope the gluten network now.

4. Rise at room temp (74F) for 2 hours. Punch down, add soaker, and knead until the dough is very developed. This intensive kneading s the key to a soft crumb, and proper volume. The windowpane will be thin and speckled with bulgur grains, but NOT as strong as one would get form a white flour dough. For more info on intensive kneading, see here.

5. Put in fridge overnight.

6. Take out dough, punch down, divide and rest for one hour.

7. Shape into sandwich loaves, the goal here is to get rid of all air bubles in the dough, and shape them very tightly and uniformly, this way the crumb of final breads would be even and velvety, with no unsightly holes. For different ways to shape (rolling once or twice, i.e. 3 piecing etc) see here.

8. Proof until the dough reaches one inch higher than the tin (for 8X4 inch tin), or 80% full (for pullman pan). About 4 hours at 74F.

9. Bake at 375F for 40-45min for the big loaves, only 30min for the mini ones. Brush with butter when it's warm.


Don't be fooled by all the visible grains, the bread is NOT tough, nor dry, nor hard


It's soft and full of flavor


I live it lightly toasted, so fragrant! Still got enough bulgur left to play with, cant wait.


Sending this to Yeastspotting.

ph_kosel's picture
ph_kosel

Peter Reinhart calls for malt powder in several recipes in Crust and Crumb so I ordered some diastatic malt from Amazon.  Yesterday was the first time I've tried it.  The stuff tastes quite sweet.  I threw together some dough, doubling up on the yeast and malt percentages Reinhart might call for just for jollies.  The stuff rose higher and faster than anything I can recall!!!  It was surprising, almost spooky!

wally's picture
wally

I've been out of the loop for sometime now, and indeed, this may be a brief 'coming up for air.'  I have a new job baking at a restaurant which provides the breads for itself, its sister restaurant, and another adjacent restaurant.  Right now we mix and bake about 600 - 800 lbs of dough per day, but that will increase as summer nears.  In addition, our restaurant group is planning on opening two new locations in the area between now and September, so our production requirements will increase substantially in the coming months.

Our major doughs are ciabatta (we'll bake 250- 300 lbs of 1 lb loaves per day, plus a couple hundred small 'ciabattinis'); pain au lait which is used for hamburger, slider and lobster rolls; English muffins; loaf breads (rye, white, multigrain), and a line of hearth breads we're just in the process of rolling out for retail sale at the restaurant.  And then there's homemade biscuits and cinnamon buns for Sunday brunch.

So I'm finding myself both overjoyed at the opportunity (we may be getting our own bakery built toward year's end) and overwhelmed by all that's happening.

Today, on my day off I practiced a bake of a new biscuit recipe.  And then decided to keep some long-neglected promises to provide croissants and pain au chocolat to my doctor's office (which has, over many years, provided 'no charge' treatment and advice on occasion) and the head chef at my local pub who provided my last 50# of KA Sir Galahad gratis.  It is a good thing to repay debts - particularly debts of kindness.

The recipe I used can be found here.  It's an adaptation of Dan DiMuzio's in his excellent textbook (as opposed to cookbook), Bread Baking. My only deviation was to up the butter content by 5% (it was convenience, not conviction).

The dough I made last night, and this morning I incorporated the butter block.  I gave the dough two series of single-folds, followed by a double-fold.  It was refrigerated for 20 minutes between the butter block incorporation, two-single folds and double (book) fold.  I then placed it in the refrigerator for 3 hours to chill well, before my final manipulation.

After 3 hours I removed the dough, which measured about 7"x 16" and cut it in two unequal parts, leaving me with one piece 7" x 10" long and one 7" x 6" approximately.  One I returned the the fridge and the other I proceeded to roll out to a rectangle about 14" high by 21" long.  After lightly flouring the surface I folded the dough top to bottom, to form a rectangle 7" x 21".  From this I cut out triangles of 4 1/2" width. 

The first batch of dough yielded 14 croissants.  The second piece I rolled out to a height of 8" and a length of 18".  I again folded it width-wise and cut in into 3 1/2" lengths, yielding 10 rectangles for the pain au chocolat.


Proofing was 3 1/2 hours, which is fairly lengthy, but my house temperature was at about 70 degrees F, so I allowed it to proceed at its own pace.  I covered the croissants and pain au chocolats with plastic wrap during final proof, but did not apply eggwash until just before placing them in the oven.

Bake was, following DonD's recommendation, 15 minutes: 5 min at 425F, 5 min at 400F, and 5 min at 375F.


In future bakes, I want to up the recipe amount: I think my current dough yields croissants that are a wee bit smaller than I'd like them to be.

Ok, bedtime at 8pm for risetime at 3am.

Best to all-

Larry


jennyloh's picture
jennyloh

Thanks to Yippee for her recipe, I managed to do this soft white milk loaf. Obviously I didn't read the instructions properly and end up with 1 loaf of bread which I could have split into 2. Anyhow, I believe I will make this bread again.

I can't find the link to upload the picture here, somehow it disappeared on me occasionally. But here's my link to what I was referring to. I will try again to upload the picture the next time.

www.foodforthoughts.jlohcook.com

David Brown's picture
David Brown

My wife and I are beginning to learn the techniques involved in baking bread. So many new terms to learn, so many steps to master. We appreciate this forum as the readers here have already helped us tremendously.

Our question now is the difference between starter and preferment. We were advised to use a preferment to create more flavor and possibly larger holes in our foccacia loaves. While reading about preferments we came across the term "starter" which we had heard before. We thought starter was only used in sourdough bread.

Can someone describe these two aspects, and point us to literature or websites that would be helpful in our journey to the percfect loaf?

Anonymous baker's picture
Anonymous baker (not verified)


I tried making my first loaf of bread that wasn't entirely made from white flour. 

As much as I love white bread, I'm eating it all the time so I felt the need for something that was a bit better for me.

I just used what I already know for making white bread and added some rye flour and wholemeal flours, then mixed in some mixed seeds. 

I'd say the percentages of flour were roughly;

60% Strong White

30% Rye

10% Wholemeal

1 egg

A quarter of an English "tea mug" of olive oil

about 2 tea spoons of dried yeast 

3 or 4 tea spoons of demerera sugar

3 quarters of a tea spoon of salt 


and full fat milk - 

I actually start the whole mix proportions off with the milk, it's why I never measure anything, I suppose some people talk about hydration of their bread, but my way of making the loaf is to put as little flour in as I can so the dough will let me knead it, no more no less - I'm trusting the dough to know best.

But if you imagine a normal kitchen measuring jug which would hold about a pint and a half, if you poured an inch or so of milk in the bottom, you'd have the amount of milk I use.


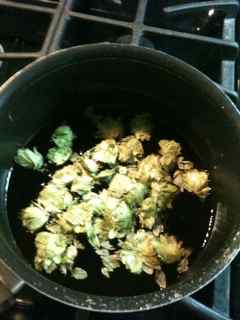
So, as always - I warmed the milk and oil (with a bit of sugar for good luck) in the pan on a medium heat until it was warm enough to feel it being warmer than my finger but not hot, poured the warm mixture on to the yeast and sugar in the bowl (the salt was in there too but on the other side to the yeast - again - a habit) 

I use a whisk to mix the mixture to a lovely warm, yeasty. sweet smelling mix - and I know when it's going to work because it smells good. (believe it or not).

I mixed in some white flour until the mix was a bit thicker than batter, then covered it with a tea towel and let it sit beside the boiler until it was all bubbly - about an hour.


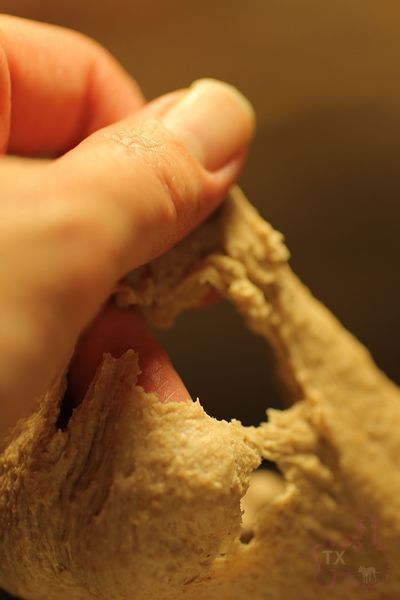
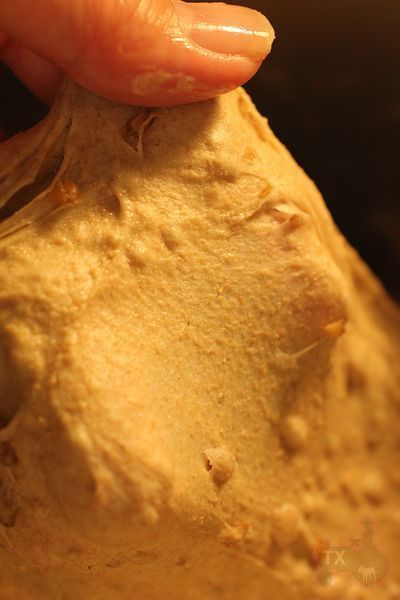
I then mixed in more white flour until it started to get thicker, which was when I then mixed in the rye flour - I noticed immediately that it made a more sticky and gloopy mix - I mixed in enough rye flour to make the mixture close to being kneadable - then I poured in some wholemeal and set about kneading it.


I, truth be known, chopped and changed between all 3 flours just depening on how I felt, when the dough stuck to my hands. 

I kneaded for about 10 minutes, then let it sit again beside the boiler, covered with a tea towel - an hour later it had doubled in size.

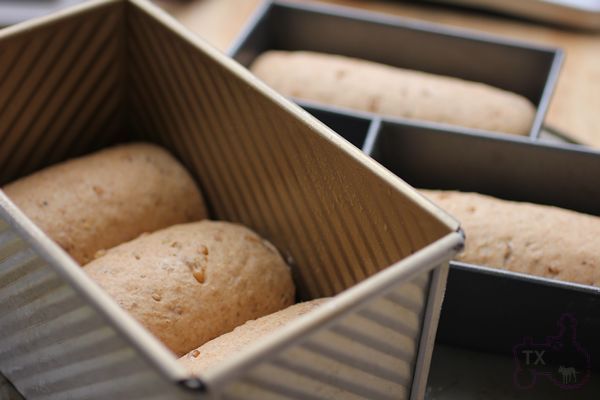
I flattened the air out of it and kneaded in the mixed seeds (I think, pumpkin, hemp and flak? not sure) then I shaped in to a nice wee bowl shape, slightly tucking in the bottom as I turned it around and around on a horizontal axis in my hands, because I hear that folding of the underside - aids the rise.

I then placed my new experiment on some baking paper on the tray in which it would finally be put in to the oven (I've found it's important not to touch it when it's risen for the second time, so put the dough on the tray you'll end up baking it on).

I put the oven on about 220 ish but it's fan assisted so maybe that's hotter than other ovens? I don't know.

And just for the crack I gently rubbed some basil olive oil over it and put some more seeds on the top.

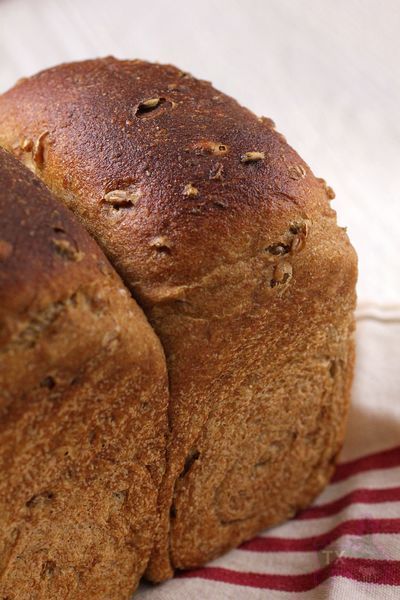
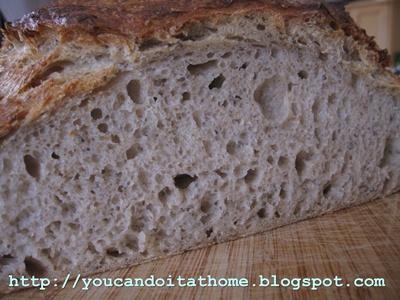
20 minutes later it was out - smelled lovely but didn't look like it had risen much, so I was a bit worried about it, immediately I noticed how soft the crust was and how it wasn't as firm as white bread, so I didn't give up hope.


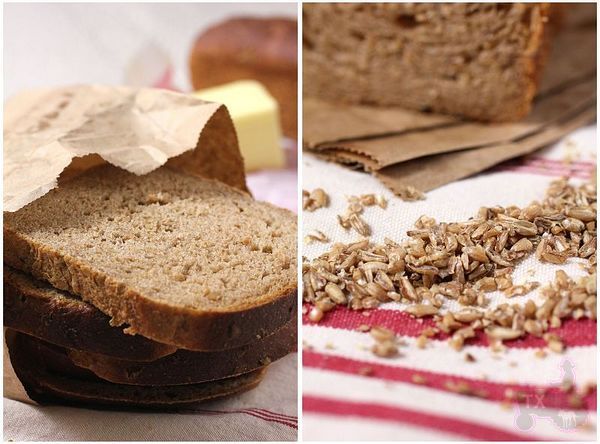
I went to work from 4pm until midnight (you don't have to do that part hehe) thinking of my loaf all night - got home and tried it out, and it was lovely.

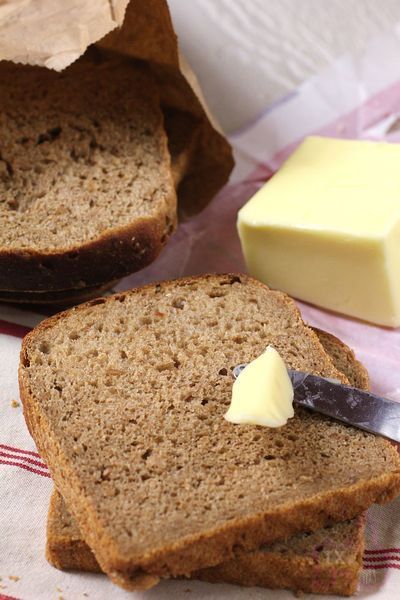
It was really lovely. 

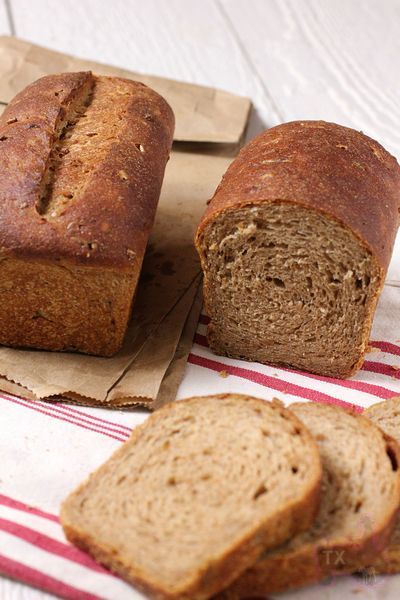
It's got a darker taste than normal, but the texture is very similar to what I normally do, the seeds taste lovely - and now to be honest I just want to make another one, but with sun dried tomatoes and onions and garlic - or I don't know - the possibilities are endless.

I promise to try to give out exact measurements in the future - I don't like cooking like that, but if anyone wanted to copy what I'd done (the beginners out there) I'd like to tell them how I did it.


MadAboutB8's picture
MadAboutB8

Another weekend baking with 20% rye bread. This time I made the bread using white starter. I still continued retarding the shaped loaved overnight. I was aiming to reduce the sour flavour in the bread I made last weekend (same 20% rye and retardation, but with rye sourdough starter).

I also added chia seeds into the dough. Chia seed was turned into gel after they were soaked, and the gel turned into liquid when baked (I believe). This made the bread really moist and chewy. The bread turned out nicely with good oven spring. I was happy with the taste using white starter. It didn't have the same strong sour flavour as last week's.

I baked two loaves, one in pan and the other as a free-standing loaf. They were both baked at the same time, same temperature. It's widely recommended to bake the bread in loaf pan at slightly lower temperature (to get the softer crust and not to overbrowning them, perhaps). However, baking the loaf-pan at the same temperature as a hearth bread worked fine for me as well. The crust was soft with a good oven bloom. The crumb was also relatively open and moist. I believe it worked as the bread is lean bread, without sugar or fat. So, it didn't have any overbrowning issues as a result.

I also tried new steaming method from Chad Robertson's Tartine Bread book. This steaming method was in the baguette baking section. He suggested this method as the baguette won't fit into the combo cooker. Soaking wet towels were place in the tray while the oven is preheated. The wet towels are removed after 15 mins of baking. I combined this method with my usual, boiling water in cast iron pan. This method had created a lots, lots of steam. So much so that my smoke alarm went off, and kept going off everytime I opened the oven. It also gave a nice shiny crust, shinier than usual for me.

For a full post and recipe, you can find it here.

 Sue

http://youcandoitathome.blogspot.com

ph_kosel's picture
ph_kosel

Last night, sometime past midnight, I got a craving for sourdough rye bread.  I had dark rye flour and some starter I made from the same flour a couple weeks back, the first time I made my own starter instead of using commercial stuff from sourdo.com.

Also, I was looking for something to do with the bag of semolina I got at the bulk foods section of the local Winco Foods market, the same place I got the rye flour.  Found a post on TFL about a sandwich loaf made with semolina that got huge oven spring and decided to throw some in the mix.

Anyway, sometime past midnight and suffering from caffien-induced sleeplessness I whipped up a batch of dough as follows:

Ingredients:

50g Semolina (yellowish stuff, coarser than bread flour)

200g unbleached bread flour

250g dark rye flour

333g water (I suppose I could just use ml but I don't have a graduate like I used to use in chemistry class once upon a time)

1.5 teaspoon salt

~1 tablespoon of my homebrew rye starter from the fridge - sorta neglected, sour and hungry stuff

Procedure:

Mixed the dry ingredients in one bowl, the water and starter in another bowl, added the liquid to the dry stuff, and tried to make dough with my recently purchased Danish dough whisk that was actually made in Poland.  Found the dough was too thick to mix with the whisk so turned it out on the counter and kneaded it into submission - sticky stuff, but not as sticky as I recall similar dough with no semolina being. Made a log of the dough and plopped it in a breadpan lightly greased with olive oil, spritzed the top with oil, and covered it with plastic wrap.

Results (so far):

Got up around noon, found the stuff hadn't begun to rise noticeably.  At this hour (9PM my time) it has risen some but not enough to fill the bread pan.  More later, time to watch Hawaii 5 OH.

David Brown's picture
David Brown

My wife and I recently aquirred an interest in baking Foccacia. We have made some screamin' loaves but when we compare them to a certain loaf we purchase at Trader Joe's.... we are lacking. Trader Joe's loaf is filled with large holes. That is a characteristic we love but we are not able to reproduce the holes. The recipe we use for the dough is 3 cups of bread flour, combo of .75 cup water and .25 cup of white wine at 120 degrees poured over 2.25 teaspoons of active dry yeast, to the liquid we add.....one T of olive oil.....one T of honey....and a teaspoon of Kosher salt. We let it rise once, punch it down, then let it rise again, then shape it into foccacia loaf and bake at 450 for 13 minutes.

Does anyone out there know what we are doing wrong? We only produce bread with tiny holes. It tastes awesome, but we want to know the difference. How do we make big holes?

Help......

Pages

Subscribe to Recent Blog Entries