The Fresh Loaf

A Community of Amateur Bakers and Artisan Bread Enthusiasts.

Recent Blog Entries

davidg618's picture
davidg618

Currently, I'm only baking three bread formulae (our daily breads), baguettes, and two sourdoughs: 50% each WW and Bread flours , and a mostly-white flour (equal amounts AP and Bread flours and 10% Whole Rye). I alternate the sourdough bakes week-to-week; and, for the two most recent bakes, I've retarded the fermenting dough for 17 hours @ 54°F. I'm doing this to extract maximum flavors.

This is the first mostly-white version with my new starter.(67% Hydration)

The flavor is all I could hope for--in both the crust and crumb. The Rye is indistinguishable by itself, yet without it the taste would be less. I've been baking this formula for at least a year; its predecessors were a less than inspiring all-white version, and a only slightly better flavored 10% Whole Wheat version. The retardation hasn't changed the formula's flavor, but deepened its intensity.

Volume increase from dough to finished bread isn't talked about much on TFL, rather oven-spring is the more common measure. These loaves, exhibited the greatest volume change I've experienced to date. To give some sense of it here is a photograph--minus the "taster slices". The container holding the loaves is that used to ferment the dough. The mixed dough occupied slightly more than 1 liter, approximately 1100 ml (the bottom of the photograph). 

David G

MarieH's picture
MarieH

Hamelman’s Vermont Sourdough is one of my favorite recipes. It is so consistent in both flavor and texture. It’s hard to mess up this formula. It’s still pretty warm in Tallahassee, FL so paying attention to the Desired Dough Temperature (DDT) is important. Following Hamelman’s instructions I needed chilly water.

Desired Dough Temperature           76

Multiplication Factor                         4

Total Temperature Factor                304

Minus Flour Temperature                71

Minus Room Temperature               78

Minus Pre-ferment Temperature     75

Minus Friction Factor                       26

Water Temperature                          54

I started the levain build yesterday at 6:30 p.m. and started the dough at 7:30 a.m. today. I created a timing chart to help me along the way.

The finished batards...

Mebake's picture
Mebake

This is an illustration of Shaping a dough into a ball (Boule). I learned this technique from San Fransisco Baking circle.

David (dmsnyder), was the first to demonstrate this shaping method here.(thanks David!). I thought of illustrating the method, and share it with all of you.

lumos's picture
lumos

******************************************************************************************************

Note : "The method"  edited on 11th Oct. '11.  Sorry I forgot to write you need to lower the temperature of the oven after 20 minutes! Sorry!!!!!!!!

****************************************************************************************************

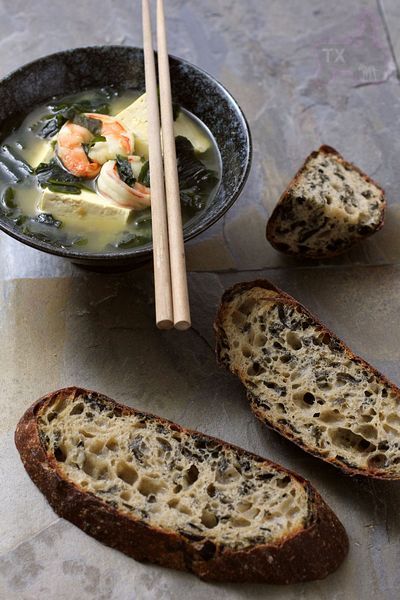
It doesn't happen all the times, sadly, but there're a few breads I was lucky enough to come across during our holidays abroad of which the momory has been staying with me even now.  A beautiful bread we had at breakfast in our hotel in a charming little village of Wengen, at the foot of Jungfrau in Bernese Oberland region during the first holiday in Switzerland long time ago (just after dinosaurs had become extinct) was one of them.  

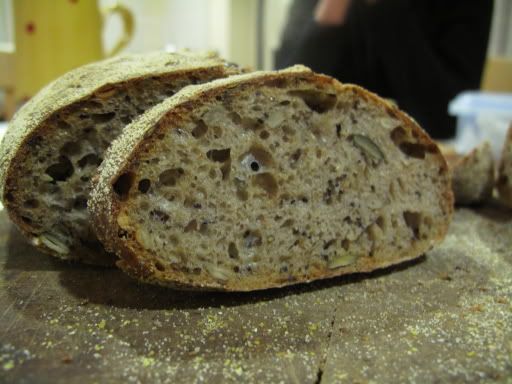
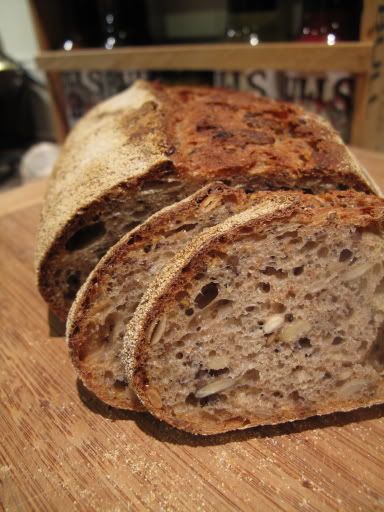
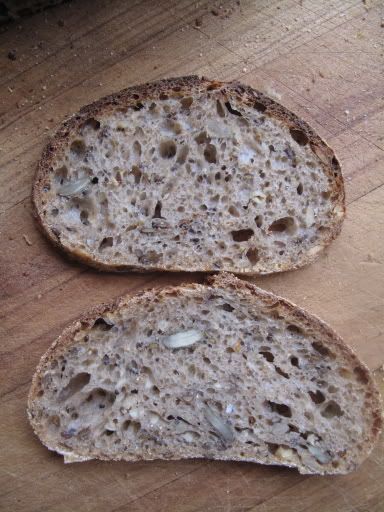
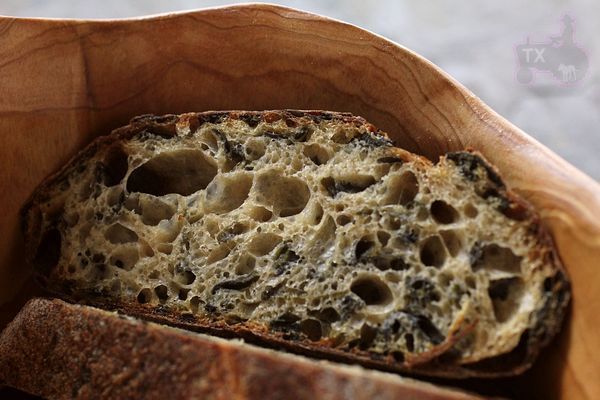
 Judging from the colour and flavour, I knew it had good proportion of wholemeal and probably smaller amount of rye, but its relative lightness and  soft-ish crumb also told me it probably had more white flour than other two. And I was also quite sure it was commercial-yeast based rather than sourdough.   But those were the days well before my breadmaking became ‘obsession,’ so I didn’t know how to ask right questions as to how it’s made or what sort of grains were used.  When one of the waiters in the hotel’s breakfast room told me it was a most common bread in the area and I was satisfied with the info, (naively) thinking I’d find a right recipe for that easily enough when I got home….……and that was more than 20 years ago and I hadn’t been able to find one, yet.                                

But one day, the Saviour arrived in the shape of our fellow TFLer, Heinz.  He shared with us a recipe for Swiss artisan bread he ate as a child when he was growing up in, no other than, Hurray!, the glorious Bernese Oberland! 

  I was overjoyed and decided to try out the formula straightaway, but wanted to incorporate my starter instead of commercial yeast in Heinz’s recipe.  He assured me as long as I kept to the basic ratio of 4 : 2 : 1 = white : ww : rye, it should be alright, so that’s what I did…..nearly 2 months ago and have forgotten to blog about it until this morning……..::sigh::

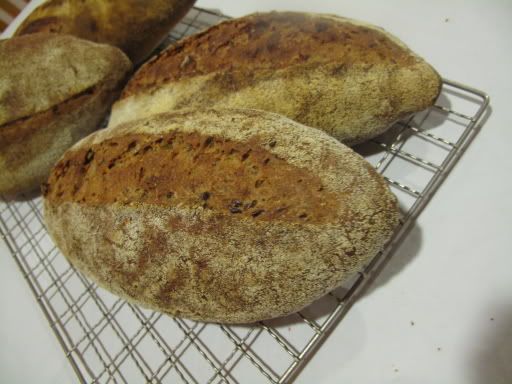
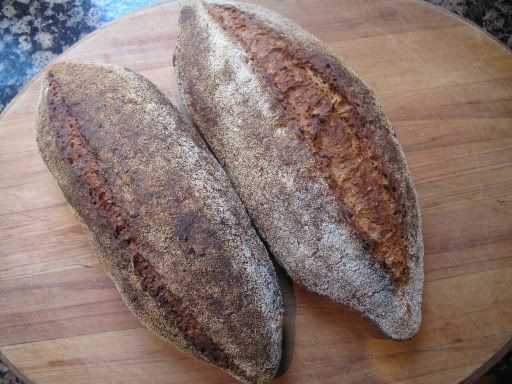
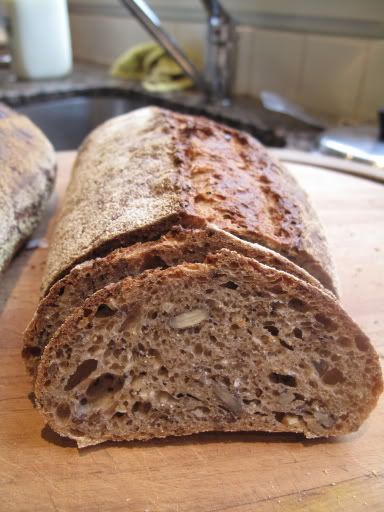
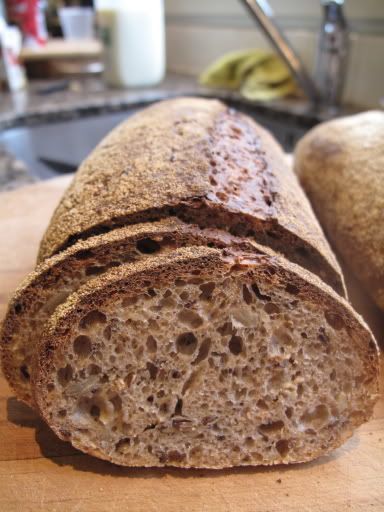
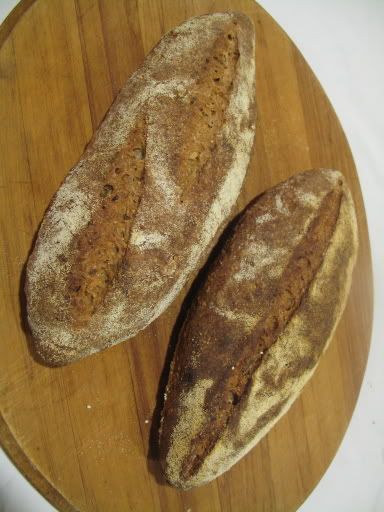
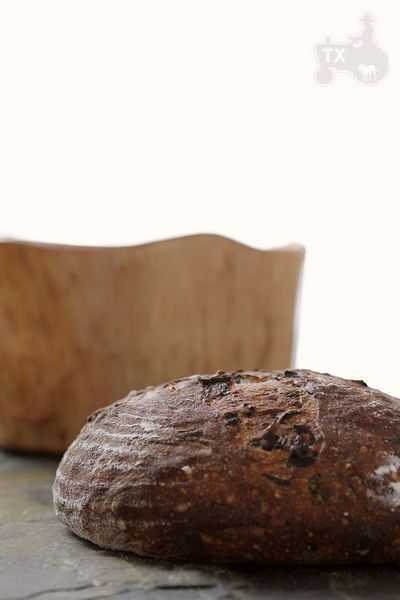
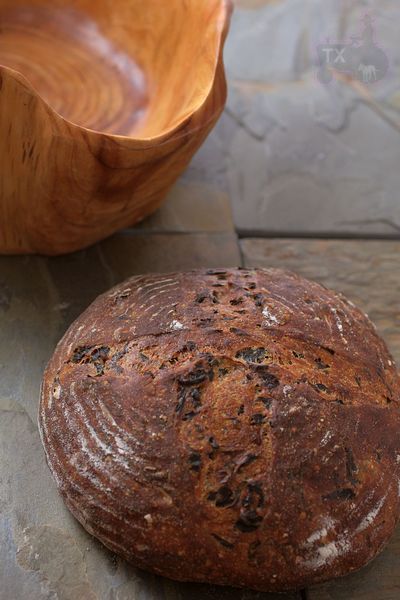
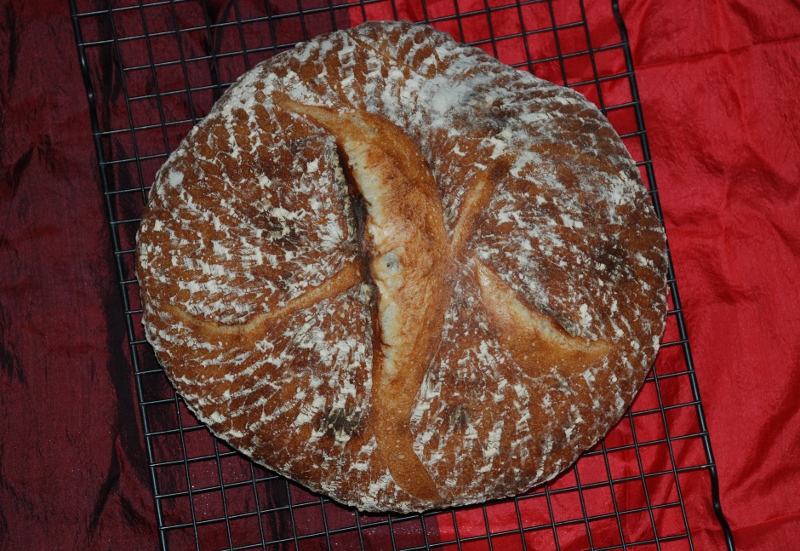
So, this is my take on Heinz’s wonderful artisan Swiss bread, made with sourdough.  By no means it’s as beautiful or artistic as his beautiful crust and scorings, but still, this is the closest I’ve had ever made so far  to the bread we had in Switzerland, and,  though it’s not exactly the same, I liked the flavour very much.  So much so that a formula I conjured up some years ago and had been calling ‘Swiss bread’ was rescinded of its title immediately and now this is my ‘Swiss bread.’ 

Thank you very much, Heinz, if you’re reading this. I owe you so much!


 Swiss/Bernese Oberland-style Sourdough Loaf, inpired by Heinz

 Ingredients : (makes one medium loaf. Dough weight around 650g)

   Starter (75% hydration)   125g 

        Fed twice during 8-12 hr period before use with 50/50 = strong/wholemeal (strong 37g + WW 37g + water 55g = 129g)


   Main Dough

     Strong/bread  flour   140g

     Plain flour    40g

    Stoneground WW  flour     80g

    Stoneground Rye flour     40g

    Wheatgerm     1 tbls

    Dry yeast (optional)    1/8 tsp or less

    Water     220 – 230g

    Salt   6g


 METHOD

1.   Feed S/D twice during 8-12 hr period before you start making the bread.

2.   Mix all the flours, wheatgerm in a large bowl.

3.   In a separate small bowl, mix S/D and water to loosen S/D a little.

4.   Pour S/D+water to the bowl of flours and mix briefly into shaggy mess. Cover and leave for 30 minutes to autolyse.

5.    Sprinkle salt on the surface of the dough and S & F in the bowl for 20 times or so until salt is (probably) evenly distributed. Cover and Leave another 40-45 minutes.

6.   Two more sets of S & F in the bowl (just 8-10 S&F this time, enough to circulate the bowl once) every 40-45 minutes.

7.   Cover and cold retard for 8-12 hours.

8.   Make sure there’re a few large bubbles on the surface of the dough after cold retard. Take it out from the fridge and leave at room temperature for 1/2-1 hr.

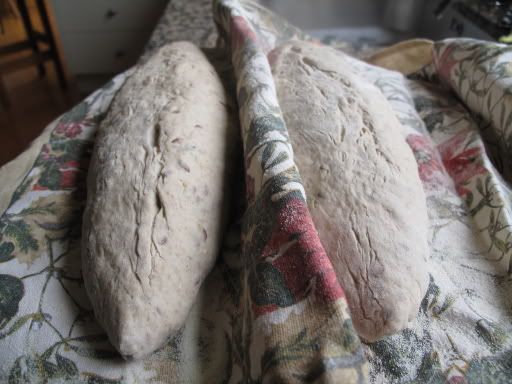
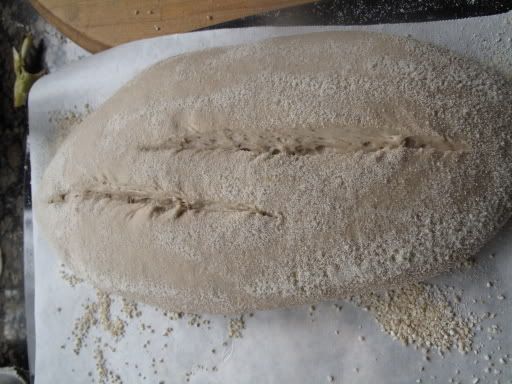
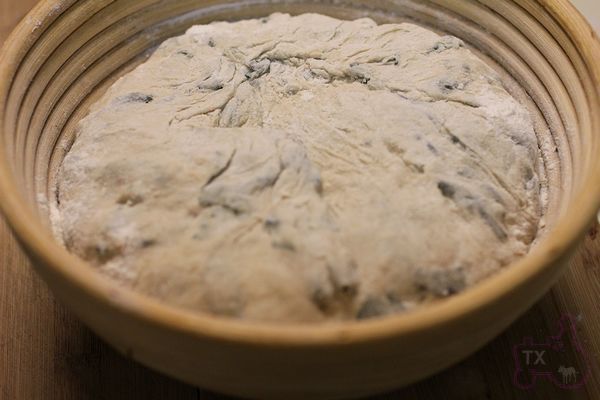
9.   Pre-shape and shape. Put in a bannetton and proof at room temperature .until your trusted finger-poking test tells you the dough is ready, which can be anytime between 2-4 hrs depending upon the temperature and the strength of your starter.

10.   Bake in a pre-heated covered pot at 240 C for 20 minutes.

11.  After 20 minutes, remove the lid, lower the temperature to 200C and bake for another 20-25 minutes.

 *Option – You can also bulk ferment for 1-2 hours at room temperature and cold retard in a bannetton after shaping.

 (Note:  This is slightly adjusted version of Heinz's original formula, in the attempt to make it (hopefully) closer to the bread we had in Switzerland.  The ratio of  flours for main dough is roughly 4.5  : 2 : 1 = white : ww : rye, which makes the overall ratio,  including the sourdough,  roughly 5.3 : 2.9 : 1 = white : ww : rye.) 


lumos


HokeyPokey's picture
HokeyPokey

I seem to be going through a “dud” phase – two below the average sourdoughs in the row. Tried a multigrain rye, and it was a disaster, all grey inside and looks like a brink. Another rye this morning – same problem, haven’t cut it yet, but it doesn’t look promising.


To cheer myself up I’ve decided to make a pie – can’t recommend a better way to cheer you up. Wonderfully tangy and full of blueberry goodness, it was gone in less than 5 hours :)


 Full recipe on my blog

ehanner's picture
ehanner

It's funny how things come together some times. Katie, one of Andy's students in college developed this recipe that Karin (a German baker transplanted to Maine) baked and posted last week. It was a beautiful loaf. About the same time a new poster from Iceland ( Schrödinger's O...) presented a beautiful bread with a natural expansion instead of slashing. I decided to try my own nut brown ale since it is very flavor rich and semi dark and, available. I also added a small amount of toasted wheat germ to add a little dimension to the chew and flavor.

I first must say to Katie I think your bread is wonderful. It has a full depth of flavor and a great aftertaste. Your hydration and baking times were right on for me. Thank you so much for sharing your creative energy. also a word of thanks must go to Andy, for bringing this talent forward for us to see and enjoy her work. And Karin for her inspiration and conformation the recipe can be baked out of scale. It's always nice to see her work. Then comes -kristjan, who showed us a beautiful boule he has been baking for some time and shared with us only that day. I was so inspired that I tried a shaping and natural expansion I had been wanting to try instead of scoring to see if I could bring some art to the surface of this loaf. So, here is my take on Katie's Stout with Flax Seeds.

nzsourdoughman's picture
nzsourdoughman

I am still new on bread making - 4th week in now. And I am learning more and more. I thought I would give the seeded multigrain sourdough a try from wild yeast blog. I subbed in pumpkin sesame sun flour poppy and flaxseeds in the soaker. I also subbed the course rye for fine rye. The mixture was pretty wet... it was sticking to my bench and hands.
But I have learnt to not alter the hydration and go crazy with flour. I kneaded it for two 3min intervals with a min break in-between.  I added the soaker and it went a bit wetter and had to scrape it into my bowl. From my understanding if its higher hydration and not well formed you give it more stretch and folds.
My dough was showing 68F which is pretty low temp for fermentation - she recommends 75. In peter rein harts book he says every 17F doubles the fermentation time. So that’s about 3mins every Degree... so I gave it about 1.25hr for each fold instead of 50min - or until I saw the dough was looking bigger in volume and loose. After two s&f it was still wet but had some shape. I upturned shaped, benched for 20, then degassing...
I'm a little unsure if you should degas a multigrain loaf since you might want to be keeping as much c02 in the dough as you can get since the seeds might make it harder for the dough? Then the question would you degas in preshaping like kingarther says to? or be as gentle as you can like hertz?

I shaped my dough into batards and let them rise for 2.5-3hrs until they barely sprung back with a indent. Does anyone have a video of testing a dough?
I need something to compare my testing to since I’m unsure if I am over proofing my dough’s?

Then when I go to slash the top I always make a mince job, My dough seams to be too gluggy. It rises well and upturns well, but always slashes real badly. I can never slash in one swoop, always takes a couple and it always catches the dough. In my cuts I get good rises but never an ear in my dough like other tflers... I really want to be able to create good-looking ears! What’s the trick to cutting gluggy dough?

Any tips to why my loafs are not rising or puffing up like other recipes? Or is this as high as I can expect to get a multigrain loaf? So far i belive it can be overkneading, overhydrated or overprooved. I'll upload some pics. I really want to make this loaf my trademark bread so any input would be much appreciated! Maybe I can make a video of me making it so you have a idea of what my process is like?

Cheers

Mark


Mondays first try... Not a nice rise


Tuesdays... I thought maybe i wouldn't degas the one on the right as much as the one on the left... it gave it more shape outwards (that i realy like) and an ear (that i realy like) but a big sagging bottom (really want to fix).


Wensdays Bake... shaped... scored...baked.

txfarmer's picture
txfarmer

Sending this to Yeastspotting.

Index for my blog entries

Lumos' blog post inspired me to make a bread with seaweed. In my miso soup loving mind, seaweed must go with miso paste, must. There are many different kinds of miso paste, you can find details here. The big bucket I stock at home to make miso soup is "soy miso" with dark reddish color. Since miso has a lot of  fermentated soy bean and salt, it's important not to go overboard and add too much. 15% seems to be a good balance for me: enough miso flavor, yet doesn't completely destroy the dough. With that much miso, plus my very fast rye starter, both bulk rise and proof were very fast. I didn't cold retard the proofing, since the fermentated soybean in miso might have negative effect on the dough over such a long period.

I used dried seaweed found at Asian markets, before use, I soak them in water for 5min+, and they expand to this:


Miso Rye with Seaweed
note: Make a 750g bread

- levain
whole rye, 57g
water, 45g
rye starter (100%), 6g

1. Mix and let rise 12-16hours.

- final dough
bread flour, 340g
miso paste, 60g
water, 220g
dried seaweed, 20g, soak for 5min+ then squeeze dry before use
all levain

2. Mix everything except for seaweed, autolyse for 30min, mix @ medium speed for 5min until gluten starts to develop. Add soaked and dried seaweed, mix @ slow speed until evenly distributed.
3. Bulk rise at room temp (~75F) for about 2.5hrs. S&F at 30, 60, 90, 120min.
4. Shape into boule, proof bottom up in basket, until it springs back slowly when pressed, about 60min for me and my TX kitchen.

6. Bake at 450F with steam for the first 15min, lower the temperature to 430F, keep baking for 25-30min.

I must admit all that miso does weaken the dough, but if fermentation and S&F are managed well, there still be decent oven spring.

Nice open crumb, very moist

You really must love miso/seaweed to like this bread, because both flavours have noticeable presence here.


varda's picture
varda

Since I got back from vacation my starter has been on rest and recuperation.   We were lucky to miss the hurricane by being in another state, but it still came through here (downgraded to tropical storm) and killed the power for at least some period of time, which made my already neglected starter even unhappier.   I've been baking a lot since I got back and it's been just edible but improving with each bake.  Today, I had a well fed starter ready to go and looking happy, but I really wanted to bake outside to see if I could get a nice burst on the hot WFO floor to make up for my troubles.   It was close to raining and most of my wood was wet from a downpour last night, so things didn't look very promising, but I decided to do it anyhow.   I mixed up a mostly white dough with a touch of white rye and prayed for no rain, scrounging around for wood that wasn't soaked all the way through.    I just managed to get the oven up to temperature with the dry wood that I had, and got my bread baked before it started raining for real.   I've got to stop living on the edge like this :)

 The crumb opened up and I managed to get at least some opening of the scores by using a steam pan in the WFO for the first time.    

The new look comes from my Indian or whatever basket. 

And following Sylvia's example (if not cooking talent) I threw a pan of potatoes and onions into the oven after the bread baked, so as not to waste the heat.  

Formula:

 FinalStarterTotalPercent
KAAP45014259291%
White Rye50 508%
Rye 771%
Water35010145170%
Salt12 121.9%
Starter250  23%


Method:

Mix all but salt.   Autolyze for 50 minutes.   Add salt and mix for several minutes.    Bulk Ferment for 2 hours with 1 counter full stretch out until very thin.    Shape into boule and place upside down in basket.   Proof for 2 hours.   Bake in WFO (around 650F floor temperature) for 25 minutes.  Remove and cool. 

pennypengo's picture
pennypengo

Hi there,

Does anyone have any input on this:  I just started two cultures, one Bahrain and one San Francisco.  They launched just beautifully at first but after checking on them in the fridge for a few days I see that the hooch is on the bottom of the mass not on top!  Also they small a bit "stinky" as opposed to the crisp sour bite that I've experienced in the past when proofing these cultures.

Any feedback would be appreciated!

thanks, Penny

Pages

Subscribe to Recent Blog Entries