The Fresh Loaf

A Community of Amateur Bakers and Artisan Bread Enthusiasts.

shaping

Mebake's picture
Mebake

This is an illustration of Shaping a dough into a ball (Boule). I learned this technique from San Fransisco Baking circle.

David (dmsnyder), was the first to demonstrate this shaping method here.(thanks David!). I thought of illustrating the method, and share it with all of you.

Mebake's picture
Mebake

This is an illustration of Shaping a batard i thought i would share with TFL memebers.

I Hope this helps new TFL members with shaping skills.

Grandma Dawn's picture
Grandma Dawn

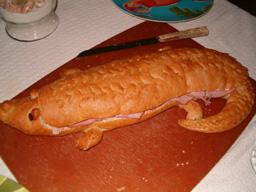
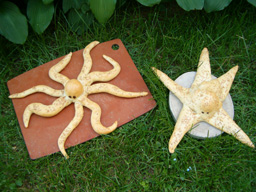
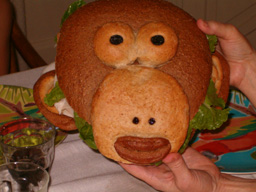
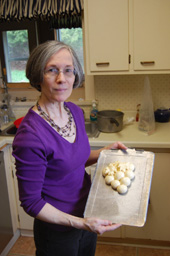
Several years ago I embarked on research and development of fun shaped buns.   The doughs I use are:  whole wheat, sweet roll, cheese, oatmeal, and caraway rye.  For the eyes I use currants, raisins, olive slices, a date slice filled with a craisin.   For fins and feet I sometimes roll out and cut pieces, other times I make a ball and cut toes in.  I use an egg white for the glaze and for some designs sprinkle with sesame seeds. 

Here are the tools I use: 

Dough cutter to divide the loaf, rolling pin, two scissors, bamboo skewer, chopstick, exacto knife, miscellaneous cookie cutters, and individual cue cards.

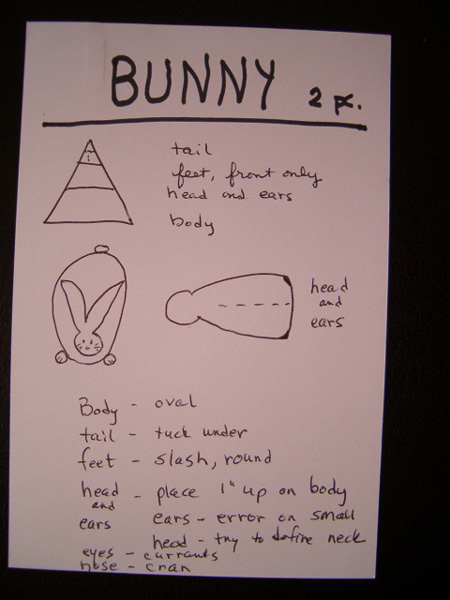
After the dough has risen the first time, I cut it into the number of wedges according to the number of buns I am making that day.  I found that working with wedges helped immensely to get the proportions correct for each bun.  I made a cue card for each design to show me how many pieces each design required and how to best cut the wedge to get the pieces.  I also added helpful notes from previous attempts. 

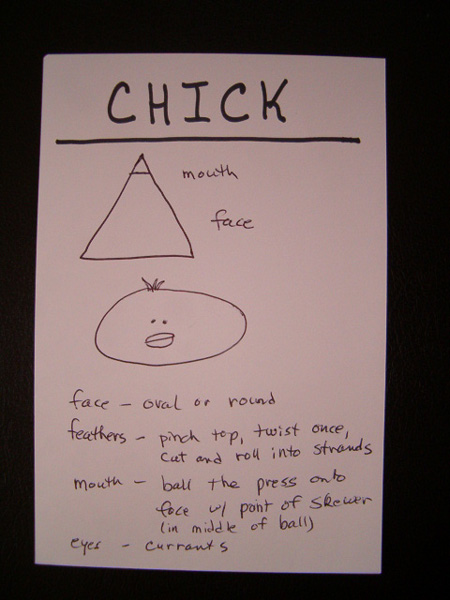
I like to make several different designs in one session.  That's where the cue cards come in handy.  Since you are working with a living organism working quickly is necessary.  I found it best to make a mix of easy and difficult designs so as to fit within the time frame I had.  I kept all pieces covered with lightly oiled clear wrap so as to prevent a crust from forming.  I found that making the bodies first then adding the smaller pieces worked the best.  I would shape the body, press it down to secure it on the pan then move on to the next body.  I would then start adding the smaller pieces, then the eyes and slash in details.  The bamboo skewer blunt end is used to make indents in the dough for the eyes and noses.  The chopstick is good for larger designs and also for cupping the ears of the bear.  The scissors are for the hedgehog and cat. 

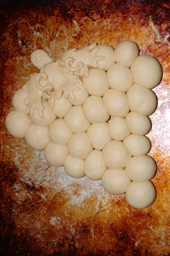
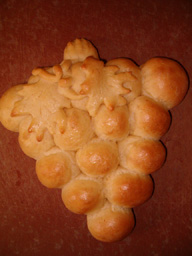
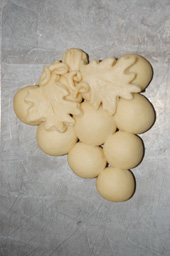
 The cookie cutters are for the fish, grape cluster, and rose. 

Right up until the time they go in the oven I continue to check on them and push the dried fruit in, etc. if they start to fall out of the rising dough. 

At first I thought I had to pinch the pieces together but found that simply tucking them under slightly held them together just fine.

Just before baking I continue to make small adjustments, redefine slashes if necessary, then brush on the egg white.  If any egg white pools in the eyes I dab off the excess with a corner of a paper towel.

My failure rate is very small.  It seems that with a little diligence the eyes stay put and the pieces stick together.


Grandma Dawn's picture
Grandma Dawn

After years of baking bread I started making fun shapes.  My first attempts were using the entire batch of dough to make one large "Fun Bun". 

I made a frog for the neighbor girls.

Then a mouse for my backdoor neighbor.

I tried a pig next.

Then a lizzard???

For Easter . . .

Decided to try bread stick dough and came up with an octopus and starfish, using sesame seeds for details -

Using sweet roll dough, dried fruits, and frosting, came up with Mr. Caterpiller.

I used caraway rye dough to give the color and texture I needed for Super Bowl Sunday.

Then a grand daughter asked for a monkey.  For this I used a regular rye bread dough and the caraway rye bread.

Can't forget Santa . . .I took a picture of the before baking and after to show that some distortion occurs during rising.

For the ladies I needed a flower.

My daughter-in-law likes a glass of wine so I created a cheese bread "grape cluster" for her.  I really like this one because #1 you can make different sizes and #2 the bun is so tasty that you don't need anything to go with it. 

So, these are my edible centerpieces.  I have since gone to making as many as 12 "fun buns" out of one 3 C. (flour) dough recipe.  I'll post pictures of those and then share how to's.


Salilah's picture

Tartine without Dutch Oven - running away?

May 1, 2011 - 2:06am -- Salilah

I've recently bought Tartine Bread book, and am trying the basic sourdough loaf

The stretch and fold seems to go fine, though I have needed to use a bit of flour for the pre-shaping / rough shaping, and for the final shaping.  The final shaping seems fine - quite a nice ball!  I've then proofed this in a linen-lined basket and it rises OK (if not that much).  The proof time feels short to me - I've poked it to the stage when it doesn't spring back fully...

ehanner's picture

New Kneading Video-Excellent!

March 28, 2011 - 1:28pm -- ehanner

I was just over at The Back Home Bakery looking at Mark Sinclair's Tutorial videos. I wanted to remember how he rolls up his sweet sticky buns in preparation for making Franko's Pineapple up side down rolls. Mark's videos are really excellent and I thoroughly enjoy going back to the DVD collection to remind me how to do things he does every day and I do once every few Months.

HLozada's picture

Questions on Shaping bread

February 26, 2011 - 12:57pm -- HLozada

Greetings all!

I am following the instructions for the Tartine Basic Country Bread recipe and have some questions on the initial shaping.  The description is, basically, "use your bench knife and work each piece of dough to a round shape".  I think he means to shape a boule, but I can't make sense of his description and the photo sequence (usually pretty clear on other parts of the process) is not very clear here.  

Pages

Subscribe to RSS - shaping