If you ever read my baker blog, you'll know that almost every week, regardless of what else I am baking, I bake a batch of pain sur poolish. I began baking a bread like this while reading The Village Baker. I've since adapted it to be even simpler.
This recipe really has become my control, my baseline for experimentation. Whether it be a new mixing technique, a new brand of flour, or a new baking schedule, when I apply a change to this recipe I have the easiest time perceiving how that change modified the outcome of my bread.
I'm offering up this recipe here because a few people have asked for it. But more than advocating this recipe in particular I'm advocating the method of finding something you like and using it as your baseline for experimentation.
My Pain Sur Poolish (Daily Bread)
Makes 2 loavesPoolish
1 cup flour
1 cup water
1/4 teaspoon instant yeastFinal Dough
1 pound flour
10-12 ounces water
1 teaspoon instant yeast
2 teaspoons salt
all of the poolish
Combine the ingredients for the poolish in a small bowl the night before baking. Cover the bowl with plastic wrap and leave the poolish out at room temperature overnight.
The next day, prepare the final dough, either by using the autolyse method of flour and water first then the rest of the ingredients with minimal mixing or by combining them all and mixing until you have decent gluten development (8 to 10 minutes).
I typically fold the dough once an hour twice during primary fermentation, then shape the loaves and give them a longer final rise, typically around 90 minutes. Meanwhile, my oven and baking stone are preheating as hot as they can safely go.
Baking, with steam, takes me 20 minutes, 5 minutes or so at maximum oven temperature, the remainder at 450-475. I rotate the loaves once half way through the baking.
That is it. Simple, tasty, and a great recipe to practice with.
Relate Recipes: Italian Bread, Rustic Bread.
Do you have a bread recipe that is your standard? Please, share it!
My Daily Bread


- Log in or register to post comments
- Printer-friendly version
Comments
Floyd,
I was looking at your recipe, thinking of making baguettes this weekend with it, but when I calculated the hydration, I came up with 90-100% depending on whether one uses 10 or 12 oz of water in the dough.
Is the poolish right? I've always used a poolish with roughly even weights of water and flour, and if you use a cup of both, I think that comes out to 4.25 to 4.5 ounces flour and 8 ounces water. Did you mean to say 1 cup flour and 1/2 cup water?
If you're wrangling with bread at nearly 100% hydration and getting the beautiful loaves I see, you are truly ... The Man. :-)
Agreed. I am trying this today. I used 12 oz water in the autolyze, which created a nice dough. But when I added the poolish it turned to soup. I added at least 1/2 cup more flour as I mixed, but I still have a dough that is more like that for an Italian flatbread. We shall see how it goes, but I don't think it is going to shape very well ;-(
Next time I think I will start with 10 oz water in the main dough.
sPh
I'm glad I'm not the only one who found this dough extremely wet...I used only 8 oz water in the autolyze and still ended up with a soup-like consistency once I added the poolish! I have only been making bread for a few months, so I thought maybe I just didn't know how to properly deal with such a wet dough. I ended up adding 1 1/2 cups of extra flour and it was still very wet (I used a mixmaster to knead and it barely started to pull away from the edges of the bowl), but it was more manageable and more what I pictured the "correct" result to be like. I am in the final stages of the last rise right now, so we will see how it turns out... I think next time I will try only 4 oz of water in the dough????
There is no question this is a super wet dough. It is not hand-kneadable, and only after folding a couple of times on a highly floured surface is it even shapeable (and even then, with difficulty). I've found I'm happiest with the results when I leave it that wet, but it'll still make a nice bread at a lower hydration.
Aha! Why didn't I read this whole thread before I tried this recipe? I thought I had screwed something up royally because I couldn't knead it in the smooth, masterful way I remember my grandmother did back when she made bread every day. Did I stop to think she was NOT making artisanal French bread? Nope. And so we learn from our mistakes.
Floyd, your tips, tricks, recipes and instructions are terrific. Thanks for all your hard work!
"I am not a cook. But I am sorta cooky."
how long can you leave a poolish sitting out before you use it an how long will it work?
I meant 1 cup to 1 cup on the poolish. I like the flavor I get out of a wet poolish better.
I'm guessing end up closer to 65 or 70% hydration by the time I bake it. The combination of a bit of extra flour I throw in when mixing plus the flour it picks up when I am folding it on a *highly* floured surface narrow the difference.
Got it. If I can find time to make a loaf of this, I'll let you know how it goes.
The crust on the loaf in your picture looks like a Panera sourdough crust, but of course this is not a sourdough. Is the crust as good as it looks? Is it chewy or flaky? What do you think creates the good crust - the very high baking temperature?
sPh
Does this crust come out softer? I made this today and it came out crisp but thin. I'm trying to figure out if it just comes out that way or if something else caused it.
Um... It typically doesn't come as crispy as a straight up French Bread, but it is still rather crusty.
Ever since I started baking bread(thanks to this faboulous cite) my husband wanted me to bake bread in the loaf style, but i did not have a loaf pan. So last night when he returned from his tour he brought a loaf pan. AND so I had to bake a bread immediately. Well not exactly so. I used all purpose flour n made a poolish n also added some of the dough that I has saved from previous baking. It was bubbly within an hour n smelled yeasty. I did not knead it too much and using a little oil made a ball n placed it in a greased bowl.As soon as the dough was near double I used the folding technique and repeated this once again n then placed the dough in the Refrigerator for a slow rising. In the morning the dough had more than doubled. Then I degrassed the dough and again using the folding method shaped the dough n placed it in the pan. After slashing n glazing I poped the loaf in the ovan with the fan on. I like my crust to be little soft so I sprayed water in the ovan once immediately before placing the pan inside n once after five minutes.
The smell of bread was so good. It was baked in 25 minutes.The crumbs was even n the bread was oh so soft inside. The coulor of the bread was not white but slightly pale can some one tell me why was it so. I think the all purpose flour I used was unbleached so the pale(cream) colour but could there be any other reason too.
n hubby was so happy to have his loaf. out came the butter n knife Couldn't wait for even five minutes n slathered it with butter n half the bread was gone. I took some to office for my friends n they too loved it.
Thanks a ton for this site n for sharing experiences. I have learned so much fom all.
shi
Shi - I've always sprayed water in to the oven to obtain a HARDER crust! And a spray five minutes into baking makes it even more so!
For a soft crust, I lightly flour the surface of the loaf and don't spary .. it seems to work! So if you find spraying makes a soft crust - it implies we are all being hoodwinked and there's no difference whatever you do!!!
Andrew
PS did you allow the loaf to rise again after knocking back and folding and placing i the tin~?
I just tried something this week to work with the crust as it was coming out hard and thick for my boules - I saw a poster suggest spraying the loaves with waater and thn covering the bread for about 1/2 of the baking time with a work cover - I had to improvise and used a metal mixing bowl.
I've now tried this technique twice and I think I'm sold in terms of getting that thinner crunchy crust that I associate wiith bread..... Open to others jumpin in if any other ideas...
andrew actually I did not spray much water just a few squirts on the walls of the ovan for ovan spring.i think for a real hard crust a lot of steam has to be created like by placing a pan of boiling water in the bottom or ice cubes etc. The crust was crunchy n thin not hard. I am really very very new to bread baking but this is how my bread came out.
I can say that the kneading i did was only for say 1 minutes(well the dough was quite wet)and then the twice folding, shaping and yes last rising in the pan. The Top was not perfect but after the slashing n ovan spring u couldnt see that. :))
Do u have any suggestion regarding the pale(cream colour) of my loaf(inside)could it be that the all purpose flour was unbleached(is that good). (sigh) in india we get only all purpose flour(we call it maida) no classification whether it is bleached or un bleached.
shi
I've had better luck with 2 cups of boiling water into a pre-headed iron skillet at the bottom of the oven. My oven vents so quickly, that I need the extra water to keep a decent amount of steam inside. I also spray water on the walls at 30 second intervals for the first 2 minutes.
Works well for me.
DON'T BLOCK THE OVEN VENTS.
I learned the hard way.
There are reasons that gas ovens are vented. Like... they need air in order to burn the gas. Like they need a way to get rid of the combustino gasses.
All in all.... like you said, don't blick the flippin' vents on a gas range. Electric is OK though.
Mike
I normally give a good water misting on loaf or loaves as they enter the hot oven, or put into cloche. My husband is an electrician say's no way to mist the walls of the oven.. This was sourdough baked under a cloche. qahtan
Beautify loaf, qahtan. Can you share more about the recipe and the temps at which you baked this?
In search of the perfect crust & crumb
Have any of you taken old recipes, that often called for baking the bread an hour at 375 degrees F, and figured out how to bake the loaves in much hotter ovens on baking stones/tiles? I'd appreciate your advise.
Sylvia
In search of the perfect crust & crumb
About the only time I use the recipes suggested temperature for bread is when I bake some thing like this....qahtan
You always get a good crispy crust when you use a cloche, before I bought
the one in KAF catalogue I used this one that my husband made for me,$7.99
at Home Depot, plus ring crew and washer, I ran the pot through the dishwasher first to remove any nasties that may have been on it :-))
But I always bake at a very high temperature,non convection, and I only mist as breads are entering the oven, never ever the oven walls. qahtan
Your loaf looked great and the idea of a cloche appeals.
Do you heat the cloche in the oven with your (appears to be) pizza stone? Then put the loaf on the stone and put hot cloche on top?
I can imagine this would simulate an old fashioned brick oven. If so - I shall get a terracotta pot like that and try it! But of course, that would only work with round loaves - my batons would have to be cooked in the oven without a cloche!
Andrew
I let the dough, loaf final rise on the what was then a pizza stone, then sprayed the loaf with water put the cover/flower pot cover on, and into a very hot oven.
The tricky part is the amount of dough that will NOT touch the wall with it's oven spring.
So the bigger the pot and base stone the better.
Brown rice flour on the base. qahtan
So do I take it that the cloche and pizza stone are not heated first? In which case is there limited oven spring?
Thanks
Andrew
I always preheat my oven to 500 degrees with the cloche inside before baking. In my opinion, this is pretty much the whole point of using a cloche - to quickly and easily approach the effect you would get by baking in a wood fired brick oven.
Eric
As you can see by the loaf pictured above there was /is no shortage of oven spring.
Maybe you would like to take a look at this, or even Google "baking bread under a cloche"
This recipe is an adaptation of one that accompanied the La Cloche.
CRUSTY COUNTRY LOAF
1 1/2 teaspoons SAF yeast
1 teaspoon honey
1 1/2 cups warm water (100-110 degrees)
about 4-5 cups hard white whole wheat flour
1/2 teaspoon salt
Place the warm water in a large mixing bowl (I use a Bosch). Add SAF yeast and honey. Mix until yeast is dissolved.
Add salt and stir to mix. Add flour 1/2 cup at a time until a dough forms that holds together and cleans the sides of the bowl. Knead by hand for 10- 15 minutes, adding as little flour as possible to keep from sticking. Knead until dough is soft, but supple. If kneading by machine, knead 6-8 minutes.
Shape dough into a ball. Place the ball of dough in the
center of the La Cloche bottom. Cover with the dome lid and allow to rise in a warm place until doubled, about 30 minutes or more.
Preheat the oven to 450 degrees. With a sharp knife or blade, make criss cross slashes in the top of the risen round loaf. Place the La Cloche (lid on) in the preheated oven and bake for 15 minutes at 450 degrees.
Reduce the heat to 400 degrees and continue to bake another 30 minutes, or until bread is crusty and brown. During the last 10 minutes, the lid should be removed for a crustier crust.
Remove the loaf when done and place on a wire cooling rack.
I needed to bake up a good crusty loaf to be an accompaniment for Cajun Shrimp.
The shrimp is baked in a sauce that needs a good bread to sop up all the
yummies. This loaf looked so good, but I was hesitant to try it because of
everyone's description of working with slack dough. I used 8 oz of water and
even though the dough was slack it was easily managed. My only error was
that I made it into one loaf...one gigantic loaf! I didn't print off the recipe
and I guess I thought since there was a picture of one loaf that was supposed to be
the end result. Even though I don't have stone yet..the loaf looks pretty good.
I will post a pic later. Don't be intimidated by the talk of wet dough as I was,
just try cutting back on the water to begin with. Next time I will try it a bit
wetter and see the difference.
I also baked a German Chocolate cake for dessert..just a few calories tonight!
The gangs all here ..time for dinner..
Happy Father's Day to all our Dads!!
This is for Paddyscake. Can you give us the recipe for the shrimp? This sounds like something I would love.
Thanks
This qualifies for the bread site cuz you have to have good crusty bread to eat
with this. What's cool is that you bake it all in one big dish. We like to take
this outside to eat, dish in the middle of the table, plenty of napkins and bread!!
Corn on the cob and you have a great meal. The best part is that it is so simple
and tastes like you had Emeril over to cook for you!
3 lbs uncooked large shrimp, unpeeled
3/4 c butter
1 1/2 c italian dressing
1/2 c lemon juice
1/2 c chopped fresh mint (don't skip, use 2 T dried if you have to)
4 crumbled bay leaves
2 T Worcestershire sauce
1 T tabasco
2 t pepper
1 t salt
Place shrimp in 13x9 glass baking dish. Melt butter over med heat. Whisk in
the remaining ingredients. Cool and then pour over shrimp. Marinate in refrigerator
2-3 hrs, stirring occasionally. Preheat to 450, then bake till shrimp are opaque
(for 13-15 count, 20-25 minutes, 15 minutes for smaller shrimp)
Hope you like it!
PS How goes your sourdough efforts?
I'm one of those lucky people who are not crazy about sour dough so I don't have to continually feed and fret over a starter. Thanks for the shrimp recipe.
I've never baked anything fancy that required something like a poolish. I did know about them though from a book that I gave to my mother-in-law, The Bread Bakers Apprentice. After seeing this recipe and finding other tips for the aspiring home baker of artisan/rustic breads I was inspired. Over the past weekend I made a loaf based on this recipe and it was fantastic.
Without a scale I had to guess the proper measurements of flour. Correct me if I'm wrong but would 1 lb. of flour come out to approximately 2-2/3 cups? Like other members who tried this recipe I too had to add more flour during the kneading process. Can someone offer a suggestion on how to properly add flour? I was adding 1/2 cup at a time and kneaded till the dough was tacky enough to peel away from the bowl without sticking to it. Anyway, below are a few pics on my results with the final being my set up in the oven.
In my oven I purchased six of these 6"x6" unglazed quarry tiles from Home Depot for about $3. I'm very happy with the results so I'll stick with them for now. As you can see I got a small cast iron skillet on the bottom of my oven for the steam part of my baking. Works like a charm.
Those are beautiful loaves! Very nicely-shaped batards, great crust!
Floyd:
Just wanted you to know that I've been working your daily bread recipe for the last couple of weekends and am just loving it. I'm using a longer, cool ferment, and I'm shaping more like un-scored baguettes, but in all other ways I'm staying faithful to your recipe.
It's frankly given me the crumb I've always hoped for: lots of air and very elastic, with a great crust.
Will put up a pic later today, if I can get my butt in gear.
Thanks a bunch!
Prandium longa. Vita brevis.
oolewisoo,
Assuming that your measurements of flour and liquid are correct, here are some things that can help your bread stand up:
1. Autolyse - sounds dangerous, doesn't it? It's simply the practice of mixing most of the flour and all of the liquid in the recipe together, then letting it sit for 20-60 minutes. Then you can add in yeast or levain, and salt. The sitting time gives the liquid an opportunity to hydrate the gluten in the flour, which gives the dough more strength.
2. Adequate kneading - can be done by mixer or by hand. Whatever technique you use (machine mixing with a dough hook, hand kneading, stretch and fold, French fold, letter fold, other), the objective is to have the finished dough be smooth and elastic. Whole-grain doughs typically require more kneading than white-flour doughs to achieve full gluten development and their textures will be somewhat rougher. Doughs with high rye contents are another matter entirely.
3. Surface tension - After the dough has proofed and is ready for shaping, your shaping technique has two objectives. First, to achieve the shape you want for the finished bread. Second, to develop enough surface tension in the skin of the loaf to help support it during the final proof and bake. Most shaping techniques involve stretching the top and side surfaces of the dough down and tucking them underneath. Note that super-wet doughs, like ciabatta, don't follow the same rules for shaping.
4. Support - while proofing, that is. You can use brotforms (willow or plastic baskets), bannetons (also baskets, sometimes with cloth liners), couches (can be made of linen, or cotton, or even a non-terry dish towel, or bakers parchment). the brotforms, bannetons, or cloth couches are usually heavily floured so that the dough does not stick to them.
That's the Readers Digest version. You can find a lot more detailed material here about the topic by using the search box that is located in the upper left corner of each page. There are also a number of videos that have been posted here which demonstrate the techniques.
Paul
I'm new to the fresh loaf site and this is my first try at bread with a preferment. I appreciate the wealth of info I've learned so far and the knowledge shared here gave me the confidence to try 'My Daily Bread'.
I'm at the point of my fourth folding. The dough seemed quite wet at first but now it can be handled. I've got some pretty huge bubbles through out the dough, some as large as golf balls, Should I make sure to break them while I'm folding or be carefull not too? A newbie question! Thanks for the help.
Somewhere in the middle: you want to be rough enough with the dough that you get good tightness on the surface, but soft enough that you leave many of the holes in it. It's a tough to nail it just right.
Good luck!
Thank you for the good advice Floyd ... and great recipe. I'm very pleased by this attempt. I've got lots to learn and looking forward to it.
This magic loaf came out of the oven at 5PM. At 530 we received a call that our first granddaughter was born. So we broke some bread in celebration. How sweet it is!
Looks really good, and congratulations!
This loaf look just right! Congratulations with family addition!
how many cups of flour and water would this be? I would really like to make this bread!
can someone please let me know what these measurements are in cups? I've not a scale, and am clueless when it comes to baking with grams.
Welcome. The recipe is at the top of the page. Cups are so variable but 8 fl oz is a cup. There are 16 dry oz in a pound. Fluid oz and dry oz are not the same. Reading the discussion should give you an idea what 1 pound of flour should be... somewhere between 2 1/2 to 3 cups depending on the flour.
Mini
thank you! I appreciate it. I think i can figure it out from here.
I just finished baking a loaf of this, and it turned out MAGNIFICENT! I don't think I've ever had better bread! Thank you for the recipe.
-TeaIV
Sorry for the silly question, but in a recipe like this (and typically) when an amount of a liquid is noted in ounces, is that liquid volume or by weight?
I weight all dry ingredients, but I'm never sure if I should be measure weights of liquid or volume.
Thanks.
When it comes to water, liquid volume and weight are the same ("a pint is a pound the world around", as my grandmother used to say). As for other liquids, I would take a cue from the other measurements. For example, if the dry ingredients are given in pounds and ounces, it's safe to assume the liquid ingredients are, too.
so a cup of water (8 fluid oz.) should be also 8 regular ounces?
8 oz = 8 oz...always...
Betty
someone said differently (above).
Im not quite sure what you were asking. 8oz liquid is equal to 8oz dry?
Betty
I'm asking about fluid ounces versus ounces... never mind though, I'll figure some other way to do it...
One fluid ounce of water weighs one ounce. So scaling water is the same as measuring it by the ounce in a measuring cup.
The same is not true of other fluid ounces. For example, one liquid ounce of whole milk does not weigh one ounce. And skim milk will weigh different than whole or buttermilk.
Sorry, I have always been math challenged..liquid=fluid to me
so one is by weight, the other by volume?
I understand that a cup of flour does not equal a cup of water
Sorry TealV ,
Sorry to be so stupid. Gaarp thanks for stepping in
Liquid is the same as fluid.
The different "ounces" are liquid and dry (or weight).
Water is what it's all based on. So 8oz liquid measure (your typical Pirex glass measuring cup) is also 8 oz in weight, for water. But for other stuff, it changes.
8 oz liquid of honey is still at the 8 oz mark on the Pirex cup but if you weigh it, it's going to be subtantially more since it's a heavier substance than water. Then if you measured 8 oz liquid of oil, again, in the Pirex cup, that is still the same but weigh it and it weighs less than the water (which is why it floats).
You'll be better off weighing everything in grams. And no, you don't have to be scared of grams, it's all based on tens, not crazy 16's like ounces and pounds. And you weight everything, including liquids. You'd add 372 grams of flour, 219 grams of water, 14 grams of salt, 10 grams of instant yeast (I'm making these amounts up) but it's all grams, and you add until you have what you need. It actually much simpler and very much more accurate than the old ounces and other ounces and pounds and cups.
I do weigh everything in grams, you don't have to convince me. I was trying to answer TealV's question. I'll just sit and absorb info, rather than trying to help anyone else!
Thanks
Betty
An avoirdupois ounce weighs 28.35 grams. A fluid ounce of water under standard conditions weighs 29.57 grams.
Sources:
Webster’s Third New Int’l Dictionary
Julia Child & Company
Thus one cup, or eight fluid ounces, of water weighs 8.3 ounces.
thanks, Charbono! that would make it a lot easier to approximate for some recipes!!
no worries, betty, I knew less than you. ;)
Discouraged? Not in the least!! First time ever with a poolish. First time with a wet dough. First time baking on a stone. NO PICTURES. Loaves? Odd name for what I got. The dough stuck to the improvised proof baskets. I was saved by oven spring. There's got to be some gaping holes in the crumb. What a ride!! Rereading the comments and I understand some of my challenges are shared. I know lots about what I will change for next time. Less water, a little more flour, highly floured board, instant yeast, real proof baskets.
I am totally pumped that the hunks o' bread that resulted look NOTHING like square sandwich bread, then again they don't look like any artisan made 'em either unless he was on drugs. Nonetheless these are free form beauties even if they are only appreciated by me. They will go nicely with a little Italian bean dip I learned in a restaurant I worked in. Cannellini beans, garlic, olive oil, rosemary and salt throw it all in a food processor with a little of the bean water. I could live on it.
With my brick oven coming I can see the future and it looks good. 50 lbs of flour and I should have a handle on this. I don't mean expert just not a rookie any more.
If you got good oven spring it must have been fine.
Now about the bean dip. I've made it and love it but I'd like to know the proportions you use.
How lucky you are to be getting brick oven. Have fun.
weavershouse--Having a ball!! Thanks for the encouraging post. Truth be told I baked until late last night and needed to wait until the wee smalls to taste it and then went to bed shortly thereafter. This am I am postively giddy. Can't wipe the smile off my face. Yesssss! It tastes great and no junk in it.
2. I cooked up a bunch o' beans in a claypot on the back of the stove the other day in anticipation of this event. Can you say slow food? I do it by taste and by feel but when I make a batch today I will attempt to document that feel.
3. You, too, can have a brick oven. Everything I am learning about the building of a brick oven came from books and the Internet. There are Yahoo groups to help you build just like this one helps you bake. cleancarpetman at msn dot com and I can shorten some of that search. I am convinced it isn't as hard or expensive as we make it in our minds. I aim to prove it, stay tuned.
H.
weavershouse, et al,
So Steve, is it baking bread or writing about it that you like best? Well... I like sawing off slice after slice knowing I can make more. I love watching my kids take an active role in consumption and ingesting Mediterraean culture along with their bean dip and returning for seconds and then a little more... Hey, there's no chocolate in it.
This is what I had on hand but would have preferred fresh garlic and rosemary
Fageoli Rosemarino
3 C fresh cooked cannellini, small white or navy beans or canned rinsed and drained
1/2 C fruity olive oil
1/2 C cooking liquid or water just off boil
2 tsp dried rosemary, crushed fine
2 tsp garlic salt
1 1/2 tsp salt or to taste
Place beans and the rest of the ingredients in a food processor and blend to a smooth puree. To serve, spoon warm or room temperature dip into small ramekins and lighty drizzle with olive oil the best you have. Cut crusty open crumb bread into hand sized pieces about two bites each and present with the dip. A few hours in the fridge melds the flavors into a heady repast. Warm or bring to room temp before you serve.
Enjoy.
I am preparing another days daily bread, a double batch. When I combined the base and poolish I mixed salt and yeast into flour with a whisk to distribute it then added 10oz of water and poolish and mixed it with a spatula to incorporate a ragged dough, which came together easily then set timer for ten minutes and mixed with dough hook and KA. Not waiting 'forever and a day' for the dough hook to chase and catch all the flour on its own makes mixing much more efficient, I discovered. It avoids throwing flour overboard, too. I am sure the mixer appreciated the help. I could see that the whole ten minutes was kneading instead of playing tag with the flour.
I am waiting for the first fold as I write this but I already know that this is a superior batch to yesterdays blind walk in the dark. What a difference a day makes--cliche or not!!
More later.
H.
Just folded the first half of my double batch of Daily Bread dough. I used a highly floured board but even for a novice it felt sooooo right on. All the folds went together just like in the movies. I watched Mark Sinclair stretch and fold one more time and applied the new learning as I was doing the same thing. What a fantastic tool the Internet is!
So, now the first two loaves are baked. I didn't get the spring I did yesterday. Possibly because there is lower hydration. Possibly because there is no steam, but there wasn't any steam yesterday, either. I shaped two boules and two baguettes and the first baguette is baking now.
I already have the poolish started for tomorrow. I want to figure this puppy out straight away. I forgot to halve one of my loaves yesterday and I think I like that bigger loaf--more usable slices.
Last baguette in the oven. What do you do with all that burned flour or cornmeal on the stone? I had to take a swipe at it with my oven mitt. I think I will make more of an effort to clean it before bringing the oven back to 550. Makes heap big smoke and is generally disliked by the wife unit. She's cute and I like living here.
Thanks for letting me ramble here. You talk any of this stuff with non-bakers and first you notice the blank stare and then the eyes roll back in the head. Feel free to jump in with any suggestions. I also think its cool that a formula such as this that has been around for awhile, all of a sudden jumps back to life when somebody shows an interest in it and starts to document their experience. Too cool.
Hey, its getting late and when that dinger on the oven goes I am calling it a day-- a very good day!!
Lleno con su gozo y paz!
H.
Instead of using flour/cornmeal/semolina to keep your bread from sticking to the peel or stone, try using a piece of baking parchment paper. No stickies, no smoke. And you can usually get several rounds of baking from each piece before they get too crispy to hold together any more.
Paul
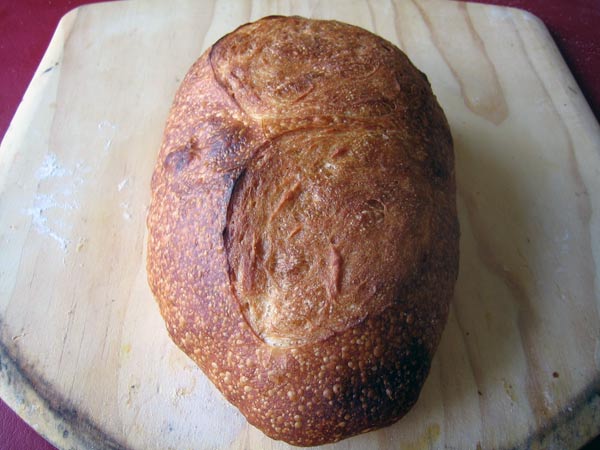
This has been a weekend long project and today is Monday and we have a lot of bread experiments in ziplocs. But, Oh! what I learned in the process. Turns out it didn't take me 50 pounds of flour to get very comfortable with this recipe. I eventually returned to follow the recipe to the letter with 12 oz of water and it turned out great. I honed my techniques and I am filled with satisfaction of having achieved my goal. I am forever grateful to Floyd and ALL of the contributors to this site who have gone before me. This has been a tremendous discovery.
The first image is the final loaf using 12 oz of water. This felt like a major step forward. The pace and rhythm of baking and listening to jazz all went smoothly. It was pure joy since I knew that I had nailed it. I look at soup recipes with a different eye. I know I am not going to rush out to the supermarket just before the soup is on to get "good bread" I kin make it myself, thank you very much.
I am dreaming of garlic and rosemary or kalamata olives.
This is where I started and where I finished. The "little blob" was a poolish and base that never incorporated and then stuck to "my peel", an improvised cookie sheet. The loaf stuck and dragged and left dough hanging over the edge of the bake stone I just shut the oven door and walked away. To my utter surprise the lift from oven spring stood it right up. I rejoiced at that moment thankful that not all had failed.
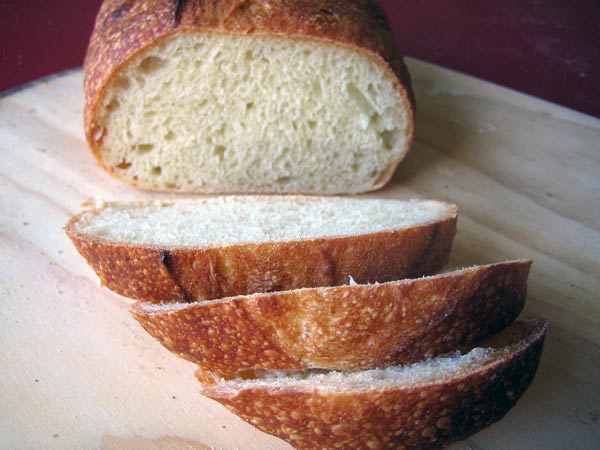
This crumb looks pretty tight here but there are places that are more open.
I apologize that it is not clearer, new phone with a camera.
The bread and photos will all get better as time goes on.
That's all for now!
H.
First of all, thanks for running a great site full of a tremendous amount of information... it's all so helpful to complete novices like me.
I made your daily bread and am pretty happy with the results, but I'm still getting a few peculiar things happening which seem to occur every time I make bread, irrespective of the recipe (I've only made a dozen of so loaves in total so still a complete beginner):
1. Relatively poor oven spring / too closed crumb, although this is gradually improving so I suspect it's to do with my poor handling technique after fermentation and during shaping. As this is gradually getting better I'm not as fussed about this as hopefully I'll eventually get there!
2. Strange crumb texture. Now, I haven't eaten a huge amount of artisanal bread so it might be that I'm just not accustomed to how the loaf should turn out (although I'm lucky enough eat out in nice restaurants fairly frequently and their bread is never like mine). My crumb is always slightly gelatinous - hard to describe, but not white or even cream, more grey / plasticky. It's always fairly rubbery (which is fine for toast as it's a nice contrast to the crispy outer toasted surface) but not massively endearing in untoasted slices.
Re: the crumb, I'm wondering whether I'm using a too-high gluten flour and/or overworking the gluten. I'm in Britain and don't have easy access where I live to artisanal flours - I tend to use Allinson bread flour with a stated gluten content of c. 12.5%.
I followed your recipe but modified the method slightly. I made the poolish and left out overnight - when I came back to it the following morning there was a slight separation which perhaps might suggest it was overdone a bit? I also made the dough with 10oz water (and excluding poolish, obviously) and put in the fridge overnight to retard. I thought this might improve the flavour. I mixed the dough until it just came together in my KA and didn't add any more flour throughout the whole process so once I added the poolish I was working with a very wet dough.
I added the poolish the following morning and it was a bit tricky because the dough was very cold - I probably should have let it reach room temp before mixing. I had to use the KA a fair bit to incorporate the two different mixtures, but mixed on a low speed (1) for probably a minute, maximum. I didn't knead (not sure it was capable of kneading!) but I effected quite a few "folds" using a spoon in the bowl. I then let the wet dough rise for about 2.5-3 hours on my worksurface. I tried a few alternative methods for preventing a skin forming - a few wet sheets of Bounty (probably the most successful), an oiled sheet of cling film - which stuck - and an upturned bowl, which the dough managed to push up and escape from! After 30, 60 and 120 minutes I did a number of stretch and folds using my scraper (it was too wet to handle with even wet hands, at least for me). I noticed significant gluten development and strengthening during these manoeuvres.
Eventually it was ready to "shape" (a misnomer if there ever were one) - I cut the bulk dough into two and put one in a loaf tin rather clumsily and the other into a round, flat-bottomed pyrex dish (and managed to knock a fair bit less air out of that one). Both containers were oiled and dusted with rice flour. I dusted the tops of the loaves with more rice flour. I let both rise for another 45 minutes while I heated the oven to max. Once done I put them in for half an hour, turning 180 degrees after 15 minutes. I inserted my probe thermometer and after almost exactly 30 minutes (slightly less for the loaf tin) the internal temp was 95 degrees C. Took them out and let cool. I turned the oven down to 200 once the internal temp reached 35 degrees C (i.e. the oven spring had pretty much finished) as I wanted soft-crusted loaves (my wife prefers these).
The taste was amazing - really bready, but definitely cooked and delicious. The crust was perfect for what I wanted - really soft. But the crumb is still odd! Makes fantastic toast but it seems like you're chewing a sponge (it's not that tough, but it's a definite plasticky texture).
Anybody with any ideas why my crumb always goes odd? Is it rubbish bread flour with too much poor quality gluten or am I overworking the dough (hard to believe given I've pretty much been autolysing and hand kneading/s&f-ing)???
Help!
Bodger--Have you read this whole thread? I seem to remember Floyd jumping in at some point and saying that he stretched and folded the dough on a HIGHLY floured surface. This wet dough whether made with 10 or 12 oz of water will incorporate a great deal of flour at that point and become workable, even more so the second fold just prior to shaping. Mark Sinclair's videos on shaping dough are great. After stretching and folding, he turns the dough over pushes the dough ball across the work surface. The friction from the work surface "catches" the dough and its as though the ball is "running over" the dough that is caught. Surface tension increases and stretches the dough surface tight. He then places his hands in front of the dough and does the same thing dragging the dough toward himself. A quick ninety degree turn and he pushes away again. It is subtle if you watch the video but knowing what he is doing helps understand what you see. Better to watch the video than read the explanation. This technique, once grasped, will help you anytime you shape dough. He is promising a set of DVD's and I will be interested in those as well.
I can't help much with the crumb at this point, it is beyond my expertise. Perhaps it will change with different recipes or sourdough. I clearly don't have the answer. I just posted some pictures of clay baking that you might be interested in since I used the My Daily Bread recipe.
http://www.thefreshloaf.com/node/10490/clay-bakingi-have-decided-throw-myself-under-bus#comment-55900
For me baking on a stone and with a cloche is definite progress for where I want to go but to each his own.
h.
cleancarpetman, thanks for the quick reply...
I did indeed work my way through the whole thread (as well as a lot of others!) so I noticed a fair bit of extra flour was added in during the kneading/folding stages.
I wanted to continue to experiment with a wet dough (my previous dough for 3 ciabatte was c. 90-95%!) so I didn't want to add the extra flour. It did make shaping rather haphazard but I was hoping to get much better oven spring and a more open crumb. I don't have a camera to hand so I can't upload any photos but this recipe has yielded the best crumb structure so far (even better than the ciabatta dough which was so wet I couldn't handle it without deflating).
I'm reasonably happy shaping lower hydration dough (up to about 75%) but above that I find I just have to dump it from the counter into the loaf tin - I use my scrapers to put in some stretch and folds beforehand to build up a bit of tension but it's nothing like "normal" dough.
The odd thing about my crumb texture is that it's consistent! No matter which recipe I use I always end up with the same thing. Perhaps I'm just expecting something "white" and more like bread I get in a restaurant??? Maybe it's my flour, although I've tried using different flours which are available in my local supermarket (either own brand or Allinsons)...
Bizarre, but if anyone can help it'd be appreciated!
By the way, you have the most amazing crust on your cut loaf in that link! Awesomely thin but looks really, really crispy... masterful!
I love a soft crust but can appreciate yours so much...
The crust was a fortunate accident not anything I did on purpose or had control of. The picture came out better than I hoped as well since I am even newer at photography than baking. That said how does the crumb compare to your result. since we can't see your crumb? I found a discussion on "Holeyness" by Steve B that may be just what we are both aspiring to. On the link you also saw some Romertopf loaves which I baked with a soft crust that turned much crustier and crisp as they cooled. My first attempts at this recipe yielded a soft and chewy crust. The cloche seems to be the difference and now they are crisper.
der Hinterhof
Your crumb looks a lot more "natural" than mine - perhaps fluffier is the best description. My crumb is probably a fair bit more open (perhaps due to the higher hydration level) with a lot of even-sized holes, perhaps 2mm average diameter. I'm quite pleased with the openness (I want the loaf as a sandwich loaf) but it's the actual texture which is the issue - quite plasticky and rubbery. Having said that, given the hydration level I should probably be getting an even more open-textured loaf, which perhaps suggests I'm over handling the dough after bulk fermentation.
I've just started another poolish with a different, all-purpose flour. The lower gluten content might help point out whether it's this which is causing me the problems...
I have prepared a double batch of My Daily Bread with my own variations and have put it in a dough trogh and refrigerated it for 15 hours. Do I bring it to room temp? How long? Do I shape dough and proof one more time? No emergency just a little advice.
h.
Hope you don't mind me jumping in here....
I understand you were following the directions at the top and instead of bulk rising, you put the dough into the fridge, correct? That would mean you take out the dough to warm up a few hours then proceed as directed:
As you fold the dough you will become aware of the bubbles in the dough, it increases in body and becomes rounder and lighter. Fold & rest, fold & rest and do as many times as you can without tearing the dough. Then yes, let if have a final rise before baking. You might not have to wait 90 min though.
Mini
Don't mind at all your jumping in and am honored to have your counsel. I mixed the dough yesterday starting somewhere near 3PM. I put the dough in two additions into the trough and waited an hour, stretched and folded, another hour stretch and folded again then into the fridge around 5PM
now here we are a few hours later looking into the trough wondering what to do next.
h.
Take the dough out of the fridge, let it warm up for a few hours. Then follow the instructions in the box. Below the box, she explains how to know when your dough is ready to let have it's final proof. Good luck, Post pics
Betty
Mini O-- the last time I posted about bulk fermentation I couldn't wait for the response and went ahead and baked, then I posted what I did. I know it appeared as though I went off on my own disregarding your advice.
Its been awhile since I wrote all that but here is what happened when I followed your excellent instruction. I put together several starters and left them in the fridge 4 or 5 days. On Saturday afternoon I put the base and last starter together, let it rise and fold twice then popped it into the fridge. On Sunday I pulled it and allowed just under a two hour warm up. The dough was enough for four small boules of My Daily Bread. I instead divided it in half and went with two oversize loaves and baked for 7 minutes at 550* and thirty five minutes at 465*
The oven spring was incredible and I got some gapers. Thanks so much for the help in stepping ahead here.
ccm
has anybody tried this with whole wheat? anyone who did care to share results?
I love the the texture of this bread. The crumb is light and airy, the crust thin and crisp. While these are not attributes everyone strives for when making artisan bread, it's a nice change of pace for me.
I would love to bake a sourdough loaf similar to this, but the recipes I use most often have a tougher crumb and thicker crust. What about this recipe makes it so light? Is it the hydration? The amount of yeast? Type of flour? Does anyone have any suggestions about modifying it to use sourdough?
I wanted to join The Fresh Loaf to comment on this recipe. It was excellent, and really easy. I added about half a cup more flour because it was sticking to the counter. For the second rise, I put it in the refridge for 3 or 4 hours.
I'm pretty new at doughs that require a poolish, but this recipe was really easy and forgiving.
thanks for the recipe!
here is a picture of the bread:
http://www.flickr.com/photos/27944662@N07/4268197242/
Very nice!
I have been baking bread for a while. I would peruse this site for ideas but never felt I had to go to the extremes that some of the afficionados do. When I read the lesson on autolyse something clicked. We are so concerned with time, consistency and convenience that we have forgotten the original processes that our ancestors used. I have learned from many years of experimentation that nothing replaces time for making bread.
I tried this recipe and I was instantly converted to autolyse, folding and working with wet doughs. The results were amazing! I was concerned lately because my doughs were not rising sufficiently and I tried everything but with time you can solve most problems you encounter with doughs.
I just want everyone to know that you don't need to be so concerned with having the "proper" tools or following recipes to the letter. Just enjoy the process and experiment. My measure of success is if someone enjoys eating what I make. They aren't as concerned with the crust or the size of the air pockets in the bread but how it tastes. That is the final arbiter of a good loaf of bread.
Thank you for this recipe; its simple to make and delicious to eat (Even my cat loves to eat it!)
Thanks for sharing your recipe Floyd. I've been wanting to experiment with some more poolish-based breads.
I was doing some math based on your recipe (I like baker's percentage), and it looks like your poolish is somewhere between 165-175% hydration, and you're adding around 65% water to your dough. Combined with the relatively high proportion of poolish in your recipe (I estimate somewhere around 85%), and you're looking at an overall hydration over 90%! No wonder why a bunch of people were saying the dough was too slack.
I wonder why it's beneficial to do it this way (really wet recipe, and add more flour via kneading) instead of scaling back the water added to the dough (to be clear, I'm not talking about scaling back the water in the poolish, only water added during kneading).
I took the liberty of approximating your original recipe using baker's percentage:
Bread Flour 100% 453.50g
Water 65.2% 295.68g
Starter 1 (poolish, 175% hydration) 85% 385.48g
Salt 3% 13.61g
Instant Yeast 0.68% 3.08g
Scaling the water back from 65% to 40% would give you an overall hydration between 70-75% (instead of ~90%), and require less flour to be added...
But again, what am I missing here? What's the benefit of kneading in extra flour?
So I've baked about 5-6 batches of this, with slight mods each time, and I must say I'm very pleased with the results.
If nothing else, I'm a convert to poolish! I love the spongy texture it gives. Great thin leathery crusts on my loaves too, very happy with it.
So in answer to my own question "what's the benefit of kneading in extra flour", I guess if you prefer to do it all by hand, or start with a wet dough and add "just enough" flour to get to the right consistency, have at it. I suppose it's good practice for getting a feel for the bread.
For baking noobs like me, I prefer a more accurate approach, and consistent results. Not to mention I use a stand mixer for most of my kneading. I still test my bread by feel at the end (looking for tackiness like a post-t note or slight stickiness).
In any case, I found reducing the hydration at least 10% helps a lot with this, and you still get great bread.
Does anyone know what may have caused my loaf to totally fail in the middle?
The outside looked perfect with it's brown crust and color. I cooked it as suggested, max oven temp, which is 550 for me, for 5 minutes then turned it down to 470 for another 15. It rose just as it was supposed to but once I cut into it the middle of the loaf was a big ball of dough, as if it wasn't ever even put in the oven.
I followed the recipe with the only change being 3.5 cups of flour instead of a pound as I don't have a scale. I used King Arthur's bread flour with SAF instant yeast. Had the poolish work over night for 8 hours and with the main dough I mixed by hand and did the French fold method four times over the course of three hours with the final resting for about an hour.
I ended up putting it back in the oven for 20 minutes after I had ruined it by cutting into it. In the end I had a large loaf of toast, but it was either doing that to salvage something or tossing it all out.
Any suggestions?
So tried this recipe today ~ turned out very good - one to add to notebook of DailyBreads. Bread was "gone" before I could take "pics" LOL.
Crust was nice - not glossy as some photos here but nice just the same - Crumb very fine not airy - going to work on that. Also how much "play" has anyone done with this recipe ~ thinking about adding oatmeal and raisins & a touch o'honey~ But thats for a later bake.
A shout out to FloyD - MimiO & Dolf nice to be back - was out in Oklahoma for awhile ( ruffin it) now back in Central Pa. AND acess to a computer .
Slide____Out
I have been experimenting with this recipe.
Last night I made a batch with 40% wholewheat and 45g of flaxseed added to the dough.
Combined with multiple folds and rests, an overnight final rise in the fridge and my combo cooker.
The result was fantastic ! Baked them this morning before work.
Brought a loaf in for sandwhiches and everyone loved it. The crunch of the flax and the addtion of the wholewheat made it stand out.
Im going to try grinding some flax and adding it to the dough next time, in addtion to the whole seeds.
Man, I love this bread. Always comes out great for me, no matter what changes and addtions I make.
Well done.
and I think this will become our new weekly loaf! I loved the texture and airy crumb of this bread, and it's easy on the wallet without any milk or butter in it. I might experiment with baking it with steam next time, but not sure what temp I should go with to bake it at in that case. In any case, thanks for a wonderful recipe! So delicious!
-Rachel
I always use steam and have found that the original temps are just fine. I have been making this bread for almost 2 years now. My wife and I travel all over the US and this bread is our staple. I add a 1/2 cup of oatmeal (which I substitute for 1/2 cup of flour). You may have to add a little flour if the dough is too wet. I agree it is a great recipe!
I really love this bread, but I was wondering if there was anyway to make it using sourdough?
Any suggestions? I have good results, but the crust softens quickly after being pulled from the oven.
I have now made this three times and have replaced 4 oz of bread flour with either cornmeal or semolina and both times had great results. I also like to add a Tbsp of honey and some flax and sesame seeds. Just started a poolish last nite and used a 1/4 c whole wheat flour in it. This morning i added my usual plus replaced with 3 oz w/w flour, I think i always have to add more flour in the end to be able to shape it somewhat. The result is superb, good crust and even open crumb.
oops! I cannot seem to rotate the pictures.
salma
Naive question: Is a cloche necessary if i am going to bake in a brick oven?
i have made this recipe several times now!! The first go round I had to add additional flour. Now I just adjust the flour to give me an less wet dough. Approximately 4 cups to 4 1/2. This is still wet dough for me but with a highly floured kneading after the first rise I find it to be perfect. I have just shaped it into my loaves on a heavily floured board after first rise snd allowed them to rise. They come out stunning. I am making 4 loaves right now. 2 all white and 2 multi grain. with the multi grain I added 1 tbs honey and a bit of vital wheat gluten! Excited for results!!!
Hi Floyd! Am I only supposed to let the poolish go for 12 hours or so and no more? If I am not ready can I ref it (the poolish) till I start mixing the dough say around the 24 hour mark? And can I retard the mixed dough 12-16 hours again before baking? Thanks!