Folding
Folding the dough is the most exciting technique I learned this year. It really is the key to working with slack doughs.
Folding occurs during primary fermentation and replaces the "punching down" step. I typically fold my dough twice during primary fermentation at roughly the same time when I would punch it down (when the dough is approaching double it's original size).
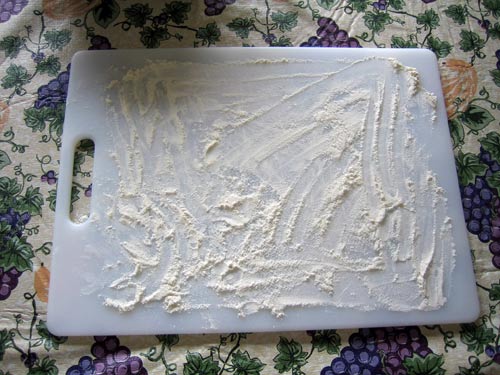
To fold the dough, take the risen dough from the bowl it has been rising in and put it top-side down on well-floured work surface.

Fold the dough in thirds, like a letter, gently streching it and degassing as you do.
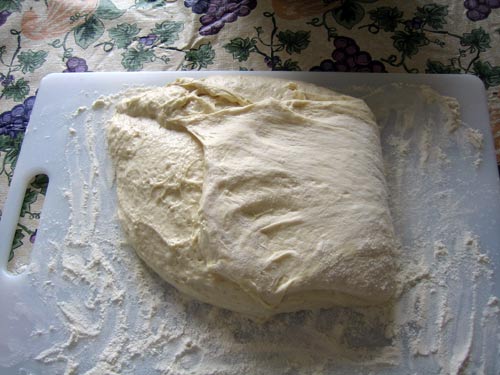
Fold it in thirds again the other way.
Flip the dough over, dust off as much of the raw flour as you can, and place it back into the bowl. Repeat this step again when the dough has risen again.
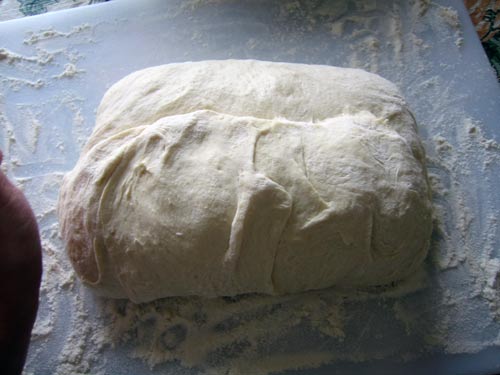
As you do this you will feel the dough begin to strengthen. By the second time you do it the gooey, slack dough you began with ought to have tightened up enough that you can handle it with bare hands.
Shaping
I have to admit, my shaping still leaves much to be desired. I think my loaves are beautiful, in their own rustic, misshapen way, but I still don't feel like I should be instructing anyone on how to make nice looking loaves yet.
One thing I can say about shaping closely relates to folding: it is all about surface tension. Both when folding and shaping your final loaf, a good part of what you are doing is creating surface tension. This helps your loaf keep its final shape despite the slackness of the dough. You acheive this increase in surface tension by forming a tight seam on the bottom of the loaf. The tighter you can make it and the more you can increase the surface tension, the better.
While shaping you also want to be degassing and agitating the loaf a little. I'm still working on finding the right amount of degassing to do. I used to really punch down and remove all the gas, but if you do that you typically end up with a very even, tight crumb. Then I went through a phase of not degassing at all and I would find my loaves would run out of steam and not spring at all in the oven. Somewhere in the middle seems to be the key: you want to let some air out and give the yeast more sugars to feed on without wrecking all of the work they've already done.
I heard a quote something along the lines of "A baker should have an iron hand in a velvet glove." It really seems to be true: there are times to be extremely delicate, but other times to treat your dough roughly. Knowing when to apply the right amount pressure appears to be something that requires much experience to figure out.
Number 5: Slow Rise.
Folding the dough is the most exciting technique I learned this year. It really is the key to working with slack doughs.
Folding occurs during primary fermentation and replaces the "punching down" step. I typically fold my dough twice during primary fermentation at roughly the same time when I would punch it down (when the dough is approaching double it's original size).
To fold the dough, take the risen dough from the bowl it has been rising in and put it top-side down on well-floured work surface.
Fold the dough in thirds, like a letter, gently streching it and degassing as you do.
Fold it in thirds again the other way.
Flip the dough over, dust off as much of the raw flour as you can, and place it back into the bowl. Repeat this step again when the dough has risen again.
As you do this you will feel the dough begin to strengthen. By the second time you do it the gooey, slack dough you began with ought to have tightened up enough that you can handle it with bare hands.
Shaping
I have to admit, my shaping still leaves much to be desired. I think my loaves are beautiful, in their own rustic, misshapen way, but I still don't feel like I should be instructing anyone on how to make nice looking loaves yet.
One thing I can say about shaping closely relates to folding: it is all about surface tension. Both when folding and shaping your final loaf, a good part of what you are doing is creating surface tension. This helps your loaf keep its final shape despite the slackness of the dough. You acheive this increase in surface tension by forming a tight seam on the bottom of the loaf. The tighter you can make it and the more you can increase the surface tension, the better.
While shaping you also want to be degassing and agitating the loaf a little. I'm still working on finding the right amount of degassing to do. I used to really punch down and remove all the gas, but if you do that you typically end up with a very even, tight crumb. Then I went through a phase of not degassing at all and I would find my loaves would run out of steam and not spring at all in the oven. Somewhere in the middle seems to be the key: you want to let some air out and give the yeast more sugars to feed on without wrecking all of the work they've already done.
I heard a quote something along the lines of "A baker should have an iron hand in a velvet glove." It really seems to be true: there are times to be extremely delicate, but other times to treat your dough roughly. Knowing when to apply the right amount pressure appears to be something that requires much experience to figure out.
Number 5: Slow Rise.
Comments
How about now? Feeling more expert at shaping? Because I would love a lesson!
Stop using volume measurements and weigh your ingredients; target for 72% hydration for the final dough. Wet the counter (slick surface) where you do the stretch and fold with water, and keep your hands wet. The dough will slide around a bit, but you can coax it to stretch by lifting and spreading the dough. If it is still sticky, wet your hands again. Then do your folds.
Get a polypropylene dough tub to ferment in (something like a CAMBRO RFS8) so that the dough slips out easily without using any oil.
If that isn't enough, try a higher gluten flour and develop it more completely before you start your bulk fermentation.