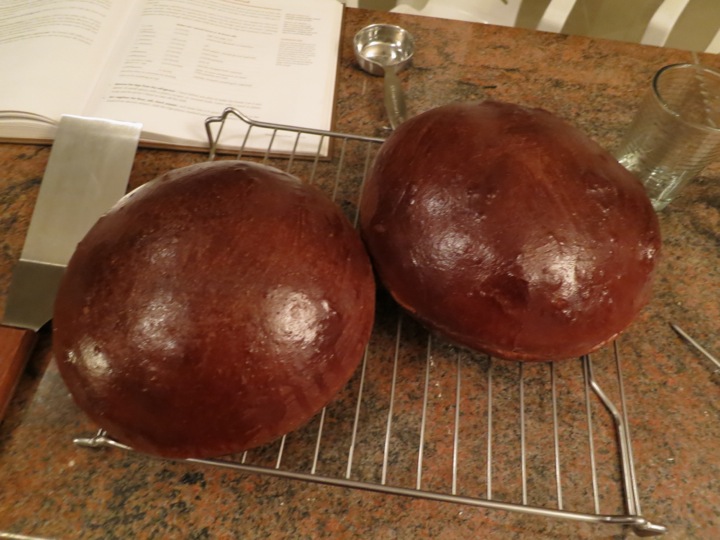
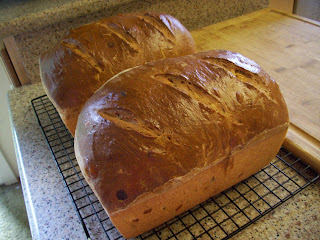
The Fresh Loaf

A Community of Amateur Bakers and Artisan Bread Enthusiasts.

Blogs

dabrownman's picture
dabrownman

No, No, No - My apprentice is not a nut!  This is a slightly more simple formula trying to achieve a balance between taste and holes.  Taste always wins out over holes and appearance in my book.  It has to taste good first before going to other wanted crumb and crust attributes.

 Sadly, when throwing boiling water into the hot cast iron skillet, water splashed onto the stone where the bread had just been placed - after sliding it off the peel taking the parchment paper with it.  No problem.  I will just tilt the stone and let the water run off.  But alas, the bread slid off onto the oven rack making a mess of some very nice bread up until that time.  Found a spatula and mooshed it back on the stone as best  we could but was left with a loaf that didn’t spring as well as it should and developed a strange knob hanging off the side of it.

It did taste great though and the WW, Bulgar and hemp sprouts came through and the texture of the crumb was further enhanced with the pistachio nuts and sunflower seeds.  The rye is subtle and WW is pronounced.  The crumb holes were OK even though they suffered the worst of the oven loading and steaming ordeal.  Formula and Method follow the crumb shots.


 Multi-grain SD w/ Multi Sprouts  2 Nuts and Seeds Somewhere 


SD Starter

Build 1

Build 2

 Build 3

Total

%

SD Starter

25


25

5.41%

Rye

25


25

5.41%

WW

25


25

5.41%

AP


50

25

75

16.22%

Water

50

50


100

21.62%

Total

125

100

25

250

54.05%


Starter


%


Flour

137.5

29.73%


Water

112.5

24.32%


Hydration

81.82%


Levain % of Total

0

25.08%


Dough Flour


%


Rye

25

5.41%


6 Grain Cereal

25

5.41%


Dark Rye

25

5.41%


White WW

50

10.81%


Bread Flour

100

21.62%


AP

100

21.62%


Dough Flour

325

70.27%


Salt

7

1.51%


Water

260

56.22%


Dough Hydration

80.00%


Multi-grain Sprouts


%


Hemp

25

5.41%


WW

25

5.41%


Bulgar

25

5.41%


Total Sprouts

75

16.22%


Add - Ins


%


Honey

10

2.16%


White Distatic Malt

10

2.16%


VW Gluten

10

2.16%


Pistachio/Sunflower

50

10.81%


Total

80

17.30%


Hydration w/ Adds

78.24%


Total Weight

997


 Method

 Do the sprouts first by soaking them for 5 hours and then letting them rest on (2) damp paper towels, covered with another and plastic wrap and reserve until needed..

 The  method is similar to recent bakes.  A 3 stage SD levain build only this time the stages were 3 hours apart.  With the AZ kitchen temps hitting90 Fa 9 hour build was more than sufficient to get a strong levain.  Instead of rye based like last time, this one was more WW and AP flour based to fit the bread we were after for this bake.  The dough was more AP Bread flour and White WW than usual to go with the levain.

 We added some honey as it pairs so well with WWW.   Had some Hemp, WW and bulgur sprouting but WW was all that sprouted so the other 2 were a soaker.

 Autolyse the flours, the VWG and the diastatic malt,  all the water, less 10 g, 24 hours in the fridge and retarded the levain for 12 hours, all in hopes of bringing out the sour.  The next morning we kneaded the autolyse and levain with the added 10 g of water by hand  before kneading on KA 2 for 8 minutes with the dough hook.  Added the salt and knead for 2 more minutes on KA 3.

 Transferred the dough to a well oiled bowl since this is a high hydration dough and let rest for 20 minutes.  Do 4 S &F’s on a floured work surface, at 20 minute intervals- about 4-6 turns each depending on how the dough feels.  When it tightened up it was time to stop.  On the 5 th S& F fattened out the dough and incorporated the sprouts and nuts.  Do 1 more S&F for a total of 6.

 Let rest on the counter for 1 hour.  You may need longer if your kitchen isn’t 90 F.  Then refrigerate for 24 hours.  Take the dough out of the fridge and let it warm up for an hour.  Pre-shape by dragging the boule’s skin tight and then let rest for 10 minutes.  Shape and place in your favorite boule final proofing container - mine is a cloth lined basket that is well floured with rice flour and AP mixed 50-50.  But, you can make what ever shape suits your fancy.

 Let bread rise in a plastic bag until it passes the poke test - mine took 2 hours at 86-88 F.  Get oven ready at 500 F with steam and stone 45 minutes before bread is ready to bake.  Turn out of the basket onto parchment and peel, slash your favorite way and place on the stone with steam for 15 minutes turning temperature down to 450 after 5 minutes.   Remove steam and turn oven to 425 F convection and bake until the bread is 205 F in the middle.  Turn off oven and leave bread on the stone for 12 more minutes with oven door ajar to dry out.

 Move to a wire cooling rack to completely cool before cutting.

ibor's picture
ibor

Come over  to "My Food Address"  (http://myfoodaddress.blogspot.com/)
to explore "The Universe of the 3 Rope Bread Braid"

hansjoakim's picture
hansjoakim

I've just returned home from a highly memorable and breathtaking three weeks in Ukraine. I love travelling, and whenever possible, I try to take my time and move along at a relatively slow pace. Instead of rushing through cities and catching the main tourist attractions, I find it frequently much more interesting and memorable to move slowly through a country, taking the time to see how they go about their daily lives, take the same buses and trains that they do, and get a grip of the atmosphere and the day to day life in the place I visit. I've long had a fascination with European history, culture and society, and particularly that of Eastern Europe and what was the East bloc. Inspired by previous journeys through Romania, Hungary, the Czech republic and Slovakia, I had mapped out a similar trek through Ukraine for 2012.

I spent three weeks travelling from Kiev to Lviv and on to Odessa, the Crimea and Kharkiv before returning to Kiev. I arrived in Kiev on Friday April 13, the start of the orthodox Easter weekend. This was a lovely time to spend in the city, and there were large crowds attending services and visiting the many cathedrals in the capitol. Particularly moving was seeing the large crowds of people - children, elderly, young couples, friends; people from all age groups and all layers of society - flocking to the cathedrals on the first day of Easter. All carrying their own basket with traditional bread and bottles of wine. Below is a photo from just outside the Church of the Assumption in the Kievo-Pecherska lavra complex of Kiev.


On my return to the city centre from the Lavra, I bought a paneton from a small bakery. The crumb was a lovely light golden yellow and feathery light. Some dried fruit and a sprinkling of crystal sugar on top made for a delicious afternoon snack.


Coming from a largely secular society where religion and the respect for religious celebrations is dwindling, I was fascinated by the spirituality and the fact that both young and old came together to mark the Easter celebration.


While staying in Kiev, I also participated in a day trip out the Chernobyl and the ghost town of Pripyat. Below is a photo of the ferris wheel in Pripyat.

Walking around in Pripyat, surrounded by apartment blocks, trees and rusted billboards and only hearing the sound of wind in the trees and the song of birds was haunting and unreal, and reminded me somewhat of the post-apocalyptic scenes told by Cormac McCarthy in "The Road". I understand that the Ukrainians themselves in general have mixed feelings about Chernobyl turning into a weird tourist attraction (something I perfectly understand), but I still found it enlightening to participate in the trip north to the scene of the accident and learning more about what happened during that decisive period back in 1986.


From Kiev, I caught a plane to Lviv - a wonderful and elegant city close to the Polish border.

A wonderful city full of art, grand architecture, open squares and cobblestone streets. Definitely a bit rough around the edges, but if anything, that simply added to a slightly romantic sense of decay and authenticity. A great city to walk around in, enjoy a central European cafe and pastry tradition (some of the cake slices to be had in this town rivals the best of Budapest IMO), and a wonderful countryside.


An overnight train ride brought me to sunny Odessa.

I spent three nights here, enjoying the beaches of the Black Sea, some great parks and a bustling and energetic city that never really sleeps or slows down.

Mark Twain said about Odessa that "there were no sights to see and that the best thing to do is idle about and enjoy oneself." I do think there are some lovely sights not to be missed, including the famous Potemkin stairs, the peaceful, well-kept Primorsky boulevard and the busy seaport itself, but the city is great for idling about and general enjoyment. Oh, and they sell terrific ice cream here, no doubt about that.


Another overnight train ride brought me to Crimea, where I spent four days based in Sevastopol under a scorching sun, close to eclectic Soviet beach resorts and fascinating landscapes that in places reminded me of the Calanques outside Marseille. Sevastopol made for a very convenient base from where I took old marshrutka buses to neighbouring areas, including Yalta

(above is the Livadia palace in the western suburbs of Yalta, the site of the famous 1945 Yalta conference, and the seaside Lenin statue in Yalta. Lenin is now facing a McDonald's; I wonder if he ever thought that McDonald's could be the ultimate consequence of the NEP...), the old Crimean Tatar capitol of Bakhchisarai (here a shot of some cliffs on the outskirts of the city):

and Balaclava.

An overnighter from Sevastopol brought me to the sprawling city of Kharkiv, in the north-east of the country. The city suffered particularly hard during the famine in 1932-1933 and again during WWII; Kharkiv was occupied twice by the Germans, and few original buildings remain. However, the city has managed to fuse the new with the old, and a sizeable student population means that there's always something interesting happening.

As in most Ukrainian markets, the Kharkiv central market had a glorious display of pork cuts to be had for a very reasonable price.

While there, I sampled some varieties of the (in)famous salo; pure pork fat cured with salt and spices, not unlike bacon, and sliced thinly, typically served with cloves of raw garlic, slices of toasted Borodinsky rye and a sprig of parsley. Absolutely delicious and a true celebration of everything great about pork.


From Kharkiv, I rumbled on back to Kiev - below a night time photo of the Maidan Nezalezhnosti (Independence Square) in Kiev.

The opera and ballet in Kiev is certainly world class; I was fortunate enough to catch performances of both Carmen and Swan Lake, and though I'm not that familiar with ballet, I was gripped and utterly fascinated by both performances. An Easter oratorium in the Kiev philarmonic was also stunning.

The memories and impressions from the trip are still very fresh, unsorted and raw, and I'll need some time to sort through my thoughts, feelings and photos. Old, vibrant cities, natural beauty, spirituality, breathtaking landscapes and a fantastic cultural tradition are some of the impressions I take home with me, but also disturbing pictures of poverty, injustice, social and economical differences and a people that has suffered hard for so long in modern times. Although the language barrier is not to be underestimated, I still felt a connection with the people while I was there; people that are deeply spiritual, emotional, humble and sincere. I hope to go back later this year, to explore some more inaccessible areas to also get a glimpse into what life is like in the rural heart of Ukraine and old-time Europe.


I brought some souvenirs back home to friends and family, and for myself I bought some bread pans from a seller on the central market in Kharkiv:

For ages, I've been looking for tall pans like these, so I was thrilled when I saw these as I was making my way out of the pork section of the market! When I got back home, first thing I did was to unload my backpack and then get my starter out of its three week hibernation so that it could make me some bread again:

The two loaves turned out very well I think (at least for an improvised dough), simply made with rye flour, toasted sunflower seeds, boiled whole rye berries and flaxseeds.

Perfect for the Ukrainian cheese and canned fish that found its way back to my place.

Faith in Virginia's picture
Faith in Virginia

Well I was goofing around in the kitchen again.  The above picture is the same bread just formed differently and the one on the right has been egg washed.  After the post a while back about how to slash a loaf to get a specific look I gave it a try on this loaf (on the left).  I altered the recipe and raised the hydration to about 67% so the loaf flattened out a bit,  then the long slash did not help the sprawling of the loaf.  None the less it is still such a tasty loaf.   With some tweaking I think it could become more visually appealing.

This is the original recipe (lazy way out of typing) it also has items of interpretation.  Large pinch of saffron?   One onion, how big how much?  I hope you can read this if you want some clarity let me know.

The dough is quite beautiful.

More pictures then words today.  This is such a tasty bread I thought I would share. It is something you can adjust to fit your preferences.  Enjoy

Mebake's picture
Mebake

Last week, I have been milling my Turkish wheat berries (don’t quite know the type-probably ordinary winter wheat, but definitely not red) using my trusty Hawos easy mill, and noticed that during the first phase of my intermediary milling (coarse), I found tiny bran particles along with the middlings . I decided to try a labor intensive method of separating the bran from the other particles. Bran weighs less than the coarse endosperm particles, so I used a hair drier to blow air through the coarse mixture while stirring it. ½ hour later, this method left me with copious amounts of bran scattered on my laps and on the floor and the endosperm particles with some bran intact remained in the bowl. I know.. I must be crazy, but I was testing a reliable way to remove bran from equally sized endosperm particles, and that surely isn’t practical. I milled the remainder mixture into fine flour, sifted it with a fine mesh sieve, and obtained really fluffy yellowish flour, with tiny specs of powdered bran. I declared it: Mebake’s high extraction flour. It was very soft and fine textured, and had a beautiful wheaty aroma. I didn’t know the extraction %, but assumed that it belongs to the league of artisanal flours. My wife made some chocolate cookies with this flour and the result was the best cookies I’ve ever made at home: Crunchy, delicate, and full of flavor. I wish I had a 50 kg sack of this stuff. I decided to put the flour to test, and bake genuine artisanal bread with it: Miche a callier, from Hamelman’s BREAD. I stuck to the recipe and the procedures, although the stiff levain did ripe in less than 8 hours. The dough received 3 stretches and folds at 40 minute intervals. I noticed some tears during S&F, and I would attribute it to the flour being green (freshly milled), and the milling heat. Here it is:

The flavor at 12 hours is wheaty / nutty and very aromatic. The crust was crunchy / chewy, and the crumb soft and creamy, but not as moist as i guessed it would be. 

The flour

The flour, although difficult to obtain using my method, was worth it.

PiPs's picture
PiPs

... Continued from the previous postChalala's Felton Miche - Wood-fired baking for a food festival - Part 1

I have heard a wood-fired oven being likened to a battery. You store energy, use it and then store it again. I still find it completely captivating watching the flames dance across the roof of the oven. Watching the black walls turn clear of soot and start to burn clean. Laurie and I stood in front of its solid heat marvelling at the flames while discussing heat retention and oven management. Laurie still finds it as fascinating today as when he first built it. The night after the food festival we were refiring the oven for Laurie’s wholesale customers. These breads would be delivered to cafes and households in and around the Toowoomba region. It was a modest bake in comparison to the Food Festival bake – approximately 170 loaves.

We were better prepared for the cooler temperatures and thus increased leaven quantities and paid even more care to the dough temperatures. A day of continual dough shaping was beginning to pay off for me. It gave me an increased awareness and I was able to react to subtle differences each dough that came off that wonderful diving arm mixer. Laurie bakes more tin loaves for his wholesale customers and he is obsessive in his quest for lofty bread proofed ever so carefully to the top of a tin. We worked well into the day, shaping and baking and shaping and baking. Towards the end of the day I was shaping and loading the oven by myself with Laurie keeping a careful eye and giving me gentle encouragement on the best order to fill the oven. Loading an oven loaf–by-loaf on a peel really is an art in itself.

As the afternoon approached we spent a few hours giving the bakery a thorough scrub down from top to bottom as the last load of fruit bread baked in the cooling oven. We were finished for the day. Rhonda had a prepared a dinner fit for kings and we slumped into chairs with a glass of red in hand. The following day I floated back to Brisbane and delivered bread for friends on my way home and that night Nat listened patiently to my stories of diving arm mixers, wood-fired ovens and shaping bread.

Cheers,
Phil

dmsnyder's picture
dmsnyder


One of my thoughts in purchasing a Brød & Taylor Folding Proofer was that I would be able to make Three-Stage Detmolder rye breads with more precise temperature control than I could otherwise achieve. After using this device for fermenting other starters, fermenting doughs and proofing loaves over the past couple of months, I my first rye by the three-stage Detmolder method employing the Folding Proofer this weekend.

My one previous bake of a Detmolder 3-stage rye was almost 3 years ago. (See: http://www.thefreshloaf.com/node/12742/hamelman039s-70-3stage-rye-sourdough) I do recall that bread as having a delicious, sweet, earthy, complex flavor. The bread I baked this weekend was the very similar 80% Three-Stage Rye from Bread. This bread has an hydration of 78%. 37.8% of the flour is pre-fermented.

As described by Jeffrey Hamelman in Bread (pg. 200), this method, developed in Germany, “develops the latent potential of a mature rye culture through a series of builds,” each of which optimizes the development of yeast growth, lactic acid and acetic acid production, respectively. The builds differ in hydration, fermentation temperature and length of fermentation.

Hamelman calls the three stages or builds “Freshening,” “Basic Sour” and “Full Sour.” The first build encourages yeast multiplication in a moist paste fermented at a moderate temperature. The second build is much firmer and is fermented for a long time at a relatively cool temperature to generate acetic acid. The third build is, again, moister, and it is fermented at a warm temperature for a short time. This build is to increase the lactic acid content of the sour. After that, the final dough is mixed.


Freshening

Wt (g)

Baker's %

Medium Rye flour

8

100

Water

12

150

Mature rye culture

4

50

Total

24


Ferment 5-6 hours at 77-79º F.


Basic Sour

Wt (g)

Baker's %

Medium Rye flour

100

100

Water

76

76

Freshening sour

24

24

Total

200


Ferment 15-24 hours at 73-80º F. (Shorter time at higher temperature.)


Full Sour

Wt (g)

Baker's %

Medium Rye flour

270

100

Water

270

100

Basic sour

200

74.1

Total

740


Ferment 3-4 hours at 85º F.


Final Dough

Wt (g)

Medium Rye flour

422

High-gluten flour

200

Water

422

Salt

18

Instant yeast (optional)

8

Full sour

740

Total

1810

Procedures

  1. Mix all ingredients 4 minutes at Speed 1 then 1-1 1/2 minutes at Speed 2. DDT=82-84º F. (Note: Hamelman's times are for a spiral mixer. If using a KitchenAid, I double these mixing times.)

  2. Bulk ferment for 10-20 minutes.

  3. Divide into 1.5-2.5 lb pieces and shape round.

  4. Proof about 1 hour at 85º F.

  5. Dock the loaves. Bake for 10 minutes at 480-490º F with steam for the first 5 minutes, then lower temperature to 410º F and bake 40-45 minutes for a 1.5 lb loaf and about 1 hour for a 2.5 lb loaf.

  6. Cool on a rack. When fully cooled, wrap in linen and let rest for at least 24 hours before slicing.

These loaves scaled to 807 g. After baking and cooling, each weighed 700 g.

Crumb and loaf profile

Slices

I sliced the bread after it had sat, wrapped in linen, for 24 hours. The crust was chewy, and the crumb was moist and tender. The flavor was very mellow and balanced. It was not as sweet as I remember the 3-stage 70% rye being, but that was 3 years ago(!). The sourdough tang was present but subdued. A lovely flavor.

I had been planning on leaving the loaves unsliced for another 12 hours, but my wife decided she wanted rye with smoked salmon as an appetizer for dinner. How could I refuse such a tempting proposition?

Delicious!

I also made a couple loaves of Hamelman's Pain au Levain today. As simple and straight-forward as it is, this is one of my favorite breads.

Pain au Levain bâtards

Pain au Levain crust

Pain au Levain crumb

 David

Submitted to YeastSpotting

GSnyde's picture
GSnyde

I hadn’t made Hamelman’s Pain au Levain with Whole Wheat for a while.  I remember that bread as one of the best I’ve ever made.  I made up the levain last night, and mixed the dough this morning, and then went to the grocery.  There, I began to crave cheese bread.  So I bought some nice dry, sharp Asiago.

I know Hamelman’s Sourdough Cheese Bread formula (like most cheese breads) calls for combining the cheese into the dough at the mixing stage.  It was too late for that.  So, at the shaping stage, I flattened one of the dough balls and spread a thick layer of grated cheese over it, and rolled it up, flattened it a bit again, added more cheese, and shaped it into a batard.

The aroma while it baked was incredible.   It was hard to wait for it to cool.  When the loaf was sliced, I saw that the crumb was nicely aerated…and cheesated, too.  The flavor is amazing!  Cat and I almost finished a 12 oz loaf as an afternoon snack.

Is this what they mean by “loaves singing”?

The other loaves also look like they’ll be good, but they’ll have to wait for tomorrow.

Glenn

dmsnyder's picture
dmsnyder

Exactly 3 years ago tomorrow, I blogged about a batch of straight dough baguettes I had made rather impulsively. (See: http://www.thefreshloaf.com/node/11925/baguette-surprise-and-challenge) They were surprisingly good being yeasted, not sourdough, and having no pre-ferment. Several other TFL members tried my formula with pretty good success. I attributed these baguettes' very nice flavor to the flour mix I used – 90% AP and 10% white whole wheat.

Although I had intended to make these again, three years have gone by … somehow. Last week, TFL member adrade posted a reply to that 3 year old blog, having made these baguettes and finding them good enough (or maybe just fast enough) to make repeatedly. This has prompted me to make some straight dough baguettes again, this time with a somewhat different flour mix and different dough mixing method.


Ingredients

Wt (g)

Baker's %

KAF AP flour

435

87

Central Milling Organic T85 flour

65

13

Water

350

70

Sea salt

10

2

Instant yeast

4

0.8

Total

864

172.8


Method

  1. Mix flours and water to a shaggy mass.

  2. Cover and let sit for 20-60 minutes.

  3. Add yeast and salt and mix at Speed 1 for 1-2 minutes then at Speed 2 for 7 minutes.

  4. Transfer the dough to a lightly floured board. Form it into a ball, and put it in a lightly oiled bowl. Cover tightly.

  5. Ferment for 2 hours at 75º F with a stretch and fold on the board at 45 and 90 minutes.

  6. Divide the dough into 3 equal pieces. Pre-shape as rounds or logs.

  7. Cover the pieces with a towel and let the gluten relax for 10-20 minutes.

  8. Shape into baguettes.

  9. Proof on a linen couche, smooth-side down, covered, for about 45 minutes.

  10. 45-60 minutes before baking, pre-heat the oven to 500º F with a baking stone and steaming apparatus in place.

  11. Transfer the loaves to a peel, making sure the smooth side is now facing up, and score them.

  12. Turn the oven down to 480º F. Steam the oven and load the baguettes onto the baking stone.

  13. After 12 minutes, remove the steam source. Continue to bake for another 8-10 minutes.

  14. When the baguettes are fully baked, turn off the oven, and transfer the baguettes to a cooling rack.

  15. Cool for at least 30 minutes before serving.


These are not the most beautiful baguettes I've ever made. The two on the left were too close to each other on the stone and stuck together. I am not sure why the cuts didn't open better. The prime suspect is under-steaming. Yet the crust was thin and very crisp. The shininess suggests adequate steam, so I'm not sure what happened.

The crumb was rather dense, as it was when I made straight dough baguettes the last time. Maybe they needed a longer fermentation. Maybe I de-gassed the dough too much in shaping. The crumb was pretty chewy but not to excess.

On the other hand, the flavor of these baguettes was totally classic – very sweet and a bit nutty. I enjoyed some with my dinner omelet and more this morning with butter and a tart plum jam. Tonight, another baguette will serve for hamburger buns. French toast Sunday is possible, if I don't make sourdough pancakes.

I think baguettes made with a straight dough are worth tweaking. It's a good tasting and versatile bread that can be whipped out in 4-5 hours. Next time, I'll increase the whole grain flour content some and extend the bulk fermentation. And get a new velvet glove.

 David

Isand66's picture
Isand66

This recipe comes courtesy of David Snyder who posted his adaptation here.

I have posted about other rye breads I have tried making previously and I have to say all of them including this one have come out pretty good.  The big difference in this recipe is that all of the rye flour is added into the rye sour and the dough is fairly high hydration compared to the other ones I have made.

I ran out of First Clear Flour so I had to substitute 217 grams using KAF High Fiber Flour instead.  I think the bread would have turned out better if I had used 100% First Clear to be honest.  I also added some dried Toasted Onions which I reconstituted in the water used for the final dough which gave the rye a nice onion flavor which I love.

One other point is that I followed Davids instructions for making a 100% Rye starter using Pumpernickel flour and I only ended up with 708 grams instead of 750 grams called in the recipe.  I am not sure if this had that much of an effect on the final bake, but next time I will make a larger batch of starter since I would have liked to keep some for my next bake so now I have to start all over again :(.  I do have to say I have made Rye starters in the past and I really like the way this one came out.  You can follow Dave's excellent instructions here if you are interested in converting your starter to a Rye sour starter.

Also, I did not have any leftover rye bread so I didn't add the Altus to this bake, but next time I will add it to see the difference.  I have made rye breads with and without the Altus and have not made up my mind if it is necessary or not.

The end result of my bake was not as open of a crumb as David achieved, but throw some pastrami and Thousand Island Dressing or mustard for you traditionalists out there and deli nirvana is at your fingertips!

Also note that most Jewish Rye recipes call for the use of First Clear Flour which is taken from what remains after the millers sift the patent flour out of the straight flour.  Patent flour is the purest and highest quality flour available.  First clear flours come from hard wheat and has a protein content of 15.0 - 18.0% which is ideal to strengthen the lower protein content of rye flours which are normally around 6.5%.

High-gluten flour can be substituted for First Clear and has a protein content of 13.5- 14.5%.

White rye flour is very important in authentic Jewish style rye breads and comes from the heart of the endosperm.  It contains only 6.5% protein.  (I used Pumpernickel or Dark Rye in this bake)

Medium rye flour is milled from the whole grain after the bran has been stripped away and is used for high-percentage rye recipes (heavier breads for sure).

Dark rye flour, is what remains of the rye kernel after the white rye flour has been sifted out.  As you can imagine it is very dark and strong flavored flour.


Pages

Subscribe to RSS - blogs