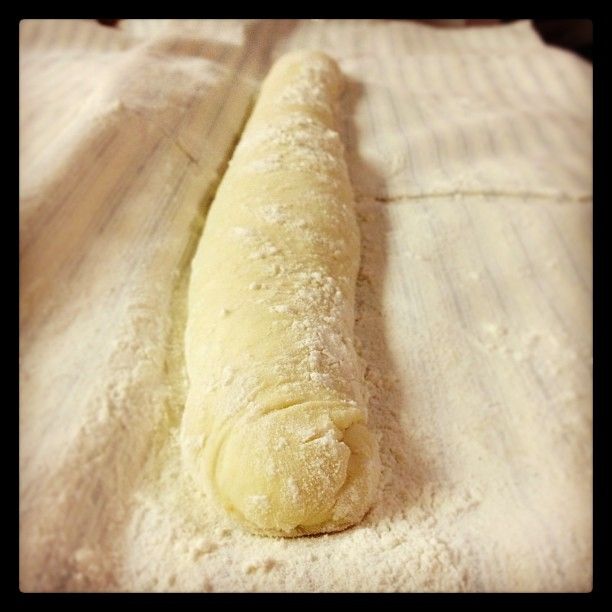
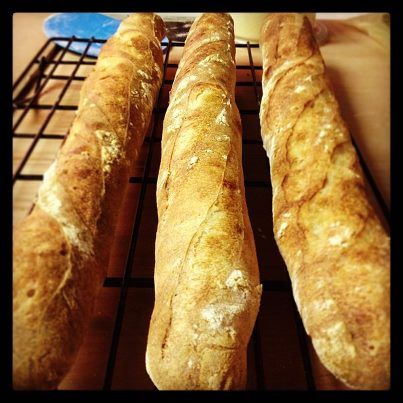
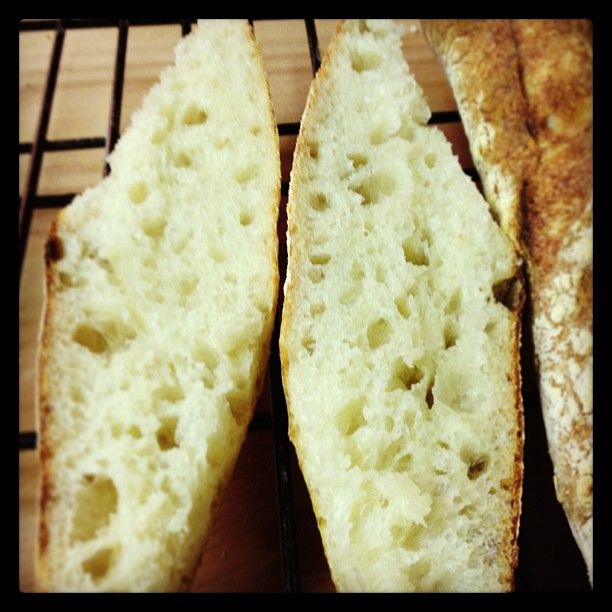
The Fresh Loaf

A Community of Amateur Bakers and Artisan Bread Enthusiasts.

Blogs

patman23's picture
patman23

As most of you know I am an avid baker.  I have thoroughly enjoyed baking traditional sandwich breads, Italian breads of all sorts, and of course, our signature multi grain breads are our calling card.  We have even gotten into making some sweet yeast breads that have been a huge hit with our clients.Last week I attempted to set up 2 variations of a sourdough starter for my bread for my future recipe needs and to deepen my own knowledge of maintaining a culture in a home kitchen environment.  To help me get going I purchased the book "Secrets Of A Jewish Baker." - By George Greenstein some time ago and have finally decided to get to work on some of his recipes. For the record, the the man is amazing.  As for the book, it is well written and quite easy to follow if you are interested in getting it.  I HIGHLY recommend it. Needless to say I went with the simplest Rye starter that I could find and began working on my own variations straightway. Chef Greenstein uses this as his basic Rye Starter. I'll refer to this as my control; 1 1/4 c room temp filtered water. 1.25c 100% WW Flour 1/2 tsp of Yeast 1tsp pulverized onions. Directions: Combine to make a soupy mixture and let rest covered at room temp until it is frothy and at least doubled in size. 50 /50 Variation #1:As most of yuo know I do perfer to mill the bulk of my own flour so I figured that I'd try to see what I could capture directly off of the winter wheat berries. 1c WW Flour 1cRye Flour 2c water (Filtered) 1tsp yeast 1 tsp pulverized onions Directions: Combine to make a soupy mixture and let rest covered at room temp until it is frothy and at least doubled in size. Note:  Variation 1 is going to be about twice as large in volume as the other two so plan accordingly with your vessels and rising / fermenting locations. Whole Wheat Variation 2:This variation simply replaces all of the Rye flour with home milled WW Flour. 1 1/4 c room temp filtered water. 1.25c 100% WW Flour 1/2 tsp of Yeast 1tsp pulverized onions.Directions: Combine to make a soupy mixture and let rest covered at room temp until it is frothy and at least doubled in size. Tomorrow will be the real test to see how they do. I have high expectations so maybe this time next week, I may have some nice SD bread!  The hope is to see a frothy bubbling action at the top of the dough mixture right before the next feeding. So the whole point here is to "catch" the "right" bacteria and allow it to grow for the purpose of fermenting your own bread recipe, to help with the rising process, gluten development or all three.  Honestly, for me, the flavor of these breads are almost impossible to be beat.  The depth in flavor and the brightness of the fermented yeasts leave an aftertaste that is truly incomparable to anything that a big box store has to offer or even local bake shops here in my area. Especially when you combine it with the flavors of the various wheat berries and fresh butter or olive oil. Wow, love it... I have attempted this a few times before and it honestly never ended too well.  Sure I was able to get a loaf or two but at the end of the day I was left wanting.  So what am I doing different now?  Great question!  I am only a few days out of the hospital, I need to have a reason to get off my keister and I have very little other distraction.  My hope is that by me being confined to the house for the next week or two, I'll be able to focus, stay disciplined and take really good notes.  So I expect that I'll be referring back to this blog entry more than you will as my regular readers. So, if you're up for it, join on and we can learn and bake together! It's only fair to warn you that I do have a few other things in my arsenal.  Another book, this one by. Susan Jain Cheney called: "Bread Time"  and I also have a few of my favorite Peter Rienheart books and lastly the "Tassajara Bread Book" - by Edward Brown.  All great authors, all great chefs, all great bakers. In regards to equipment I do have a nice bread mixer, I have the right pans, a clean work surface and I'm starting with a clean kitchen.  Our oven is clean and functional and I have cooling racks to get my loaves cooled down quickly.  Lastly I do have a decent baking stone, but don't get hung up on that.  Any brick wrapped in foil will do.  A decent internal thermometer is also nice to have. You may remember, the last time I tried this, I ended up in the hospital for a week. Join me in hoping for a better outcome would ya?!  One poster said that I may be allergic to wheat.  That is something my wife would love to convince me of.  No such luck on a wheat allergy, just a bad season for headaches. :-) Meanwhile I'm onto my second feeding so lets see how we look.   Day Two FeedingAll three batches look quite frothy and active.  They are not too aromatic but I'm not sticking my nose right into the bowl either.  My feeding went exactly as follows. Control:  Add 1c Rye Flour plus 1/2c room temp filtered waterVariation #1: Add 1c Rye Flour plus 1c of WW Flour, plus 1c room temp filtered waterVariation #2:  Add 1c WW Flour plus 1/2c room temp filtered waterNow that the new feedings have been mixed in I'll let this sit for 12 to 24 hours depending on how long it takes for the dough to become highly active again.  Based on what I've seen so far, I think we will be closer to the 12 - 14 hour mark.  I'll let you know as soon as I get there!!  Ok, so it's been about 4 or 5 hours since I fed the starter and it has already literally doubled in size and is nice and bubbly. There is lots of great action throughout the dough that shows that the fermentation process is moving along quite nicely.  I decided not to feed the dough this time.  There seems to be plenty for it to feed on and as such overfeeding will actually decrease the fermentation process that we are working towards.   After stirring the starters I have noticed that they each have a very gelatinous consistency, not very pleasant if you ask me but it's all part of the process... I'll see if I have any additional containers because I'll obviously need a bigger bowl before it's all said and done.  

dabrownman's picture
dabrownman

The last time we made English Muffins the kjknits way we took her SD version and added yeast water.  gmakaing made some for her grand daughter and also fried some as donuts!  What a great idea.  Her grand daughter really liked them and they disappeared fast.

Look at that color and the nice DO we got at the Estate Sale down the street.

When I told gmabaking I was doing another EM batch today and was going to fry some as donuts, I asked if she had glazed the donuts or put powdered sugar on them.   She said that they were gone too fast but thought that an apricot glaze would be nice.  Well, that sounded pretty good to me and a nice outlet for our home made apricot, nectarine and ginger jam.

The 100 g of combo YW and SD starter was pinched off a larger amount I was building for some WW Semolina bread.  It used  that nice Joe Ortiz cumin, WW SD starter and the now richly purple Apple, Minneola YW that has gone beautifully colored due to the addtion of fresh cherries inspired by Ian at isand66.  It matches my place mats which should be a requirement for any serious home baker - or possibly dumb luck :-) 

The starter was built with duram atta, whole soft white wheat and white whole wheat.  The muffin dough had 2 C of AP and 1/4 C of Duram Atta.  So these EM's were to be a healthy whole wheaty, semolina variety.  The rest of the recipe can be found at kjknits blog at http://www.thefreshloaf.com/node/3241/sourdough-english-muffins/  We love this EM recipe and it has turned out to be easily modified and versatile too.  Always very tasty no matter nhow my apprentice butcher's it.

The starter, flour and milk (I added 2 T more than the Cup of milk due to the extra 1/4 C durum atta in the dough flour) are allowed to sit out overnight for 8 hours.  In the morning the rest of the ingredients go in.  Then knead for 3-4  minutes and  roll them out 3/8" thick for cutting.  After cutting, place them on parchment paper dusted in semolina top and bottom and rest for 45 minutes covered in plastic.  The EM's are then dry fried in a 12" cast iron skillet.

We made 6 flat donut shapes by hand by using the bagel forming method of ball with afinger poked through it and then using two fingers opening the hole in a cirular motion.  Then we squished (another fine baking term) them flat.  Why we squished them flat I have no idea and it doesn't make much sense now, since they were going to puff up in the hot nearly smoking Crisco anyway.

These EM are explosive with the YW and baking soda working with that vigorous Ortiz SD starter.  We made the EM's larger diameter this time (same as Thomas) and increased the thickness a little to 5/16" thick.  Will make them 3/8" thick next time because, even though these babies really spring,  they still were only a little over an 1" high after cooling .  We made 11 EM's and 6 donuts instead of the 24 mini EM's made the last time.

The EM's came out as usual but were more tasty with the WW and semolina flours.  Not quite as open as the all AP flour ones, but still pretty good like Wofferman's in KC where I worked as a sack boy nearly 50 years ago.  Best job I ever had too.  The donuts were a hoot to make and fry up.  Fried them 1 at a time to save on the oil since we don't fry much around here except Crab Rangoon's,  Egg and Spring Rolls and a few other appetizers.  Will make some dry fried or baked bagel ones next time too.

The donuts fried up nice and brown and the spring on them was very good.  The crumb was very open, light and moist.  The crust was chewy just like a fried English muffin would be so, these donuts aren't like the cake or glazed donuts you are used to but they are tasty none the less.

We mixed some of our apricot, nectarine and ginger jam with some powdered suger and a T of milk to make the glaze for the donuts.   We dipped them twice to get an extra thick coat.  Butter and this tasty jam were have too's for the warm EM's.  Just delicious.  I personally had 3 of each for breakfast and can attest to their addictiveness!

Thanks to gmabaking for her great donut and glaze ideas for these fine EM's

.

madisonbaker26's picture
madisonbaker26

After putting my bread baking on hiatus, I decided to return and try out the 47% rye from Wild Yeast Blog.  It's my first rye loaf, save for the major disaster I made several months back.  I ended up finding the dough relatively easy to work with, which definitely surprised me.  It's also my first time trying out a chevron cut, so I'm looking forward to practicing that more.

UPDATE: This bread is awesome!  It's got a pretty assertive rye flavor for only 47%, it's quite tangy and a little sweet.


 And, as promised the crumb shot:

varda's picture
varda

Learning to make bread is full of milestones - some large, some small.   For the last few months I have been trying to get pointy ends on my batards.    This seemingly modest goal has eluded me.   No matter what they looked like after shaping, by the end of proofing it was back to rounded ends.   Gradually though, I've been adjusting my shaping, and today - drumroll please - pointy ends!    This is solely an aesthetic pursuit, with no impact whatsoever on the taste of the bread except, I suppose,  for the end pieces themselves which have a nice crunch to them.   

The bread itself (apart from the ends) is a 23% medium rye sourdough, 65% hydration, baked in my WFO.    I changed my process today by placing a pan with water and a soaked towel into the oven just before loading the loaves.  

It made a tasty afternoon snack with just the smallest possible pat of butter. 

dabrownman's picture
dabrownman

When I was in architectural school so long ago, way before 4 legged apprentices were allowed in the kitchen, one of my best friends, a fine designer, was of Creole decent from New Orleans - the heart of Creole Country.  Cajuns weren't well thought of in New Orleans and scarcely seen then.  His wife was and still is a Cajun from the bayou country around Lafayette - the heart of Cajun Country where Creoles were shunned and hard to find.  It’s not that they hated each other, after all they were both French based to the core, but it was a bit like thick oil and thin vinegar trying to make an emulsion without any duck fat.

Uncooked veggies and chorizo just added to the not very much roux.

Creoles were the upper crust of the French in Louisiana, the New Orleans Upper Crust merchants and the plantation owners who tried to emulate the aristocracy of France.  You can think of them as the perfectly scored ‘Paris Baguette French’ even though their blood was steeped in native American and to a greater extent the Blacks from Africa.

Smoked chicken and 2 smoked sausages - one pork, one chicken.

Cajuns on the other hand were also of French decent and mingled with native Americans more and Africans less but they also immigrated from Nova Scotia to LA instead of from France like the Creoles.  They were more rustic and country than their Creole cousins and weren't into imitating any kind of French aristocracy.  You can think of them as ‘Rustic Country French Sourdough Boules’.  The two things they could agree on was that they hated the English; with the Creoles and the Cajuns coming together to defeat the British in NO ending the war of 1812 after it had already ended on paper several week before and they liked the same kind of foods.  Even if they argued mightily over their slightly different preparation and ingredients of the same dishes it was still all gumbo in the end. 

The dark roasted chicken stock.

The Africans brought the spice, peppers and tomato to the Creoles and the Native Americans brought the crayfish to the Cajuns.  Both had that French sauce; roux, in their veins.   They say that the closer you get to NO the less tomato you will see.  This is totally incorrect.  Cajuns shun tomatoes and they weren't from anywhere around NO – the Creole heart where tomatoes are fine in just about anything.  You can always tell a Creole from a Cajun by noticing if they put tomatoes in the same dishes or not – because they make pretty much the same dishes otherwise - except for the little difference in the addition of file.  File as a spice is also Creole.  With Cajuns, file is totally optional and not required.  Cajuns also tend to put less onion, celery and green peppers in their dishes too.  Cajuns like 1 part onion, 1/2 part green pepper and 1/4 part celery.  Creoles want up to a full part of each.

Stock and beer hit the veggies and the roux.  

Needless to say, my married friends from LA were like night and day when it came to cooking authentic Creole and Cajun food from NO or the Bayous.  They both made every kind of sausage, gumbo, jambalaya, etouffee, French breads and other food treats linked directly to the French in LA be they Creole or Cajun.  Both sides claim to have invented and perfected these fine dishes but, in reality, they worked together to make these dishes world famous and world class.   All of these foods have many variations depending on who makes it and who they learned from and with mixed Creole and Cajun marriages…… anything is possible!

Meat hits the pan- it's nearly time to eat.

It was so much fun cooking with my LA friends because they would always argue over how much of what to put in or not to put in every delicious meal - what ever it was.  Both were equally fine cooks – just different.  What ever we cooked always had a 6 pack of beer consumed as we waited for the low and slow roux commonality to get that deep brick red.  Another 6 pack went down with the meal.

Served over white rice.

Etouffee is usually crayfish or shrimp, when mud bugs aren't available.  The bugs give Cajun’s their main claim to authenticity especially when made with a nice mud bug or shrimp stock - depending.  This etouffee version is smoked chicken, smoked; chicken and pork sausage.   It’s  based on a great smoked shrimp and sausage gumbo I had in KC a couple of weeks ago at one of the many BBQ joints KC is known for.

After dinner bike ride rudely interrupted by a pesky sunset.

The Brownman portion of this recipe is the Mexican; amber beer and spicy chorizo added with the veggies.   The recipe might at first seem to lean toward Cajun since no tomato is ever allowed – too sour.  Too much tomato will spoil any sofrito too.   But the file, spices, peppers and ratio of veggies is pure Creole through and through.   The Mexican influence is unmistakable too.  Us 3, the old friends and cooks, are all represented in this fine etouffee that I’m sure each of us would be proud to call our own.   But I’m certain, both of them would want to change it to better suit their Cajun or Creole tastes.  So, it is not theirs – it’s all mine.

The sunset got better a few minutes later.

I prefer it served over large French Rustic Country SD croutons just to make it more Cajun and even the Creole tilting playing field.  But this time it was served over the traditional rice.     Call it bad planning or possibly fear of too much French :-)

In tribute to the previous nights orange sunset, an orange breakfast of Stan Ginsberg's Bagels, Minneola Medium Caramelized  Marmalade and Cantaloupe.  A magnificent 24 hours of nostalgia, etouffee,  orange; sunsets and breakfasts the Cajun, Creole and Brownman way.  Wish you guys were here to enjoy it with me as I enjoyed our cooking together so long ago. 

I'm such a doofus for forgetting to post the recipe.  Where is that apprentice when you need her?

Smoked Chicken Sausage Etouffee

Ingredients

 1 pound smoked boneless chicken – your choice - we use thighs

½ pound each of smoked pork and chicken sausage

¼ pound chorizo

1 C water

2 C dark roasted chicken stock

1/8 cup grape seed oil + 1/8 C Butter for the Roux Or all oil if you want

2/3 cup flour

1 small onion - diced

2 stalks celery – diced

1 small green bell pepper – diced

1 amber beer - or less if you taste test to make sure it isn’t spoiled –Bohemia preferred

2 bay leaves

2 T Worcestershire sauce

2 T Creole seasoning – equal parts; salt, pepper, onion powder, garlic powder, dried oregano, dried thyme, smoked paprika, paprika, cayenne pepper - 1 T each for the roux and veggies.

2 T Creole seasoning for the chicken and sausages before smoking

½ tsp of Gumbo file - some say it is optional but it isn’t around here.

Tabasco sauce for individual serving heat if the Creole seasoning isn’t hot enough for you or others.

Salt and pepper to taste.

Serve over white rice with some buttered French SD bread to sop up anything left in your bowl.  We sometimes just make huge French SD croutons and serve the etouffee over them instead of rice – great for folks who don’t like rice but love SD..

Make the chicken stock ahead of time.  Etouffee deserves the very best stock.

Smoke the chicken, sausage and chicken sausage with the Creole seasoning . 

Heat oil and butter in large skillet until it is hot but not quite smoking.  Add the flou and 1 T of the Creole seasoning, turn down the heat to low and cook the roux while constantly stirring until a dark peanut butter color is achieved.  This is called a blond roux even though it will be a brick red and may take 20 minutes or more.  Add the vegetables, the chorizo and 1 T Creole seasoning and cook while constantly stirring for about 6-8 minutes until the vegetables soften and the roux gets darker.  Make sure not to burn anything.

Turn heat up to medium.  Add the beer and chicken stock, Worcestershire sauce and bay leaves. Cook while stirring until the mixture boils and thickens to correct consistency10-15 minutes.  Etouffee is a thicker sauce than Gumbo.   Add in the smoked meats and cook for about 2-3 minutes until the meat is just heated through.  The chicken should be chopped into ½" cubes and the sausages cut into ¼" thick coins. Have Tabasco ready for those who want more heat.   Serve over plain white rice or some kind of rustic French SD croutons Which is my preference.  For a more smoked flavor you can smoke the finished etouffee in the smoker too.

 If 3 Cajuns or Creoles are making etouffee you need about 12 additional beers while making it in order for them to have a good time and learn to get along while working hard on that roux that takes patience and low heat.

hanseata's picture
hanseata

The owner of A&B Naturals, the store that sells my bread, asked me one day: "Can you bake pitas, too?" I had never made them, so I said with conviction: "Yes!"

At least I knew where I could find a pita recipe!

In "Whole Grain Breads", one of my favorite baking books, Peter Reinhart has a recipe for whole wheat pitas - just the right thing for my grain loving customers.

I started my first pita dough. No big deal, until I got to the shaping part. The pitas had to be rolled out no thinner than 1/4 inch (6 mm), and to an 8-inch (20 cm) diameter. But my pitas already reached this thickness at 6 1/2 to 7 inches (16 to 18 cm.)

Pitas are shaped in three steps, first into rolls, then rolled out to 4"/10 cm. Don't skimp on the flouring!

Below: rolling out pitas to a larger round (6 1/2 - 7" or 16 - 18 cm.) Re-flour them, if necessary.

A high oven temperature is key to a pita's proper horizontal separation into two layers. This high temperature has to be maintained during the whole bake, from below as well as from above.

Many cheaper ovens don't heat up to the necessary 550ºF (280ºC.) Without that boost pitas can't produce the large gas bubble that creates a pocket. And without a pocket - no delicious filling!

A baking stone, or a rack lined with unglazed terracotta tiles (like I have), works best for keeping the  temperature stable, even when the oven door has to be opened several time during the baking process. And very hot stones make the best baking surface for pitas, too.

To reheat fast enough after each opening of the door I remembered Peter Reinhart's advice for baking pizza ("American Pie"), where the problem is the same: intermittently switching the oven to broil for a short time.

How many pitas can you bake at the same time? One batch of dough makes 8 (or 6, if you want larger ones.) Peter Reinhart says one at a time, but, of course, being a semi-professional I wanted to do it a little less time consuming.

After some trials, I found that I can put two at the same time in the oven. That's the maximum, with more it becomes very difficult to load and unload them without damage, and to keep control over their baking process.

2 pitas can be baked at the same time. Once out of the oven, they deflate quickly.

Of course, it takes a little bit of experience to slide the pitas into the oven without them folding over in one place, and to extricate them without nicking them with the peel.

But it's not rocket science, a smart child can do it:

  Josh, our carpenter's son, thought it was much more fun to help with my baking than reading his book!

Though Peter Reinhart's original 100% whole wheat pita is very good, I made a few changes to it. I substitute a 7-grain mix for some of the whole wheat flour, and add an overnight bulk rise in the fridge, this is more practical for my baking schedule, and, in my opinion, improves the taste even more. It also has the advantage that I can reduce the yeast amount by 2 grams.

Though I usually cut down on the sweetener in Peter Reinhart's recipes, this whole grain bread needs the full dose.

We like our pita filled with grilled Halloumi cheese, tomato and lettuce - the way we had it in Girne/Kyrenia on Cyprus. And how do my customers at A&B Naturals like them? They fly off the shelf so that I have to bake them every week!

Here is a link to the recipe in my blog "Brot & Bread".

pmccool's picture
pmccool

Although my baking has waned recently because I need to reduce the bread backlog in my freezer, it hasn't gone entirely dormant.  For instance, I baked some hamburger buns today (thanks, dolfs!) as a demonstration/interview for an instructor's position with the Culinary Center of Kansas City.  It was a lot of fun and felt more than a little bizarre.  After all, I am, to steal proth5's pet expression, just a raggedy home baker, not a professional chef/baker.  Still, any time that you get to talk to people about baking bread is a pretty good time.  And I apparently managed to do so in a coherent fashion because they asked me to teach for them.

The demo was slated as a 30-40 minute session in front of six of the CCKC staff and instructors, followed by their feedback.  That's a very small slice of time to work with, so I broke it into two separate phases and applied some "TV cooking" tricks.  The first phase was to demonstrate the mixing and kneading of a single batch of dough (using pre-measured ingredients), fielding questions as I went.  Some of the reviewers are bread bakers, some are not.  From a previous test run with the dough, I knew that I did not want to add more flour to the dough.  I also knew that the butter content was high enough that the dough would not stick to the work surface.  Consequently, I only did a rough mix and dumped the not-entirely-cohesive mass out onto the work surface, which was a polished marble or travertine material.  That elicited a few questions about why I wasn't worried about the whole thing sticking, so I showed them how the butter in the dough was keeping my hands and the counter comparatively clean.  I only kneaded it enough with the push-turn-fold-push method to get everything to hang together, then started French folding, a la Richard Bertinet.  That triggered a number of questions and comments, since none of them had seen that technique previously.  They were impressed with how easily the dough developed and smoothed out, and with how it picked up the initial goop from the countertop.  Putting that aside, I pulled out six batches worth of dough that I had made prior to leaving home for the demo and put each of them to work shaping the dough into the bun type of their choice, with pointers on how to achieve the various shapes.  I gave them tips for the final fermentation and baking (they have plenty of ovens to work with at the center) and that was the end of the demo.  Next up was listening to the critiques, which were uniformly positive and provided some very useful tips for me as a presenter.

So, the next step is to work out what courses to offer and to get them scheduled.  The catalog for the November 2012 - April 2013 semester is being developed now, so my timing was good.  I'll probably teach once, perhaps twice, a month.  This promises to be a lot of fun and I'm really looking forward to sharing the joy of good, home-made bread with others.

Paul


Isand66's picture
Isand66

Chocolate flavored coffee.....what could be wrong with using some in a bread you ask?  Nothing of course, so why not use it in a soaker as well ?  That is exactly what I ended up doing.  I normally leave the grains soaking for about 30 minutes to an hour, but in this case I left it over night for around 24 hours and the soaker grains sucked up all the coffee.  When I mixed the final dough I decided to make this a very moist, high hydration dough so I didn't cut back on the additional coffee used and the end result as you will see was the most moist bread I've made to date that almost melts in your mouth.

I used some rolled oats, cracked wheat and malted rye berries for the soaker and for the final dough I used durum, dark rye, white rye, European style flours and some roasted wheat germ.  I added some barbecued potatoes and pistachio oil as well.

In order to make the soaker I used 285 grams of hot water and mixed it with the ingredients and let sit at room temperature for 24 hours.

For the starter, I refreshed my standard AP 65% hydration white starter the night before and used most of it in this bake.

Soaker

100 grams Rolled Oats

100 grams Cracked Wheat

50 grams Malted Rye Berries

285 grams Hot Mocha Coffee

Mix coffee in a bowl with other ingredients and let sit covered at room temperature for 24 hours.

Starter

71 grams Seed (Mine is 65% AP Flour Starter)

227 grams AP Flour

151 grams Water (85 - 90 degrees F.)

Mix seed with water to break up for a few seconds and then mix in flour until the starter form a smooth dough consistency.  Put it in a lightly oiled bowl and loosely cover and leave at room temperature for at least 10 hours.  The starter should double in volume.  Put the starter in the refrigerator for up to 1-2 days or use it immediately.

Main Dough

Ingredients

425 grams Starter from above (all of the starter)

100 grams Durum Semolina Flour (KAF)

100 grams White Rye Flour

100 grams Pumpernickel Flour or Dark Rye Flour

150 grams European Style Flour (KAF)  (Sub Bread Flour if you don't have this)

50 grams Roasted Wheat Germ

370 grams Mocha Coffee (90 degrees F.)

14 grams Sea Salt (or table salt)

209 grams Mashed Roasted Potatoes

10 grams Pistachio Oil (substitute any oil desired)

Procedure

I mixed  the flours together with all the coffee except for 50 grams and let them autolyes for 30 minutes.    I then added the levain, potatoes, oil and the soaker and the rest of the coffee with the salt and mixed on speed #1 for 1 minute and #2 for 4 minutes.  I then did a stretch and fold, rested the dough uncovered for 10 minutes.  I then did another stretch and fold, covered the dough and let it rest for 10 minutes.  I did one more stretch and fold and put it in a lightly oiled bowl for 2 hours.  I then put it in the fridge overnight.

The next day I let the dough sit out at room temperature for 1.5 hours.  After 1.5 hours I formed it into loaves and put them in floured bannetons and let them rise covered for 2 hours.

Score the loaves as desired and prepare your oven for baking with steam.

I then baked on my oven stone with steam at 450 degrees until both loaves were golden brown and reached an internal temperature of 200 - 210 degrees F.

I had to bake this bread for almost 50 minutes since it was so moist and the final dough came out with an excellent crust and moist crumb.

Please visit my other blog for my older posts at www.mookielovesbread.wordpress.com.

Crumb Close-up
codruta's picture
codruta

Summer News.   My path in becoming a baker... (part II)

... goes through Kalispell Montana USA

 (A true story about chance, adventure and passion without boundaries)


Hello, TFL friends.


          As some of you know, there are some changes going on in my life and it all started a few months ago, when I decided I want to be a baker and open my own bakery in my town.
In the last years, I've been an amateur home baker and a TFL member and I spent hours and hours reading bread related subjects, experimenting and learning from my mistakes. I learnt a lot from books, blogs and from the greatest bakers on TFL. My love for bread grew so much, till one day I realized I'm only happy when I bake (no exaggeration here) and from that moment my final decision was taken.


I have been searching for a while some bakeries in Europe who would take interns during summer and some of you probably already read my previous post about this (link here) and so you know I'll go to Powburn at the beginning of August to meet Andy (Ananda) and to work with him for a week.

          One day I was talking with MC Farine, asking her if she can guide me to a nice bakery she visited in her travels in Europe. Her answer pointed me in a direction I would have never thought of: she suggested to talk to Mark Sinclair (mcs on TFL), the famous baker from the Back Home Bakery, Kalispell, Montana, USA. I needed three days to have the courage to write him, but I finally did and his answer to my request was affirmative.

          To make a long story short, I will spare you of the part that I had to go to the trouble of getting a tourist Visa for USA (there was some stress involved, because I was not the classic rich tourist type and there was a high risk of being rejected, but it all ended well) and I rather speak about the great joy I feel for getting the chance of traveling to USA to meet Mark, the baker who inspired me so much in the past and in the last months. My emotions are precipitating as the time for internship is approaching and I can't tell how glad I am because things arranged themselves as they did.

          I read all the posts here on TFL written by the former interns or by Mark himself, I read and re-read his internship application, I made my homeworks, I've talked to Mark a few times about the program and I know exactly where I'm heading (sleep deprivation, long hours of work, rigorous program) but I am very excited and motivated and determined to do my best and get the maximum from this amazing opportunity and challenging experience.

          TFL members who have been there before me, please feel free to advise me or to warn me, if it's the case, what are the dos and don'ts I have to be careful about.

          I think I will be the first Back Home Bakery intern who travelled from so faraway to get there. Also the first to spend more than 2 weeks in a row there. The first who's English is not the native language.

          For those of you unfamiliar with Mark's website, please visit it (link here) and watch his tutorial videos (link here) (or order the DVD's) because they are amazing and helpful whatever is your stage in baking (the ones demonstrating the shaping techniques are my favorites).

          I'll be at The Back Home Bakery in the interval between 16 August - 3 September. I will keep you updated when I'll get there, but till then I want to share wih you a drawing that Mark did specially for this blog post, which makes me smile everytime I look at it and it also makes my future to look so pretty :)

                                             "Under the spell of Kalispell" (my title)
with the note that "brutarie - deschis" means "Bakery - open"


If you have time and patience you can also read my post in my romanian blog (link here) (translation available on the upper right side), which given the fact that it was written in my native language it is a longer and more emotional version of this one presented here. Hope you'll enjoy it :)

Till we'll hear again, I'm wishing you all the best and keep on baking!


Codruta

www.codrudepaine.ro

breaducation's picture
breaducation

In my last post, I experimented with spelt flour in a country bread. The flavor was very appealing with slight nutty undertones and the bread came out great! However, I'm never satisfied with my last bread and always want to push into new areas. So I decided to increase the spelt in the formula from 10% to 20%.

I didn't stop there however, as at the last second I decided to add in polenta. I've tried using polenta in bread before and liked the result. There are a few steps to take when adding polenta or any grain for that matter into a bread.

Soft grains and seeds need to be soaked in water first so that they don't steal water from the dough and change the dough composition. With a hard grain like polenta you may need to go a step further and either use a boiling water soaker or just cook the grain beforehand. I elected to cook the polenta as I didn't have time to let it soak in hot water for 2+ hours. Once the polenta was cooled off I simply hand mixed it into my dough.

The loaf was dusted with cornmeal to hint at the polenta on the inside.

But that is not all! Like I said, I had put polenta in bread before and liked it but this time I really wanted to try something new. I decided to consult The Flavor Bible which is one of my absolute favorite books for cooking and baking. It is essentially a list of just about every ingredient you can think of and then under each ingredient is another list of all the other things that pair well with that ingredient. I simply looked up polenta and found a number of options that would go great with it. I decided on roasted garlic.


The still-warm crumb.

If you've never added roasted garlic to your bread I highly recommend it! Think garlic bread except the garlic is built into the bread instead of spread on top. It created a wonderful aroma throughout the apartment while baking. How to add roasted garlic to bread you ask? Simply roast the garlic with your preferred method and allow to cool. Then chop up and mix into your dough by hand. I went with four medium to large sized cloves in my 500g. loaf. I think I could have doubled that though and been fine(the garlic flavor I got was mild and subtle).

All in all this loaf was quite delicious and I would definitely bake it again especially if I was making bread for an Italian dinner.

Pages

Subscribe to RSS - blogs