The Fresh Loaf

A Community of Amateur Bakers and Artisan Bread Enthusiasts.

Recent Blog Entries

fleur-de-liz's picture
fleur-de-liz

Here is a Potato Bread with Roasted Onions from Jeffrey Hamelman's Bread. Nice moist crumb, crackly crust and lots of flavor. It's a yeasted dough with a pate fermentee. I shaped it in the fendu style, as recommended by Hamelman. Next time I will initially roast the onions a bit less, as they end up a bit too toasty after the long bake required of a potato bread.


bwraith's picture
bwraith

Savory Sourdough Focaccia

I spent the day making a couple of sourdough focaccias and a miche that is similar to the Thom Leonard Country French recipe in Artisan Baking by Maggie Glezer. The recipe for the focaccias follows.

A spread sheet in xls format and html format for the dough is posted, which has amounts in ounces and bakers percentages, percent of fermented flour and other possibly useful information. Some photos of the process are posted, as well.

These focaccias use a small amount of instant yeast. Olive oil seems to significantly slow the activity of the sourdough once it is introduced in the dough. The fermentation in this recipe runs long enough before a large amount of olive oil is added to the dough to allow the sourdough flavor to develop.

Levain:

  • 15g of white flour starter (I used my 90% hydration starter, but you can use any healthy, active starter) Use about 12g of 60% hydration firm starter.
  • 216g of bread flour (I used Wheat Montana AP, which is like bread flour despite the AP designation)
  • 194g of water

Let the levain rise overnight until at least doubled. It can ripen a few more hours after that without changing the results very much. The levain is designed to rise for 12 hours at 70F. At 76F it might take 8 hours to be ready and at 65F it would take about 15 hours to be ready. If the levain is ready before you want to mix the dough, refrigerate it when it has about doubled, and it can be used 1 or 2 days later.

Dough:

  • 14g Malt Syrup
  • 22g Salt (1.6%, because I put additional salt on the raisin focaccia, and the chorizo and cheeses add additional salt in the savory version)
  • 4g instant yeast
  • 70g olive oil
  • 988g water
  • 84g whole rye flour
  • 84g whole wheat Flour (I used Wheat MT Bronze Chief)
  • 280g bread flour (I used Wheat MT AP)
  • 350g high gluten flour (I used KA Sir Lancelot HG)
  • 378g AP flour (I used KA organic AP)

Mixing and Kneading

You could easily use all bread flour for the white flours in the dough. This is just what I did due to finishing some bags of flour. I usually use 50% AP and 50% high gluten flour in this dough.

I mixed the dough in a DLX mixer at low/medium speed with the dough roller attachment for 5 minutes, and let it rest a few minutes. Then I split the dough in half. To one half I added a box of golden raisins - about 15 ounces, and mixed the dough for another few minutes to further develop the gluten. The other half of the dough was separately mixed for a few more minutes.

Each half of the dough was allowed to rest about 1/2 hour and then poured out on the surface and folded a few times and each was placed in its own covered bowl to rise.

Folding and Bulk Fermentation

Each dough was folded about once per hour over the course of about 3.75 hours and was at about 75F. At 70F the bulk fermentation should run longer, maybe 5 hours. The dough should become puffy and soft over that time. How much it rises is hard to tell, since it is being somewhat deflated during the foldings that are done once per hour.

Prepare Ingredients for Savory Focaccia

Sautee 1/4 inch on a side pieces of chorizo or other salty, firm sausage in olive oil until they render some of their fat and are somewhat browned. They will cook more in the focaccia, so they shouldn't be sauteed so much that they become hard. Roughly chop most of a large onion and 4-6 garlic cloves. The onions should end up in strips about 1 inch by 1/4 inch. The garlic pieces should be about 1/4 inch on a side. Sautee with some red and black pepper (maybe 1/2-1 tsp, depending on how spicey you want it). Sautee the onion and garlic until tender and translucent or beginning to brown. Chop up fresh mozzarella, about 1/2 pound into about 1/4 to 1/2 inch on a side chunks. Also have on hand enough shaved or shredded asiago or parmesan or similar salty flaked dry cheese for topping the savory focaccia. Drain the sauteed ingredients well and spread out on the counter or place in refrigerator. They will need to cool to room temperature before being pushed into the focaccia.

Place in Pan

Line a 1/2 size standard tray (about 17x13x1 inches) with parchment paper. Grease the parchment paper with olive oil, about 1/4 cup. Place the dough on the parchment paper and patiently press it your fingers starting from the center and working out to the edges. If the dough will not spread out, let it rest a few minutes, and continue pressing it out. Don't squeeze it with flat palms, only press straight down, dimpling it with your fingers. With patience it spread out over the whole pan. Don't worry too much about filling the corners.

In the case of the savory focaccia, as you spread it out, drizzle about another 1/4 cup of herb infused olive oil on top. Also, once it is reasonably spread out, begin to work in the sauteed ingredients and the mozzarella cheese. Push the ingredients into the dough with your fingers. Continue to patiently push all the ingredients down. At first they may pop back up or remain on the surface. After a while the puffy dough will begin to envelop them. Every few minutes for the first hour of the final proof, continue to press in the ingredients.

In the case of the raisin focaccia, just let it rise for the first hour, while pressing in the ingredients in the savory focaccia. After an hour, press the raisin focaccia down with your fingers, working across the entire dough surface.

Proof

Cover both focaccias with plastic wrap and allow them to proof for another 2.5 to 3 hours at 75F. If they become very puffy, remove the plastic wrap and gently press them down with your fingers. The dough should be puffy, evenly risen across the whole pan, and at about the height of the top lip of the pan or a little higher. Poke any big bubbles that form with your fingers while pressing down the dough.

Toppings

Before the raisin focaccia is baked, sprinkle 3/4 tsp of salt evenly across the surface. Use your fingers to pinch the salt and carefully spread it over the dough.

The shaved, flaked, or shredded asiago or parmesan cheese should be sprinkled over the savory focaccia when it is within 5 minutes of being taken out of the oven during the bake.

Bake

These focaccias were baked in a brick oven that had been brought to a hearth temperature of about 550F and allowed to cool down to about 510F. The air temperature in the oven was about 425F. They baked for about 15-20 minutes, first in the pan for 5 minutes. They were then scooped out of the pan with a peel and placed directly on the oven floor. If I were doing this in my kitchen oven, I would bake in the pan for about 20 minutes in an oven with a stone preheated for about 1/2 hour to 450F. It may help to gently scoop the focaccia out of the pan onto a peel and drop it directly on the stone, but is not necessary. I sometimes notice a second oven spring when I drop them directly onto the stone.

Cool

If they haven't been removed from the pan, slip a peel underneath the parchment paper and carefully remove the focaccia from the pan and place on a cooling rack. Remove the parchment paper also. The bottom of the focaccia will come out better if exposed to air while cooling. Allow to fully cool before cutting.

Results

The sourdough flavor goes well with both the raisins and the savory flavored focaccias. These focaccias are favorites among family and friends and are regularly requested.

bwraith's picture
bwraith

Miche with Spelt and Rye Levain

Miche with Spelt and Rye Levain - Closeup

Zolablue, a frequent TFL contributor, encouraged me to try the Thom Leonard Country French recipe in Artisan Baking by Glezer. This recipe is a variation that incorporates some of the things I have liked in other miche recipes. For example, I am using Heartland Mills Golden Buffalo flour as the main flour, but spelt and rye are added in the levain, and there is some additional whole wheat added with a soaker. The hydration is lower than most of the other miche recipes I've tried or blogged here on TFL, which gives it a slightly more regular, dense crumb that is excellent for sandwiches or for holding honey or any wetter toppings. It is a robust texture, as opposed to a very light, irregular, open structure.

Spreadsheets in xls and html format are posted with weights in ounces, bakers percentages, and other possibly useful information. Some photos of the process are posted, as well.

Levain:

  • 10g white flour paste consistency starter (I used my 90% hydration white flour starter) Use about 8 grams of 60% hydration firm starter.
  • 58g whole rye flour
  • 119g whole spelt flour
  • 141g water

The levain is designed to rise for about 12 hours at 70F. At 76F, the levain would be ready in about 8 hours. At 65F it would be ready in about 17 hours. You can let the levain rise by double and refrigerate it if you want to make it in advance. It can be used after 1-2 days without changing the results of this recipe very much.

Soaker:

  • 203g whole wheat flour (I used Wheat MT Bronze Chief)
  • 203g water

The soaker was mixed the night before and allowed to sit on the counter overnight at about 70F. Refrigerate unless you plan to use it within 12 hours.

Dough:

  • 1 tsp diastatic malted barley powder
  • 15g malt syrup
  • 27g salt
  • 721g water
  • 203g AP flour (I used KA Organic AP)
  • 763g high extraction flour (I used Heartland Mills Golden Buffalo)

Mix and Knead

The dough was initially mixed/kneaded in a DLX mixer on low/medium speed for about 8 minutes. It was allowed to rest in the mixing bowl for about 1/2 hour and then kneaded in the mixer for another 5 minutes. The dough was dropped on the counter and folded into a ball and placed in a rising bucket. It was placed in a warm area, about 76F, for the bulk fermentation, which should run about 4.25 hours at 75F. The bulk fermentation should take about 6 hours at 70F or 8.5 hours at 65F.

Folding

The dough is fairly firm with the very water absorpent Heartland Mills Golden Buffalo and whole rye at a 79% hydration. At this consistency, the dough is stiff enough that it resists much folding, so it was folded only once about 1.5 hours before shaping.

Shaping and Final Proof

A boule was formed and allowed to sit on the counter for 10 minutes to seal the seams. Note, the loaf doesn't rise by double during bulk fermentation. The loaf was placed upside down in a lined round wicker basket style banneton dusted with a mixture of semolina, rice, and bread flour. The loaf was also dusted with the dusting mixture plus a small amount of bran. The basket and a bowl of warm water was placed in a Ziploc "Big Bag" and allowed to rise for 3.5 hours at 75F. Allow 4.5 hours at 70F for the final proof or 6.5 hours at 65F.

Peeling and Scoring

The boule was turned out on a piece of semolina and corn meal dusted parchment paper on a large peel and slashed with a cross-hatch pattern.

Bake

This loaf was baked in a brick oven after some focaccias were baked, as noted in another blog entry recently. The hearth temperature had dropped to about 485F, and the air temperature was about 425F. The oven was steamed using a very fine garden sprayer designed for orchids (1/6 gal/minute, by Foggit) and sealed with a towel covered wooden door for 15 minutes. It was then rotated and sealed with a metal door thereafter for a total bake time of about 1 hour. The hearth temperature dropped to about 445F at the end of the bake.

To do the same thing in the kitchen oven, I would use a stone and preheat the oven to 500F and steamed according to your favorite method. I use a cast iron skillet and place a special can with a small hole drilled in it with about 1 cup of water that dribbles out creating steam in the oven for about 10 minutes. I drop the oven temperature to 450F for the first 15 minutes, immediately after adding the water, and then drop the temperature to about 400F or lower, for the rest of the bake, monitoring the crust color and dropping the temperature further to avoid charred crust.

Cool

Allow to fully cool on a rack before cutting.

Results

This is a great loaf for any juicy ingredients, or things like honey, mayo, and whatnot. It's more dense and chewy than other miches I've blogged on TFL. It has a nutty, toasty, and slightly sweet flavor, I believe due to the spelt, and is a little crunchy due to the crisp thick crust that has a little bran encrusted in it, and maybe also from the added whole wheat.

AnnieT's picture
AnnieT

I'm not sure who mentioned this loaf recently, but many thanks to whoever it was. Just took the loaf out of the oven and it is lovely, and I have to admit I was a bit sceptical when I had to refrigerate it overnight. It seemed like a long time for the starter to keep working with the overnight on the counter too. Oh ye of little faith! Another first - I refreshed my starter and put it in a small jar and it overflowed. What a mess, but I guess it is getting stronger? There are HUGE snowflakes falling past my window but so far it isn't sticking, A.

BrotBoy's picture
BrotBoy

i am looking for a receipe for russian black bread.. Does any one have a  tried and true receipe?

JMonkey's picture
JMonkey

I was concerned that my success with the whole grain hearth bread that I posted about early last month was just a one-hit wonder. Thankfully, it seems I can repeat it. Here's a few loaves that have come out of the oven in the past weeks:


I've also used the same technique for a 60-40 whole wheat to whole rye batard, and it, too, turned out well, though the crumb was, naturally, much tighter than in the loaves pictured here. I'd have taken pictures, but the camera was full and, by the time I got around to downloading them off of the camera's video card, the loaf was just a little nubbin.

umbreadman's picture
umbreadman

Inspired by the Chocolate Cherry bread from Zingerman's Bakery down the street, and spurred on by a fellow FreshLoafer's (JMonkey) post on the matter, I've finally made it my own!


I'll admit it. Asthetically, it's a brute. Shaping didn't really happen, clearly there are no slashes, the sharp chocolate corners broke through the dough because I wasn't thinking about how I was handling it, it oozed, and the chocolate on the outside was mildly charred.

None of that matters.

The smell was incredible. The essence of sour cherries and dark chocolate mingled beautifully and delighted the nostrils of everyone in the vicinity. I dare say it was very seductive. 

It tasted great. The little bit of honey I added to the dough helped connect the ingredients better. Otherwise, I wonder if there would have been too much contrast between the fruit/chocolate and bread flavors...

There is though, much room for improvement. I did not develop the dough adequately before folding in the additives. And I think it showed. I also made the mistake of not fully reviving my starter before introducing it to the dough; while it worked, it was rather weak. Also, the crust colored very quickly, and I pulled the loaf before it was fully baked, let it cool slightly, cut it, noticed it was underdone, and rebaked it. Next time, lower temp.

Still though. Very tasty. All the mistakes are rendered, at least temporarily, insignificant by the wonder of this creation.

Dark Chocolate Tart Cherry Levain

1.5 lbs Bread Flour (I used Golden Buffalo)

1lb 2ozs water

.5oz salt

Small amount of refreshed s.dough culture (adjust depending on taste/rising time preference)

~8ozs dark chocolate, broken into small bits

~12ozs dried tart cherries (if sugar is added, its okay. They will come out during soaking)

1) Soak cherries for at least 30 minutes to remove any added sugar and prevent burning

2) Mix flour, salt, and water until fully hydrated, let autolyse/sit for ~30 minutes (can do while cherries soak)

3) Cut up levain, add to dough with cherries, mix until fully distributed, knead to develop gluten (which I did not do), but be gentle not to destroy cherry integrity

4) Bulk ferment until approx 1.5x volume increase, folding once* halfway through.

*During fold, add chocolate bits inbetween each fold over. JMonkey's blog illustrates this well, here.

5) Very gently shape the loaf, trying not to puncture the future crust. While it's not tragic if it does happen, if there's a leak, chocolate can leak out and burn, and it might make you a little sad. But you'll be fine! It's okay!

6) Bake on a preheated stone with steam at ~400-425F (I did 450F and forgot to turn the heat down [it was a busy day in the kitchen], so the crust darkened very quickly. A lower temp would give a more thorough bake without the crustular trauma)until internal temp reaches 200F.

LET COOL BEFORE CUTTING. Molten Chocolate is very hot! It will burn if you, so it is imperative that you resist the nearly irresistable urge to eat this bread. Even after about 25 minutes, it was hot enough to burn my friend a little, so be careful. 

7) Devour. It will probably not last very long. Not because it won't keep. But because it's too tasty. Even if you mess up a bit. 

AnnieT's picture
AnnieT

Has anyone made this bread from the BBA? I was so thrilled with the dough which was easy to handle and shape, and they went into the refrigerator overnight. I was totally amazed when I pulled them out this morning because they were what I imagine was overproofed. I am so used to chilled sourdough breads being rock hard. I tried to gently move the loaves apart and one began to deflate, horrors. So I went ahead and baked them and followed PR's instruction to gently part the loaves halfway through the bake time - and the dent had filled out. They looked great and this time I didn't scorch the sesame seeds, but the crumb is a total disappointment. Instead of big holes it is almost tender and fluffy. Good flavor but not what I was hoping for. So am I correct in thinking they were overproofed? If so I will have to make them later in the day or get up earlier! Any comments and suggestions welcomed, A.

KipperCat's picture
KipperCat

Sweet Potato Pecan Cinnamon Rolls

My Entry in Bread Baking Day #04, Bread with Spice http://bakinghistory.wordpress.com/2007/10/18/bread-baking-day-04/

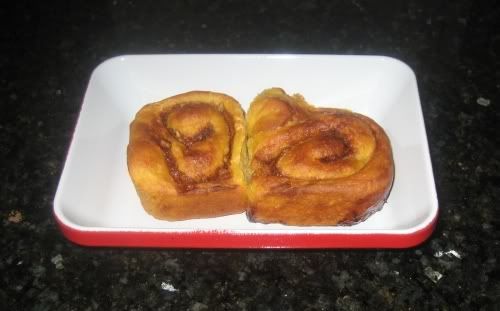
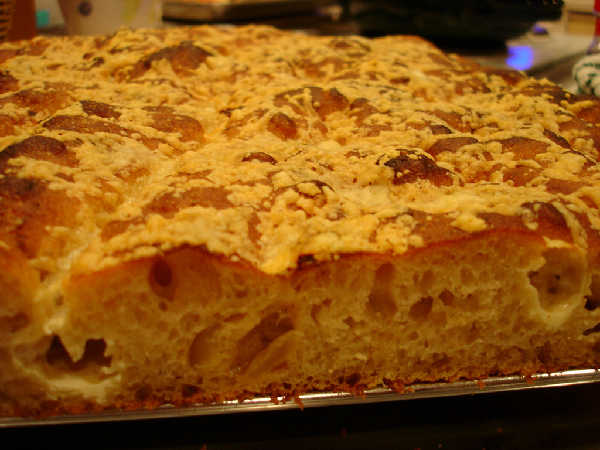
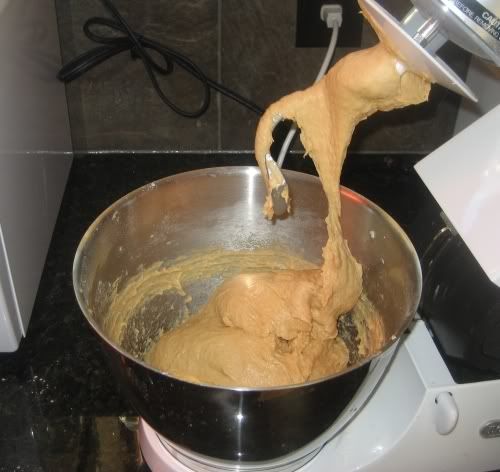
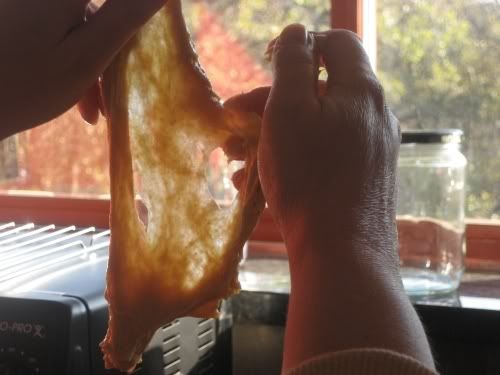
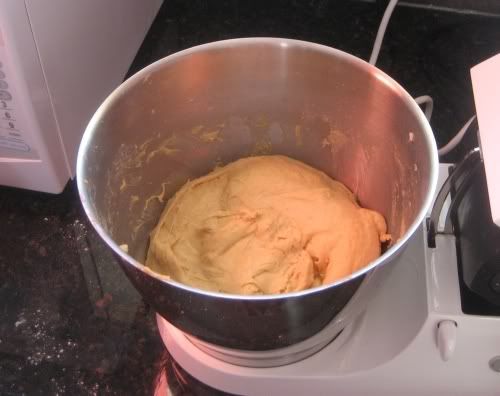
I’ve been wanting to make these ever since I saw Floyd’s beautiful sweet potato dinner rolls. There were only two left when I went to take a picture. These are a decadent treat, great for special occasions. Here’s the finished dough. Even this gloppy dough will make a nice windowpane if the gluten is well-developed.


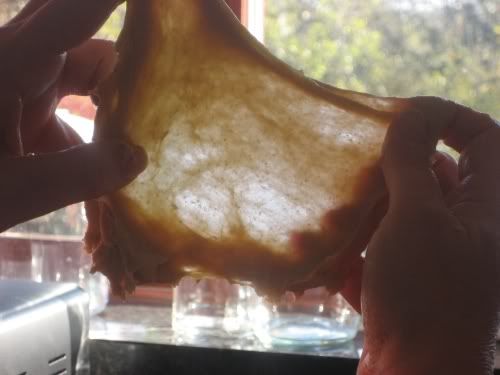
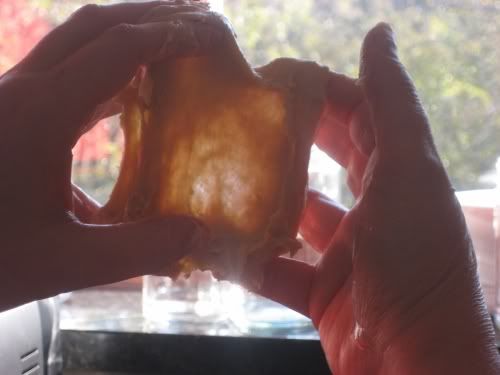
Here’s me just starting to tease the windowpane from the dough. An earlier attempt obviously failed, but showed the dough was getting close.

I scraped the dough into a sort of ball, and left it to rise. It rose quickly, and was probably a bit overproofed in the next picture.

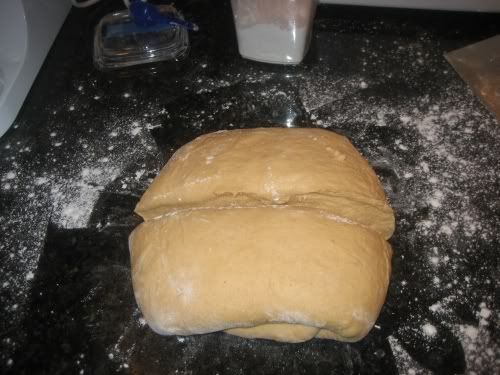
The dough was still quite soft, so I did a set of envelope folds to the dough, then cut it in half to make it a bit easier to work with.

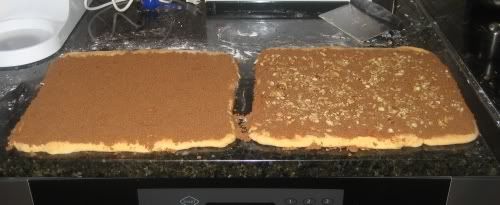
Each half was rolled into a square, buttered, and topped with brown sugar, cinnamon and pecans.

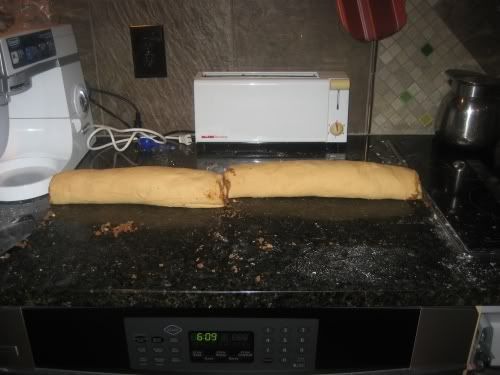
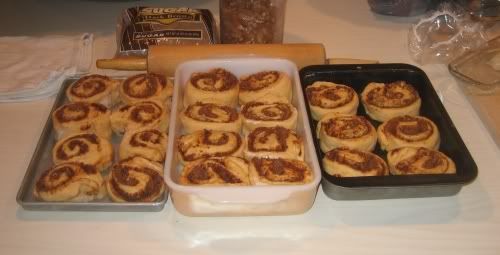
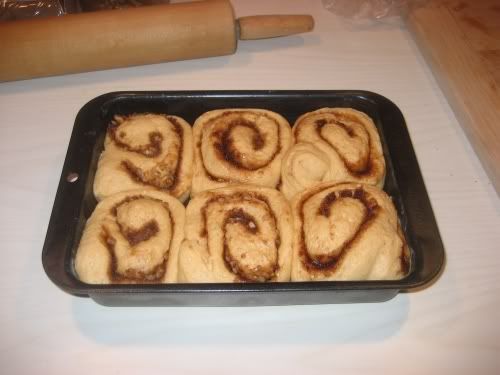
The left roll was rolled a little loosely, which is why half of the rolls don’t make a pretty spiral pattern – I had to tuck in the loose dough as I placed them in the pan, resulting in an extra little loop. You can see it very plainly in the baked rolls.

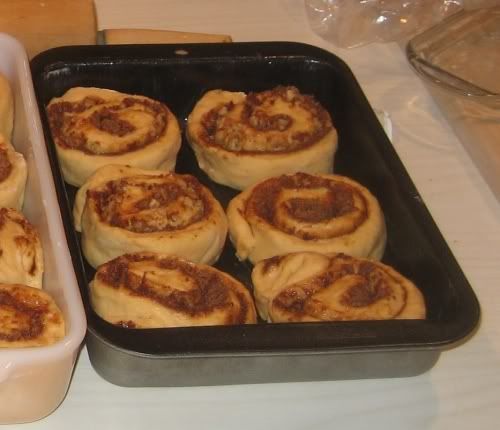
Here are the rolls tucked up in their pans. I only baked one pan, the others went into the freezer for a holiday morning treat. The rolls might have risen higher if I hadn’t overproofed the first rise. I don’t know, but they were ready to go in the oven.


Sweet Potato Pecan Cinnamon Rolls

Time – based on my equipment, my kitchen – YMMV!

Soaker - 30 minutes to 24 hours

Final Dough – 30 minutes (including rest)

Primary Fermentation – 90 minutes

Forming Rolls and Final Fermentation – 3 hours

Baking – 35 minutes


Soaker

1¼ cup milk, scalded (heated to about 185F)

1 tablespoon lemon juice or vinegar

200 grams WW pastry flour

100 grams WWW flour

Final Dough

All of soaker

1 sweet potato, roasted, cooled, and peeled

4 tablespoons unsalted butter cut into pieces

2 eggs

1 1/2 tsp. Ground cardamom or ground seeds of 12 pods (optional)

1/8 teaspoon ground nutmeg

2 teaspoons salt

2 ½ teaspoons instant yeast

450 grams AP flour

Filling
8 ounces light brown sugar, about 1 cup packed
1 tablespoon ground cinnamon
2 tablespoons melted butter

1/2 cup chopped pecans

Icing

4 tablespoons soft butter (or cream cheese)
3 tablespoons milk
5 1/2 ounces powdered sugar, about 1 1/2 cups

Prepare Soaker Put flour into bowl of stand mixer. Stir the lemon juice into hot milk, and pour over flour. Mix well. Cover and let rest for 30 minutes to 24 hours. Refrigerate if soaking for more than a few hours. (A long soak will yield a softer roll.)

Prepare Dough and Filling Add all remaining ingredients to soaker, and mix with paddle until thoroughly combined. Let rest for 15 minutes. Knead with dough hook until smooth and satiny, with a nice windowpane. This will be a soft, gloppy dough. Cover dough and let rest until doubled..

Butter your baking dishes. Turn the dough out onto a lightly floured work surface and divide in half. The dough will be extremely soft at this point, so do a couple of envelope folds (one each direction.) Divide the dough in half, and let rest a few minutes if you’ve folded. (Meanwhile, prepare the filling. Combine the brown sugar, cinnamon and salt in a medium bowl. Mix until well incorporated. Set aside until ready to use.)

Form Rolls Gently shape the dough into 2 squares. Roll each into a 12-inch square. Brush the dough with the melted butter, leaving 1/2-inch border along the top edge. Sprinkle the filling mixture over the dough, leaving a 3/4-inch border along the top edge. Sprinkle the pecans over the filling. Gently press the filling into the dough. Beginning with the edge nearest you, roll the dough into a tight cylinder. Firmly pinch the seam to seal and roll the cylinder seam side down. Very gently squeeze the cylinder to create even thickness. Using a serrated knife, slice the cylinder into 1 1/2-inch rolls; yielding about 16 rolls. Arrange rolls cut side down in the baking dish; cover tightly with plastic wrap and store in the refrigerator overnight or up to 16 hours.

Baking When rolls are ready to bake, place in a cold oven and set to 350. Bake until interior temperature reaches 190F, about 15 to 30 minutes. I checked in my toaster oven at 20 minutes, and they were already at 212F!

While the rolls are cooling slightly, make the icing by whisking the butter in the bowl of a stand mixer until creamy. Add the milk and whisk until combined. Sift in the powdered sugar, and whisk until smooth. Spread over the rolls and serve immediately.

For frozen rolls, place in buttered pan and let thaw in refrigerator overnight. Remove the rolls from the refrigerator and place on the middle rack in an oven that is turned off. Place a shallow pan on the rack below the rolls and fill 2/3-full of boiling water. Close the oven door and let the rolls rise until they look ready to bake. They should be more than slightly puffy; This should take 30 to 45 minutes.

Turn the oven on to 350F and bake until golden brown, or until the internal temperature reaches 190F on an instant-read thermometer, somewhere between 15 and 30 minutes.

NOTES

After the first few, I got a bit careless cutting the rolls. So I ended up with 22 instead of the 16 I expected. The two in the first picture were cut at about 1 inch instead of 1 ½ inch.

If you’re uncomfortable working with a sloppy dough, go ahead and add more flour during the mix. Be sure to keep the dough soft though, as too much flour will affect the rise and tenderness.

I omitted the cardamom, but only because I didn’t have any. A lack of powdered sugar meant no icing either.

I hope you enjoy these as much as we did! Even my sweet potato adverse husband loved them.

AnnieT's picture
AnnieT

I have been rushing to finish a quilt and haven't baked since last week. The quilt is nearly done and I just couldn't stand it another minute - I started the pate fermentee (I LOVE those words!) to make the PR Pane Siciliano. I made it when I first bought the book and managed to overbake the loaves. They tasted good but looking back I don't think the dough was right. Probably not proofed long enough which is one of the things I have learned here. One of the neighbors is having an open house on Saturday and if the loaves are presentable I will take one with me. May have to trudge throught the snow which is forecast, brrrrrr. A.

Pages

Subscribe to Recent Blog Entries