The Fresh Loaf

A Community of Amateur Bakers and Artisan Bread Enthusiasts.

Recent Blog Entries

browndog's picture
browndog

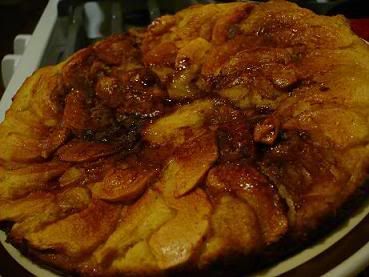
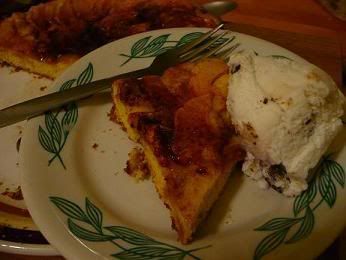
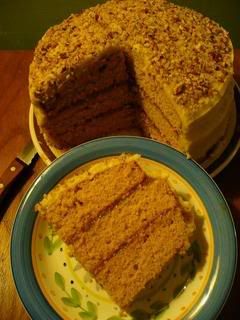
Grandmother's Apple Cake

5 tablespoons plus 1/4 cup sugar

1 cup AP flour

1/2 teaspoon salt

1 teaspoon baking powder

1 egg

2 tablespoons milk

1 teaspoon vanilla extract

4 tablespoons unsalted butter, at room temperature

2 medium baking apples

1/2 teaspoon ground cinnamon


1. Set the oven to 400 degrees. Spray the bottom of a 10 inch cast iron skillet with cooking oil spray. Sprinkle 2 tablespoons of the sugar into the pan.

2. In a bowl, sift the flour, salt, and baking powder.

3. In another bowl, whisk the egg, milk, and vanilla.

4. In an electric mixer, beat the butter with 1/4 cup of sugar for one minute or until light. Remove the bowl from the mixer stand. Stir in one third of the flour, then one third of the milk. Add the remaining flour and milk in the same way.

5. Use the back of a spoon or your fingertips to spread the batter in the skillet - it will be thick and sticky.

6. Peel and core the apples. Slice them 1/8 inch thick. Starting at the outer edge, arrange the apples on the cake in slightly overlapping concentric circles.

7. In a small bowl, mix the remaining 3 tablespoons with the cinnamon. Sprinkle over the apples.

8. Bake the cake for 20 to 25 minutes or until the apples are tender and a skewer inserted into the cake comes out clean. Let the cake cool for 10 minutes.

9. With a wide metal spatula , loosen the edges and bottom of the cake from the pan. Place a large plate on top and invert the pan and cake together. Lift off the pan. Place another plate on top of the cake and invert it again, so the cake is right side up. Serve warm.


Be careful not to burn this cake!
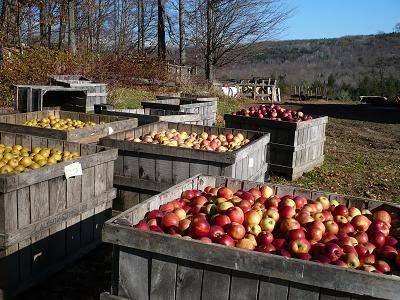
Heirloom apples are a palette of the past. Their names reach across centuries: Ashmead Kernel, Cox Orange Pippin, Lamb Abbey Pearmain, Reine de Reinette, Sheepnose or Black Gilliflower. Their flavor does, too--either one in the mouth takes you to a tree in a stone-edged field, discussing apples with a man in leather and homespun.
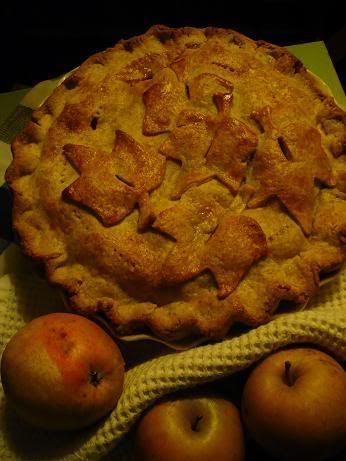
Hudson's Golden Gems
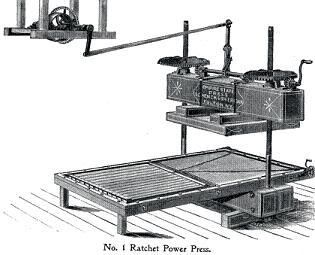
Our neighbor Willis Wood makes cider from antique apples on a press bought new by his family in 1882.
The best cider comes from knowing the apples and how to combine them.

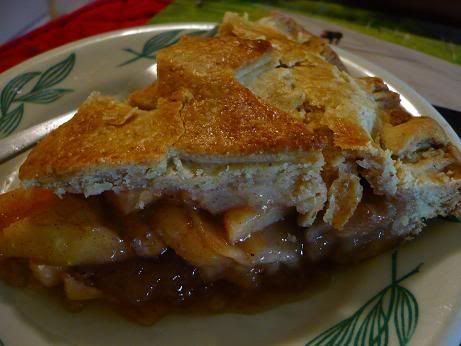
This cake uses 3 cups of it.
Willis boils fresh cider into syrup and jelly.

A little more than half way along the forest trail that leads from my house to the cider mill, the scent of apples meets us, pungent, sweet and vinegary, odd against the smell of fallen leaves.

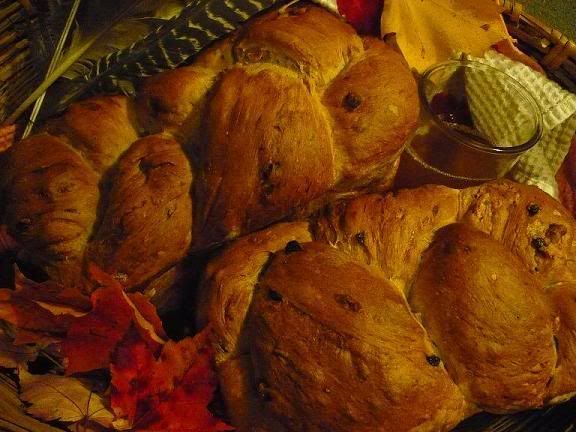
Beth Hensperger's Fresh Apple-Walnut Loaf
Ingredients

1 tablespoon active dry yeast

2 tablespoons light brown sugar

1 cup warm water (105-115 F)

1 cup warm milk

6-6 1/2 cups unbleached all purpose flour or bread flour

2 medium-large tart cooking apples, peeled, cored, and coarsley chopped (2-3 cups)

1/2 cup dried currants

1/2 cup walnuts, coarsley chopped

2 tablespoons walnut oil

2 large eggs, at room temperature

2 teaspoons ground cinnamon

1/2 teaspons ground mace

1/2 teaspoon ground allspice

1 tablespoon salt


1. In a large bowl using a whisk or in the work bowl of a heavy duty electric mixer fitted with the paddle attachment, combine the yeast, brown sugar, warm water, warm milk, and 2 cups of flour. Beat until smooth, about 1 minute. Cover the bowl loosly with plastic wrap and let stand at room temperature until foamy, about 1 hour.

2. Add the apples, currants, walnuts, oil, eggs, cinnamon, mace, allspice, salt, and 1 cup more of the flour. Beat until creamy, about 2 minutes. Add the remaining flour, 1/2 cup at a time, until a soft dough that just clears the sides of the bowl is formed. Switch to a wooden spoon when necessary if making by hand.

3. Turn the dough out onto a lightly floured work surface and knead until smooth and springy yet firm, about 5 minutes, dusting with flour only 1 tablespoon at a time as needed to prevent sticking. Push back any fruit or nuts that fall out during the kneading.

4. Place the dough in a greased deep container. Turn the dough once to coat the top and cover with plastic wrap. Let rise at room temperature until doubled in bulk, 1 1/2 - 2 hours.

5. Gently deflate the dough. Turn the dough out onto a lightly floured work surface. Grease two 9 by 5 inch loaf pans. Shape into two braided or regular loaves. Let rising pans till tops are an inch above rim of pan, about 45 minutes.

350 degrees for 45-50 minutes.


A wild apple tree is as gnarled and angular as an elderly aunt.

Most evenings deer gather beneath this tree, till the snows bury the remains of the season's apple crop.

ejm's picture
ejm

wild bread
Lately, I have been having a devil of a time judging whether the dough has risen enough. And I have been allowing it to over-rise. The over-risen dough produces flat as pancake loaves that taste good but don't look all that great. But finally, after weeks of trying, there was oven spring and the loaves are round rather than flat. Yay! I like to balance cookie cutter(s) on top of the just shaped bread to etch a design in top of the loaf. For this loaf, I used 3 star shaped cutters. (Remove the cookie cutters just before baking the bread.) I really like the way it looks! It's not quite as spectacular as the ridges that people get by proofing their bread upside down in baskets but it doesn't require nearly the nerve. One doesn't have to flip risen bread out onto a peel with this designing technique.
okieinalaska's picture
okieinalaska

Just wanted to jump for joy and shout it out loud. I made the Rustic Loaf recipe from this post  http://www.thefreshloaf.com/recipes/rusticbread  and it turned out pretty good.  I have only made dinner rolls and cinnamon rolls before so I am very pleased.  I haven't cut the loaf yet so not sure how it looks on the inside (or how it's supposed to look actually) but I am still proud. Can't wait to taste it. I used a Sushi knife to cut the slashes, it's the only sharp knife in the house. I learned a lot already from this one loaf.  Can't wait to make more. : )

Here is a picture!Rustic Loaf by (Hope this works!)

Had to try uploading it to yahoo, hope you can see it now

Floydm's picture
Floydm

A right sidebar! We have a right sidebar! Whoo hoo!

Ok, if you aren't a geek you probably don't care, but I think it is neat. If you are running at 1024x768 or less you won't see it, but that is ok because it isn't critical information. If you are running at a high resolution, it is an added bonus.

Of course it looks perfect in Safari and Firefox but a bit funky in IE. If you are still browsing in IE, I beseech you to download Firefox. Even non-techies find it a much nicer browser than IE.

The right sidebar gives me a good are to show off many of the beautiful things people have baked and posted to the site over the years. I'll be digging through the archives and adding more thumbnails into the rotation in the next few days. Not tomorrow though: jury duty.

I baked a miche tonight. Probably the prettiest I've baked yet. I'll try to get photos in the morning.

AnnieT's picture
AnnieT

I was looking forward to spending the day playing with bread dough, but the wind has been blowing a gale all night and there is a wind advisory. The power has been out twice already so it doesn't seem wise to start any baking. I do have the steel cut oats version of the NKB all ready to shape so I guess I will cross my fingers and go for it - don't have much choice. Or go fly a kite? A.

Floydm's picture
Floydm

I made a few changes to the layout over the weekend. The logo has changed and is now dynamic, I've reduced the padding between some of the elements, and, most significantly, I've fixed the width of the body.

Non-nerds may not care about this, but whether web pages should have a fixed width so they look the same on all machines or a flexible width so that they can take full advantage of large monitors is one of these debates that web designers discuss endlessly. I've always been in the flexible width camp, but of late I've begun to move into the fixed width camp.

For me, the big advantage of fixed width isn't the design consistency, it is the readability. When text flows over 1000 pixels before wrapping, it becomes very difficult to not lose your place. Think about newspapers for a minute: if they printed copy all the way across the page rather than in columns it would be much more difficult to read. A consensus is emerging that as the web is becoming more and more of a reader's medium, designers should do whatever they can to improve readability. So with that, I'm sold on fixed width.

The screen resolution stats on people who visit this site are interesting:

The vast majority of us have large, high resolution monitors now. So with that I'm making sure 1024x768 is well supported. I may add perks for folks with even larger monitors, like a rail to the right of the content that could include links to favorite stories or something. We'll see.

Any issues with the new layout, please let me know.

Floydm's picture
Floydm

burnt waffle

Hm. Yes, must remember to remove the waffle from the oven before stepping into the shower. Does not bode well for this weekend's baking.

miche

Last week's miche turned out quite well though. And I have a couple of loaves rising right now that I'm optimistic about.

In site news: I just swapped out the Drupal search with a customized Google search. It is hard to beat Google's search algorithm, so I think people will prefer this. Let me know what you think.

umbreadman's picture
umbreadman


This is my High Extraction loaf I made the other day. I'm finally understanding the idea of a full bakeand cooling before eating. In the past I'd think it was done baking, only to find the loaf soft and lacking in crust shortly afterwards. This one though had a nice crunchy crust (a little thick onthe bottom) with a solid, hearty crumb. Chewy, not too dense, and definately not too airy to be lacking in stubstance, very satisfying.

If I remember correctly, this was (for 2 loaves)

3 lbs Heartland mill golden buffalo flour (a high extraction flour)

75% * 3lbs tap water (add most to flour/salt for 1hr autolyse, add rest with starter dissolved in it afterwards)

~.7 oz salt

a few tablespoons of starter dissolved in the water


I've been taking a rather lax approach to refreshing my starter right before use, which I know is a recommended method. Generally, I've been taking my starter out of the fridge, mixing it in lukewarm/warm water, and adding it straight to the dough/autolyse. Since gas always escapes my sealed starter jar when I take it out, I take that as a sign that it is still active, and assumed that the flour in the final dough would be enough food for it to rise the dough. I do this partly because I'm impulsive, and partly because it's just more convenient... One day I plan on doing a side by side comparison straight starter addition vs. refreshed starter/sponge in a final dough to see if there's a difference. (any comments on this would be nice).

Ultimately though, a very tasty, smooth bread. No sweeteners, nothing. Very nice. I think I like this flour a lot, since it combines the best of white and whole wheat flours in terms of taste, nutrition, and texture.

u.m.breadman

redivyfarm's picture
redivyfarm

Work has kept my bread making to a minimum the past few months. Visiting all of you at TFL this evening has me pulling the starters out of the fridge and shopping for food grade lye once again. With my family on the road I like to make pretzels just for me. I've been using a boiling water bath with baking soda but I used a link I found here for www.aaa-chemicals.com in Houston Texas and found that they will be offering free shipping November 19th - 23rd. The lye is 8.99 for 2# (the smallest quantity they offer) and regular shipping is 11.99 minimum. If I can wait, I'll avail myself of that window of opportunity, irresistable to internet shoppers, free shipping!

My favorite recipe I've adapted from one posted by the American HomeBrew Association. They require drinking a homebrew (can we substitute a microbrew?) both before and after the pretzel making steps.

4 1/2 tsp of saf-instant yeast

1 1/2 C warm water

2 T sugar

1 tsp salt

4 C high gluten flour

2 T powdered buttermilk

1 well beaten egg

Margarita salt

Preheat oven to 450. Cover a baking sheet with parchment and lightly spray with oil. Disolve yeast in warm water, add sugar. Mix salt, flour and buttermilk powder in the mixer or by hand. Add the liquid and mix for 5-10 minutes with the dough hook or knead by hand. Let dough rest and hydrate for about 10 minutes. I divide the dough roughly into six pieces and roll between my palms into a rope about 18" long. Form the pretzels and give the ends a little pasting down by dipping your fingertips in water and pinching the overlapping dough a bit. Disolve 4 tsp baking soda in 4 C water and bring to a boil. I use tongs to dip the pretzels, one at a time, into the boiling water for 1 to 2 minutes turning once. Dry them a bit with paper towels as they come out of the water bath and arrange them on the oiled parchment. Brush with beaten egg and sprinkle with salt, if desired. Bake at 450 for 12 to 15 minutes or until a deep brown. I've learned that darker is better to my taste.

I have experimented with using other bread doughs to make pretzels with mixed results. I think you need a fairly high protein formula and really active yeast to stand up to all the handling and the water bath. One of my pretzel recipes says that as good as pretzels are hot from the oven they are very bad cold and don't reheat well. I don't agree. I store cooled pretzels in a zip-lock and toast them one or two a day in my wide slot toaster. De-lish! The perfect bread-for-one.

dolfs's picture
dolfs

Today I decided it was time for a serious try at baguette and epi.

Baguette and EpiBaguette and Epi

I made a straightforward french dough (68% hydration) and did not knead, but used the stretch and fold approach, both to develop the dough, and part way through bulk fermentation. I made two demi-baguettes and one epi. Unlike all my previous baking, today I used the convection mode which gave a very even browning of the bread (also used baking stone and steam of course). The crust was crackling, which was also a first for me. Way cool to hear that. It all resulted in a very thin but crispy crust and a very tender inside with nice crumb and decent holes.

Baguette and Epi crumbBaguette and Epi crumb 


--dolf


See my My Bread Adventures in pictures 

Pages

Subscribe to Recent Blog Entries