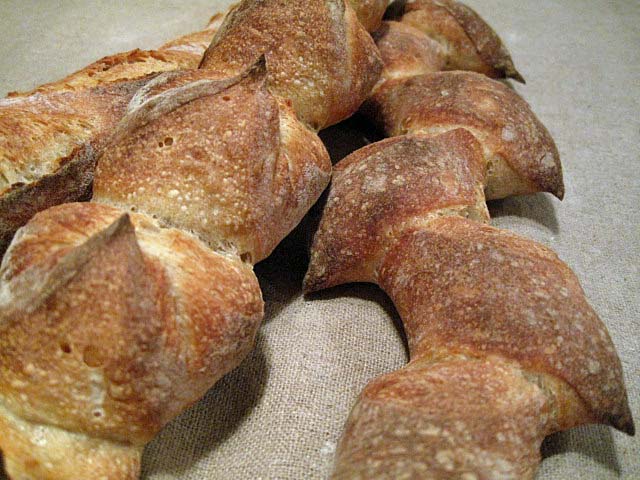
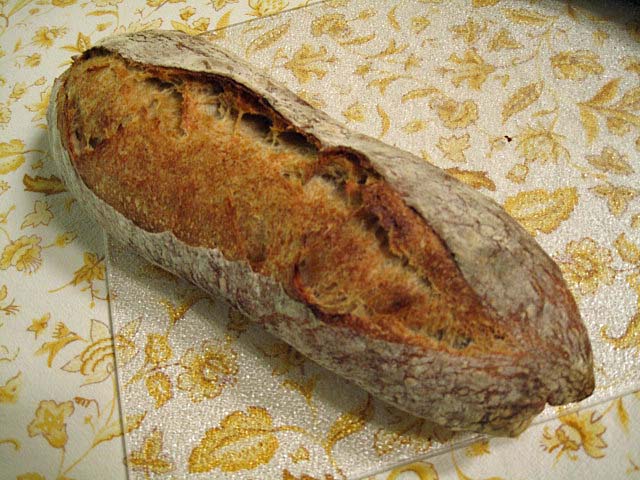
The Fresh Loaf

A Community of Amateur Bakers and Artisan Bread Enthusiasts.

dmsnyder's blog

dmsnyder's picture
dmsnyder

When I took the Artisan I workshop at the San Francisco Baking Institute last August, Miyuki demonstrated the method of oven steaming they recommend for home bakers.

The oven is not pre-steamed (before loading the loaves). A cast iron skillet filled with steel pieces (nuts and bolts, rebar pieces) is pre-heated in the oven along with two baking stones. One stone is placed on a rack above the stone and rack on which the loaves will be loaded.

When the loaves are loaded, a perforated pie tin filled with ice cubes is set atop the skillet. As the ice melts, water drips through the perforations and turns to steam when it hits the metal pieces.

I had a hard time finding the perforated pie tins, so I hadn't been able to try this method until today. I did two bakes: One was two loaves of a very familiar bread – Hamelman's “Vermont Sourdough with Increased Whole Grain” from “Bread.” The other was a new bread to me - Chad Robertson's “Basic Country Bread” from “Tartine.” I made two large boules of the Country Bread. One was baked using the “Magic Bowl” technique and the other with the SFBI steaming method, minus the second baking stone and using lava rocks in place of metal pieces.

My current baking method is to pre-heat the oven to 500ºF with the baking stone and skillet in place. When I load my loaves, I turn down the oven to whatever temperature the recipe specifies, using the conventional bake setting. After 10-15 minutes (depending on the total length of the bake), I change the oven setting to convection bake but 25ºF lower. I find, in my oven, conventional baking retains steam well, but convection dries the crust better.

Using the SFBI steaming method, the Vermont Sourdoughs came out substantially similar to how they come out with my previous method – pouring boiling water over the lava rocks. I could not detect any difference in oven spring, bloom, crust color or the texture of either the crust or crumb.

Vermont Sourdough with Increased Whole Grain

Crust Crackles

Vermont SD with Increased Whole Grain crumb

The Basic Country Breads were different from each other. The one baked in under a stainless steel bowl was a bit shinier. The crust softened quicker with cooling. It did not sing when cooling. I don't think there was any real difference in oven spring or bloom.

Basic Country Bread baked with the "Magic Bowl" method

Basic Country Bread baked with the SFBI steaming method

Basic Country Bread crumb

My conclusion is that the SFBI method is effective. It does not require that water be boiled and poured into the hot skillet. To me, it seems a bit easier than the method I've been using. That said, the breads baked using the SFBI method for steaming the oven seem pretty much identical to those I get using my previous technique.

I don't have the kind of covered cast iron skillet/shallow dutch oven that Chad Robertson recommends be used to bake his Basic Country Bread. I do have enameled cast iron ovens that should perform similarly. Perhaps I should try one of them, although my expectation would be that they perform similarly to the "Magic Bowl" method.

David


dmsnyder's picture
dmsnyder


Questions regarding how to convert one kind of starter into another are frequently asked on The Fresh Loaf. The easy answer is to just take "a little bit" of seed starter and add enough flour and water to make a mixture of the desired thickness. This is fine and it generally works very well. However, sometimes a recipe calls for a precise hydration level levain and changing this, even a few percentage points, will make the dough consistency quite different from that intended by the formula's author. For those times, one needs to be more precise in making up the levain. 

To convert a starter of one hydration to a starter of another hydration - For example, if you have a 50% hydration starter and want to build a 100% hydration starter from it. 


Here's a general method for a precise conversion:

First, you need to know four things:

1. What is the hydration of your seed starter?

2. What is the hydration of your final starter?

3. How much of the total flour in your final starter comes from your seed starter?

4. How much (weight) final starter will you be making?

Second, you need to calculate the total amount of flour and the total amount of water in your final starter.

Third, you need to calculate the amount of flour and the amount of water in the seed starter.

Fourth, you can now calculate the ingredients of your final starter. They will be:

1. Seed starter

2. Flour (from seed starter plus additional)

3. Water (from seed starter plus additional)


So, let's see how this method works with some specific assumptions. 

The four things you need to know:

Assume you have a 50% hydration seed starter that you want to use. Assume you want to make 100 g of a 100% hydration starter. And assume you want the seed starter to provide 25% of the total flour in the final starter.

Note: Using "Baker's Math," Flour is always 100%, and all other ingredients are proportionate to the flour. So, in a 50% hydration mix, the water is 50% (of the flour, by weight). If hydration is 125%, the water is 125% (or 1.25 times) the flour.

To calculate the total amount of flour and water in your final starter:

Flour (100 parts) + Water (100 parts) = 100 g

So, the 100 g of starter is made up of 200 "parts." The weight of each part is calculated by dividing the total weight by the number of parts. So, 100 g /200 parts = 0.50 g.  This number is sometimes called "the conversion factor."

Then, since there are 100 parts of flour, its weight is 100 parts x 0.5 g = 50 g.

The total water in the final dough is 100 parts x 0.5 g = 50 g.

To calculate how much flour will come from the seed starter and how much will be added to make the final starter:

We now know that the total flour in the final starter will be 50 g. But we decided that 25% of this flour is going to come from the seed starter. This means that the seed starter must contain 50 g x 0.25 = 12.5 g of flour, and the flour added to this to make the final starter will be 50 g - 12.5 g = 37.5 g.

To calculate the total weight of the seed starter and the weight of water in the seed starter:

We now need to calculate how much seed starter it takes to provide 12.5 g of flour, and how much water is in this amount of seed starter.

If the seed starter is 50% hydration, it contains 100 parts of flour and 50 parts of water. We know then that the amount of water is 50 parts water/100 parts flour = 0.5  parts of the flour.  Since we already know that the flour has to weigh 12.5 g, then the water must weigh 12.5 x 0.5 = 6.25 g and the total weight of the seed starter is the sum of the water and flour or 12.5 g of flour + 6.25 g of water = 18.75 g.

To calculate the weight of water that must be added to the seed starter to make the final starter:

Now we can calculate how much water must be added to the seed starter to make the final starter. It is the total water in the final starter minus the water in the seed starter or 50 g - 6.25 g = 43.75 g.


Now we know "everything!" To make 100 g of 100% hydration starter, beginning with a 50% hydration seed starter, we would mix:

1. 18.75 g Seed Starter.

2. 37.5 g Flour

3. 43. 75 g water


This method can be used to build any amount of starter of any hydration using a seed starter of any (known) hydration. 


David


dmsnyder's picture
dmsnyder


I based the formula and procedure for these ficelles on Pat Roth's (Proth5) baguette formula, which I have made several times. These are entirely levain raised and use a 65% hydration dough. The dough is entirely hand mixed. It employs a long bulk fermentation. The bread develops a delicious, sweet baguette flavor with no noticeable sourness when made following Pat's procedure. See Baguette crumb - 65% hydration dough

I wanted to make baguettes this weekend, but didn't have a block of time long enough. Also, I had a 125% hydration levain but not time to convert it to Pat's 100% hydration levain. So, I improvised.


Ingredients

Wt.

Baker's %

AP flour

11.25 oz

100

Water (80ºF)

6.25 oz

55

Salt

0.25 oz

2

125% hydration levain

3.0 oz

27

Total

20.5 oz


Note: Taking into account the flour and water in the levain, the Total Dough hydration is 63%.

Procedure

  1. Prepare the liquid levain and let it ripen at room temperature until the surface is all bubbly (8-16 hours, depending on how active your seed starter is and the room temperature).

  2. Refrigerate the levain for a day.

  3. In a large bowl, dissolve the levain in the warm water. Add the other ingredients and mix to a shaggy mass.

  4. Cover tightly and allow to rest for 30 minutes.

  5. Stretch and fold in the bowl for 20-30 strokes. Re-cover the bowl. Repeat every 30 minutes 3 more times.

  6. Transfer to a clean, lightly oiled bowl.

  7. Bulk ferment 1.5 hours. Do a stretch and fold on the board.

  8. Bulk ferment for another 2 hours.

  9. Refrigerate overnight (8-12 hours).

  10. Take the dough from the fridge and immediately divide it into 3 equal pieces.

  11. Pre-shape each piece loosely into a log and cover them.

  12. Let the pieces rest for 1 to 1.25 hours. The should feel a bit puffy but should not have expanded much.

  13. Shape into ficelles and place en couche, seam side down.

  14. Pre-heat the oven to 500ºF with baking stone an steaming apparatus in place.

  15. Proof the loaves until they spring back slowly when pressed with a finger tip.

  16. Pre-steam the oven.

  17. Transfer the loaves to a peel (making sure that they are seam side down on the pel) and score them.

  18. Load the loaves onto the stone. Steam the oven and turn it down to 460ºF.

  19. Bake for approximately 20 minutes, until the loaves are nicely browned and the bottom sounds hollow when thumped.

  20. Transfer the baguettes to a rack.

  21. Cool completely before eating.

The ficelles had a crunchy crust. The crumb was sweet and tender with a very slight sourdough tang.

There is frequent discussion on The Fresh Loaf about how to fit baking into a busy schedule. I share this experience as an example of adaptation of a known recipe, usually made in one day, to a two-day procedure. I think it was reasonably successful, and I may very well do this again when I don't have an 8 hour block to babysit dough.

David

Submitted to YeastSpotting


dmsnyder's picture
dmsnyder


I can't believe six months have gone by since I made Hamelman's Vermont Sourdough with Increased Whole Grains. (See Vermont Sourdough with Increased Whole Grain, from Hamelman's "Bread") I liked it so much the first time, I promised myself I would bake it again soon to see if was consistently so good. So, I forgot about it. I'll blame the NY Baker's test baking pre-occupation of the Summer.

A few days ago, I was thumbing through “Bread,” deciding what to bake this weekend, when I re-discovered this formula. A happy moment.

My second bake of the Vermont Sourdough with Increased Whole Grain confirmed the wonderfulness of this bread and my personal preference for it over the basic Vermont Sourdough.

OVERALL FORMULA


Bread flour

1 lb 11.2 oz.

85.00%

Whole Rye

4.8 oz

15.00%

Water

1 lb 4.8oz

65.00%

Salt

.6 oz

1.90%

TOTAL YIELD

3 lbs 5.4 oz

169.90%


LIQUID LEVAIN BUILD


Bread flour

6.4 oz

100.00%

Water

8 oz

125.00%

Mature culture (liquid)

1.3 oz

20.00%

TOTAL

15.7 oz.


FINAL DOUGH

Bread flour

1lb 8 oz

Whole Rye

4.8 oz

Water

12.8 oz

Liquid levain

14.4 oz

(all less 3 T)

Salt

.6 oz

TOTAL

3 lbs 5.4 oz


METHOD

  1. The night before mixing the final dough, feed the liquid levain as above. Ferment at room temperature overnight.

  2. Mix the final dough. Place all ingredients except the salt in the bowl and mix to a shaggy mass.

  3. Cover the bowl and autolyse for 20-60 minutes.

  4. Sprinkle the salt over the dough and mix using the paddle of a stand mixer for 2 minutes at Speed 1. Add small amounts of water or flour as needed to achieve a medium consistency dough.

  5. Switch to the dough hook and mix at Speed 2 for 6-8 minutes. There should be a coarse window pane.

  6. Transfer the dough to a lightly oiled bowl and ferment for 2.5 hours with one stretch and fold at 1.25 hours.

  7. Divide the dough into two equal parts and form into rounds. Place seam side up on the board.

  8. Cover with plastic and allow the dough to rest for 20-30 minutes.

  9. Form into boules or bâtards and place in bannetons or en couch. Cover well with plasti-crap or place in food safe plastic bags.

  10. Refrigerate for 12-18 hours.

  11. The next day, remove the loaves from the refrigerator.

  12. Pre-heat the oven at 500ºF with a baking stone and steaming apparatus in place.

  13. After 45-60 minutes, pre-steam the oven. Transfer the loaves to a peel. Score them.

  14. Load the loaves onto the stone and pour ½ cup boiling water into the steaming apparatus. Turn the oven down to 460ºF.

  15. After 15 minutes, if you have a convection oven, turn it to convection bake at 435ºF. If you don't, leave the oven at 460ºF. Bake for another 25 minutes.

  16. Remove the loaves to a cooling rack.

  17. Cool completely before slicing.

I got the same crackled, crunchy crust and moist, chewy crumb as I did the first time. The flavor was more assertively sour than I remember, which is fine with me. The overall flavor was delicious. The sourness did not detract from the lovely complex wheat-rye flavor that is my favorite.

This is indeed a wonderful bread, and I promise to not let so much time go by between bakes again! I heartily recommend it to those seeking a “more sour sourdough.”

David

Submitted to YeastSpotting


dmsnyder's picture
dmsnyder

In my continuing search for whole wheat breads to add to my list of favorites, today I baked the “Sourdough Whole Wheat Bread” from Michel Suas' “Advanced Bread and Pastry.” I had previously baked the Honey Whole Wheat from AB&P, but still prefer Peter Reinhart's 100% Whole Wheat from BBA to it.

Most of my bread baking is with sourdoughs, and I want to have a sourdough whole wheat bread that I really enjoy in my repertoire. The one I have made - I can't remember where I got the formula - was not to my taste. I just didn't like the combination of sourdough tang and whole wheat flavor. On the other hand, I have enjoyed other sourdough breads with a high percentage of whole grains, so the AB&P formula seemed worth trying.


Levain


Ingredients

Baker's %

Wt (oz)

Bread flour (KAF)

95

2 3/8 oz

Medium rye flour (KAF)

5

1/8 oz

Water

50

2 oz

Starter (stiff)

80

2 oz

Total


5 7/8 oz


Final dough


Ingredients

Baker's %

Wt

Bread flour

40

5 7/8 oz

Whole wheat flour

60

8 ¾ oz

Water

76.6

11 1/8 oz

Yeast (instant)

0.16

1/8 tsp

Salt

2.53

3/8 oz

Levain

40

5 7/8 oz

Total


2 lb

Yes. I know it's not “pure” sourdough, and it's not close to purely whole wheat, but if Chef Suas wants to call it “Sourdough Whole Wheat,” who am I to quibble?

Procedure

  1. Mix levain ingredients and ferment at room temperature for 12 hours.

  2. Mix all ingredients to medium gluten development. The dough should be quite tacky.

  3. Bulk ferment for 2 hours.

  4. Divide into 2 equal pieces and preshape for boules or bâtards.

  5. Let the pieces rest, covered, for 20-30 minutes.

  6. Shape as desired.

  7. Proof en couche or in bannetons for 60 to 90 minutes.

  8. Bake at 450ºF for 35 minutes with steam for the first 12-15 minutes.

  9. Cool completely before slicing.

I mixed the dough in a KitchenAid stand mixer for 3 minutes on Speed 1 and about 7 minutes on Speed 2. After bulk fermentation, the dough was still tacky but very extensible. I rested the loaves seam side down after pre-shaping. This was a mistake. There was enough flour on the seam side to interfere slightly with final shaping. (See my boule tutorial.) I recommend proofing seam side up.

I think I slightly over-proofed (90 minutes) and got less oven spring than I thought I should get with this bread.

The crumb was quite chewy. The flavor was rather simple – A very slight sourdough tang and a straight ahead whole wheat flavor with no grassiness or bitterness. I look forward to tasting the bread as toast in the morning and as a sandwich for lunch tomorrow.

David


dmsnyder's picture
dmsnyder

Today, I baked Hamelman's "5-grain Levain" from "Bread."

Various TFL blogs have featured this bread. They can be found by searching the site. The recipe was posted by fleur-de-liz here: Eric: Hamelman's Five-Grain Levain. She was a very active contributor to TFL at the time I joined and an inspiration to me. She encouraged me to bake this bread for the first time way back when. It is, indeed, among the most delicious breads I've ever made or tasted.

David

dmsnyder's picture
dmsnyder

I have read so many bread baking books and viewed so many videos on shaping boules, but I didn't really "get it" until I saw our instructor, Miyuki, do it in the SFBI Artisan I workshop I attended a couple weeks ago.

I will attempt to show what I learned in still photos with descriptions. I hope that viewing these and then reviewing some of the excellent videos available might help others who are struggling with this technique.

Mis en place

You will need:

1. a batch of fully-fermented dough

2. a lightly floured "board" on which to work.

3. a scale, if you are dividing the dough.

4. a bench knife or other cutting implement, if you are dividing the dough

5. prepared bannetons or a couche on which to rest the formed boules for proofing


Procedure


1. Weigh your dough

2. Divide it into equal pieces.

3. Pre-shape each piece gently, incorporating any small pieces of dough on the inside. 

4. Rest the pre-shaped pieces, seam side down and covered with plastic or a towel  on the board for 20-30 minutes.

5. Prepare your bannetons or couche for receiving the shaped boules.


6. After the pre-shaped pieces have rested, shape each as follows:

* Pick up the piece and turn it smooth side down.

* Gently fold the long ends together under the piece.

* Rotate the piece 90º in your hands, and fold the other two sides together.

* Place the piece on an un-floured board, smooth side up.


* Cup your hands around the piece, and gently drag it 3 inches or so towards you in such a way that the edge closest to you sticks to the board and is dragged under the dough, thus stretching the top of the piece into a tight sheath containing the dough.


Note the position of the markers before stretching

After the stretching, the marker at the apex of the boule is unmoved, but the one that was at about 40º North, is now about at the equator.

* Rotate the dough 90º and repeat. Do this 3-4 times until the bottom of the boule is relatively smooth and the whole boule has an unbroken, smooth sheath.

Note that there are no visible seams on what will be the bottom of the boule, after the procedure described.


* Place the boules in bannetons, smooth side down, spray with oil and place each banneton in a food-grade plastic bag to proof. (Alternatively, place the boules seam side down on a couch and cover with a fold of the couche, plasti-crap or a towel.)


Well, there it is. For me, being able to visualize the stretching of the "skin" of the boule between a fixed North Pole and a point on the side, using the board to "grab" the bottom of the boule as I dragged it towards me was the "aha moment." I hope it makes sense to others.

The goal (to form a tight gluten sheath) in forming other shapes is fundamentally the same, but the method is entirely different.

Comments and questions are welcome.

Happy baking!

David


dmsnyder's picture
dmsnyder


Ruth (our sister) left her sourdough starter in the refrigerator at Pelican Way (vacation home).  I plan to use it when we're back here in a few weeks.  Where shall I start?


Dear Glenn,

I'm so happy that you have decided you are mature enough to enter into a long term commitment to a levain. You have, no doubt, heard the expression "starter marriage." I assume, like most, you have the impression this refers to the failed marriage of two people at a young age, but, as the Egyptians first discovered some 5000 years ago, it really refers to the successful long-term relationship between a baker and his or her wild yeast culture.

This can be one of the most rewarding experiences anyone can have, but it only works if there is mutual respect, an understanding of the partner's needs and a willingness on the baker's part to be patient and flexible, especially in the first months of the relationship. There will be disappointments, inevitably. You must accept these adversities and work through them together. If you do, your starter will reward you with nourishment for your body and soul. It will become resilient and forgiving. It will provide an endless variety of pleasures - pain au levain, pain de campagne, sour rye, challah, even croissants! 

As you feed your starter, it will awaken and come alive. It's yeast and lactobacilli will grow and multiply and produce the CO2 that raises your dough and the alcohol and acids that strengthen your gluten and lend complexity of flavor to your bread. But, if you neglect it, it will weaken and ooze liquid (hooch) as it's strength fades to nothingness. Yet, if you feed it again and again, it will revive and forgive you, time after time. Who cannot but treasure such loyalty?

The material requirements for a successful relationship are minimal: Your starter, water, flour and salt. Bowls and spatulas and ovens you have. You will need a scale to accurately measure ingredients. It should measure to 1 g (1/4 oz) and have a tare function. The most inexpensive but very acceptable one I know is made by Escali and costs less than $30. 

Your levain can be fed all purpose (AP) flour, but it really likes its feeding spiced up with a bit of rye and/or whole wheat (WW). The mix I use for feeding my starter is 70% AP, 20%WW and 10% rye. (All measurements are by weight, not volume.) So, I advise you to mix up a batch of starter food, say 210 g AP, 60 g WW and 30 g rye and keep it in a quart jar.

I generally keep my starter at 75% hydration. (This means 4 parts flour to 3 parts water.) And when feeding it, I mix together 1 part starter with 4 parts flour and 3 parts water. For example, mix 15 g starter with 60 g flour (the flour mix described above) and 45 g water. This makes 120 gms of starter. Mix this in a medium sized bowl (3-4 cup size), cover the bowl and let it ferment for 12-16 hours. It should double in volume and be all bubbly with a domed top. I like to do this in a glass or clear plastic container. Before using the starter to make bread, repeat the feeding. Discard all but 20 g of starter and feed the starter with 80 g of flour and 60 g of water. You now have 160 g of starter. It may now double in 6-8 hours. It is now ready to use to make bread.

I would start with a simple San Francisco-type sourdough bread. I would plan on making the same bread several times before you feel you "know it." Then, choose a variation or another type of sourdough bread. I know you like my Sourdough Italian Bread, so you may want to work on that. It is a little trickier, in that it is a wet, sticky dough. I can send you formulas for these or other types of sourdough bread.

There is a wealth of information online. You know TFL. Read Sourdough Lessons which has links to a number of sources. Mike Avery's Sourdough Home - An Exploration of Sourdough also has a lot of good information and tips. You may also want to explore Susan Tenney's Wild Yeast blog for inspiration. If you read my blog on TFL, you will find many formulas, most of which contain detailed instructions for procedures. I'll be home next weekend (making bread, no doubt) so feel free to give a call.


Love,

David


dmsnyder's picture
dmsnyder


SFBI Artisan I, day 5


Today, we baked 3 batches of baguettes - with poolish, sponge and "pre-ferment" (like biga). The didactic portion covered baker's math for doughs with pre-ferments. We reviewed a lot of material on mixing and dough handling. As a "bonus lesson," Miyuki demonstrated special baguette scoring techniques.


Miyuki called this a "Dragon Tail."


Dragon Tail baguette


Bend the baguette into a curve and cut as for an epi, except fold all the pieces to the convex side of the baguette


These are all Miyuki's - ready to load


These are mine - baked


Loading baguettes 


I don't think I've mentioned that there were wonderful pastries available with coffee when we arrived, and we were served delicious lunches each afternoon. Lunch today was two kinds of pizza - margarita and 5 spices chicken, mango and scallion - really delicious. Today, we were also served wine - a very nice pinot grigio. The desserts were lemon macarons and "nouveau linzer," a layer of flourless chocolate cake spread with raspberry jam under chocolate mousse. Ooooooh my!


At the end of the day, Michel Suas met with the class, which is a long story for another time. We tasted the different baguettes we made and also some hand-mixed baguettes Miyuki made and baked in a home-type oven. We took some photos and went home with a couple half-pints of ice cream the interns had made. I got strawberry and cassis.


Michel Suas


Class photo (3 students had to catch planes prior to this, unfortunately.)


I would certainly recommend this course to any serious home baker or any professional baker. For the home bakers: It really helps if you have studied modern bread making concepts beforehand. The workshop covers a lot of material, and it moves fast. You do not want this to be your very first exposure to baker's math or scaling ingredients or using pre-ferments, just to give a few examples. 

On the other hand, the class was about half professionals, some with many years experience as bread bakers in restaurant or bakery environments. There was no one who didn't learn a lot. I think I heard every one of them talking excitedly at one or more points about concepts and procedures they were eager to apply in their own workplaces.

Now, to go home and try to apply everything I've learned. 


David


dmsnyder's picture
dmsnyder

SFBI Artisan I, day 4


Yesterday, we looked at the effects of two variables - pâte fermentée and high-gluten flour - on one kind of bread - baguettes. Today, we used pâte fermentée as the constant, and made 5 different breads with it. They were:

1. Pan Bread. An enriched sandwich loaf.

2. Rye Bread: A French-style pan de seigle.

3. Whole Wheat Bread 

4. Egg Bread. Very enriched with sugar, eggs and butter and braided.

5. Multi-grain Bread. With a soaker of 3 seeds, rye, whole wheat and AP flour.


Plan for the day


Ripe Pâte Fermentée. (Incidentally, a good illustration of the chaotic pattern of un-organized gluten resulting from a short mix.)


We made multiple loaves of each. We made the pan bread using 3 different shaping methods. We used multiple scoring patterns with the the rye bread and  the whole wheat bread. So, we did 7 shapes, 12 scoring patterns, 5 kinds of dough and 20 loaves, in all. I was truly wiped out by the end of the day. 

My breads from today (absent the 3 pan loaves). Front to back: Multi-grain, Whole Wheat, Egg Bread and Rye Bread.


One of my Whole Wheat boules


Miyuki squeezed in a couple classroom sessions on different pre-ferments.

As a very special treat for me, Susan Tenney (SusanFNP) came over to SFBI to chat and stuck around helping Miyuki with racking the baked loaves. It was such a pleasure to meet her face to face. She is such a pillar of the home artisan baking world!

At the end of the day, before tasting all the types of breads we baked today, we mixed pre-ferments - pâte fermentée, poolish and sponge - for tomorrow, when we return to baguettes.

The "aha moment" of the day for me was finally really learning how to pre-shape and shape a boule correctly. It's about time, eh? Again, having Miyuki show me once was all it took. Having to then shape 10 boules help consolidate the technique. I learned more in an hour today about this technique then I've learned in the past 3 years. As Leadbelly said, "It's so easy when you know how." 


David

Pages

Subscribe to RSS - dmsnyder's blog