The Fresh Loaf

A Community of Amateur Bakers and Artisan Bread Enthusiasts.

Recent Blog Entries

wally's picture
wally

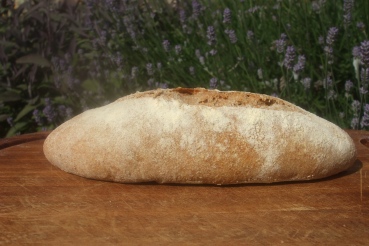
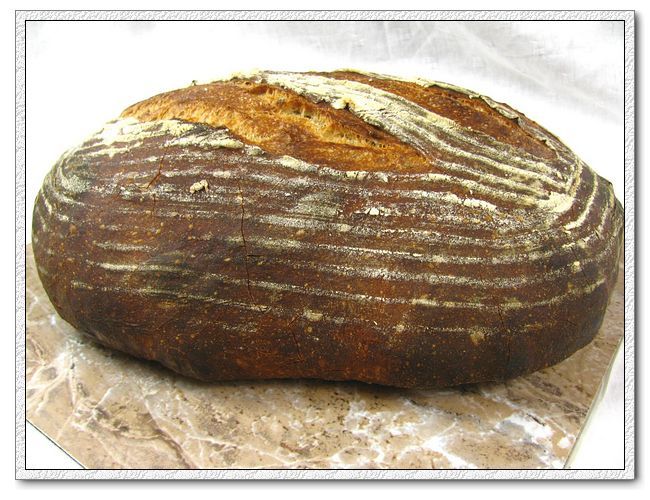
This past weekend I decided to revisit a favorite bread of mine - Polish Country Bread. Although I don't have Daniel Leader's "Local Breads" I've scrounged together a recipe from web searches that seems quite similar so far as I can tell. It's a 15% rye, where the entirety of the rye is in the starter. The hydration is 71% which I believe may be slightly lower than Leader's.

You can find my formula and thoughts on this variation of Leader's bread here on my website.

Lately, however, I've discovered the virtues of hot rye soakers in terms of the added sweetness they bring to rye breads, so I decided to attempt a variation-on-a-variation of his classic that still keeps all the rye within the starter - and the added soaker.

This necessitates a mixed levain bread since some of the rye is being removed from the levain to the soaker.

To make things easy (for me) I rearranged the formula so that the final dough would be essentially the same mix, with the single difference that the water weight would be reduced to offset the water used in the soaker.

2 x 1.5# loaves

Overall formula:                  Bakers Percent
Bread flour             733 g              85%
Rye flour                128 g               15%
Water                     610 g               71%
Salt                           16 g             1.90%

Mixed levains:    Flour         Water         Levain

White levain            56 g            56 g          21 g
Rye levain               56 g             56 g          11 g
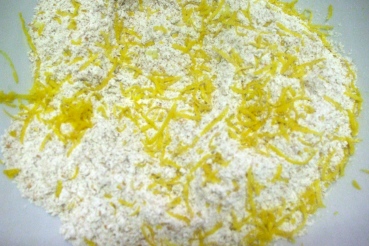
Soaker:

Rye flour                  67 g
Water                      132 g

Final mix:
Sir Galahad/AP      733 g
Water                      356 g
Salt                            16 g
Levains                    256 g
Soaker                     199 g

Mixing:
The levains should be mixed 12 - 14 hours prior to use (depending on temperature, time may be decreased or increased. In DC just now, my levains are 'cooking' by 10 hours).

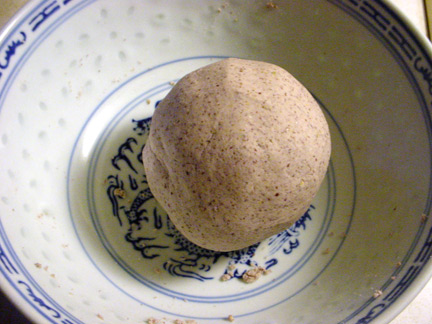
For the soaker, which should be made up at the same time as the levains, boil water and pour over rye, mixing until well incorporated. (Note: My last hot rye soaker used equal amounts of water and rye and almost immediately turned into a hard, dense, mass. Doubling the water helped noticeably, and next time I may triple the water as a percentage of flour.)

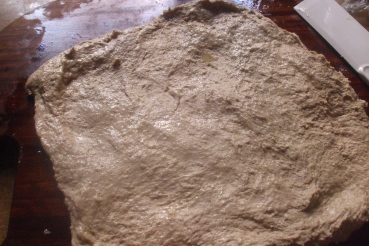
The next day I mixed together the water, levains and soaker, and then added flour and salt. Once I had a shaggy mass I covered the dough and allowed to sit for 30 minutes. (This is not a standard autolyse in that the levains and salt were added immediately. But I wanted to make certain that both levains and the soaker were well-dispersed from the get-go, so I decided to break with tradition and do an autolyse after all the ingredients were incorporated.)

After the rest, I mixed on speed 1 for 3 minutes, then on speed 2 for 2 minutes, and finally on speed 3 for 2 minutes. I've added speed 3 because this dough wants to climb up my hook and I've found that by increasing the speed it stays lower in the bowl and more quickly shows gluten development (slapping against the sides of the bowl).

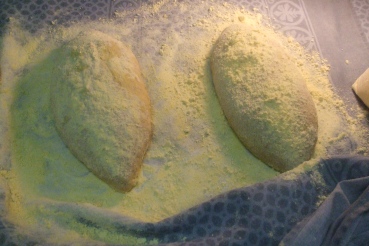
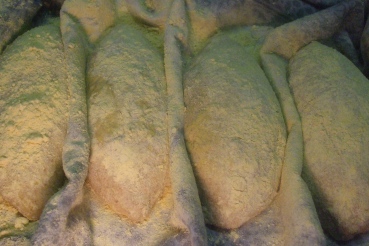
Bulk fermentation is 2 hours, with two folds at 40 minute intervals. After preshaping and resting briefly, form into boules or batârds. Couche or proof in bannetons/brotforms for 2 - 2 ½ hours. Preheat oven to 460°F, presteam, and load loaves, steaming immediately and again after 2 minutes.

Bake at 460° for 15 minutes, and then reduce heat to 440° for another 30 - 35 minutes.

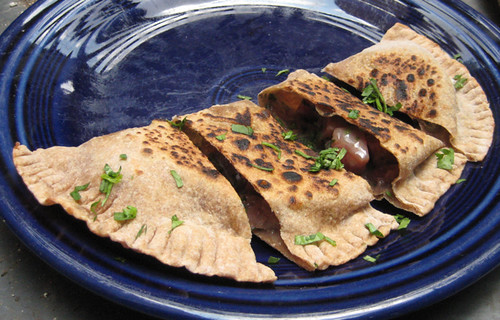
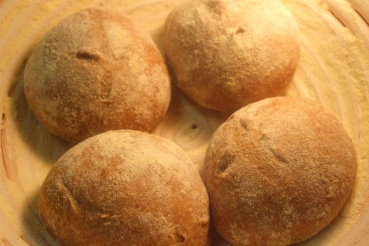
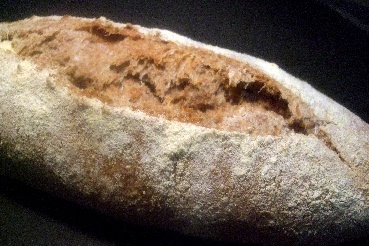
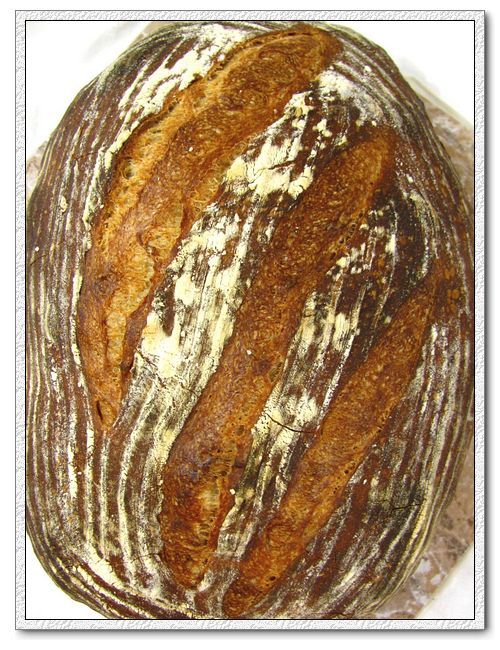
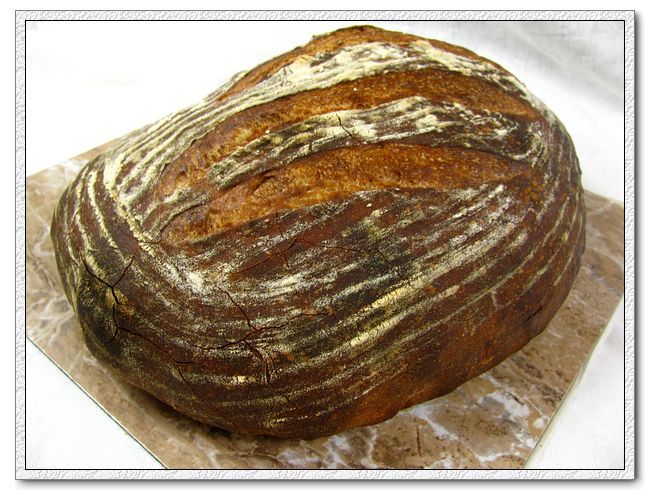
I'm still struggling to get my cuts to stay open in my (steam) leaky gas oven, as evidenced by the finished loaves. And my chevron slashing technique is in need of a lot more practice.


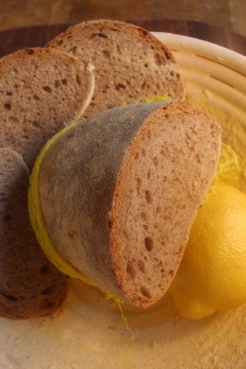
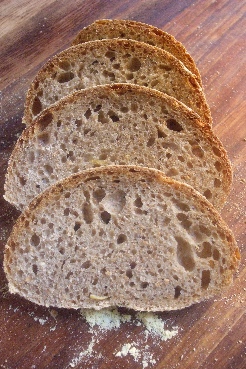
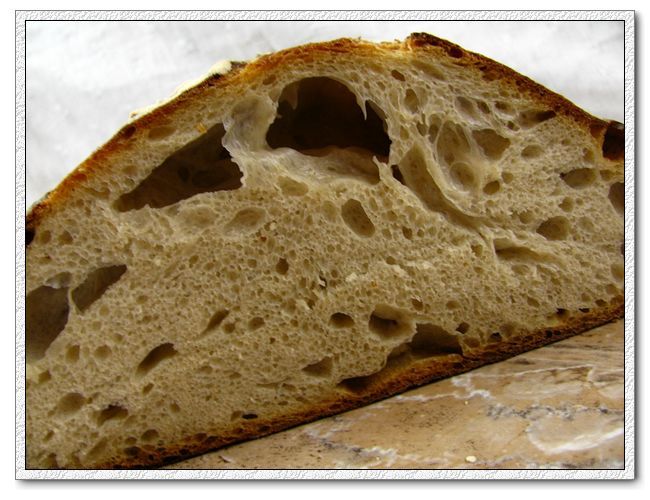
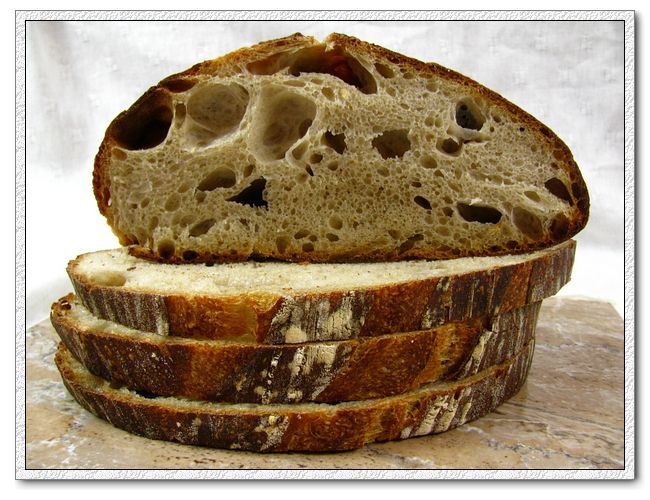
However, the crumb is nice and open and moist, and I really love the flavor of this bread. The hot soaker definitely brings additional sweetness. And this is absolutely sandwich bread. It recalls to my mind Jimmy Breslin's old Piels Beer commercials where he admonished us: "It's a good drinking beer!"

Well, this is a good eating bread!

EDIT (Jan. 23, 2011): My thanks to RonRay who pointed out in a message that my Overall Formula is incorrect in terms of Bread Flour weight and thus, overall hydration.  He correctly surmised that I had forgotten to factor my white levain into the overall bread flour weight. 

Actual figures for Overall Formula should be:

Bread flour: 799 g

Rye flour: 130 g

Water: 616 g

Salt: 16 g

This yields a dough with a hydration of 66%, NOT 71%.  My inclination would be to increase the hydration to at least 68%, which would entail increasing the water in the Final Mix from 356 g to 372 g.

Thanks again RonRay for an eagle eye!

Crider's picture
Crider

The Corona mill isn't a grain mill, it's a corn mill. Got that?

Catalog page circa 1929.

I'll admit it took me a long time to figure this out. I've been aware of these mills way back in the early 1970s when I used to subscribe to Mother Earth News magazine and dreamt of a life of subsistence farming to replace the suffocating suburban lifestyle of a twenty year old. Buy whole wheat in bulk and grind your own flour for pennies!

To this day, people buy these things and then complain at how totally useless it is for bread flour.

“I bought this for the sole purpose of making bread flour. I got it, set it up, put some wheat into it, tightened basically as far as it would go, and the berries came out almost exactly as they went in. Plus, there were little iron filings from the burrs mixed in. Great.”

reported an unhappy customer on Amazon's Weston Cereal and Multi-Grain Mill customer review page.


The original Corona mill was developed by Landers, Frary and Clark of Connecticut some time before 1900 and was apparently sold worldwide. In 1951, a company, LANDERS Y CIA. S. A., was formed in Columbia to make these for home nixtamal production. It still produces this ancient cast-iron, hot tin plated mill along with Columbian rival Victoria, and the Mexican-made mill Estrella. These three mills are virtually identical, the Estrella being painted rather than tin-plated. There are many other brands of the same-design corn mills and I believe those are made in China (note the rubber pad on the upper part of the clamp).


Victoria and Estrella mills.

I've been making more tortillas and other pan breads lately because summer weather makes oven baking a sweaty pain in the ass. I had been using dried masa harina and the result is much better than store-bought tortillas. Realizing that GMO corn is the norm these days, I went looking for organic masa harina and didn't have any luck. I can get whole organic corn from my local co-op for only about $0.50 a pound if I buy it in 25 lb. bags, so why not get one of those cheap mills and make the good stuff myself? Ebay has new Coronas for $64.29, Victorias for $60.24 and the Estrella for $58.99, including shipping. Shipping is a killer for these heavy cast-iron mills.

I found a used Corona for $24.50 with $8.99 shipping. I later found the all-time best deal at Amazon for a new Victoria Corn Grinder at $34.99 with free shipping (I had been searching for 'grain mill' and missed it).


My dirty and scuffed Corona mill of unknown vintage.

When I received it, I took it apart and washed it in hot soapy water. The scuff marks didn't disappear, and I found a bit of rust inside. I lightly oiled the whole thing with food-grade mineral oil (baby laxative). The grinding burrs show little, if any, wear. Perhaps it was originally owned by someone who expected to make bread flour with it!

There's just one Mexican grocery in the county where I live, so next time I was in the area, I picked up some reddish blue whole corn and a little package of Cal (slaked lime). I tried grinding some of the untreated dry corn and the mill was a lot stronger than I expected! Corn meal, grits or polenta is easily ground with by adjusting the coarseness of the grind. A few days later, I made some fresh tortilla masa.


Rinsed whole corn.

Rather than explain the whole nixtamalization process, there's a video on Youtube of the Alton Brown's excellent show "Tort(illa) Reform" that was written by professionals.


I used the recipe from that show for my masa. I've seen similar nixtamalization recipes on the net for tamales and posole that require longer cooking times than for tortillas.


Finished fresh masa. The wet corn went through the Corona so easily. No metate for me! The nixtamal smell is a lot less strong than when using dried masa harina. My kitchen lights don't show enough of the blue spectrum.

Then I made some extra-large sopes.

I hand-formed the very thick tortilla. Cook on a medium hot pan for about 30 seconds, then flip over and cook the other side for about 1 ½ or 2 minutes.


Remove the tortilla from the pan, flip it most-cooked side up and form a little lip around the edge. Return the tortilla to the hot frypan and spread with refried beans.


In another pan quickly fry a bit of good-quality mozzerella, string cheese or Oaxaca cheese. I used a not-so-good quality mozzerella here and it spread like butter.


Add shredded lettuce to the sope and top with the fried cheese. My cheese turned to glop.


Finally, add salsa, onion and chopped tomato.


Tortillas made from fresh masa taste and smell much better than ones made from dried masa harina, which in turn are much better than store-bought corn tortillas.

I've since made great peanut butter with my Corona, and expect that I can do from-scratch falafels by grinding soaked chickpeas. If I wanted to make my own tofu, it would be great for grinding soybeans. The home-brewing crowd uses these to crack malted barley for beermaking. Survivalists tout these as necessary items to have on hand for the ever-impending collapse of civilization.

I saw that flour-mill maker Retsel offers stone grinding-wheel kit for Coronas for only $29.95, but I still don't think the fit of the Corona mill is precise enough to get good flour from them. It's corn mill, remember?

Yassel's picture
Yassel

Honey Whole Wheat

Made two sandwich and one baguette.  Used super fresh Dominican Honey.  Baking bread for 7 months now.   I've been reading alot! Thanks TFL!


Sam Fromartz's picture
Sam Fromartz


image from farm5.static.flickr.com
Image: Chipati with chickpea, potato and spinach stew.

I wrote a story in the WaPo on a wood-fired baking class at King Arthur Flour with Jeffrey Hamelman. Here's the companion recipe on flatbread, which has a hydration of 66%. It seemed appropriate given the long thread launched by Bhutan Baker.

Summer is a great time to make this yeast-free flatbread, which takes minutes to cook on top of the stove. The recipe calls for chapati flour, a very finely ground whole-wheat flour that is available in Indian markets. You can use regular whole-wheat flour, but it must be sifted to remove any large particles of bran.

MAKE AHEAD: This dough is best made in the morning for use later in the day. The balls of dough can be refrigerated in a lightly oiled resealable plastic food storage bag for 2 or 3 days; let the dough come to room temperature before rolling. The flatbreads can be wrapped in aluminum foil and reheated in a 400-degree oven for about 5 minutes.

Makes 12 flatbreads

Ingredients:

3 cups (400 grams) whole-wheat flour or chapati flour, plus more for the work surface (see headnote)

Scant 1 1/4 cups (265 grams) water

2 tablespoons vegetable or olive oil, plus more for the bowl

1 1/2 teaspoons (8 grams) salt

Directions:

Combine the flour, water, oil and salt in a bowl until they come together into a mass. Let sit at room temperature for 20 to 30 minutes while the flour absorbs the water.

Lightly flour a work surface. (All-purpose flour can be used for this; if using whole-wheat flour, make sure it has been sifted to remove any large bran particles.) Transfer the dough to the work surface and knead for about 5 minutes by pushing down on and spreading the dough and then turning it over on itself, being careful not to rip the dough. It should be smooth and elastic. Form it into a ball and place in a clean, oiled bowl. Cover with plastic wrap and let the dough rest for 8 to 12 hours.

About 45 minutes before you want to bake, spread out the dough on a lightly floured counter and form into 2 logs. Cut each log into 6 equal pieces. You should have 12 pieces of dough that weigh about 2 ounces each; evenly distribute any leftover dough as needed.

Shape each piece into a ball. Let the balls rest for 30 minutes at room temperature under plastic wrap.

Place a cast-iron skillet over medium-high heat; cover with a lid. (Alternatively, invert a wok over a burner for cooking on the underside of the wok.)

Liberally flour a work surface. Flatten a dough ball and dust it lightly with flour, then use a rolling pin to roll it out as thin as possible (7 to 9 inches in diameter), rotating the disk to keep it even.

Rolling out dough

Image: dough rolled out nearly paper thin.

When the skillet is smoking lightly, gently lift a disk of dough. Place it in the skillet and cover immediately. Cook for 30 seconds to 1 minute, then flip the dough. Cover and cook for 30 seconds. (If using an overturned wok, simply place the bread on top of the wok and flip it when ready.) The breads will bake in 2 minutes and should be blistered and dark in spots.

Remove the flatbread and cover with a towel or aluminum foil to keep it from crusting over. (Dot it with butter and fold it in half if you like). Serve warm. These can be made in advance and stored in a resealable plastic container.

Recipe adapted from Jeffrey Hamelman, a master baker and bakery director at King Arthur Flour.

This version was posted on my blog at ChewsWise.com

Stuffed flat bread

Image: Flatbread stuffed with beets, goat cheese and cilantro

Anonymous baker's picture
Anonymous baker (not verified)

I was led to Swedish baker Jan Hedh's book Artisan Bread by Dan Lepard's recommendation on TFL. I owe him thanks for that as it full of great formulae and beautifully photographed by Klas Andersson. There is lots in it to inspire.
One of my favourite Hedh breads is a lemon bread flavoured with lemon zest and green olive oil (pp.126-7). Created by Hedh when lead baker on a Swedish cruise ship, this aromatic bread was designed to work well with fish dishes. It can be made in the shape of a lemon-shaped, small dinner bread or a more traditional round roll. The breads are dusted in yellow semolina flour during the second proof, to make them even more lemon-like.

Hedh's recipe gives enough for a small batch, In fact this is one of the few breads that I can batch bake in an hour after preheating my small domestic oven, baking 3 dinner breads in the first firing and 4-6 round rolls in the second.

The bread has a great texture. It is moist but remains firm even when sliced thinly. It takes savoury toppings well without bending or getting soggy, making it also ideal for open sandwiches and canapés.
We have enjoyed it with fish dishes and also topped it with tomato, oil and vinegar or tangy cheese and pickles. It is also good dipped simply in olive oil. However one of my favourite ways to eat it is sliced thinly with no accompaniments, so that the subtle and delicious lemon taste can be enjoyed to the full.

Hedh's original lemon bread is a yeasted bread made with a preferment of yellow durum wheat flour (grown traditionally on the Swedish island of Ven), and light rye flour with stone ground, strong wheat flour added to the final, machine-mixed dough. The version I am writing up here is my adaptation, a sourdough made with semolato, whole rye flour and wholemeal flour, which is hand mixed.

Some pictures of the different stages plus a chart of the adapted formula and process follow:


Sourdough Wholemeal Lemon Bread: Adaptation of Jan Hedh Recipe

This bread is flavoured with lemon zest rather than lemon juice. This results in subtle highnotes in the final bread, rather than a widespread lemon taste. It is well worth getting organic and unwaxed lemons to zest if available. When grated and mixed with the flour the lovely aroma also fills the kitchen! The wholemeal, olive oil infused dough has a lovely, silky consistency and is good to work with.

I have baked this bread several times. The original instructions make no reference to scoring the bread. I made the first batch without slashes and they came out well. However the picture in the book shows a loaf with an open top. I later read in the Introduction that Hedh proofs and bakes some of his breads with the seam side upwards. The loaf then splits along the seam, giving it an attractive rustic look. My shaping skills are not yet so good that I can prevent an unscored loaf rupturing elsewhere. I now normally score the breads with one long stroke along the top and this has worked well to date.

I was concerned that a predominantly whole grain formula at lowish hydration might produce too dense a crumb and loaf. I imagine that the loaves might rise higher when Hedh's original formula is used. However the preferment seems to work well with sourdough as well as baker's yeast and I have been able to get quite an open crumb and good rise for the size of loaf and type of flour used.

My sourdough starters are quite feisty but the relatively low levels of starter in the preferment and final dough have meant that the overall fermentation has taken place without the dough losing elasticity. The amount of starter and fermentation times I give are relevant to my own situation. I am realizing more and more now that with sourdough starters any formula is just a guideline! Please feel free to adjust this to suit your own starters.


The quantities below are for 4 dinner breads:

With this formula I used a wholemeal starter at approximately 66% hydration. I have made this bread successfully with wholemeal flours from Dove's Farm, Waitrose and Bacheldre Mill. Bacheldre Mill was the most fruity and aromatic. I used Dallari semolato because it was the only one available locally at the time but would prefer to use DeCecco, a brand that is sometimes available, also recommended by nicobdv.

I estimate overall hydration including starter hydration at 530/945 = 56% but I'm always open to correction!

Total FormulaWeight 
Wholemeal flour695g650+45
Semolato or other yellow durum wheat flour150g 
Whole grain rye flour100g 
Water530250+250+30
Green, virgin olive oil50g 
Sea salt or other salt20g 
Zest of 2 medium lemons, preferably unwaxed, organicApprox. 10gWill weigh next time!
Total1555 
PrefermentWeight 
Semolato or other yellow durum wheat flour150g 
Whole grain rye flour100g 
Whole meal starter at approx. 66% hydration30g 
Water250g 
Total530g 
Final DoughWeight 
Wholemeal flour

650g

 
Water250g 
All preferment530g 
Wholemeal starter at 66% hydration45g 
Green, virgin olive oil50g 
Sea salt or other salt20g 
Zest of 2 medium lemons, preferably unwaxed, organicApprox. 10g 
Total1555 
Method  
Preferment

Make the preferment approximately 12 hours before baking, normally the evening before:

Mix a small amount of starter with water to form a paste

Add the rest of the water to the starter mixture

Combine the flours and pour the water and starter over the flour.

Mix for 8-10 minutes in preferred fashion. (I 'air knead' in the manner of Andrew Whitley in order to incorporate the starter fully)

Cover and leave in an oiled container in the fridge

 
Mixing of final dough

Wash and zest lemons, mix into flour

Add preferment to flour

Dissolve second lot of starter in second lot of water and pour over flour

Mix by preferred method for 3 minutes

Add oil and salt and mix by preferred method for 8 minutes. (I air knead for 8 minutes then perform one stretch and fold on the bench).

Make sure that all new starter and preferment are mixed in well.

Mix for another 7 minutes if needed, to form an elastic dough.

Place in a lightly oiled, covered container

 
DDTC26 
First proofApprox. 90 minutes with 1 S&F at 45 mins. Adapt as needed. 
PreshapingQuarter, form into balls and leave covered for 10 mins. 
ShapingShape dinner breads into tapered, lemon-like rolls and smaller rolls as small rounds. Brush with water and dust with polenta or other yellow flour. 
Second proofProof on a floured couche for 60 mins. or until doubled in size 
PreparationPreheat oven to C250 and prepare to steam. For steaming I preheat 2 small fajita trays and pour boiling water onto them as soon as the bread is in the oven. 
Baking

I bake the dinner breads for 10 minutes at C250 with steam, open door to releas steam and turn the oven down to C230 for the rest of the bake

Check internal temperature after another 12 minutes, bake for further increments of 3-5 minutes, if needed, until internal temperature of around C90 is reached and crust is an attractive light golden colour.

Jan Hedh recommends baking rolls for around 12 minutes

 
txfarmer's picture
txfarmer

This past weekend was big for our household - July 30th is my birthday and our 5th anniversary, July 31st is my husband's birthday, lots to celebrate. Made some baguettes and the following Polish Cottage Rye from "Local Breads"

This bread has been well documented and recommended on TFL, see here for formula.

I don't know why I waited so long to make this one, it definitely lives up to the hype. The rye flavor is surprisingly noticable even though there aren't that much rye flour in the dough.

Even with the long kneading (13 mins!), the crumb is surprisingly open, I guess the high hydration made up for intensive mixing.

With such dark and crackly crust, it's big and beautiful 

I will join others to highly recommend this bread!

For our 5th wedding anniversary (year of "wood"), I made Yule Log cake, with chocolate swiss roll + chestnut cream filling + cream cheese chocolate frosting, yum!

Love the cute meringue mushrooms

Hey, it's all about the details, I don't feel guilty carving this tree!

For DH's part, he gave me hand-made tree leaf bookmarks and card, with patterns he designed himself. He used peach tree leaves for their natural heart shape.

Also gave me an anniversary ring, with 5 diamonds. Designed the ring himself. to match the wedding band and engagement ring.


All around a great weekend, we spoiled each other silly. I found time for a birthday run as well, with my trusty running partner! This is after a 15 miler long run, it was hell-ishly hot. Trust me, you don't want to know the temperature.


trailrunner's picture
trailrunner

The request for a good Challah recipe that was not sourdough had me posting my recipe that I have used since the 70's. I haven't been making it weekly as I did for decades since I have been working with wild yeast and have been exploring artisinal breads and formulas. It felt wonderful to have my hands in the dough and to knead and develop with only 10 min. of effort. None of the 3 days that I have been spending lately with a minute or 2 here and there. Different but nice in its own way also.  Crumb later when it cools. c 

Photobucket

Mebake's picture
Mebake

This is a 50% spelt Sourdough I made up, adapting the formula from Hamelman's Mich callier stiff levain:

Levain: 275g @ 65% hydration fed with (40% seplt, and 60% AP)

Final Dough:  - 505g water

                   - 720g Flour (50%AP, 50% WHole SPelt Flour)

                   - 30g (1T) Sea salt.

                   - All Levain (275g)

                   -----------------

                   1500g dough @ 70% Hydration

Baking day: I dissolved the stiff levain in 505g water, then added the 720g Flour. Left to Autolize for 30 min, then salt went into the dough. I french-Kneaded  the dough for 10 min. let rest for 5-10 minutes, then french-kneaded for anoth 5 minutes, and shaped to a tight boule.

Fermenation 2.5 Hours with 2 folds. I then divided the dough into 750g doughs, preshapd gently, and then shaped after an hour. Final fermentation for 2 Hours, and into a hot 500F oven reduced to 430F with steam for 15 minutes, 30 min utes without steam.


Taste was very pleasent: typical of mild sourdoughs, with nutty aftertaste from spelt. Versatile for spreads, or even alone!

Khalid


hanseata's picture
hanseata

I'm baking my own version of Peter Reinhart's Pain a l'Ancienne (from the BBA) regularly for three years now, it is a hot seller at our local natural food store. Since I wanted my bread to be a little healthier than 100% white, I substitute 100 g of the bread flour with whole grain flour, either rye, whole wheat, oat, spelt, corn or buckwheat. I also add a little sourdough just for the taste, and found the right baking technique for my oven. Thanks to DonD's - and others from TFL - advice to leave the breads for 5 minutes in the switched-off oven with the door slightly ajar, the crust comes out perfect now - and stays crisp for several hours.

After trying DonD's version of Pain aux Cereales (and loving it) I thought of doing something similar with my organic 7-grain mix (rye-, wheat-, barley chops, cracked corn and oat, millet and flaxseed), but in a simpler way that would better fit my time schedule, to be able to sell it. So yesterday morning I made a soaker from 100g multigrain mix and 100 g water. In the evening I mixed it with all the other ingredients and placed the bowl in the fridge overnight. I took the nicely risen dough out this morning at 4:00 am to de-chill and rise somewhat more. Three and a half hour later, with the Vollkornbrot already in the oven (I start with the breads that bake at a lower temperature), I divided the dough, placed the pieces in perforated baguette pans and let them proof for another 1/2 hour more until the rye breads were done and the oven reheated to 550 F.

I bake my Pains a l'Ancienne for 9 minutes, with steam, then rotate them, remove the steam pan, and continue baking for another 8 minutes, keeping the breads 5 minutes longer in the switched-off oven with the door ajar, before they are cooled on a rack. My oven is very well insulated (no steam escaping unless I open the door) and I bake with convection (fan-assisted, not "real"), since I bake on two shelves.

This is the result:

This one we kept and had for lunch, the others are sold. My husband's comment: "This is the best Pain a l'Ancienne you ever made".


Shutzie27's picture
Shutzie27

The following are some photos of breads I've bakes since last winter. It's fairly obvious I'm just learning and a bit timid (i.e., I could stand to leave the bread in longer for browning, but I'm always gripped by this abject terror that the bread will burn). I'm mostly posting these so I have a kind of pictoral catalougue of my attempts and can see how I'm (hopefully) improving with practice and over tiime.

This was my first loaf of sourdough bread. A bit pale, and not particularly crusty, but it was actually shockingly good and had a definate sourdough taste.


 This is an Italian bread I made about two weeks ago. I was happy with the taste and the way the Rosemary stuck to the crust, but again, it went soft and seemed a bit pale.


This is a fresh honey wheat loaf I made. It's a bit darker than the picture shows (I have my Blackberry set to auto flash). I would have liked much, much, much more honey taste in it, but the recipie already called for 1/3 of a cup. Also, I was a bit disappointed with the wrinkle on top. Still, though, not awful at any rate.


My other pictures apparently are bmps, so I can't seem to upload them.

Pages

Subscribe to Recent Blog Entries