The Fresh Loaf

A Community of Amateur Bakers and Artisan Bread Enthusiasts.

Shutzie27's blog

Shutzie27's picture
Shutzie27

Back in 2014, for the third time, I attempted to make pan pizza for guest. For the third time, everything seemed to be going perfectly and yet the crust came out far too hard. You can read about that here

After that, I literally hung up my pizza peel (though I took it off the kitchen wall for free-form boules and loaves). 

Recently, however, my neighbors insisted on me attempting again. So, I did, and was actually successful. I did change some things, but I'm not sure which ones made the difference, with the exception of the first two I'll list, which are pretty obvious. 

1.) We bought our first -- and hopefully forever -- home two years ago and it came with a not-awesome (but actually calibrated) oven. My apartment oven needed some serious bread-pan Jenga'ing to make loaves come out evenly. It ran so hot I had to put an inverted cookie sheet over the heating coil to keep the heat in check. 

2.) I give all baker demi-gods on this site permission to laugh and poke fun at me for this: I used to think you had to use a pizza stone no matter what. So I'd put the stone under the pan pizza pan, which I think (correct me if I'm wrong) multiplied the heat. This time, the pizza stone was used only for serving. 

3.) Instead of the sprinkle method, I did not sift the flour at all and just straight scooped it. Obviously, this means I used more flour. 

4.) At the same time, this time I didn't blind bake. When the crust felt far too dry, I remembered the author of the cookbook lived in Chicago, where there is humidity, and I live in Arizona, where there is none. I've actually cut out as much as a full cup of flour on some loaves with good results. So this time, I dipped my hands in ice water and "wet kneaded" until it felt right

5.) I parbaked for only 3 minutes, not four, on the bottom rack and pricked way more holes in the dough. 

6.) I left it to the bread gods. I didn't oven peek, I didn't even let myself turn on the light and look through the window. I focused on making appetizer veggies and the salad with the stoic determination of a Spartan heading into battle. Nothing, but nothing, was going to make me check this pizza. 

7.) I pre-sauteed the toppings (turkey Italian sausage, green peppers, onions and mushrooms). This is not a step I would do again, as I did end up with excess liquid. The previous fails were not topping-related, so I don't think mushroom moisture is an issue for me. 

Whatever the difference was, I do believe I have, at last, made peace with pizza. I shall attempt this art in other forms. Stuffed, thin crust, the possibilities are endless! 


Shutzie27's picture
Shutzie27

These are my attempt at black rye rolls, again from Beth Hensperger's The Bread Bible.* I thought I wouldn't have enough rye flour but then I did -- phew!

I consider these rolls a success, cracks and all, for several reasons: 

First, this was only my second time working with rye flour, and I almost didn't have enough. 

Secondly, I really had to follow my gut here because I didn't have one of the ingredients and knew I'd have to adjust the moisture to make up for it. Which I did. While I don't "blind bake" bread, exactly, I also don't like to deviate that much from a recipe. I think the fact that I could feel my way into a successful roll is a sign that I am learning and getting better. 

Thirdly, I don't have a food scale and so when making rolls use what I call The Scone Method; I divide the dough into scone triangles and then roll them into rolls. Despite this, I still ended up with a mishmash of rolls and mini-boules. 


Shutzie27's picture
Shutzie27

Yesterday I made a from-scratch deep dish pizza using the recipe in The Great Chicago Pizza Cookbook. The crust turned out beautifully, or so I thought until I tried to cut it. It wasn't burnt, but was hard as a rock! We had to saw through it and it was just too much chewy to enjoy the rest of the ingredients. 

Does anyone have any suggestions? The recipe calls for 1/2 c of yellow cornmeal and I wasn't sure if that was the issue or if I should forego par baking or what? There are photos below. Any and all advice welcome!!! 


Pre oven: 


Again, it looked fine, but was hard as concrete. I only parbaked for four minutes....any ideas what went wrong?


Shutzie27's picture
Shutzie27

The weather is finally cooling off here in Phoenix and for my hubby and I that means one thing: picnic season has arrived! And with it, my favorite part, a reason to bake picnic breads. 

I think I've had a fairly successful Crescia al Formaggio, although I'm not sure that the inside looks as it should. The bread was flavorful, even the sponge that the melted cheese didn't get to. 

I'm looking for suggestions and feedback as to how the inside turned out. It tasted heavenly; even the crumb with no melted cheese was infused with the flavor of gruyere. Still, taste aside, I'm trying to learn technique. Should I have rolled it tighter? It was my first flute-pan bread, does that have something to do with it? Or is it just fine the way it is..? Any and all feedback welcome and appreciated, fellow bakers! 


One concern I had was that my butter became soft and warm. This seemed to be OK after the first rise, however.


I did have some trouble getting the butter beaten into the dough, but ultimately it did seem to absorb it.


The recipe said to roll a 10" by 4" rectangle, but that didn't seem nearly large enough, so I got as close as I could without having to sacrifice cheesy goodness. 


And here's the inside: 


Nothing left to do but enjoy! 


Shutzie27's picture
Shutzie27

After some trepidation, I finally attempted the Italian-Style Herb Bread from Beth Hensperger's The Bread Bible. The hubby and I are avid picnickers and my parents had just gotten me a snazzy portable picnic table I can't wait to try out tomorrow. 

Several things made me nervous about this bread:

1.) The only other cooked stuffing bread I'd attempted prior to this was onion rolls (also from BB; it's the only bread book I have) and they turned out well, but the filling didn't quite blend as well as I'd like.

2.) I'm not a fan of sun-dried tomatoes, so I knew I was leaving those out. I considered adding more olive oil to the sausauge, onion and garlic stuffing, but decided against that and instead drizzed just a touch of trufflle oil (a gift from a neighbor I gave the grilled flatbread I tried last week) to over it before it cooled.

3.) I've never baked a bread with the herbs directly in the crust.

4.) I was forced to make substitions: Chambord for the anise liquer that went into the stuffing and fresh chervil instead of dry.

So, with all that in mind, I began. I'll let my photos tell the story of the journey.

There's quite a bit of prep for this loaf, between chopping the onions and mozzarella, etc., but that's the time I let the herbs soak in olive oil. 

The next step was to combine the slurry with the herbs, wine and salt and "beat until foamy." 

That did confuse me a bit, but I beat hard using a whisk until there was indeed a layer of foam on the top.

Next I added the flour, kneaded, and while the dough rose worked on the filling. Again, I substituded Chambord for the anise (we don't drink, and I had some on top of the fridge I was given as a gift forever ago) and truffle oil for sun-dried tomatoes (also a gift):

The next sequence is the baking: 

The next part, folding, flipping and scoring, made me especially nervous: 

Unfortunately, then I failed miserably....instead of making 1" cuts on an angle, I made them vertically. At first, I tried to fix it, but that wasn't working, so I simply pressed on. 

 One thing that would've been extremely helpful, however, is to know how long across the loaf the cuts needed to be. I'd never had this kind of bread before, so I wasn't even really sure how it should look.

And -- as is often the case with my breads -- somewhere in the oven things went wrong. When I pulled out the loaf, it was all I could do not to cry. I might be edible (I'll wait until it cools to try it) and maybe we can even take it on our picnic with us, but I think it's took dark and doesn't seem right somehow. 

 The third "arm" I took off to get a better image of the filling, which did bake into the dough well, so that's good at least. 

The crust is definitely on the "extra crispy" side, which isn't great either. 

....Sigh....

Well, I'll try it again. In retrospect, I should've known better than to let it go for the full 40 minutes as my oven runs hot and often I have to cover the top of my white bread loaves with foil. Lessons learned, I guess. 

On the brigth side, the crumb looked and tasted marvellou! I was surprised at how well the pepper and sausage came through. So that's good. 


Shutzie27's picture
Shutzie27

In continuing my mission to bake my way through The Bread Bible, I had the opportunity to try the recipe for Whole Wheat Walnut Raisin Bread. I was a bit worried it would be a bit advanced for my skill level, but I was baking it for my dad, who needed to transition to whole wheat bread to aid in his recovery from intestinal surgery.

The first thing that made me nervous was plumping the raisins, something I had never done before. But, a quick Google search led me to completely cover them in boiling water and set the timer for an hour as I worked on the dough. I drained them in a collander and then on a papertowel, trying to get them as dry as possible, but now I'm wondering if one shouldn't keep them a little moist so the finished loaf doesn't dry out....? At any rate, I hand mixed them with the walnuts and set aside.


I found the dough to be pretty easy to knead and not nearly as nubby as I thought it would be. However, it did seem to be rising very slowly.


Since the formulae called for a two- to two-and-a-half rise to double in bulk as opposed to the usual hour, I assumed this was normal. At any rate, the dough eventually reached the doubled point, a little over two hours after being set to rise.

This is where some mild difficulty began. The first fill-and-roll went fine.

The second, not so much.

I had a hard time keeping all the walnut pieces and raisins in the dough, though eventually I got there. 

I then cut the dough into three pieces, but (and I’ve already tried this recipe again), the middle piece inevitably ends up with far more filling. And, much to my disappointment and frustration, the dough began to tear over the filling in the middle boule:

I wasn’t sure if this was ok or not—on the one hand, I’d certainly seen boules like that in stores and whatnot, but on the other hand, the other boules felt more sturdy. Still, after about forty minutes of futzing around with it, I decided to just let the three boules sit for their second rising and learn by doing when the time came.

Scoring them also proved to be a bit challenging. 

When they did come out of the oven, they came out really, really dark. I thought they were burnt, but they ended up tasting ok.

The second time I tried this formulae, I moved the oven rack (on which I have a square stone) to the second-to-the-bottom place, and that seems to have solved the problem. I’m wondering if I shouldn’t leave it there for my other loaves. That being said, sure enough the raisins that were poking out of the middle were burnt and fell off.

Fortunately, the rest of the filling stayed within the loaf, even after slicing. Since this was my first time baking a yeast bread with filling, I counted this as a success. 

I was, however, concerned about a small moist streak you can see on the bottom right-hand side. It didn't effect the taste any, and the texture wasn't noticably different, but all the same inconsistency worried me. 

Shutzie27's picture
Shutzie27

Continuing my journey though The Bread Bible, I finally had both the flour and the time to move on to the third recipe, onion rolls. Since the basis of the rolls are the previous French white recipe, which with I've had repeated success, I'm not going to bother explaining that process. If interested, you can see my first attempt at that pain ordinaire here: http://www.thefreshloaf.com/node/25195/pain-ordinaire-bread-bible

Onion rolls made me so nervous I actually put off baking them for a bit. My trepidation arose from two facts: First, other than Betty Crocker casseroles and slow-cooker stews, I'm not much of a cook at all, so the onion cream really intimidated me. Second, I didn't generally like onion rolls (or so I thought, until I gave this recipe a spin), so I wasn't even really sure what they should look or taste like in the end. I was hoping my husband's penchant for onion bagels would get me through, though of course a bagel isn't a roll, so who knew how helpful that would be. 

In the end, I sucked it up, reminded myself you don't learn by not trying, and plunged in. First, I prepped the onion-cream filling: 

I couldn't help but think that perhaps I was wrong about onion bread--after all, how could anything, especially a bread, made with this much butter and heavy cream possibly be bad tasting? 

But then, my love of butter and cream probably verge on unhealthy...but I digress. 

The butter melted, I poured in the cream, it simmered, I stirred, and so it went. I watch a lot of Food Network and decided that cooking the onions "until clear" was a good place to start. Of course, the clarity was difficult to assess with the cream in there, but I pressed onward nonetheless. 

This is the mixture before I reduced it: 

And this is the mixture reduced (or, at least, what I thought was reduced; by all means, any cooks out there feel free to chime in and offer some tips): 

I should mention that I was, in fact, pleased with the French bread dough: 

While the onion mixture cooled, I made the rolls using a neat trick I got off a Betty Crocker forum:  

(i.e., making squares, then tucing the corners in underneath, pinching the seam, rolling gently a few times for shape, and voila! A roll!). While this trick does work well, I'm still hoping that Santa brings me a food scale this year because getting even dough divisions continues to be difficult and I'm worried on day I'll come across a recipe it really impacts. 

I used kitchen shears to cut an X into the dough, as instructed, and smushed down my fingers in the middle pretty deep. This is where I got concerned--it didn't seem as though there was enough room for 1 tablespoon of onion filling, let alone two. Still, I pressed onward: 

They really did seem rather overstuffed at this point, and I was getting more and more worried. 

Surprisingly, however, by the time they were ready for the oven, I had run out of the filling: In they went, and the results were I think pretty ok.

On the one hand, I learned the importance of letting the "legs" of the roll surround the filling because it really bakes the filling in. The roll portion came out lovely, I must say, but I was kind of disappointed that the onion filling wasn't more integrated into the bread. Ultimately, it seemed more like a topping, but that might be how it's supposed to turn out. The oninons were also very wet and only a little blackened. I notice on onion bagels, the onions on top at least are charred. 

 Still, my hubby and I did eat them pretty quickly, but I'm wondering if I shouldn't bake these again to work on filling technique before moving on to the flatbreads listed next. All feedback welcome! 

Shutzie27's picture
Shutzie27

Bolstered by my success in baking White Mountain Bread, I finally had the time and the flour to attempt the second recipe in Beth Hensperger’s Bread Bible, French bread, or Pain Ordinaire.

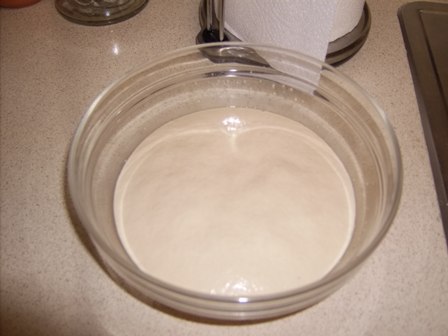
Things began auspiciously enough with a beautifully smelling, light, spongy and almost fluffy slurry.


Since I proofed the yeast in a glass prep bowl, I actually ended up adding the slurry to the two cups of bread flower and salt (as opposed to adding the flour to the slurry; I guess Mom was right about me never following instructions). This didn’t seem to ruin anything, however, and I proceeded to mix the batter into a dough using my trusty and deceptively strong wooden baking spoon.

Just when I thought my arm would tire, (I always mix by hand, partially because using my hands is my favorite part of baking bread, and partially because I use the kneading and mixing process as a way to justify putting melting pads of butter on the warm, oven-fresh bread I’ve baked. All that mixing has to burn off some calories, right?), the “shaggy dough” Hensperger described seemed to form.

I found, however, that I only needed to use 2 ½ cups of all-purposed flour (which I should add here is bleached, though this doesn’t seem to make too much of a difference in taste or texture).

With that, I rolled the dough into a ball and tucked it into an olive-oil shmeared bowl to rise.

I was happy to see that it did, though I worried about the lumpiness of the post-risen dough.


With that, I deflated the dough by gently turning it out on to the table. It let out a satisfying little pphht sound and gently exhaled upon hitting the surface. Knowing I have a tendency to over-work dough (which has resulted in an almost too-tight and compact sponge in the past), I resisted the temptation to sink my fingers into the dough and start kneading.

Instead, I grabbed my dough slicer (super handy with inch measurements on the side) and did my best to create three equal portions. Since I don’t have a food scale, this always gets a little tricky, but I thought I did pretty well.


Covering the hopeful little dough boules with some plastic wrap, I put them back in the laundry closet on top of the dryer to rise.

Forty minutes later, I saw that—clearly—I had not done as well of a job creating equal boules as I would’ve liked.

Still, they looked and smelled delicious, the oven and stone were preheated, and I had loving brushed on the nice egg glaze.

I used the whole egg with two tablespoons of water, even though in the introduction Hensperger does suggest just egg whites for French breads.

It was time for one of the most difficult parts of bread baking: The Transfer.

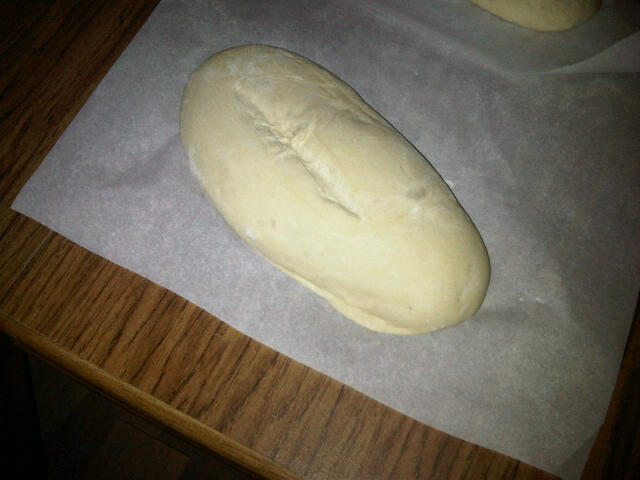
And naturally, this is where things went a little awry. Despite having sprinkled my peel with what I thought was a liberal amount of cornmeal, the boules stubbornly clung to the wood. I shaked, and shimmied, I scotched the peel, terrified of collapsing the three boules I had worked so hard to shape until finally, worried about the heat escaping from the oven, I nudged the boules in with my thumb.

While the boules didn’t collapse, one of them did seem to crack on the side (see below, on upper left-hand side) as a result.


But, all in all, they looked gorgeous and smelled even better. We gave one to our new neighbors, who seemed to enjoy it, froze one (using both plastic and foil, which I have to admit, does seem to keep it tasting a bit fresher after thawing), and made it through the third in two days. Which is why I don’t have any pictures of the crumb. It was even, uniform, light and fluffy.

Shutzie27's picture
Shutzie27

One of the best wedding gifts my hubbilicious and I received was Beth Hensperger's The Bread Bible. After reading the introduction and first chapter, I decided to follow in Hensperger's footsteps and do what she did, twice: teach myself more about the craft and art of bread baking by baking every recipe in a bread book, in order. And so it began, on August 14th......

When I first opened the oven door, my heart sank. Surely, these loaves were far too brown. A quick tap on the upper crust of the left loaf yielded a reassuringly hollow sound, but also the discovery that the crust was, as feared, rock hard. Which would be great, if I had attempted an artisan bread, but I hadn't. This was white bread. It was supposed to be pillowly soft and offer an airy, slightly-sweet cushion for peanut butter and jelly or crisp up in a toaster into a perfect bed for melting butter. The warm, unmistakable smell of baking bread that had gently settled in the house like a blanket seemed almost mocking. I sniffed once while taking the loaves out of the oven; it didn't smell like burnt bread. Placing the loaves on the rack, I stood over them and fretted. 

I laid them on their side, remember what I'd read about that way, the cooling would be even. My husband, meaning well, said, "Don't the crusts usuually soften up?" I was forced to reply with a grumpy, "Yes," not bothering to explain that most of the time, that wasn't a good thing. 

So, I turned off the oven, returned to the couch where we'd been watching TV, and waited. 

Or, at least I appeared to be waiting. What was really going on was a step-by-step analysis of what I had done. 

Thinking about it, the formula had seemed a little strange to me, as the liquid base of honey, melted butter, water, salt and one single cup of flour seemed to create a batter similar to pancake batter. Maybe that wasn't what it was supposed to be like at all. Maybe that's where it all went wrong. 


After adding the flour, using the maximum of the six cups stated in the recipe, I had turned to kneading. I remember thinking that although the dough was a bit sticky and difficult to shape, it did feel right by the end. 


Once I coated it (using olive oil), I of course put it in a bowl to rise and covered it with plastic wrap. Normally, I use a damp towel to raise my dough, but I deferred to Hensperger's expertise. I found the rising to be very successful. 


I really enjoyed shaping this dough, although I recalled that I had worked it quite a bit. Was the sponge going to be too dense and compact? The loaves hadn't felt heavy when I put them on the rack, but then again, I "dumped" them out rather quickly as the pans were, of course, hot. And what if the crust did soften? Didn't that mean the bread had gotten soggy? Wasn't that a bad thing....? 

Perhaps my "lightly floured surface" was too floured. But honestly, it had really felt ok. I'm not a master baker by any means, or even an amateur one, for that matter, but I did generally trust my instincts when it came to baking my bread. The dough had been firm, pliable, perhaps a touch sticky but not too bad....heavy, but not dense.....flexible.....it had that wonderful earthy smell of clean yeast.....

And finally, they were put in the pans. I did know I felt the dough was a bit lumpy, but assumed it would kind of smooth out. 


And then, of course, they had come out. 

Unable to stand it anymore, I finally decided to just cut into the bread. I was terribly nervous. Flour wasn't getting any cheaper and, in a rather literal sense, I couldn't really afford to make too many learning mistakes. The bread hadn't quite cooled, but had that last layer of warmth that begs one to eat it. 


To my relief, the crust had softened (this was not how I had felt when the same thing happened to my ciabatta last year; the irony did not escape me). The crumb looked much better than my worried mind might have otherwise made it. 


In fact, the entire loaf looked, smelled, and felt wonderful. My sprits cautiously began to rise like yeast in warm sugar water. My husband, a fan of the heel, took the first bites. Hardly an objective reviewer, but I knew him well enough that I could watch his face and see how the loaf had really turned out. 

He seemed to really, really enjoy it! I took a closer look at the crumb. 

.....I tried a piece, putting a doomed pat of butter upon it. Took a bite and.....VICTORY!!! It was everything warm, fresh-baked bread should be. Soft, chewy, not soggy, and glorious in its simplicity. As promised, we gave a loaf to our neighbor from Poland, who said it reminded him of bread he got at home. A few days later, he made a point to tell me he enjoyed it. But I didn't need his compliments, appreciated though they were. I knew, because I had enjoyed perfect toast for the past three days. 

Shutzie27's picture
Shutzie27

Well, time passed in that way it does and soon I had two loaves ready for the oven: 

Ciabatta ready for the oven


I trimmed the parchment paper (which burned to a crisp, by the way, any tips on avoiding that in the future?), wished them well, and gently slid them on the stone. 

Twenty minutes later, I pulled out these: 

Ciabatta just out of oven


As you can see, they were far darker than I'd wanted. The recipe stated they should be a "pale golden," and I got, well, flour-ed brown. They came out crispy enough and the crust had some crackle, and the bottom sounded hollow enough. 

But alas, it wasn't long before they were soft. I wondered if I shouldn't have tried spritzing them or something. 

Still, when it came time for stew, the crumb was ok in the loaf we ate (haven't tried the second one yet), though not as bubbly as I had expected: 


So, that's my ciabatta adventure. I'll definately try again, as I'm a tad disappointed in these loaves. Any tips for next time would be greatly appreciated. 

Pages

Subscribe to RSS - Shutzie27's blog