
hello Considering a tefal actiftr experiment.
Hi
Newbie bread machine owner here, 40 odd years ago i was the odd job /Tea boy on Saturdays in a local bakery and later lived above the village bakery so by osmosis i gotta be a natural eh?
Anyway the machine is drying after its thorough clean, (in V-good condition for a used machine too..hardly any evidence of use.. Thanks ebay.. it included everything including manual and recipe book with notes deciphering what a bloody cup of flour is?? (anything between 160 and 250g apparently? ) )
First off it will be a standard white loaf, but the end goal is mixing and kneading the dough for sandwich rolls I hope to bake in a tefal actifry airfryer? (the round one with a paddle to move contents during the cook,Super for Large portions of chips, Bread though??
The intent is to remove the air fryer paddle and cover its void with foil to allow the rolls to bake without being disturbed. ?? the glass lid will allow me to monitor progress..
hey its a plan and just in case its a TOTALLY BAD IDEA???? This seemed like a good place to check on the level of idiocy im exhibiting, So here i am .. hello ;)
If this is a bad idea please do shoot me down in flames kindly.. While the actifry is used only for chips atm its mighty fine at cooking them and it would be a shame to ruin the machine for an experiment..
Anyway folks thats me, and why ive landed here hoping to learn from your collective wisdom.


Watch those conversions for a cup. 250 would be mL, which is also grams for water, but not flour. A US cup of flour is ~125-130 grams, but then your instruction book might not be in US cups (sounds like you're in the UK).
As for baking in an air fryer, I've found I can't adequately cover the food with foil to stop overbrowning---it just blows around. I've seen videos of bread baking in an air fryer, so go for it, if you want.
Edit: I looked up your model and see that it does not have the fan at the top, so that blowing & overbrowning problem is eliminated. Actually, it looks like it might be a pretty good bun baker.
Have you tried it yet?
Thank you for the clarity regarding the measures. While the manual/booklet contains a table for equivalent measures in g etc, a couple of the actual recipes are overwritten with large ball point pen measures too ;) iirc the table indicates a 250g measure for 1 cup without distinction of fluids or dry goods (density) Obvious now you bring it to my attention.. doh!
Not yet progressed to the air fryer, loaf #1 from the bread machine had its 'features' that need addressing first.
Very nice but.. a bit 'cakey' crumbly, I think due to my using plain flour in error to firm up the doughball after using a tad too much fluid to start with, 4x heaped spoonfuls at least..
Then it didnt rise as much as i expected what with being a bit over the max recipe size.. the finished loaf remained just under the height of the bake tin and is on the heavy side of ideal. Im using standard dry yeast, so will try a warm sweet yeast starter to hydrate and propagate a healthy population in advance next time..
Thirdly the crust didnt brown and i did not open the machine during the bake cycle, i only opened it at start up to modify the dough ball. ?? i baked the loaf an extra 20 mins by starting a 2nd bake only cycle at the end of the initial bake which had no impact to the crust top only added a mm or so to the in tin crust making it extra crumbly on the inside.,, the loaf tapped hollow.. Perhaps an oiled sheet of aluminium foil or 2 to insulate/reflect heat back in??
So when i finish the current loaf off (just the last crust remaining for toasting..) I will bake up a revised Small 1lb 500g ish loaf and see how that goes..
As soon as i get a good rise and bread textured loaf from the dough i will move onto the air fryer..
I live alone and even a small loaf can be too much bread at times.. Ideally small rolls par baked in the air fryer can be frozen and after an hour or so defrosting re-fryed to bake on demand.
And if not at least i can have some fun finding out ..
I have a talent for stating the obivious, but you do know there is a crust shade selector, right? A old-timey member here (maybe Paul?) commented somewhere that often the top of a machine loaf doesn't brown as well as the lower part. I've never had that problem in my own machine and my crust selector works very well, but you can add foil if needed.
Yes, too much flour will give those crumbly results.
Active dry yeast should be dissolved, but bread machine/instant yeast works very well dry.
Bread machine loaf #2 was a disaster baked overnight in the morning the crust while dark had absorbed way too much atmospheric moisture sat in the machine next to store bought baggets gone dry..
So using the machine to mix only i prepared a yeast culture in warm milk and weighed out 250g of flour to add to 150ml of yeast starter, (2 x tsp of sucrose with the active yeast slurry) mixed in 1 tsp of salt into the flour and 1/2 tbsp of oil.
the mix was too soft out of the machine so i knocked it down and kneaded a short while adding flour into the folds to firm it up a bit before dividing into 5 and placing in the airfryer under clear film to rise near a heat source..
the rise wasnt even so i 're-wrapped' and re-spaced the rolls a couple of times until all 5 rose domelike evenly spaced.
After 5 minutes in the air fryer the roll directly under the hot air in vent was brown/ looked done.. the 2 sat either side were partially brown, while the furthest from the vent was not brown at all.
SO... I stopped the air fryer and checked on the structural integrity of the rolls, the softest being the one furthest from the vent. i lifted the softest out along with the upturned tin covered in foil i had used to cover the paddle mechanism from heat. and replaced the paddle designed to rotate and stir the contents under the hot air stream, placing the soft roll back in with the paddle fitted i started up the machine for a further 7 minutes while the rolls were pushed around and over each other as per usual with the actifry ..
The results-- some dented and mis-shapen rolls, 2 of which were devoured about 10 minutes after cooking..
More bready bit still a hint of cakey?? and clues as how to proceed
Next.. I have a stiffer mix on the go same as above + 50g extra flour and a dribble of milk to help it bind.
and I will try a foil shield covering the area that was browned within 5 minutes last 'bake' 2 , 3, or perhaps more layers of foil to dissipate the heat more evenly within the bowl , If I can par-bake without significant browning I can complete the bake using the actiftry with its paddle installed to rotate the rolls under the static hot air stream without any further concerns of an uneven bake,
I will probably discover that if i can prebake the rolls to firm without browning they will need to cool down and continue to loose moisture to firm up fully?
so NOT winning yet but eyes firmly set on the target..
Well Fil, this certainly is entertaining! You are probably the first person to ever stir buns as they baked. :)
What kind of flour are you using?
150ml of milk and 250g flour is between 56 & 60% hydration. 150ml milk=155g, but water makes up 90%, not 100% of milk, and there is yeast in the cup also, so close to 56% hydration. Even with the oil, that's a fairly low hydration dough for rolls. Then you added more flour during hand kneading.
So, although that air fryer doesn't have a top fan, it still blows too much heat onto the bun top. I have a feeling you'll work it out.
Hi Moe, Thanks for the friendly input, and I am happy to entertain..
The flour for loaf#1 was a slightly out of date(nov 2023) wheatmeal loaf mix (just add water etc.) so i supplemented with a spoon full of yeast. All subsequent attempts have used Tesco strong flour for bread dough and pizza bases.
Your mention of hydration levels provides me with some further reading subjects.. having manhandled many 50kg batches of bread pulling from the mixer dividing up for proofing i 'think' I have what seems like a damn good muscle memory for the optimum texture of a dough, but,, i could be wrong,, have been before.. and will be no doubt again in the future too. And when left to rise the rolls grew more horizontally than vertically and didnt meet 'firmness' expectations.
Having been deep down the rabbit hole of yeast through brewing, starting and maintaining a live culture of yeast in prep for a batch is no problem, - Talking of yeast how come none of the sour dough champions haven't isolated the 'golden' cultures and shared?? after all thats stage 2 after harvesting a wild yeast for brewing successfully?? I ask as i was expecting to find a thriving yeast swapping culture like found in many online brew groups.
Though i may just buy some of the 'easy yeast' next time i go shopping, and perhaps i may splurge on a brand of flour rather than the cheapest option on the shelf (supermarket own brand)
I had put the cakey texture down to a combination of less than optimal rising and perhaps over cooking.. So appreciate your input on that.
*Yes I have spotted the crust (light,med,dark) options on the machine, unfortunately it was not changeable for loaf #1,
loaf #2 was set to the dark option.. and ;(
Rolls batch #1 discounting the dents.. i would rate at 50% there.. I would be happy to achieve a credible soft bap Or a crusty roll. batch #1 was neither, thickish but chewy crust,
I have a dough mix in an oiled bag in the fridge (mixed late last night) on return home this evening i shall divide into 4 and attempt to rise and par-bake to solid.. and will grab a camera to record the results just dont judge the kitchen clutter..
Fil, don't mistake me for any kind of expert. I just try to make logical suggestions. (This part I'm whispering:"don't know about sour dough starters because I've never made one.") I would say there is no gold standard for a starter. They all seem different and the results are many & varied, even from the same recipe, and there are many recipes.
Your dough shouldn't be flabby if the hydration rate truly is between 56% and 60% and the kneading was adequate. For that, I refer you to a real expert, Mariana. Hers is the second post on this thread and has pictures. The thread is about crispy, thin cursts, but the information on gluten development is universal. https://www.thefreshloaf.com/node/54803/chasing-thin-crispy-not-thicktough-dough TXfarmer also has some excellent info on gluten development in her posts on soft bread.
Another consideration is under and overproofing. I believe overproofing can cause problems in maintaining shape. There are so many vaiables: maybe a little more liquid than what was noted, a little underkneaded and/or overproofed. None of the above, or a combination of things.
Strong flour is good. I thought you might be using a very low protein flour when you said the bun was cakey and crumbly.
I'm sure you'll perfect the recipe. That really is the easy part. Cooking them in the fryer is the tricky part.
Cheers Moe, your suggestions are welcome, and far better informed than my vague ideas.. thanks for the links and pointers, i shall chase them down..
Ok so I have an sd card full of pics but need to down size them below 2mb apparently, I guess this sites apparent antiquity is testament to its quality if the 'aint broke-dont fix it' approach is taken..
well I have 4 x rolls finishing off and cooling down in the air fryer,
i did not par bake - cool- reheat them, but cooked under a foil heat shield for 5 minutes before reforming the shield to cover less while doubling up over the closest areas and heating a further 10 minutes after which i swapped the rolls around and heated again for 5 minutes with a foil sheild and 1 minute without before leaving to cook/cool in the closed air fryer to retain heat. (browning started as soon as the shield was removed.. )
While kneeding and forming the dough from the fridge i scoffed the last roll from batch no1, and no trace of cake beyond perhaps the sweetness from the sugar, so Im allowing this batch to fully cool before tasting critically (If fully cooked??)
Oven baking is not really an option, baking for one is not economical, i mean heating up the oven for a few rolls makes no sense, and given that the gas mark numbers washed off the oven knob within a year of purchase the sort of temperature control required isnt available atm. (thermocouple and battery powered reader bought but gathering dust)
So when i saw a youtube about air fryer bread i thought why not..
And thats been a good time to leave them, im off now to pull out and take one more pic..
I will get round to resizing the pics sometime and post later.. with any stirring action that may follow too.
Pics
First 3 minute cook..
next 10 minute cook
Swapping about and cooking for 5 more mins
removing the shield
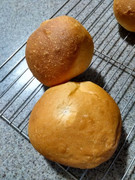
and cooked??
and cut
and yum
86% success, crust is a bit 1/2 and 1/2 still..
That last comment may seem flippant, dont misunderstand me i am VERY pleased to get such results so quickly..
and would be very content to bake up rolls of this quality for 35-40 minutes expended, a bit more air fryer intervention than i initially expected but that may get refined still..
Only other time i tried to flex my ex-baker cred was way back about a year after leaving the job trying to impress a girl with pizza base mixing.. that went way worse,, though the girl was kind and took pity on me appreciating the effort if not the results..
I was wondering if there was any kind of lidded container you could put the buns in that would fit inside the basket. That would protect them from much of the direct heat, give them some steam, and the pan would be easy to turn if needed. Then I thought of an angel cake pan. Would the open tube fit over the hole where the paddle was removed? This pan is 5.7" in diametre and 2.2" high. Might fit.
I hope you don't give up on baking bread in the bread machine. I haven't tried it, but I don't see why you couldn't do buns in one. So what if it's just a small quantity of dough? Four buns should fit well in the pan. I'm going to have to investigate this. If I can't find anything online, I'll make 'em myself.
thanks again for the input, as well as the kind words. The cake tin insert idea is worth looking into, i will measure up and have a look at whats available, but as the paddle sits over and in a similar centre (english spelling) off centre positioning wont be an option.
i can cut down the time taken with a better shaped with more layers foil shield to protect from the hot air jet and expose more crust to the ambient heat perhaps? attempt 1 was crumple n stuff.. iirc ideal bake time is about 10-12 mins for rolls this size placed into a hot oven
texture wise these are spot on, 100% bread no cake..
leaving to cool in the machine was a mistake CONDENSATION!! thats what probably happened to loaf no2 too doh!!
And I think the slower acting yeast not providing a sufficient rise could also have contributed to the cakey texture of loaf #1
I will not be giving up on the bread machine either, since i plan on pulling the paddle from future loaf attempts re forming the dough into 4 x rolls squashed together is certainly worth a go, and if after following the pointers you kindly provided i can select the crust composition through the recipe, that sure sounds delicious for a soft bake..
but next i am attempting to mix a 2lb(1kg) batch of 'good' dough,so 1/2 i can bag up in the fridge while using the rest for rolls while i refine the air fryer baking. Then i shall google the 'fridge life' of bread dough... ;)
Thanks again for the input I could still be pondering and considering if not nudged onward by yourself..
Your actifry has me a bit confused. I looked up videos, but I'm not clear. I thought the paddle was attached to a centre (I'm Canadian) shaft that could be removed. This would leave a raised? hole in the middle over which the cake pan tube might fit.
I'm glad you said you were going to try soft buns today. When I checked my bread maker pan I saw it's too small for 4 stand-alone crusty buns. I need a few buns for supper, so I'm going to try something with the bread maker. I still want to bake 4 buns that aren't attached to each other. Stay tuned...my ideas are bordering on Rube Goldberg territory.
And is certainly a bit of a puzzle..Only thing i can think of would be using some grease-proof paper or perhaps silicone to separate, cupcake-esq? my own thinking was to hope any shaping of the separation of the rolls would remain evident through the rise and give low points to tear free individual quarters? perhaps with some knife guidance??
looking forward to hearing what you have planned and how it goes, will keep the digits crossed this end..
I have yet to delve into my recommended reading for the dough consistency and am focusing on repeating the same/better? results with the current set up right now, to confirm the recipe, and ensure it wasnt a fluke.. fwiw next day the last roll was still very tasty, so looking good for a prep the night before sandwich lunch.
Rather than waffle on about my actifry (best kitchen toy ever..) here is a pic of the bowl without its handles etc from a spares seller.. there are a few different models,mine is the current/latest? being just over a year old now, so out of warranty -er??
I use it for Chips.. and 'grilling/baking' thinner things upto 2" thick in the tray fitting, at least once or twice a week and have tried the other features like stirfry meal cooking and auto stirred pasta sauce, but as you stlll need to stand by to add ingredients as and when, that novelty soon wore off.. And for chips and chicken wings etc its unbeatable.. stuff your face comfort sized portions for all zero under cooked if all chips have been cut evenly and only nominal charring of the sharpest thin ends.. a full load from spuds in 35-40 mins, and from frozen in about 25mins.
Worth the high price new imho tho i gota say that.. , and certainly worth the bargain prices on ebay here atm..
i dont work for tefal 'honest guv'..
Anyway this evenings rolls should have risen by now so im off to test my new improved heat shield idea (more layers front end only) for a shorter over all bake , well thats the idea, results may indicate otherwise..
good luck with your own buns ..
If you don't mind pulling the finished product apart, you could roll up the pieces like Japanese milk bread and place them sideways in the pan. They pull apart easily, but are more breadlike than bunlike.
So, my buns are done.
I put two buns on the bottom of the breadmaker. The placement of the other two would have to be above the lower ones. A small rack or trivet that sat halfway down would be ideal. Don't have one, of course. It would need legs, like a tiny table. The alternative was to suspend the buns in the pan. Again, a trivet with thin wires running upward, out of the machine, OR, two silicon egg poachers with holes at the corners. I tied them up with string to keep them suspended. Not an easy feat with one set of hands. My husband was out--just as well, or I would have had a lot of splainin to do. I couldn't open the lid or they'd tumble. I thought about tying weights to the ends of the strings, but that wasn't too feasible (as though any of this is).
Here are the egg poachers suspended inside the breadmaker. This machine has a large vieweing window.
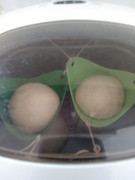
The buns turned out ok--edible anyway. The bottom ones were crusty, but a little flat, the silicon ones too light where they were covered, but brown tops.
I can say I made 4 crusty-ish rolls in the same breadmaker at the same time. And that is that. I'm totally mad.
That sure did surprise me 10 out of 10 for originality there.. They look great though you dont sound too pleased..
I had to double back when reading i first misunderstood and thought you tied that one handed!! That would be IMPRESSIVE.
If going suspended i would probably have opted for a diy bent wire rack in copper or steel the poached egg hammocks tho - truly inspired!! last thing i expected to see..
fwiw My batch #2 repeating the same recipe, with a new shield and NO intervention during the bake of 17 mins ..
As my dough is softer, I attempted to bake without crusting for a more bap -ish soft roll, meh,
Not given them a taste test yet.. am letting them cool properly for once.. But now they just might be ripe ;)
Brushing them with butter while they're hot will soften a too-crusty top. People have said cover them with a tea towel to soften, but I've never tried that--afraid of the results you got by cooling them in the machine.
It looks like you're on your way to baking buns in an Actifry. This last batch turned out really well. One day you'll have the only video on youtube showing how.
The tasting was a revelation, i selected the palest to try first, however it had an exposed corner not shielded so had a Very brown spot at its end.
Every thing i have baked so far has been OVER Baked!! this pale roll with one singed corner told me a LOT its the overbaking thats been responsible for the 'cakey' texture, oh so evident in the bun with one thick crust over baked end and the rest Lovely..
the 150ml warm water as a base for a yeast slurry with 300g of flour with a dribble to help the dough ball form immediately IS a top notch very lightly baked soft Bap recipe.. And i feel confident a shorter 14-15min bake is well worth testing next time.. (switched from milk to water..)
However i slipped up in mixing a stiffer dough (double batch) for bagging in the fridge, 8x rolls worth.. same as above but without the extra dribbles of fluid to aid balling up.. so not a Huge difference..in fact imperceptible in the dough when knocking down to bag. but will it show? If i 'bake' tonight i will find out.. dont know how soft bread rolls will go with the curry i need to heat up thats in the fridge for tonight tho.. I should chase down the links provided above and read up on this ..
Originally, you used 150ml milk and 250g flour. Now you are using 150ml of water and 300g flour. Other than the dribble, is that it for liquids? That is very low hydration:~50% + ? for the dribble. Put in perspective, my bagel dough is 56% and that's the driest thing I make. Those buns will stale very fast (if they hang around). The low hydration is probably also why overbaking was so hard on them. I thought the two lighter ones in the picture may have been a little underbaked, but if their hydration was around 50% that explains why they were fine inside. You said hydration was one of the things you were still going to research, so I will leave that with you.
A suggestion for future experiments is to try tangzhong or yudane. It increases softness and moisture content. Many recipes for Japanese milk bread using this method have quite a high hydration, 70+, but I've found that is not necessary. My bread is between 62-65%, with yudane, and is very soft. BTW, yudane is refrigerated overnight to develop flavour. That is not necessary, if you're not looking for the mild flavour it adds. It can be used as soon as it cools, just like tangzhong.
Another thing you could do with your present dough batch is give the buns a misting of water before they are shielded & baked.
As I said before, you will work out the right recipe for you--the baking part has come a long way in one week, wouldn't you say? A daft idea that is working.
(btw the above post was typed earlier but not posted until I returned home and looked in here)
batch #3 just cooked.. i erred, I focused on the shape and structure of the shield and not its position, hot air blasted down on the edge of one roll onto the next..
I decided not to intervene and allow the 15minute test bake to continue without interruption and heat loss, the well shielded rolls were not at all brown, whipping out the shield and pushing the rolls around until the 2 white rolls were directly under the hot air vent and restarted for 15-20 seconds which browned off the pale rolls perfectly lightly.
I decided to try brushing a bit of butter over the next to the directly heated roll as it was the most consistently browned,
no pics, no battery life in the camera atm..
I have been separating circa 110-120g of dough for each roll, 3 x this size should fit behind an effective heat shield, or perhaps 4 x 100g portions? One Long curled up baguette might work? but how useful?
The idea behind the heat shield is to capture the blown jet of hot air and to recirculate it into the cooking space in a less focused blast, (posibility of containing some water in a foil bowl?) the hot air is blown at a constant speed and temp 200c iirc focused down onto the one position in the cook bowl from above, cooked? rolls take seconds to brown under the heat such that a quick scoot under the vent to 'finish off' to an eye pleasing colour at the end of a bake is not a problem at all..
I decided to leave the curry in the fridge tonight and have got some ground beef for a couple of burgers, possibly with a few chips to garnish ;)
er? did you mean brush butter on rolls out of the 'oven' or going in??
I meant after they are baked, but still hot. Sorry if it was ambiguous. It softens the crust, if it needs softening.
Just in case you missed it, I posted something else above.
Phew, thats what i thought, but post action panic set in.. And thanks for the nudge about your pointer rich post above, Yes i did miss it.. disorganised me ..
I had not thought about expanding my horizons beyond 'local' breads, and familiar ingredients/adjuncts tbh im blown away its worked so well, last time I followed a youtube inspired 'crafting' idea the results were simply a costly mess.. this time round and even screw ups (with the aid of hindsight) were pleasing and eagerly devoured and it cost me £28 inc shipping for a 2nd hand bread machine..
I will be chasing down the links and pointers above, its just hectic during the day atm in a week or two i will back to being a lazy git with time on my hands.
- Yes the recipe post batch#1 changed to 300g flour and 150ml water following the comments made about hydration, Though in order to get the dough ball to form rapidly (cos i thought thats what was needed??) i had dribbled excess water in the initial mix (Not this current batch tho.. and the dough pre relaxation was much firmer.. post proving, not so different..)
I really dont know where i am or the full impact of hydration of the dough atm (but I will..) , as it stands a 15 minute cook time plus time directly under the hot air jet after to brown/crust to taste/please the eye is very workable. cooked with a barely brown light crust they make grand soft rolls that go very well with burgers ;) and perhaps with a 40second+blast of hot air post cook i could get a crusty roll too?? There is one way to find out...
Yudane is just boiling water & flour. Same recipe as you are using, only a percentage of the flour and water is used to make a dough or paste that is cooled and added back to the rest of the ingredients. The heat gelatinizes the flour so that it is capable of retaining more moisture. So, nothing exoitc. It's also called scalding. But that was just an idea for down the road.
Made a start with the reading, well youtube video watching, and have formulated a basic bake plan.. 15 minutes seems to be the ideal bake time, pretty much regardless of dough consistency/hydration.. (starting from cold, dough raised in the cook bowl, a 2 minute preheat while forming the rolls from the fridge sets the stage for a circa 60 minute rise before baking.
Crusting/colour is simply a case of exposing to the direct uninterrupted hot air flow. If fully shielded during the majority of the bake.
A 3 minute crusting seems ideal for a crusty roll 1 -1:30 minutes for a softer paler bake.
And i have become quite speedy in opening up whipping out the heat shield and nudging the rolls into a more advantageous position for colouring/crusting (under the hot air jet)
Thanks again for all the pointers, positive comments and encouragement.
Looking at my first complete failure atm tho, just a small batch of fruit rolls, soft dough recipe + 200g dried fruit on a whim, It didnt rise..
Too dry? didnt soak/rinse the fruit.... something like sodium metabisulphate used as a preservative on the dried fruit? I binned the empty bag..)
- My approach was to add more yeast and as it seemed 'hard' more moisture too..via a quick initial remix in the machine.. the result due perhaps in part to all the broken fruit was a very sticky dough which clung to both the breadmaker bowl and the silicone scraper i used to try and free it.. so if this rises it should be fun to form up..
So Consider the experiment a success and the start of a whole lot of further fun n games..
A dough that is very dry doesn't rise well, so that could be it. Now it's too wet, eh? Let me know how they turn out.
I made cinnamon raisin bread this week. The raisins were very dry & hard, so I soaked them. Big mistake. They pretty much disintegrated during the kneading cycle. The raisin "paste" made the white bread as dark as a rye. It tasted fine, though.
The more I learn about making bread, the less I know.
I call it a fruit bun dough, but its was in fact a hastily put together batch of 'softer' More hydrated (60%ish) mix of bread dough but i had failed to stir in the sugar into the yeast starter/liquid which was discovered when washing up while the bread machine was mixing. As i turned to the machine the old bag of dried fruit caught my eye and poor judgement allowed inspiration to strike.
The dough was mixed last night the empty fruit bag binned and collected this morning, (bins collected every 2 weeks not daily just pot luck it was bin day ..)
Some 'cheap' own brand or no name brand of dried fruit i have bought fairly recently did stand out in memory as containing sodium metabisulphate as a preservative. its a perfectly fine and safe preservative but uncommon in this particular use case, and a compound known to me as a sanitiser i have used when brewing, its also the ingredient of 'campden tablets' used by wine makers to kill yeast in a live/green wine prior to bottling.
It was a no name brand of sultanas i used...?? I did not check the label before throwing the empty bag away.
So If my fruit was preserved using sodium metabisulphate... DOH!! Ho-Hum ;)
Your plan to experiment with a bread maker and an air fryer sounds interesting. I wouldn't dare to experiment; it sounds too risky.