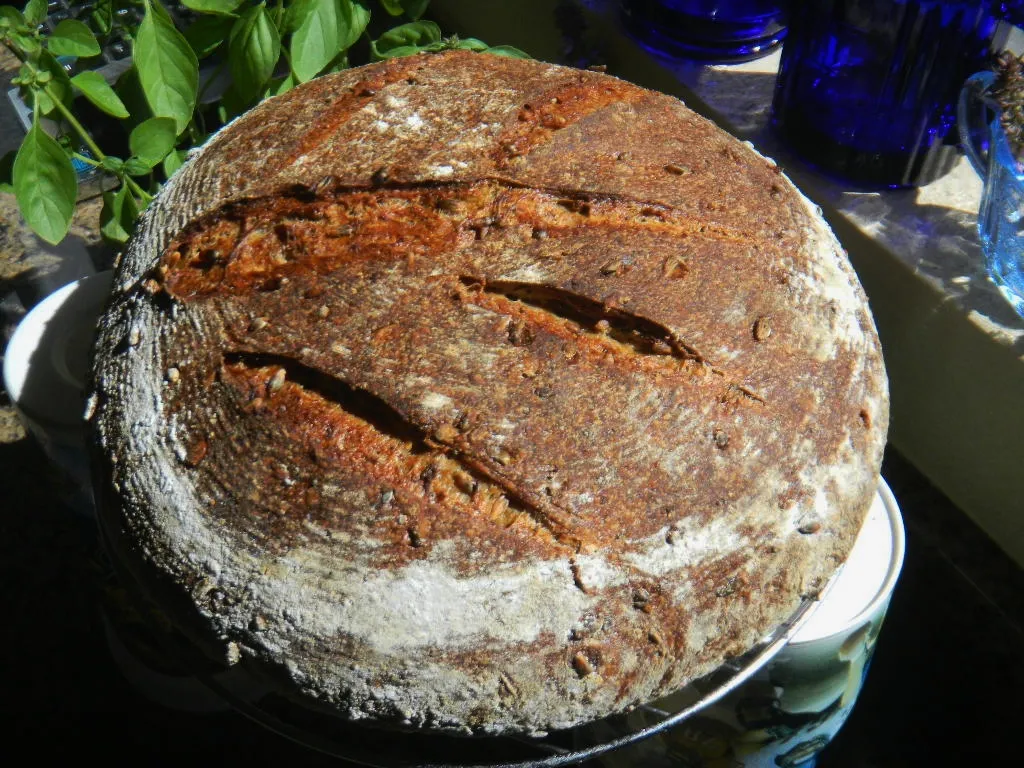
The Fresh Loaf

A Community of Amateur Bakers and Artisan Bread Enthusiasts.

Blogs

txfarmer's picture
txfarmer

Sending this toYeastspotting.
Click here for my blog index.

Holiday season is pumpkin season. Pumpkin in dishes, in pies, in cakes, in breads, and in croissants!

Pumpkin Croissant with Sourdough Starter
Note: for details and tips on making croissants, please see this post & this post.
Note: this recipe makes about 12 large danishes.

-levain
starter (100%), 35g
water, 59g
bread flour, 105g

1. mix and leave at room temp for 12 hours.

-final dough
bread flour, 422g
sugar, 68g
salt, 10g
instant yeast, 7g
butter, 21g, softened
pumpkin puree, 200g
water, 120g
levain, all
roll-in butter, 287g

1. Mix everything but the rolling butter, knead until medium gluten developement. Then follow the steps here.

Tried out two fillings. The ones at bottom were filled with dark chocolate, a safe bet that never disappoints; the top ones had a caramelized cranberry walnut filling, how very seasonal! Chocolate ones were easier to roll than the soft/mushy cranberry filling, that's why the bottom ones had more turns and appeared to be fuller/taller.

Both had pretty open crumb though. Love the golden hue.

Makes great holiday gifts

Franko's picture
Franko

Tom/toad.de.b recently posted  *here* about a new organic sprouted whole wheat flour he'd run across in his local market that is produced by One Degree Organic Foods. I was delighted to learn that One Degree OF is located here in British Columbia Canada, not far from Vancouver in the city of Abbotsford. One of our local supermarkets carries two of their products, the Organic Sprouted Whole Wheat flour that Tom featured in his post, and an Organic Sprouted Spelt Flour milled from grain grown in Lumby, located in the Southern Interior of B.C.

A rare treat indeed to have a locally grown grain to use and since I haven't baked with spelt in over a year the decision was an easy one to make. When I think of spelt breads, particularly100% ones as these loaves are, the nutty flavour of the grain is what first comes to mind, and not far behind that is the fragile nature of the dough due to it's lower protein content. What spelt flour lacks in gluten strength, aptly described by http://www.thefreshloaf.com/user/nicodvb as wheat's “poorer cousin” is more than made up for by its earthy, well rounded flavour that compliments a wide variety of toppings and accompaniments. Toasted almonds and dates were included in this mix along with honey and a touch of apple-cider vinegar. Increasing the dough's acidity just a little goes a long way toward strengthening a dough made from spelt or durum flour, both of which typically have low or poor quality gluten content. Although the One Degree flour shows a protein content of 13.3%, how much of that is gluten based isn't clear. If this mix had included a sour leaven of some kind I wouldn't have bothered with the vinegar but since I was using a spelt pate fermentee as the preferment I decided to hedge my bets by including it. Between the preferment, vinegar, or the flour itself I'm not certain which contributed more to the overall strength of the dough but it resulted in a mix that showed very little of the tearing so common with high ratio spelt doughs.

The loaves took on a rich brown colour during baking and I detected a whiff of the cider vinegar as it baked off but no evidence of it upon tasting. The primary flavours are those of the grain and the toasted almonds accented by a touch of sweet from the dates and honey. The crumb is fairly soft and moist with a very nice texture compared to other 100% Spelt breads I've made. Overall I'm quite happy with the final results of this bake and the performance of One Degree Organics Sprouted Spelt Flour.

Best Wishes,

Franko

Procedure: 

Other than the six hours it took for the pate fermentee to dome, indicating it was ready for final mixing, this is a relatively quick bread to make.

DDT 76-78F/24-25C 

  • No autolyse needed, just dump all the ingredients except the fruit and nuts in the bowl and mix by hand until the dough comes together. Knead for a few minutes (less than 5) until the dough begins to build strength and becomes smooth. If the dough begins to tear stop kneading and let it rest for 5 minutes before resuming.

  • Cover the dough and rest it for 15 minutes, then press it out to a disk and cover with the fruit and nuts. Fold the dough over and slowly work the fruit/nut mixture into the dough until evenly dispersed. The dough has 2-3 stretch and folds during bulk fermentation so any clumps of fruit or nuts tend to even out by the time it's completed BF.

  • This dough had 70 minutes BF time at 76F/24C with a stretch & fold at 20 and 40 minutes. After bulk was complete the dough was rounded lightly and rested for 15 minutes before scaling at 740 grams per loaf, then shaped and put for a final rise of 60-70 minutes. 

  • Preheat the oven and stone to 465F/240C. Watch the final proof very carefully during the last 20 minutes as an all spelt dough can over-proof quite quickly. When the dough has a little less than doubled remove it from the proofing environment and let it air dry for a few minutes before slashing.

  • With preferred steam system in place and oven vent blocked, slash the loaves as desired and place in the oven. Lower the temperature to 440F/226C and bake for 10 minutes, remove steam system, vent the oven and bake with convection on for a further10 minutes. Lower the temperature to 430F/221C and bake for a final 15 minutes, rotating the loaves if necessary for even colouring.

  • Check the loaves to ensure full baking either by tapping the bottom for a hollow sound or use a thermometer looking for an internal temperature of 206-210F/96-98C. Cover and cool on a rack for 6 hours before slicing.

Link to working spreadsheet *here*

winstonsmith's picture
winstonsmith

A couple months ago I was using my KA Pro 6 of a dozen or so years of age when it finally stripped a gear. I ordered parts and repaired it, but as I thought about it I realized that it no longer suited my needs. I expect it will last another decade or more, but it will be reserved for light loads.

The bagel formula I have been using is from Jeff Hamelman and I like it quite a lot. This time I decided to try the BBA, or at least a somewhat modified version. That makes a bakers dozen, which would have been too much for the KA since I use HG flour. Fortunately, I have a new Bosch Universal! I decided to double the recipe and see how the new machine worked.

I want to say right now that this post is not about a KA vs. whatever. The KA is a fine machine for many purposes, but it was never intended to make 26 large bagels worth of high gluten dough at once. Consequently any comparison between the two is irrelevant. Use what you have within its limits and if you move beyond it do so and remember the good things you've made rather than bemoan what you could not do. My 2 cents. 

Onward!

I followed the BBA formula as I've said, creating the sponge in the mixing bowl. Once it sufficiently proofed I added part of the flour to collapse the sponge. I've read that getting dough into the center column could be a problem so I incorporated the ingredients in two batches, mixing half the flour in for a few moments then in with the rest. In doing so I had no problems later.

One concern was that I wasn't sure just how long I should mix the ingredients. This was an untried formula in an unfamiliar machine. I decided that I would let it knead for 5 minutes and try to windowpane test it every minute thereafter. I found that 8 minutes provided sufficient time. I could have gone a little longer, but I don't like to over-oxidize. 

Please forgive the low quality cell phone pics. 

Here's the Beast with its first "victim" 


This may not look like much, but it's roughly 7 lbs of high gluten bagel dough which ultimately made 26 bagels of about 4&1/4 ounces each. That would have been impossible before, but the Bosch acted like it didn't care at all. 


I went back and forth on Hamelman or Reinhart and ultimately the latter won simply because I wanted to try it. That said I didn't depart entirely from my old ways and  follow everything to the letter. 

What follows is my standard work practice for bagels. 

I use an apartment sized fridge for retarding dough and I pre-cut sheets of parchment to fit the shelves. I then spray them lightly with Pam and rub it into the paper. I then  cut the number of portions from the dough ball which will fit onto the sheet and roll them into ropes and form the bagel. Onto the sheet they go and into the fridge after covering with plastic wrap. Once that's all done I let them sit for about 15 hours until the next morning.

I preset the oven to go off an hour before I woke set to 500F. The bottom two racks have rectangular stones and the top one has a large aluminum flat sheet. 

When I get up I take another set of parchment sheets sized to fit the stone and spray as before to avoid sticking.  I don a pair of surgical gloves and add three teaspoonfuls of lye to three quarts of cold water in a stainless pan. Note cold water. The reason the reason for that is lye will react strongly with water, and if the water is hot it could go everywhere, including yourself. Cold is definately the safe way to go.

There's a thread explaining the use of lye with bagels. Coincidentally it turns out the fellow who does this shares my profession and we both grew up in Philly. Small world, eh?

Once the water gets up to a boil I put 4 bagels in and flip them over at about 30 seconds for a total of a minute them remove them. One side of the bagel is flatter than the other and what I do is put whatever topping I want on the more curved surface and have that side down on the parchment. I then carefully take the hot sheet out of the oven and quickly slide parchment and all onto it. The reason being is that I want both sides to bake a bit, but not completely set. The hot sheet holds enough heat to start the process without burning the toppings and the flat side being exposed to the open oven has a chance to rise and round itself. I then use tongs and slide the parchment and bagels onto another flat sheet, close the oven and quickly flip them over. Back into the oven onto one of the stones. I'll repeat the process of boiling and topping on another parchment paper and repeat, then put that onto the other stone. Total baking time is about 22 minutes at 500F. With the oven opening and closing I doubt the oven stays quite that hot for the second batch so I may give another minute or two if needed. 26 bagels required three batches on the size stones I have and here's the results, minus several. 


I took some with me to work that morning and they were well received. They were nice and chewey with a light crunch when bitten into. I will have to try Hamelman again with the Bosch to compare the results between it and the Pro 6. There was better development of gluten this time, but there are too many variables to know why.

As far as the machine itself, I'm thrilled with it. I would have to do this in three or four batches and the time involved would have been prohibitive. I believe I could have done perhaps three dozen, but this is about the perfect quantity. 

cookingbyheart's picture
cookingbyheart

Vishwani Agrawal teaches his daughter, Chitra, to make traditional North Indian flatbread known as chapati or roti.

http://vimeo.com/30384978

It was a treat to spend the day with Chitra and her dad while we shot this piece and learned from a master. Chitra’s father, Vishwani, shares his method of making chapati, also known as roti, a flat bread most commonly prepared in northern India. Vishwani grew up in Allahabad, one of India’s oldest cities, where he learned to prepare chapatis by watching his mother and then as time went on, by refining his own technique. On the shoot, Vishwani told us about leaving home for college, which is when he first began making chapati. Later, when he met his wife, Prathima, he continued to make chapati. Prathima is from south India, where rice is more commonly served as a staple. To this day, Vishwani remains the primary chapati-maker of the house. And since Vishwani and Prathima make chapatis weekly, they’ve become masters. It seems like making any kind of bread dough takes some experimentation to get it right.

When I asked Vishwani about the importance of passing down the tradition, I was excited by his response. He pointed out that traditions are not a one way street. They aren’t blindly passed on and can’t be forced onto the next generation, but rather they are actively accepted, practiced and kept alive by the younger generation. It’s refreshing to hear a different perspective and to consider that we are not just vessels but we are active participants in creating new traditions and keeping old traditions alive. Vishwani can teach what he knows, but it’s up to Chitra to keep it going, if she so chooses. As he tells Chitra, he teaches procedure, technique is what you figure out on your own.

Vishwani and Prathima reside in Alabama, where they both work in the Computer and Electrical Engineering Department at Auburn University.
Chapati

Ingredients (makes 6 rotis)
1 cup of flour
~1/2 cup lukewarm water
extra flour for rolling

Method
Sift the flour into a bowl and slowly add water while kneading until you get to a dough that is soft, smooth and pliable. The longer you knead the dough the better but 5 minutes of heavy kneading will do.

Take the dough ball and cover with a damp cloth for a minimum of 30 minutes (you can also make the dough and put in your fridge for making another day).

Divide the dough into 6 dough balls or loee and roll them in flour.

Flatten each each dough ball with your palm and roll out to a 6 inch diameter, using extra flour so it does not stick.

Heat an iron skillet on medium heat. When it is hot (water drops should sizzle immediately), place roti on.

Let it cook and when you start to see bubbles form in many places, flip it over and cook until the other side does the same.

Over a medium flame, with flat tongs or chimta place the roti until it blows up or browns on both sides. (If you are cooking on an electric stove, you can press the roti in different places with a cloth to make it blow up a bit right on the skillet)

With the tongs, hit the roti against a surface to shake off any excess flour.

Butter one side with ghee and place in an airtight container lined with paper towel.

Music: Boss City by Wes Montgomery; Evelyn by Dabrye; Pacific Theme by Broken Social Scene; Cause=Time by Broken Social Scene; Little Chin by Tommy Guererro

Vishwani and Chitra, thank you for sharing. Franny & John, Thank you for letting us take over your apt for the day! Sintalentos, thank you for your musical consultation. Michael Legume, thanks for the audio equip. Paul, you’re the best.

greedybread's picture
greedybread

Fou…Fou…Fougasse….Fresh from the oven…

Carrying on my crush on lovely Richard Bertinet, I decided I really should try his Fougasse as it looks so easy!!

Very yum!!

This recipe is from his first book “Dough”.

It seems to be quite simplistic, but for people who have never baked bread before, he gives you delicious recipes, confidence and a full belly..

And before you know it, you are onto the complex buggers like Gubana or Panettone!!

“You are on your way baby…”

I like to call it the breaking in book…If I have a crappy baking week, I choose one of his recipes to give me a boost!!

Very fougasse!!

looking like the mask in Scream!!

This bread does though remind me of the mask in Scream.

Can you see it? Or am I mad?

Anyhow enough blathering…you will not believe how easy this recipe is!!

LETS GET YEASTY!!!

What will you need?

15g dried yeast

500g Strong Bakers flour

10g Salt

350 mls water..

Easy peasy dough…

Warm the water and add in the dried yeast and allow to become frothy.

Combine flour and salt and give it a mix, then add in the yeasty water and form a soft dough.

Knead for about 10 minutes until smooth and elastic.

Place in lightly oiled bowl and cover, standing for an hour.

Scream!!

ready to bake..

Preheat oven to 250 celsius.

Sprinkle semolina on the baking tray paper  or onto the baking stone but if doing on the stone, do 5 minutes before bread goes in:)

Turn dough out on floured bench/ board.

Cut into 4 pieces .

Be very gentle and roll out or use fingertips to spread out the dough as my pictures above show.

There is no right or wrong shape really.

Then slice 4-5 cuts in the dough and pull apart.

Place on baking tray. and sprinkle with a little flour or semolina.

cooling…

Open oven, give a quick mist on the walls, place the tray in the oven and shut the door.

Turn the heat to 230 celsius and bake for about 10-12 minutes or until golden brown.

Remove from oven and cool on racks.

look at it!!

ready to eat!

Someone has had a bite!!

And another…almost gone.

I will try a more complex recipe that I have, and let you know how that goes.

A wheaty one too maybe nice….maybe I could slip in the wholemeal again:)

Great bread for dips and salsa’s.

ENJOY, ENJOY, ENJOY!!

Gorgy!!

mwilson's picture
mwilson

Christmas is fast approaching and life has been quite hectic recently... 

I simply don't have time to maintain my beloved lievito 2.0. So instead with the little time I have had, I made my regular yeasted version of Pandoro.

It has a wonderful aroma thanks to the cocoa butter, vanilla, lemon, and fancy pandoro sugar. Although this version lacks the softness typical of the real thing made with natural yeast.

Well mixed dough.


Primo (30C ~4hrs)

62.0 Biga (50% hydration)
62.0 Flour
2.0 Instant yeast
4.0 Water
21.0 Sugar
48.0 Egg

Secondo (30C ~4hrs)

140.0 Flour
82.0 Sugar
96.0 Egg
14.0 Water

Terzo (24C ~12-14hrs)

140.0 Flour
62.0 Sugar
10.0 Honey
5.5 Salt
48.0 Egg
17.0 Milk
31.0 Water
228.0 Butter
16.0 Egg Yolk
23.0 Cocoa Butter
Flavouring (seeds from one vanilla pod + zest of one lemon)
1111.5

Final dough, total % ingredients:

100.0 Flour
59.5 Butter
50.1 Whole Egg
43.0 Sugar
18.2 Water
6.0 Cocoa Butter
4.4 Milk
4.2 Egg Yolk
2.6 Honey
1.4 Salt
0.5 yeast

Pandoro sugar

100 Icing sugar
70 Potato flour
6 Cocoa butter
6 Rum
- Vanilla seeds

Sorry for the rushed post... errand's to run.

Michael

Wandering Bread's picture
Wandering Bread

Hey y'all. Has anyone here ever baked with Swiss "Ruchmehl"? I just tried it for the first time and I really like it. It's somehwere between medium and whoe wheat. A lot of flavor but can still hold together gluten wise. 

I'm only here in Switzerland for another week so I figured it was time to give this a try. Now I'm wishing I had done it months ago!

It was super tasty with a full wheat flavor and a crunchy crust with a cool, soft crumb.  

I also wanted to say it's been very inspirational to read all of your posts in tribute to Eric. I wish I had been around to get to know him, he clearly had a huge impact on many of you, who have in turn had a large impact on me. I am very sorry for your loss and I am grateful for his legacy here.

-Ryan

Ruchbrot formula at Wandering Bread

Isand66's picture
Isand66

There are many things in my life that I have a passion for, with bread  being near the top.  Recently I was very saddened to learn of the sudden passing of a terrific baker and person Eric Hanner.  Eric was a frequent contributor on The Fresh Loaf website and he inspired me with his passion for baking and touched a great many people along the way.

His willingness to share his vast baking experiences and cooking expertise as well photography pointers left an unforgettable mark on all that came in contact with him.  One of Eric's favorite recipes was his Jewish Rye which goes great with his homemade pastrami.  I had a spirited conversation with Eric regarding our pastrami passion and  I couldn't wait to try his pastrami after I had baked his famous rye.

In tribute to Eric I offer my own inspired Jewish Rye (I'm Jewish...therefore it's a Jewish Rye :0).  I have not used my yeast water starter in a while so I refreshed it with some oranges due to my apples having gone bad.  I also created a rye sour converting my AP starter in 3 stages including adding sautéed onions in stage 2.  Both starters were finished by bringing them from 100% hydration to 65% hydration.

I also picked up some interesting ale at the local supermarket which was brewed with lemon peels, ginger and honey so naturally I needed to use some in this rye bread.

The final loaf ended up being by far one of the best rye breads I have  made to date.  The onions combined with the 2 starters and the ale made this a wonderfully tasty moist bread perfect for a pastrami or corned beef sandwich or a smear of cream cheese.

Procedure

Yeast Water Starter Build 1

60 grams Pumpernickel  Flour (KAF)

60 grams Yeast Water Starter

Mix the flour and Yeast Water in a bowl until thoroughly combined.  Cover the bowl and let it sit at room temperature for around 6 hours.  The starter should almost double when ready to proceed to build 2.

Build 2

Add ingredients below to starter from above and mix until incorporated.  Cover with plastic wrap and let sit at room temperature for 6 hours.

100 grams Pumpernickel Flour

100 grams Yeast Water

Build 3

Add flour to starter from above and mix until incorporated.  Cover with plastic wrap and let sit at room temperature for 4 hours or until bubbly and either use immediately or put in the refrigerator for the next day.

100 grams Pumpernickel Flour

10 grams Yeast Water

(Note: I made extra starter since I wanted to use this for another bake.  You can cut the amounts down to make the 125 grams needed in the recipe)

Rye Sour Starter Build 1

63 grams AP Starter

63 Pumpernickel Starter

75 grams Water

Mix the flour, starter and water in a bowl until thoroughly combined.  Cover the bowl and let it sit at room temperature for around 4-6 hours.  The starter should almost double when ready to proceed to build 2.

Rye Sour Starter Build 2

100 Pumpernickel Flour

100 grams Water

123 grams Sautéed Onions (sautéed in olive oil)

Mix the flour and water with the sour starter from build 1 along with the onions.  Cover and let sit at room temperature for 4-6 hours until doubled and nice and bubbly.

Rye Sour Starter Build 3

102 grams Pumpernickel Flour

Add the flour to the rye sour from build 2 and let it rest covered for 4-6 hours until bubbly and nearly doubled.

Main Dough Ingredients

300 grams Rye Starter from Above

125 grams Yeast Water Rye Starter from Above

400 grams First Clear Flour (KAF)

80 grams White Rye Flour (KAF)

50 grams Rye Chops (KAF)

30 grams Potato Flour (KAF)

357 grams Tenacious Traveler Shandy Ale

18 grams Seas Salt or Table Salt

8 grams Caraway Seeds

1 Large Egg (for egg wash only)

Procedure

Build your Yeast Water levain and rye sour starter the day before you are ready to bake.

The evening before you want to bake, mix the flours, rye chops, caraway seeds and the ale.  Mix on low-speed in your stand mixer or by hand for about 1 minute until the ingredients are combined.  Let the dough autolyse for about 20 minutes to an hour.

Next add both levains along with the salt and mix for 4 minutes on low.  The dough will come together and be slightly sticky.  Place the dough in a slightly oiled bowl and do a couple of stretch and folds.  Cover the bowl and let it rest for 10-15 minutes.  Do another stretch and fold in the bowl and let it rest another 10-15 minutes.  Do another stretch and fold and let the dough sit out in the covered bowl for another 1.5 hours.  Place the dough in the refrigerator until ready to bake the next day.

When ready to bake take the dough out and leave it covered in your bowl for 1.5 to 2 hours.  Next divide the dough into 2 loaves and either place in a banneton or from into batards and let them rest in floured couches for 1.5 - 2 hours.

About one hour before ready to bake, set your oven for 500 degrees F.and make sure you prepare it for steam.  I have a baking stone on the top shelf and the bottom and use a heavy-duty rimmed baking pan that I pour 1 cup of boiling water into right as I put the loaves into the oven.

Score the loaves as desired and brush each loaf with a simple egg wash using 1 whole egg and a couple of teaspoons of water.

When ready to bake place the loaves into your oven on  your oven stone with steam and lower the temperature immediately to 450 degrees.  It should take around 30 minutes to bake  until the rye breads  are golden brown and reached an internal temperature of 200 - 205 degrees F.

Let the loaves cool down for at least an 2 hours or so before eating as desired.


txfarmer's picture
txfarmer

Sending this to Yeastspotting.

Click here for my blog index.

A couple of years ago, after having posted quite a few blogs on thefreshloaf, I got a private message from a TFL member I never conversed with. His name was Eric, and he wanted to teach me how to improve my photography. Now, this message could've come off as insulting or arrogant, but not when it's from Eric. Eric's sense of generosity, enthusiasm, sincerity, and kindness shines through across virtual world to reach me, who in fact desperately needed exactly that: photograpy 101. (Do you know he actually did teach photography lessons on the side? Multi-talented that man was...)

From there on, he was a kind friend yet a strict teacher. He never shied away from telling me exactly what I was doing wrong, however, he also was always patient, kind, and encouraging. I know I can show him what I have done and hear  his honest opinion without sugar-coating. Without his lessons, I couldn't have had improved so quickly.

Truefully, he taught much more than what I could digest at the time. He knew that, yet he was never frustrated with me. He just smiled whenever a light bulb came on and I emailed him with all CAP letters yelling: NOW I KNOW WHAT YOU MEANT BY ...

Recently he has posted less, but we still exchange emails from time to time. Even though we've never met in person, but I feel he's one of my most repsected teachers and friends. Then the news came and I was in shock and disbelief. 

So, Eric, this one is for you. It's now my favorite too. RIP.

A few notes: Eric's original recipe is here. I have no First Clear Flour on hand, so I used a blend of WW and bread flour. 


GSnyde's picture
GSnyde

I baked five smallish loaves of the wonderful Five-Grain Levain.  Not much to add to my forum post on the subject (http://www.thefreshloaf.com/node/31273/adjusting-bake-time-and-temp-smaller-loaves), except some pictures.

Glenn


Pages

Subscribe to RSS - blogs