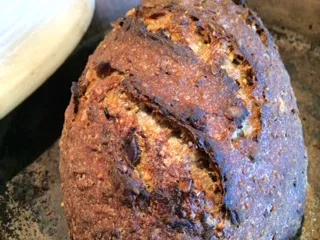
The Fresh Loaf

A Community of Amateur Bakers and Artisan Bread Enthusiasts.

Blogs

andychrist's picture
andychrist

 SD Sweet Potato Spinach Nyetzel Rollz


jaltsc's picture
jaltsc


I remember the old fashion bagels from my youth. Today's bagels, even those in NYC, are much larger, paler, and not as dense as the ones I remember. Contrary to popular belief, the original bagels were much smaller than today's. They were 2-3 ounces. I make mine around 3 1/2 ounces (90-95 grams after baking). I grew up in the Bronx and use to watch the union bagel bakers from local shop 338 forming and baking bagels at the Nelson Avenue bagel bakery. The guy who formed the bagels would cut a two inch square section from a large block of dough. His left hand would roll the piece into a cylinder shape, wrap the dough around his right hand snap off the right size piece and roll it into the proper shape. I don't have their skill. However I use the rope/dog bone method (described in the following recipe) and get quite good results. The hole is large after forming and after the boiling. It shrinks during bakes as the bagel expands during baking. I find the hole necessary for proper baking. I also bake the bagels on wooden slats. I use 1/3" (1 cm) teak wood which fit into sheet pans. The original wood used was redwood. I find this prevents the bottoms from becoming flat, harder and browner than the tops. I turn the bagels over when they reach the proper color. If I put on toppings, I dip the bagels into the desired topping right after boiling and place them with the topping side down until I put them on the wood, right side up. This helps the toppings stick. The results I get are bagels with dense and crisp surfaces and a slightly softer interior.  The process is a bit complex, but the results are excellent. Luckily for the diaspora who have decided to retire in my small village, smoked salmon and Philadelphia cream cheese are now available at our local market.

24 BAGELS 

 1500 Gms +3/4(70 gm)  C          Bread flour

       2                              T          Wheat Gluten (Much better texture)

  900                               Gms      Water    (57.6% Hydration)

      2                              T          Diastatic malt powder  

      2                              T          Salt      

 100                               Gms.     Sourdough Starter

     1                               t           Yeast


Combined all ingredients including salt. Autolyzed  for 15 minutes

Mixed for 8 minutes.

Dough was dense and smooth. Good window pain.

TOTAL WEIGHT:     2675 gms.

Let rest for 90 minutes in refrigerator Dough was very smooth.

Divided each batch of dough into two pieces (4 batches altogether).

Left half in refrigertator to keep cool.

Weighed out 12 bagels @ 110gms.

Formed rolls and then formed into logs.

Rolled into 14 inch dog bone shaped rope.

Formed bagels by wrapping rope around my hand and rolling the thicker ends until they blended into each other.

Placed in pans, with moderate dusting of cornmeal. Covered with plastic

Let rise for 20minutes.

Repeated with other batch

Refrigerator was at very cold setting. Dough was very chilled, solid, but not frozen.

NEXT DAY:

Placed trays into freezer for 20 minutes to get full chill and make dough more solid. 


Added 2 T blackstrap molasses (To help with coloring during baking) and 4T baking soda (To produce a tougher surface).

Boiled, starting with flat side down.Removed as soon as they floated to the top.

Put on toppings and set them face side down.

Turned them face side up and placed on boards.

Keeping Bagels extra cold had very positive effect on maintaining the proper shape and density.

Baked @ 400F+ degrees on middle shelf.

 Turned trays around after 5 minutes. Maintained 400F Degrees.

Baked until bagels turned medium brown. About 10 minutes. (Times may vary depending on oven used)

 Turned turned bagels over...top side down. 

Turned trays around after 7 minutes (19 minutes total time).

Baked additional 12 minutes, for total time of  34 minutes.


CeciC's picture
CeciC

Baguette - 36Hr Rye n Wheat

Main recipe
WeightIngredientBaker's %
315.00Wheat flour, white (industrial), 13% protein, bleached, enriched62.38%
100.00Wheat flour, white (industrial), 9% protein, bleached, unenriched19.80%
40.00Wheat flour, whole-grain7.92%
50.00Rye flour, dark9.90%
370.00Water, tap, drinking73.27%
10.00Salt, table1.98%
885.00Sub total175.25%
Levain
WeightIngredientBaker's %
40.00Wheat flour, white (industrial), 13% protein, bleached, enriched7.92%
40.00Wheat flour, whole-grain7.92%
80.00Water, tap, drinking15.84%
160.00Sub total31.68%
Final stage
WeightIngredientBaker's %
275.00Wheat flour, white (industrial), 13% protein, bleached, enriched54.46%
100.00Wheat flour, white (industrial), 9% protein, bleached, unenriched19.80%
50.00Rye flour, dark9.90%
290.00Water, tap, drinking57.43%
10.00Salt, table1.98%
160.00Levain31.68%
885.00Sub total175.25%

My second attempt at Baguette. Using 36Hours Formula it gives nices volume and a lot easier to handle this type of wet dough. The cross section is much better than last time too. 

I really hope I can create one of the best Baguette for my uncles memorial. Hope he is Rest in Peace.


dosco's picture
dosco

I used Reinhart's recipe from BBA with some deviations ...


- I made a 1/2 batch

- I used sourdough levain with about 1g of commercial yeast as leavening

- 4 day fermentation in the refrigerator

- Slightly heavier bagels at 6.75 oz/bagel instead of 4 oz/bagel


Yesterday morning I cut the dough into 6.75 oz pieces and formed them into 5 small boules. Last night I pinched the middle, poked my finger through, and formed them into torus-shaped bagels. They went back into the fridge and this morning I setup the water+lye solution and heated the oven to 450dF. I boiled each bagel for about 70 seconds, and then baked until deep brown (I'm not certain of the time but would estimate it was about 20 minutes of baking).

Parchment is a necessity as I tried baking 2 directly on my stone and they stuck. I was able to "save" them without much damage.

As you can see by the pic I need to do a better job on shaping.

I just ate about 1/2 of one and it is tasty. It has the proper consistency, nice doughy and tight crumb with a firm, flexible, and crunchy crust. Nice.

I'll definitely be making these in the future. I think I'll incorporate some other flours as this batch was 100% KA bread flour. I'll also put some toppings on ...

Cheers-
Dave


limmitedbaking's picture
limmitedbaking

Hi all back to posting after a long hiatus. Inspired by the numerous Tartine 3 breads that have been popping up over thefreshloaf and reminded by a post that is filed under my to-bake list, I decided to make a Polenta Pepita Sourdough over the weekend. 

I mainly followed the Marcus's recipe here: http://www.thefreshloaf.com/node/34729/polenta-pepita-sourdough but instead of soaking in boiling water, I cooked up a batch of polenta by stirring it over the stovetop over low heat. Here's my take on it:

Sourdough

Metric

1 kg

Bread Flour

180

92.78

Water

125

64.43

Mature sourdough culture

35

18.04

Total

340

175.26

Cooked Polenta


Polenta

40

20.62

Water

160

82.47

Total

200

103.09

Final dough


Bread Flour

660

340.21

Whole Wheat Flour (15%)

150

77.32

Water

520

268.04

Salt (2%)

20

10.31

Cooked Polenta (15%)

150

77.32

Sunflower Seeds (10%)

100

51.55

Sourdough

340

175.26

Total

1940

1000

Mix all and autolyse for 20 minutes. 
Bulk ferment for 3 hours with 4 S&F at 20 minutes interval.
Proof for 1.5 hours and bake at 230C for 40 minutes.

I think the difference between the two approaches show in the final result. The cooked polenta totally disappeared into the crumb resulting in a softer texture bread but no noticeable specks of polenta. My bread's crumb turned out slightly off yellow rather than the yellow in Marcus's picture. There is no gritty bite of the polenta too.

But otherwise the texture was good with a nice slight chew and sweetness probably from the cooked grains. Next time, I will further bump up the polenta to 20% and try the soaking method instead. Now off to trying other porridge breads!

-Tim

CAphyl's picture
CAphyl

I adapted the Hamelman recipe below, as I really wanted to make a multi-grain bread with a soaker. I didn't have any bulghur, so I used cous cous instead. I continue to go for the bold crust, so I allow a little extra time on the bake.

It is just so much fun getting that soaker going, isn't it?

The liquid levain got so bubbly and smelled great.  I had to push this a bit, as I indicated in the recipe below.

I love my covered baker and used it for this recipe. I have started using the oblong covered baker a bit more with better results than my early bakes.  I never tried this before, but for this bake I proofed the dough in the baker (with a bit of cornmeal underneath) and pre-heated the lid. I have always found it difficult to transfer the proofed dough to the baker, even using parchment paper.  This new system worked well, with a nice bake underneath and a bold bake on top.  In fact, in the past the bread would be a little overdone underneath, and this was just about perfect, so I think this is my new method for this baker. There was good oven spring as well and decent height.

I am always concerned about the crumb, but it was fine for a dense bread like this.

I got in trouble with my husband as I snatched his sandwich for a photo just as he was getting ready to take a bite!  The bread was crusty, tangy and very nutty.  Delicious.  It's nice to know that you can vary the soaker and still have very good results.  Phyllis

Five-Grain Levain Bread

Adapted from Jeffrey Hamelman’s Bread: A Baker's Book of Techniques and Recipes

Makes 3 medium loaves
Overall formula
Bread flour 680 g
Whole wheat flour 226 g
Cous cous 82 g (I didn’t have Bulghur as called for in the recipe, so I used the same amount of cous cous)

Flaxseeds 82 g

Sunflower seeds 71 g

Oats 71 g

Water 890 g
Salt 22 g

Total 2.13 kg


Liquid Levain build
Bread flour 226.8 g
Water 283.5 g
Mature culture (liquid)  45 g


Soaker

Cous cous 82 g

Flaxseeds 82 g

Sunflower seeds 71 g

Oats 71 g

Water, boiling 400 g

Salt 5 g (1 teaspoon)


Final Dough
Bread flour 453 g
Whole-wheat flour  226 g
Water 250 g

Salt 17 g (1 tablespoon)
Soaker all of the above
Levain all less 3 tablespoons


Baker Percentage

Bread flour 75%

Whole wheat flour 25%

Cous cous  9.2%

Flaxseeds 9.2%

Sunflower seeds 7.7%

Oats 7.7%

Water 98%

Salt 2.5%
Total 235.1%

METHOD

  1. Liquid-levain build: Make the final build 12 - 16 hours before the final mix.  I ran out of time, so I accelerated this to seven hours, placing the hot soaker on top of the levain build bowl.
  2.  Soaker: Make the soaker at the same time when making levain build. Pour the boiling water over the grain blend and salt, mix thoroughly. Put it in a covered container and sit at room temperature.

3.  Mixing: Add all the ingredients to the mixing bowl except the salt. Mix or stir the ingredients together until it becomes a shaggy mass. Cover the bowl with cling wrap or plastic bag and let it stand for an autolyse phase for 20 -60 minutes. At the end of the autolyse, sprinkle the salt over the surface of the dough and mix on a medium speed for 3 -5 minutes until the medium gluten development is achieved.

4.  Bulk fermentation: 1 to 1 ½ hours or 2 hours if the dough is retarded overnight. (I bulk fermented for 2 hours with a fold over with my dough scraper at the 1 hour mark).

5.  Folding: If the fermentation is 1 ½ hours, fold once after 45 minutes.

6.  Dividing and shaping: Divide the dough into three equal pieces, pre-shape the dough into round. Cover the dough with tea towel and let it rest for 15 minutes. Final-shape the dough into either oblong or round. (I froze the other two loaves, which were a touch smaller than the one I baked.  It will be interesting to see how these come out when I bake them later).

7.  Final fermentation (proofing): Retard the loaves in the refrigerator over night.

(I baked my loaf in my covered baker.  I proofed the loaf in the bottom of the covered baker with cornmeal on the bottom.  I preheated the top of the baker at 500 degrees and allowed the loaf to warm up at room temperature while the oven preheated.  I baked the loaf with the cover on for 30 minutes at 500 degrees and then took the lid off and lowered the oven to 435 degrees convection.  If you don’t have a covered baker, the original recipe instructions follow).

8.  Baking: with normal steam, 235C for 40 45 mins, turn the loaves half way through the bake.


phinnia's picture
phinnia

I've been reading for a while and took this opportunity to post.  Made some granary style loaves today from a KAF recipe: the bread pans were a bit big for the loaves (9x5) but the final product was absolutely delicious, with a slight crunch and a bit of malt flavoring. 


(sourdough starter in the background) :)


Phin

amberartisan's picture
amberartisan

Lately I have been learning how to bake baguettes and have been experienting with various formulas and methods. I have never been able to make the usual 66% hydration baguettes work, so I typed 'high hydration baguette' and got weekend bakery's <a href="http://www.weekendbakery.com/posts/recipe-for-80-hydration-baguette/">80% hydration baguette</a>, which made a good crumb and okay flavor, but was quite difficult to shape and score (obviously) and formed a rather crunchy crust (as opposed to crispy), due to the use of high-protein flour. After increased experimentation, I arrived at this formula, using 75% hydration and all-puropse (im my case Shepherd's Grain Low-Gluten flour @ 11.2-11.7% protein). You will probably recognize elements from other classic recipes on this site (like Pain a l'Ancienne from Gosselin):

OVERALL FORMULA:

AP Flour: 100% (500g)

Water: 75% (375g)

Salt: 2% (10g)

Yeast: 0.5% (2.5g)

AUTOLYZE: Mix 375g flour and 250g ice-cold water together until just together. Refrigerate 16 hours.

POOLISH: Mix 125g flour and 75g warm water, plus .5g yeast together and let stand 4 hours at warm room temperature (80 degrees F)

FINAL DOUGH: Use the remaining water (warmed to 100 degrees F) to "soften" the autolyze. Mix in the salt and yeast, mixing by hand until the autolyze and poolish are completely incorporated (you don't want chunks of undissolved autolyze in the dough!). Now let ferment 3-4 hours, as needed, with 2-3 folds, as needed.

PROOTING: After dividing, preshaping, and resting, place in couche and ferment for 45 minutes to 90 minutes, or retard overnight (I retarded, but forgot to cover with plastic. I got a skin, which kept it from rising properly, forming the dense loaf you see, but formed a great crust! Next time I will proof seam side up, and bake seam side down; covering, so I will  get a crust from the side in the couche, but will get my proper rise!)


NOTE: I tried baking this bread with bread flour and 80% hydration, and got much bigger, nicer holes; but a much less nice crust. Next time I will try my AP flour version at 77% hydration, and maybe give a few minutes floor time).


Mebake's picture
Mebake

It was time for the much anticipated Arts and crafts market – Times Square, Dubai.  On Friday, the 9th, I had prepared my display gear, packed and loaded my bread, and head to the Market.

A w eek earlier i had been baking  5 sandwich loaves (600gr each) of “Many seed bread”  from Peter Reinhart’s (Whole grain breads), and 5 boules  (600 gr) of “Roasted Garlic Levain “ from Hamelman’s (Bread).  The whole grain bread was packed in plastic freezing bags and frozen, while the garlic bread was baked fresh on the eve of the Market day. I could not bake larger quantities, as I was suffering lower back pain. In retrospect, however, I could have baked and frozen more in advance; I realized that whole grain breads retain freshness even when frozen! Some hope for me :) 


Upon arrival, I unloaded my gear and bread, and marched across the parking lot to the mall entrance. I arrived at the registration desk at 10:30 am, and there I saw  a queue of some 12 Artisans lining up already! Wow, this has become popular, I thought to myself.  Finally, I registered for July Market (I’m going on a vacation to see the family on June), and picked my table number.  Table No. 395 it was; positioned on the sunlit second floor. I made a trip around the tables, and there are none that sell bread! I believe that most vendors think that bread making  is too much trouble for too low a profit margin.

I prepared my table for display, and sat there waiting. This time, I brought some olive oil for a taster’s dip, as against butter. My first client was a neighboring vendor, an Indian lady, who happened to like my previous market’s garlic bread and bought one immediately. I was delighted to learn that she and her husband absolutely loved it.  Some familiar faces showed up every once and a while, notably my regular enthusiastic bread client who happens to be also a vendor. He bought a loaf of each, and went on on how he loves the bread and that it is alone worth the trip from his home hundred tens of miles away! That felt really heartwarming.  Finally, I had sold all the bread, with Roasted garlic flying off FAST; It was utterly delicious, and intensely aromatic.

I had also printed some handouts on A4 highlighting the advantages of Artisan bread, and gave those away with my business card. I offered many visitors and clients baking them bread on order, but I have yet to hear from any of them. Thus far, I have only 1 client who orders a few loaves bimonthly, and  another prospective client is in the making.  I also noticed again and again, that many ask for gluten free bread, and so felt the urge to learn how to make it.

I happened to visit a multi commodity store earlier this month and as I walked down the food aisles, I noticed that there was Psyllium husk, marketed as a health drink powder. Packed at 100gr each, they were quite cheap !. I also found cheap tapioca flour from the same store.  It was good enough reason for me to seek gluten free flours, so I bought some sorghum and millet flours from another food store.

The recipe that I followed was that of (The bread kitchen) on YouTube. Her gluten free recipe is also dairy and egg free. I weighed the ingredients, and mixed them up with a spatula into a thick batter and poured it into my lined tin. The batter was proofed for 1.5 hours at room temperature, and a thin coating of olive oil was carefully brushed on top prior to baking. I baked it without steam for 40 minutes at 210 C with fan, as directed. I only substituted the potato flour with rice flour.


2 hours later, I sliced the loaf hoping for bread like texture. I was surprised  that it sliced, looked, felt, and tasted like a good 50% whole grain bread, with a hint of spice owing  to the sorghum, I think. I had few slices with my wife for dinner, and it was delicious! Quite hard to imagine that it contains no wheat flour at all.  I shall try substituting millet for roasted chickpea flour, or corn flour in my future GF bakes, or even try leavening it with a GF sourdough starter.

Khalid


golgi70's picture
golgi70

I decided to go back to the 5 Grain Levain from Week 26 found here http://www.thefreshloaf.com/node/37954/farmers-market-26-five-grain-levain.  

I made two major changes.

First, I increased the hydration by a total of 13% in the dough portion.  

Second, I  decreased the PF in half from 25% to 12%.  I kept it split 7% liquid levain and 5% rye sour.  

Another change I made which I suppose was significant but not as much so as the priors is the soak(which could be any combination of seeds/grains).  Our local COOP has Rolled Rye and I thought to use it in place of the called for Rye Chops (which I subbed with Bulgar last time).  I also subbed toasted sesame for the sunflower seeds this time around.  So all in all it's equal parts toasted sesame, toasted steel cut oats, flax, and rolled rye.  I gave the loaves about an hour to proof before retarding overnight and an hour to warm up before being baked.  I'm very happy with the results and the only change I think I'll make will be upping the hydration just a touch further.  


-----------------------------------------------------------------------------------------------------------------------------------------------------

5 Grain Levain

-----------------------------------------------------------------------------------------------------------------------------------------------------

Rye Sour (5% Prefermented Flour @ 82% hydration) 12 hours @ 73F

Liquid Levain (7% Prefermented Flour @ 125% hydration) 12 hours @ 73F

-----------------------------------------------------------------------------------------------------------------------------------------------------

Soaker (Seeds mixture = 30% of total flour)  Make Soaker at the same time as the levain/sour

25% each toasted sesame, toasted steel cut oats, flax, and rolled rye

125% boiling water

1% Salt (1% the weight of the soaker grains)

-----------------------------------------------------------------------------------------------------------------------------------------------------

Flour: (65% CM Bakers Craft, 25% Hard White Wheat, 10% stone milled whole rye)

H20:  (75% holding back 50-100g to help add soaker/salt)

Salt:  2%

-----------------------------------------------------------------------------------------------------------------------------------------------------

Make Levain/Rye Sour and Soaker (12hours)

Autolyse with preferments 1 hour

Add soaker and combine well using some of held back water.  

Add salt and mix with remaining water to medium development.

Bulk Ferment 3 1/2 hours with 3 folds at :40, 1:20, and 2:00 

Divide and preshape loosely.  Rest 15-20 minutes.  

Shape into boules/batards in rice floured bowls.  Let proof 1 hour at room temp and then retard 12-15 hours. 

Bake 480 with steam for `15 minutes, vented for 25-30 more.


Pages

Subscribe to RSS - blogs