The Fresh Loaf

A Community of Amateur Bakers and Artisan Bread Enthusiasts.

Blogs

oceanicthai's picture
oceanicthai


Another 7-grain seeded sourdough boule.  I am amazed how much the temperature affects the dough.  The raise on this loaf was slow, but not as disasterous as the boule I tried to make 2 days earlier.  We had a freak cold weather front come in, dropping from high 90's to high 50's.  For Thailand, that is a freak weather drop...I realize for many both are pretty balmy.  Anyway, I had one loaf that refused to rise...I eventually baked it anyway and it was awful.  Even though I had added salt I was concerned that it would turn to grey mush with too much enzymatic activity.  Outside was flat, inside was raw.  I gave it to the dogs.  This loaf is better, because the temperature is up to the 80's now.  Tomorrow is supposed to be normal weather, in the 90's again, so tomorrow's loaf will probably be big and fluffy as usual.  Next month, April, is hot season...past the temps where the yeast & lactobacillus is supposed to die...should be interesting. 

Mebake's picture
Mebake

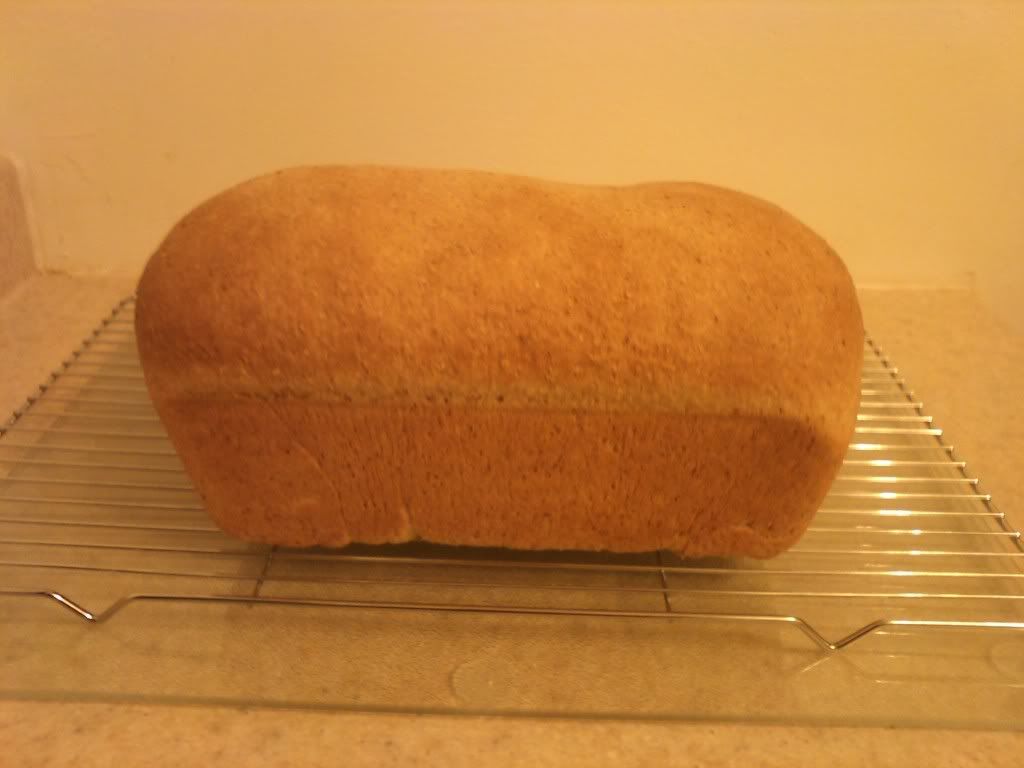
I purchased some Pakistani Wheat (for Atta) , and i wanted to see how it fairs in Peter Reinhart's Wholegrain Recipes. I'am not sure of the protein content of This wheat, but i read that Atta flour is between 11.5% to 13% Protein. I milled the berries, and found them to be medium hard. The resultant flour made a coherent smooth dough, and delayed fermentation helped strengthen the dough even more.

Adding Milk, Butter and Honey, helped soften the dough further, and the result was a pliable soft dough that passed windowpane test.

PR's Recipe for this sandwich bread is a real winner, as this 100% wholewheat is transformed into a very fluffy and light loaf which was a true treat, especially when toasted!

I shaped my dough into a tight sandwich load in the manner that Txfarmer does hers as i wanted that shredable texture. My shaping needs improvement.

The flavor was Superb!


arlo's picture
arlo

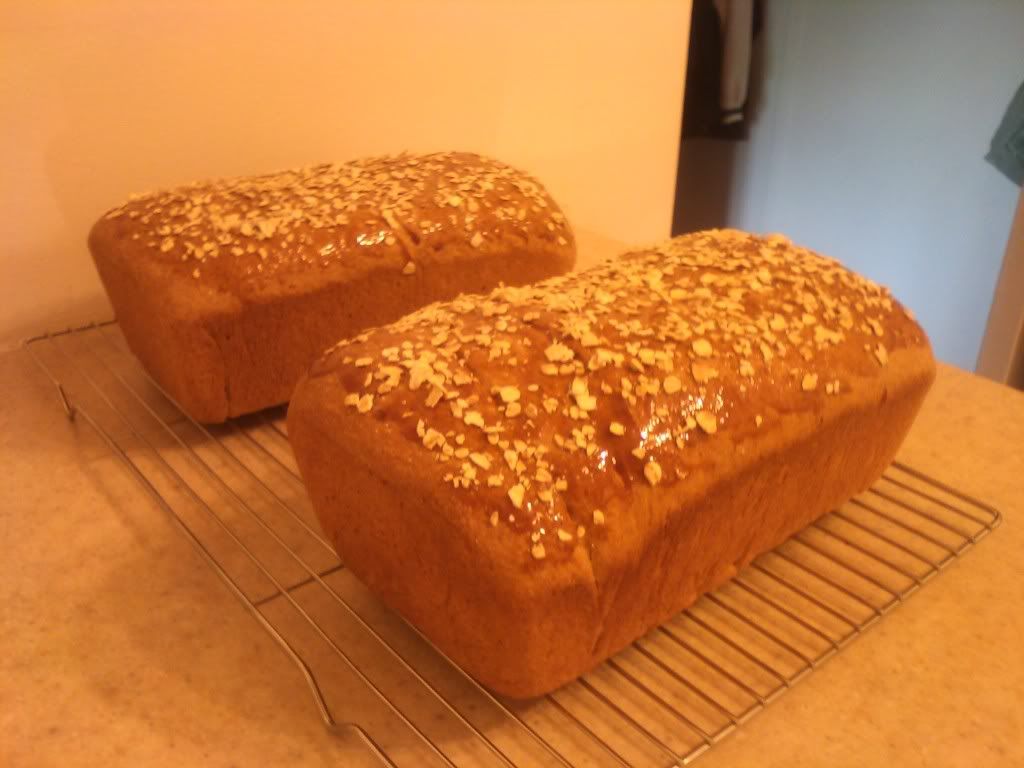
Though I haven't posted about bread in a while, I have my reasons. No, I am still working at the bakery baking bread daily which hasn't made me bread-sick. I still am studying to complete my degree (end of this fall it looks like!) but I make time for the important things in life (like baking!). But what is keeping me away from bread is that I am working towards my American Culinary Federation Certified Pastry Chef title, which I hope to obtain this year. What that means is I have been baking a lot of genoise cakes, cookies and attempting Bavarian cream. Since those are the required pastries to be made for the practical examination.

Today, after getting off my shift I went ahead and made some molded Bavarian cream which is actually still in the fridge due to other time restrictions and appointments, but also went ahead and changed my game plan when it came to my cookies. I decided against my original molasses and oatmeal raisin cookies and went for the more familiar. Although I am still sticking with my two brownie recipes I decided. It's not that my molasses or oatmeal raisin recipe were bad, it's just I thought I should pay homage to the bakery that has taken me in and taught me so much.

I took a look at some of my aforementioned baking knowledge from working at a bakery that promotes whole grains and decided to make a two cookies using 100% whole wheat flour. They are different than what I make at the bakery by a long shot, but they remain true to using entirely whole grains.


WholeWheatOatNChoc

The end result was a deliciously chewy whole wheat oatmeal cookie, and whole wheat oatmeal chocolate chip cookie! I made roughly four dozen, two and half went to my fiances work to be shared (they see lots and lots of my pastries from homemade poptarts, cakes to truffles) and the other half will be for her father, who is in the armed forces and is going overseas to the middle east again this month.

I am very pleased with the taste and texture and am glad I went with something I am familiar with. I think it will bring along confidence when it is time to step up to the plate.

dmsnyder's picture
dmsnyder


This is the “80 Percent Rye with Rye Flour Soaker” from Jeffrey Hamelman's “Bread.” It's a wonderful bread about which I've blogged before. (Sweet, Sour and Earthy: My new favorite rye bread) These loaves were made applying a number of tips and tricks contributed by a number of TFL members, and I have to say, I was pleased with the results of every tip I used. So, a big “Thank you!” to MiniO, hansjoakim, nicodvb and the other rye mavens who contributed them.

I followed the formula and methods according to Hamelman, with the following techniques added:

  1. Rather than dividing and shaping on a floured board with floured hands, I wet the board, my hands and my bench knife. I kept all of these wet, and experienced much less sticking of this very sticky dough to the everything it touched.

  2. I shaped the boules “in the air,” rather than on the board. Again, less dough sticking to the board, and I think I got a smoother loaf top without tears.

  3. I proofed the loaves in brotformen, floured as usual with a rice flour/AP mix, with the seams down. This results in the loaves opening at the seams, yielding a lovely chaotic top to the loaves and no bursting of the sides.

I am very happy with these loaves. I'll continue to use these techniques and recommend them to others struggling with high-hydration, high-percentage rye breads.

David


proth5's picture
proth5


Once again Captain Kirk has saved the Federation.  A new shipment of quadrotriticale will be delivered to  Sherman's Planet.  But how are they to eat it?  Yes, it can be cooked liked rice or flaked and cooked into porridge.  But what if the good people of Sherman's Planet want sammiches?  What are they to do?

In the spirit of "never give up - never surrender" (uh - a different space epic) I am determined to create a formula to bake triticale bread. Thinking over the dense but tender crumb of an earlier try and determined to apply things that I have learned about dealing with less than "perfect" wheat varieties, I formulated a plan.  I was thinking a mildly enriched bread baked in a pan.  The Bob's Red Mill folks suggested treating the dough like wheat dough except letting it rise only once, shape, proof and bake.  I remembered that the dough really behaved like a rye dough and pondered that I should not do the first rise, but considered that the miller should know.

The formula is as follows:


Total Dough Ingredients


Percent of Flour in Levain

0.3


Final Dough


%

Wt

UOM

%

WT

UOM

Ingredients

Wt

UOM

Total Flour

100%

18

oz

100%

5.4

oz

Total Flour

12.6

oz

Triticale Flour

100%

18


100%

5.4

oz

Triticale Flour

12.6


Water

62%

11.16


60%

3.24

oz

Water

7.92

oz

Shortening(leaf lard)

4%

0.72

oz


Shortening(leaf lard)

0.72

oz

Agave Nectar

11%

2.016

oz


Agave Nectar

2.016

oz

Milk Powder

4%

0.72

oz


Milk Powder

0.72

oz

Salt

3%

0.504

oz


Salt

0.504

oz

Yeast

1%

0.216

oz


Yeast

0.216

oz


Seed

1%

0.144

oz

3%

0.144

oz

Levain

8.784

oz

Totals

186%

33.48

oz

163%

8.784

oz


33.48


Total Dough Ingredients


Percent of Flour in Levain

0.3


Final Dough


As you can see from the formula, I decided to preferment what is, for me, a very high percentage of the total flour in a firm levain.  I chose a levain so that the higher acid would bring some strength to the dough and a firm preferment, again, to bring strength rather than extensibility.

I also loaded the dough up with yeast, so that I would get as rapid a rise as possible.  I would depend on the pre ferment for flavor.

I milled the triticale to a fine, whole grain flour in three passes on the Diamant.

I mixed the pre ferment by hand and allowed it to mature about 10 hours.

Since this was a small batch, I pressed the mighty Kitchen Aide back into bread making service.  I am the type of person who has a sensitivity to pitch - and I will have to say that after some time with My Precioussss, the KA sounded like a little buzzing insect.  There was a time when I considered the KA to be a powerful mixer (and really, it sort of is) - what a long strange trip...

Anyway, the dough actually came together quite nicely, but always had the putty like quality of a rye. I don't particularly enjoy that feel but am starting to get used to it (I'd better - I really need to gather myself together and practice rye bread  - or bring shame upon myself later this year....)

Even with all the yeast, it took two hours of bulk ferment to get the dough to double.  Honestly, looking at the risen dough it had a nice, open quality.  For triticale, that is. 

I shaped the dough an put it into a high sided Pullman pan - brought back from Okinawa.

I allowed it to proof until double - 2 hours.  At that time the dough seemed exhausted and I popped it into a 375F oven for about 45 minutes.

As before, when I had proofed it much less (Oh, I don't write up everything I do...), the dough had zero oven spring.

What amazes me about triticale is the aroma.  The plumbing crew fixing up my bathroom plumbing kept telling me how great the house smelled.

The next day, sliced, I had reasonably sturdy bread with a sweet taste and that fine, tender triticale crumb - as pictured below.

Triticale Bread

I keep mulling over how much more open the texture was after the bulk ferment and have pretty much convinced myself that next time I will treat the dough like a rye and give more of a rest before shaping and capture all of that rise in the proof.  Rye bakers - advice welcome.

The taste - delicious.  Triticale is delicious and I don't know why it is so neglected.

The good people of Sherman's Planet will have sammiches today...

davidg618's picture
davidg618

I'm still wearing a temporary cast on my left wrist/hand, but an x-ray, Tuesday, revealed no fracture. None the less, although relieved, the doctor prescribed an infernal nylon-velcro cast be worn until the sprained and bruised wrist heals: about three to four weeks. So, I've regained the ability to use the shift-key, but not the bowl scraper. No hand-mixing for me for the duration.

Back to the title:

Some historians argue that St. Patrick was a Welshman, enslaved by pirates, from south Wale's shore, who sold him to a cruel master in 5th century Ireland. He escaped after six years of hard service, returned to his Roman parents in Britain, ultimately returning to Ireland, a Catholic bishop, forgave his former master, chased out the snakes, converted the Irish pagans, and became a sainted national hero.

Loving all things Welsh, I've always felt akin to St. Patrick and Ireland and celebrated St. Patrick's Day--admittedly only in a secular (some would say hedonistic) fashion. This year, much influenced by TFL posts, I made the almost obigatory Corned Beef and Cabbage dinner, and invited a few friends. The Corned Beef was made with the recipe from Charcuterie, a cookbook I would never found were it not for hansjoakim's review http://www.thefreshloaf.com/node/21880/totally-not-bread-confit-de-canard , and included Sylvia's Irish Soda bread, http://www.thefreshloaf.com/node/11028/sylvia0395-irish-soda-bread (with a wee bit more whole-wheat flour) which inspired my offering. Dessert was Brambrack (a Googled recipe), a delightfully different fruit cake (made with dried, but not candied fruit):a traditional Irish celebratory cake.

So once again, TFL, thanks!

David G

dmsnyder's picture
dmsnyder

Tre Franceses


“Pan Francese” simply means “French Bread” in Italian. It is a long, thin loaf that is the Italian version of a baguette. Daniel Leader has a formula in Local Breads which he titles “Italian Baguettes” and says are called “Stirato,” which means “stretched” in Italian. Michel Suas' Advanced Bread and Pastry includes a formula for “Pan Francese,” and we made this bread during the Artisan II workshop at SFBI.

The differences between Leader's and Suas' formulas are relatively minor. Leader uses a biga at 60% hydration, and the biga is 61% baker's percentage of the total dough. Leader's dough hydration is 70%. Suas' hydration is 76% - a significant difference. Suas uses a poolish (100% hydration), and the poolish is 50% baker's percentage of the total dough. Leader uses all AP flour, while Suas' formula uses 13.6% whole wheat flour, the rest being AP. Leader's mixing instructions, as usual for his high-hydration doughs, call for an intensive mix (10-12 minutes at Speed 4). Suas specifies a short mix but 2 or 3 folds during bulk fermentation. Their shaping instructions are also significantly different: In spite of pointing out that “Stirato” means “stretched,” Leader tells you to shape the loaves like you do baguettes. Suas has you simply cut long strips of dough and stretch them to shape.

Of course, there is no end to variations with breads. The Il Fornaio Baking Book, from the bakery chain of the same name, has a recipe for “Sfilatino” which they call “Italian Baguettes.” Theirs are made with a biga. They are shaped as demi-baguettes, then stretched to about 15 inches long.

The “Pan Francese” I made followed Suas' formula and method from AB&P.


Poolish

Baker's %

Wt. (oz)

AP flour

100

3 5/8

Water

100

3 5/8

Yeast (instant)

0.1

1/8 tsp

Total

200.1

7 1/8

  1. Mix all the ingredients until well-incorporated.

  2. Ferment for 12-16 hours at 65ºF.


Final dough

Baker's %

Wt. (oz)

AP flour

79.52

11 7/8

WW flour

13.48

2 3/8

Water

70

10

Yeast (instant)

0.35

¼ tsp

Salt

2

¼ oz

Malt

0.98

1/8 oz

Poolish

50.03

7 1/8

Total

223.36

2 lb


Total dough

Baker's %

Wt. (oz)

AP flour

86.4

15 1/2

WW flour

13.6

2 3/8

Water

76

13 5/8

Yeast (instant)

0.3

1/2 tsp

Salt

1.6

¼ oz

Malt

0.78

1/8 oz

Total

178.68

2 lb


Method

  1. Prepare the poolish the evening before mixing the dough.

  2. Measure all the Final dough ingredients into the bowl. (I used a KitchenAid mixer.)

  3. Mix with the paddle until ingredients are well mixed – 1-2 minutes -then switch to the hook and mix at speed 2 or 3 for about 5 minutes. There will be some gluten development, but the dough will not clear the sides of the bowl. It will be like a thickish, glutenous batter.

  4. Transfer the dough to an oiled bowl and cover tightly.

  5. Ferment for 3 hours with 2-3 stretch and folds on a well-floured board.

  6. Prepare your oven with a baking stone and your steaming apparatus of choice in place. Pre-heat the oven to 500ºF about 30 minutes before the end of fermentation.

  7. Transfer the dough to a well-floured board. De-gas the dough and stretch and pat it into a rectangle about 8 x 12 inches. Dust the top with flour.

  8. Using a bench knife, divide the dough into 3 strips. Stretch them to about 15” long and place them on a well-floured linen couch. (I suppose parchment paper would serve.). Cover with linen or a towel.

  9. Proof for 30-45 minutes.

  10. Transfer the loaves to a peel and then to the baking stone. Turn the oven down to 460ºF and steam it.

  11. Bake for 22-25 minutes.

  12. Transfer the loaves to a cooling rack. Cool for at least 30 minutes before slicing.

Francese cross section crumb

Francese longitudinal section crumb

The loaves had a thin, crisp crust that got chewy as it cooled. The crumb was very open with some chewiness. The flavor of the whole wheat was present when tasted still slightly warm. I expect it to meld by tomorrow. The flavor was similar to ciabatta, not surprisingly. The bread was nice as a chicken salad sandwich for dinner.

David

Submitted to YeastSpotting


Br6e5gir4's picture
Br6e5gir4

Dear Susan,  or whoever answered my question regarding this dark loaf,   thank you for telling me what size to make it in my bread machine.  2 lbs.  This is regarding my question about the dark loaf from the cheescake factory.  Thanks again!  Laurie K.

sortachef's picture
sortachef

Here's a sandwich roll that just might eclipse the Italian hoagie roll for best in show. It's got some egg in it which, along with the sesame seeds, adds a savory undertone that can hold its own against almost any filling -- no matter how wild you want your sandwich to be. And, because I've streamlined the process for home baking, this one's considerably easier to make.

Now if you've ever been to Paesano's in South Philly, you'll understand what I mean by wild. Grilled meatloaf, suckling pig or spicy chicken with broccoli rabe? Yep, they've got it. These rolls were created with sandwiches like that in mind. See Sandwich Spectacular: Paesano's and Sesame Seeded Sandwich Rolls for more on that.

Of course, if you want to make true east coast Italian hoagie rolls, my companion recipe will warm the cockles of a Philly boy's heart. Check that one out Here.

Cheers and happy baking!


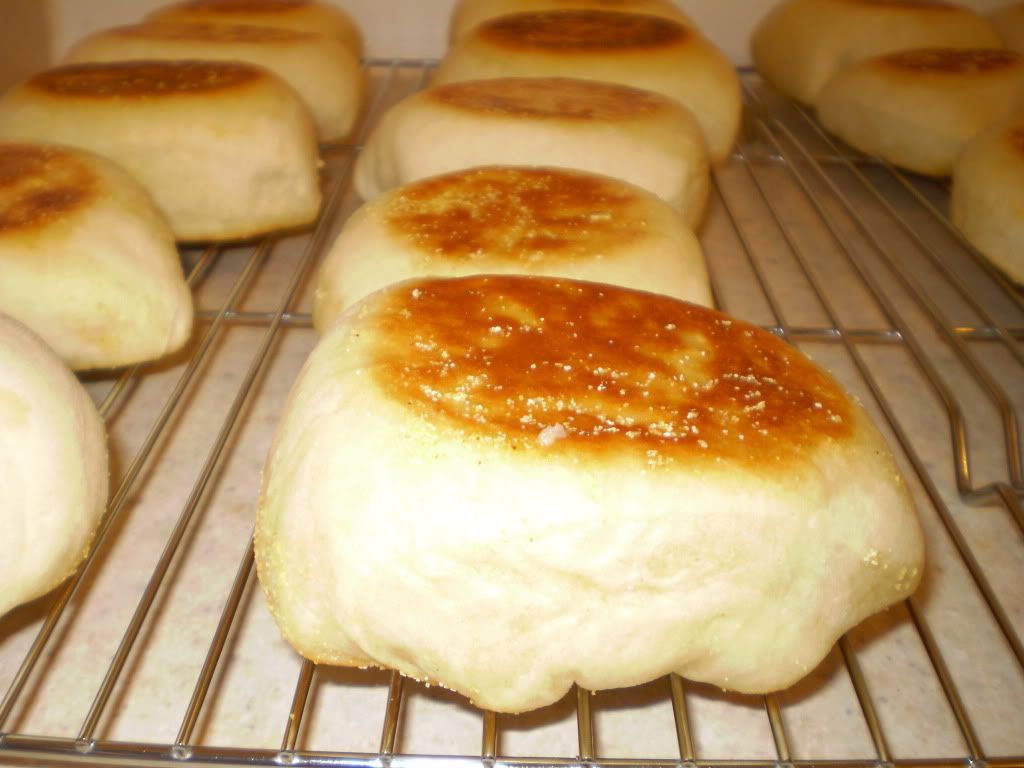
Sesame Seeded Sandwich Rolls cooling on a rack


Sesame Seeded Sandwich Rolls


Makes 8 rolls, 5 ounces each


½ cup water at 100°

2¼ teaspoons instant dry yeast

15 ounces (3 cups) unbleached all-purpose flour + 5 ounces (1 cup) high gluten flour

-or-

10 ounces (2 cups) unbleached all-purpose flour + 10 ounces (2 cups) bread flour

4 teaspoons of sugar

2½ teaspoons of salt

1/8 teaspoon of ascorbic acid, or Fruit Fresh (optional)

1 cup water at 100°

1/3 cup milk, scalded and cooled

2 eggs

Additional flour for bench work

2 Tablespoons of sesame seeds


Recommended equipment:

2 pieces of parchment paper 11"x15"

6 quarry tiles or a large pizza stone (see note below)


Prepare yeast and milk: In a small bowl, whisk together ½ cup warm water and a packet of instant yeast. Let stand for 5 minutes, until blooms of exploding yeast rise to the surface. Meanwhile, scald 1/3 cup of milk in a small pan by bringing it to a bare simmer over medium heat and then let cool.


Make the dough: In a large bread bowl, dry mix the flour, sugar, salt and Fruit Fresh. Make a well in the center and add the yeast mixture, 1 cup of warm water and the cooled milk. Mix it all together with the handle of a wooden spoon until the flour mixture and liquids are incorporated. 

Lightly flour a work surface. Using a dough scraper or spatula, lift the raw dough out of the bowl onto it and knead for just a minute to lump dough together. Invert the bowl over the dough on the counter and leave to rest for 20 minutes or a half hour. This will make kneading much easier.


Kneading and first rise: Knead the dough for 7-10 minutes until smooth and supple, adding small amounts of flour to keep it from sticking to the counter and your hands.

Clean and dry the bowl and put the dough back into it; cover and let rise for 2 hours or more at room temperature, until dough doubles in size.


Egg addition and second rise: Separate 1 egg, reserving one egg white in a small bowl to be used later.  Add the egg yolk and 1 whole egg to the risen dough, mixing in ½ cup of flour to counter the stickiness (yes, it's kinda sticky at first). Knead for a few minutes until the egg is well worked in. Clean and dry the bowl again if necessary. Put the dough back in and let it rise for a further 1½  hours at room temperature.


Shaping, coating and third rise: Divide the dough into 8 equal pieces. For accuracy, use a scale; each piece will weigh just over 5 ounces. On a lightly floured work surface, shape each roll into a 9" long snake. For best results, stretch rolls gradually over a 10-minute period in order to avoid tears in the skin.

Whisk the reserved extra egg white with 1 teaspoon cold water. Lay the parchment paper out on the backs of two cookie sheets. Put the dough snakes onto the parchment paper, 4 to a sheet and brush the tops twice with egg wash. Sprinkle with sesame seeds. Let rise in a warm humid place for 1 hour or more until doubled in size again.


Bake the rolls: In a conventional oven, fit quarry tiles or a pizza stone on the center rack and preheat oven to 425° for 30 minutes.

Slip risen rolls directly onto the quarry tiles or pizza stone on their parchment paper, cooking 4 at a time. Spray a few squirts of water on the hot oven walls for a nice bloom, quickly close the door and bake for 11 minutes until the rolls are lightly browned on the top. Remove from the oven and let cool for 30 minutes on a rack before diving in.

Repeat as necessary with the other rolls.


To make an awesome Chicken and Broccoli Rabe sandwich: Split a Sesame Seeded Sandwich Roll and layer with field greens, hot chicken breast, steamed broccoli rabe and mature cheddar. Happy noshing!    


Quarry tile note: If you don't have quarry tiles or a pizza stone, don't worry; the rolls will be fine, just a bit flatter. Sprinkle cornmeal or semolina onto 2 cookie sheets and put the dough snakes onto it for their last rise. Coat as directed above and bake in the oven on cookie sheets. Quarry tiles are available here in Seattle at Tile for Less.


Here's a photo of a Sesame Seeded Sandwich Roll filled with Wild Greens, Chicken, Broccoli Rabe and Mature Cheddar. Go on, free your imagination!

Copyright 2011 by Don Hogeland and woodfiredkitchen.com


txfarmer's picture
txfarmer

I have been working like crazy lately, with so little time, I like to make rye breads: deliciou and fast.

First, it's the sourdough rye with walnuts from "Bread", however, I followed Hans's modification here, used SD levain only (no dry yeast) and baked smooth side down to get that lovely pattern on top. My hydration was 75%, bulk rise time 1 hour, and proofing time was 100min.


Used pecan instead of walnuts since that's what I have on hand, still delicious. 50% of the flour is rye, with gives a rich flavor, without losing too much gluten structure


It did take me more than once to get the cracking look right. I think the dough has to be wet and not strongly developed for the surface to crack in multiple places like this, if the gluten is too strong, it will burst in one place. When I round and shape the dough, I also used more flour than usual on the table, so that the seam wouldn't completely close. My rye starter is exceptionally fast, so I had to really watch the dough to avoid over proofing. I uaually don't like too much dry flour on my bread, but for this one I shifted some flour on top before sending it to the oven, otherwise the cracks won't be as striking.


Exceptional with some cheese


The next rye is even simpler. I made it for my parents who are used to soft breads, but in need of more whole grain in their diet. I want to gently train their taste to like rye/ww/other whole grain, this KAF recipe is a good start. I did use much more water than the recipe instructed to get a dough I am comfortable with.


It has about 30% rye, as well as a bit of butter and sugar, so that the crumb is softer than a lean hearth loaf. Flavorful and slightly rich, it was a hit with my parents.


I want to thank Minioven for her post on how to use scissors to creat scoring patterns, the technique is perfect for a "fake hearth bread" like this one.


Sending this to Yeastspotting.

Pages

Subscribe to RSS - blogs