The Fresh Loaf

A Community of Amateur Bakers and Artisan Bread Enthusiasts.

wally's blog

wally's picture
wally

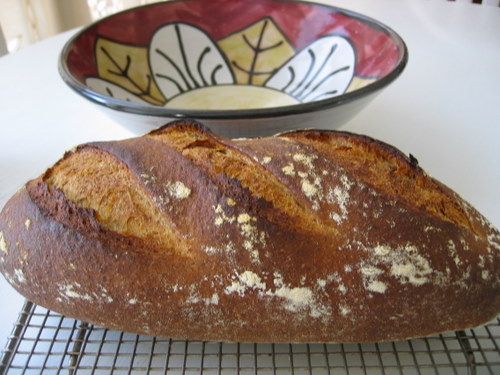
My tradition of Christmas bread baking began by accident back in 1975, when, considerably younger and poorer, I discovered a recipe for cheese bread in Joy of Cooking that yielded a pretty tasty product.  So I decided that Christmas that family and friends would receive a loaf, something I could afford and that was personal.

To my surprise, I started receiving inquiries the following holiday season to the effect of, "So, I'm looking forward to another loaf of that fabulous bread."  So began a tradition (curse in my weaker moments) of baking cheese bread at Christmas time.  This year, that amounted to 30 loaves, baked over two weekends.  A busman's holiday for me I reckon.

I've tweaked the recipe over the years, but the central ingredients remain extra sharp cheddar cheese, butter and milk.  The combination makes for a rich, dense loaf of bread with excellent keeping qualities and a simple set of instructions I send with each loaf: "Cheese Bread - For best results, slice, toast, butter, and enjoy!"  The recipe below is for 5 loaves which is my standard at-a-time bake these days.

While this is an easy, straightforward straight-dough bread, I've found that to achieve a really good loaf requires a fair amount of hand labor.  I hand grate the cheese - about a quarter pound per loaf - because my experience with KA mixer grater attachments is that they produce too coarse a grate, and I then gently rub the cheese into the flour, a bit at a time, to both coat the individual gratings and to gently warm the flour and cheese which makes for better incorporation.   Beyond that, because I mix 9 lbs at a time, there is no way short of using a commercial mixer to do this except by hand.

It's actually a kind of sensual experience, gently rubbing flour and cheese between my palms until the flour itself begins to take on an orange hue.

The second taxing part is that because this is a stiff dough, it requires kneading.  Not so much for the gluten development I think as for the final effect of warm hands on dough in 'melting' the cheese so that it's really incorporated.  After 7 minutes or so of kneading, you are rewarded with a dough that is silky smooth and now very orange-hued.

The milk, butter, salt and sugar are heated in a pan to a scalding temperature to denature the enzymes in the milk, and then cold water is added to reach DDT.  Instant dry yeast is added to the flour and cheese, the liquid is poured in, and then hand mixed until fully kneaded.  Bulk fermentation is 1 - 1 1/2 hours depending on temperature, and then the dough is divided, allowed to rest for 20 minutes, and then shaped and placed in bread pans and covered. 

I braided one up as a challah, and thinking about it, the formulas aren't that far removed excepting the cheese.

Final proof is a short 1 hour, and then the bread is baked, steamed, in a 375° F oven for 45 minutes.

After removing them to racks to cool, they are brushed lightly with melted butter to achieve a soft crust (no hearth bread, this!).


I've frozen this for several months in frost-free refrigerators after cater-wrapping them in plastic, and they still turn out wonderfully.

Other baking I've done includes some stollen.  I like to marinade my fruit in rum for about 8 weeks prior to making my dough.  Pics are below - sorry no crumb shots as these are all presents.


I wish everyone at TFL the best of our Holiday season!

Larry

wally's picture
wally

One downside to working as a baker is that it doesn't allow me time to bake during the week.  So now everything gets crammed into weekends.  And frankly, sometimes after a week at the bakery, I really don't feel like spending a day off baking more.  And yet, inevitably I find my two starters staring at me ruefully, and so on a beautiful Fall day when the temperatures felt more like September than mid-November, I decided to do a series of bakes.

Below, from the upper left moving clockwise: a 72% rye with soaker, Vermont Sourdough, a batard and a boule of Polish Country Rye.

On Saturday I got started by mixing and then retarding overnight Hamelman's Vermont Sourdough.  I've discovered that even with giving the bread an hour and a half proof before final retarding, it still needs an additional three hours the next day at room temperature to finish proofing.  But, the finished loaf rose nicely in the oven.


Here's a couple crumb shots of the Vermont sourdough:


Saturday evening I prepared the rye levains and soakers for the 72% rye and the Polish Country Rye.  I've become so fond of the added sweetness imparted by soakers, that they are now a routine part of my rye preparation.  However, a couple weeks back I had my first experience with the dreaded 'starch attack' and this has led me to now add either part of all of the salt in my rye formulas to the soakers as a preventative measure.

This morning while the Vermont sourdough finished its final proofing, I began with the 72% rye because I knew it would have the shortest floor time before final shaping and baking.  In using a high proportion of the water for the recipe in the levain and soaker I unintentionally created a problem I had not foreseen: my kitchen was cold this morning, and I found that the flour temperature and those of the levain and soaker were only about 68° F.  But there was so little water to be added to the final mix, that it was not possible to arrive at a DDT of around 80°.  This necessitated both extending the bulk fermentation from 30 minutes to 50 minutes, and setting the dough container on top of my then-warming oven to increase its internal temperature.  Note to self: it's important to retain a sufficient amount of water for the final mix to adequately adjust DDT!

In any event, the jury-rigged proofing worked, and once the loaf was air-shaped (the hydration was at 80%) and placed in a pyrex baking dish, it required a little under 50 minutes before it was ready for baking.  I baked if for 60 minutes, starting out at 450° and dropping the temperature by 25 degrees every 15 minutes, so that the oven temp at bakes end was 375°.

Here's the final result: it will sit for 24 hours to completely set and then I'll add some crumb shots.  But it's already got a pleasant sweetness about it.

The Polish Country rye I altered slightly by upping the percentage of rye from its usual 15% to 30%.  Even with that, this is a most agreeable dough to work with - it has the gluten development and consistency of wheat-based doughs, so there is very little of the stickiness associated with high percentage ryes.  Final proofing after shaping one into a boule and the other a bâtard was about two and a half hours and it baked at 440° for 45 minutes.  Here's some more shots of the final result - crumb shots to follow.

        All three breads were baked using a combination of SylviaH's wet-towel-in-a-dish method and my lava rocks in a cast iron frying pan to generate steam.  As the loaves and cuts indicate, I cannot say enough good things about Sylvia's simple yet effective work around for those who, like me, struggle to maintain steam in our steam-venting gas ovens.

So, at the end of a beautiful Fall day I sit at my kitchen table surrounded by a week's worth of wonderful and varied sandwich breads, along with a rich rye loaf that will accompany some good cheeses and spreads.

Not a bad way to unwind after all.

Larry

EDIT: crumb shots of 72% rye and Polish Country rye below.


wally's picture
wally


Anyone who's followed my blogs knows that I'm constantly whinging about my gas oven and it's tendency to vent steam as quickly as I can create it.

But it's true: my relationship with my oven is probably like that of Ike and Monty in WWII - hated one another but needed each other.

So, having tried the numerous Rube Goldberg remedies found on TFL (I'm still using lava rocks in a cast-iron frying pan), and found them either impractical or wanting, I read Sylvia's recent post with interest - but skeptical interest I must admit.

Still, looking for anything that might offer a tactical advantage over my oven, I tried it out today with a pain au levain recipe using mixed rye and AP levains from Hamelman's Bread (still my favorite sandwich bread!)

I slightly improvised on Sylvia's instructions: I thoroughly soaked a terry cloth towel in water, placed it in a glass pyrex bread pan, filled it 3/4's with water and then nuked it in my microwave for about 10 minutes before placing it in my oven just before loading my loaves.

On loading a cup of water was carefully tossed onto my lava rocks, and then two minutes later, another half cup.  I removed the pyrex pan with the towel 15 minutes prior to finishing the bake.

Oh the result!  The most oven spring and the best opened cuts I've ever had at home - easily!

Here are some shots of today's bake:


If I could sell Sylvia's technique I'd be like Ron Popeil at this point.  However, I'm having difficulty visualizing an infomercial featuring a terry cloth towel steaming in a bread pan, so I'll give that a pass.

However, I will heartedly add my endorsements to those Sylvia has already received. 

This is one way of overcoming the shortcomings of home kitchen gas ovens.  And how!

Larry

And the crumb shot:

(Crumb shots to follow once the bread's cooled)

wally's picture
wally

My last rye experiment involved a variation on Hamelman's 66% rye sourdough found in Bread.  The variation was the inclusion of a boiling rye soaker (brühstück) and toasted sunflower seeds.  I was pleased with the result, especially the sweetness imparted by the soaker.

Since then I have ventured farther away from his recipe with two further experiments.

The first involved repeating my earlier variation, but with the addition of a portion of old rye bread (altus).  I soaked the bread in hot water for 4 hours, and then attempted to wring as much water from it as I was able.  But it almost immediately dawned on me that the addition of this (I added 15% of total dough weight in altus) was going to complicate my attempts at arriving at the proper hydration level since I neglected to weight the stale bread before soaking it.  Nevertheless, I decided to press ahead and assume as a matter of fact that the overall hydration would be in excess of 75% which is called for in the formula.

Once I began mixing the dough it became evident that the hydration was way in excess of 75% - the mix resembled a thick pancake batter, and it never came together even somewhat during the 10 minute mix on speed 1.  I poured it into a bowl and gave it a 45 minute fermentation. 


Following that I attempted briefly to handle it with wet hands and see if I could shape it.  Failure - the dough/batter was simply too wet to allow for shaping.  So I scraped it into a bread pan, allowed it to proof for another 45 minutes, until it had just cleared the sides of the pan, and then placed it in a pre-steamed oven (to the extent you can presteam a gas oven), and baked it for 75 minutes. 

The initial temperature was 475° F for 15 minutes, followed by a reduction to 425° for 30 minutes and then a final 30 minute bake at 400°. 

As you can see, the loaf slightly deflated - it came out of the pan level with the rim, whereas it was slightly above when I placed it in the oven.  I feared for the worst - insertion of a toothpick seemed to indicate that the interior had collapsed.  However, I dutifully allowed it to cool, wrapped it in a linen towel, and waited 24 hours before cutting into it.


My surprise was that it had not collapsed, and though I think the openness of the crumb may be an indication that I pushed it almost to the point of overproofing, it has been (and remains) very good.  It is quite moist, but not gummy.  And between the altus and hot soaker it has a wonderful flavor, full of sweetness and dark caramel tones.

Should I attempt this again (and given the flavor I probably will), I will weight the althus before soaking it, so that I can retain some control over how hydrated the final dough is.

As I now realized that even a hydrated dough that resembled a batter could yield good results, I spent the last couple weeks thinking about a further variation on Hamelman's rye - one that still incorporated the hot soaker, but went for considerably higher hydration levels.  As luck would have it, inspiration came in the form of SylivaH's wonderful seeded bread and hansjoakim's very timely seeded sourdough rye that features a quite wet dough.

So, I decided to draw from these and construct a rye that would be an all-sourdough bread with no commercial yeast, use a boiling soaker, and feature the addition of other seeds.  The general numbers I had in mind were a levain that comprised 40% of total weight and a soaker of equal weight.  Thus, I was looking for fully 80% of the dough to be either preferment or soaker.  Here is the formula in full:

I should mention that the 'high gluten' flour I use is KA's Bread flour, which, with a protein content of 12.7%, is at the low end of what can be called high gluten flour.

The levain and soakers were created 12 hours in advance of the final dough mix.  I first mixed them together with the small addition of water to fully disperse the levain, and then added the remaining flour, seeds and salt.  The first thing I noticed was that while the hydration here was 100%, the dough was still more dough-like than batter-like, and I attribute that to the amount of water absorbed by the flaxseeds. 

I had planned on a primary fermentation of 45 minutes, but as the pictures below show, in just 30 minutes the dough had doubled in volume and was threatening to climb out of the bowl it was in. 


I'm assuming that the fact that the levain accounts for 40% of the dough weight is responsible for this - my other rye experiments generally involve a levain that constitutes about 25% of total weight.

The dough was divided and deflated and then shaped and placed into the bread pans. 


I had the forethought to immediately begin preheating the oven which was fortunate, because in just a little over 30 minutes the loaves had risen just above the rim of the pans and I knew that they needed to be placed into the oven at once or else risk overproofing and collapse.


The total bake time was 75 minutes, beginning at 475° and then decreasing the temperature by 25° in 15 minute increments, so that the final 15 minute bake was done at 375°.  I cooled the loaves, shown below, and then wrapped them in linen for 48 hours.

This afternoon I finally cut into one loaf and found a very agreeable crumb that while moist, is nowhere near as moist as the previous loaf made with altus.


The addition of sesame and flaxseeds to the toasted sunflower seeds is quite noticeable and the sesame seeds add a nice complexity of flavor and balance out, along with the sunflower seeds, the sweetness from the hot rye soaker.

I must admit that I have become smitten with ryes.  The flavor(s) and texture are just exquisite.  I grew up hating rye bread, because the only rye I was ever exposed to was the caraway seed laden version sold in most groceries.  I hated caraway seeds as a kid, and I've never outgrown that.  So it was not until quite late in life that I've finally discovered the wonders of rye.

Better late than never - and even better with a little goat's cheese!

Larry


wally's picture
wally


This past weekend I decided to continue my experimentation with ryes and hot soakers. After my experience spending 7 hours making a mash for my last rye, I took Hamelman's comment on my attempt to heart: "it's always seemed to me that historically people would have been grateful to be able to make a simple manipulation of ingredients and wind up with a little sweetness in their bread."

So I decided to trade-in further chemistry experiments in favor of seeing if greater simplicity could still yield greater flavor. I selected Hamelman's 66% rye in Bread because I wanted a sandwich loaf and this seemed like it would fit the bill - sufficient rye content to provide a flavorful loaf, yet not so much as to yield a dense crumb.

The variation on his recipe was to add a hot soaker as well as toasted sunflower seeds. To create the soaker I took his rye levain, which accounts for a little over 40% of total dough weight, and halved it, creating a soaker with equal portions of flour and water that would have gone into the levain. This also raised total hydration from 75% to 80%. I then upped the percentage of yeast slightly to account for the smaller amount of levain used.

The night before my bake on Sunday I mixed my levain, and then poured boiling water over the rye. According to Hamelman this is called brühstück (a scalded soaking) in Germany. Using equal parts water and flour you end up with a very dense mixture. Both levain and soaker were covered and left overnight.

The next morning I mixed levain, brühstück and water, and then added the remaining ingredients. My toasted sunflower seeds were salted, so I gave them a quick rinse in a sieve.

Because I wanted sandwich bread - and because the hydration was so high - I air shaped the loaf and placed it in a somewhat smaller than standard bread tin. After 55 minutes proofing it was baked at 460 F initially, after which the temperature was decreased to 400 for the remainder of the bake. I wrapped the loaf in a tea towel after it cooled, and allowed it to rest 24 hours before cutting.


This, it turns out, was a good move, because it was quite moist, and over the past few days while it has dried somewhat, it remains moist. The soaker did in fact impart a noticeable sweetness that balanced nicely with the nuttiness of the sunflower seeds. Not as sweet as a mash soaker, but much simpler. This is bread I'll bake again.


While waiting for the rye to finish baking I was reading through old articles I've accumulated related to bread, and stumbled upon James MacGuire's wonderful The Baguette, printed in The Art of Eating in 2006 (Number 73 + 74).


I've read a number of times his wonderful accounting of the history of the baguette, how French baking underwent near ruination after World War II with mechanization, and of the pivotal role played by MacGuire's friend and sometime collaborator Raymond Calvel in resuscitating the art of baking through the introduction of autolyse. James MacGuire is a master baker, but he is as well a masterful narrator and commentator on the history of bread - particularly in France. I cannot too highly recommend this article to anyone unfamiliar with it. (Reprints may be obtained from The Art of Eating.)

The surprise for me, however, was that I had neglected to ever look at his recipe for a pain tradition at the article's end. And I delighted in what I found there. MacGuire is keenly aware of the challenges baguettes present to the home baker, starting with the fact that most home ovens will not accommodate a true baguette's length, and including the travails one confronts with steaming, especially in gas ovens.

And then there too is the fact that his pain tradition is a super-hydrated dough at 80%, meaning that for the vast majority of bakers it would present formidable obstacles in shaping and slashing.

MacGuire says, in effect, Ok, you want a baguette but it is very hard to do. Here instead is a baguette dough which we'll shape to an easier profile (more like a miche), and through this achieve basically the same crumb to crust ratio a baguette has.

Again, simplicity is chosen over complicated schemes. (A theme is emerging I think).

His recipe calls for hand mixing and hand folding over many hours. Because I machine mix dough at work I'm inclined to do so at home - it just seems easier. But as I followed his process I was struck by how much more in touch you become with the gluten development of the dough. It is truly fascinating to experience over many hours what transpires in mere minutes in a mixer.

My one variation on his recipe was to give it a bulk retarding overnight in my refrigerator to develop more flavor since it is a straight dough.

Next day, after 16 hours in the fridge, I preheated my oven, and turned the dough out on a floured counter. Shaping, such as it is, is equally simple: MacGuire advises patting it out to a diameter approximating that of the bottom of your floured banneton or mold, and then plopping it in for final proof. That's easy.

Final proofing was about 75 minutes. The secret to this bread is a long bake which dries out the loaf so that its crust does not go soft after coming out of the oven. And to accomplish this means an initial bake at a fairly high temperature, followed by a long bake at a much lower temperature.


The loaf, just under 1 lb., was in the oven for 70 minutes. The trick is to achieve bread that has dried sufficiently, but not in the process developed a dark crust which overwhelms the delicate flavor of the crumb. The profile in terms of height is comparable to that of a baguette and it has a crisp crust and an amazingly light, airy crumb.

I love baguettes, but I tend to avoid baking them at home because the results are never as good as what I get in a commercial steam oven. And that is frustrating. But here, in this marvelous little recipe that MacGuire tucked at the end of his article, is a simple and enjoyable method of enjoying everything good in a baguette with the exception of its form.

Not a bad compromise!

Larry


wally's picture
wally


I shared in a forum recently that I've been wanting to try to make what is in essense a rye mash instead of using the standard hot soaker.  The inspiration for this is the distilling experiences using rye of my friends Scott and Becky Harris at their distillery in Purceville, VA - Catoctin Creek Distilling Company.  Here they make two wonderful certified organic and kosher ryes - one casked and the other an uncasked white whiskey, and a rye based gin. (Unabashed plug, their micro-distillery products are now available in Virginia, Maryland, Washington, DC, and yes, the Sacramento area of California.)  I've been able to taste their rye mash, and it's incredibly sweet.  Way beyond anything I've been able to achieve using a hot rye soaker.

With this goal in mind, I contacted one our of resident experts, Debra Wink, to see how I might proceed.  Debra, in turn, drew on some of her expert baking friends, and with her help and their advice I decided upon a plan of action - namely, to attempt to slowly cook a mash of whole rye flour and water for nearly 7 hours at a temperature just below 170°F, which, I believe, is the temperature at which amylase, which is responsible for converting the starches in rye to simple sugars, becomes denatured.

So this weekend I set aside a day and proceeded first to build a formula.  I decided upon a 40% rye, with a mash equivalent to 40% of the total dough weight and a starter just over 20% of dough weight (more on this later). I used Hamelman's rye recipes as general guidelines in determining what percentages both the starter and soaker would be, though I deviated downwards significantly in the percentage of the starter in relationship to overall dough weight, and as we'll see, that may not have been entirely a good idea.  The rye flour used throughout is Heartland Mill's Certified Organic Whole Rye Flour which I am able to procure from my friends Scott and Becky.  Although it is a whole rye flour, in texture and composition it seems comparable to medium rye flours I've seen.  The AP flour used is KA's Sir Galahad.

The total dough weight was to be 1004g, just a bit over 2 lbs.  My overall formula is:

Ingredient      Baker's Percent   Weight
Flour                   100%                       560 g
Water                   76%                        426 g
Salt                        2%                           11 g
Yeast                      1%                           6 g

Starter

Rye Flour               100%                  112 g
Water                      80%                     90 g
Levain                       5%                       6 g

Mash/Soaker

Rye Flour               100%                  109 g
Water                     264%                   288 g

Final Mix

AP Flour                 337 g
Water                        45 g
Salt                            11 g
Yeast                          6 g
Levain                    208 g
Mash/Soaker          397 g

I made up my starter approximately 10 hours before the final mix.  The soaker I began in early afternoon by mixing the flour and water in a double boiler and then bringing the temperature slowly up on my simmer burner.  My goal was to achieve and maintain a temperature of 160°F for approximately 7 hours.  This proved easier said than done.  I found it necessary to stir the covered double boiler every hour, after I achieved my desired temperature, which took me about an hour of stirring at 15 minute intervals until I was there.  However, maintaining a consistent temperature was difficult.  I had to add a small amount of cold water to the double boiler at hour intervals, and in the end, the temperature reached was 170°F which was cutting it close if not too high.

Frankly, a slow cooker would be the ideal way to do this.  Unfortunately, unless you are making mash for 15 loaves or so, there is insufficient volume to make this viable.  If anyone out there has any suggestions of other methods for maintaining a constant temperature under 170°F for 7 hours, by all means share.

I left the cooked rye mash covered overnight.  The next morning I uncovered it, and found that it was sweet - more so than my hot soakers, but less so than Catoctin Creek's mashes, and about the consistency of cream of wheat.  I realized after the fact that I should have taken some pictures, but....

The final mix was accomplished by mixing first soaker, starter and the final water, and then adding the AP flour, yeast and salt to the mixture.  I realized that during my hourly stirrings of the mash, a certain amount of liquid was being lost due to steam evaporation.  This was borne out as I mixed the dough, and I ended up adding an additional 20g of water, which is reflected in the formulas above.  I mixed the dough for 3 minutes on speed one, and then an additional 5 minutes on speed 3, at which point it showed definite signs of gluten development.

Using Hamelman's section on ryes in Bread I did a one hour bulk ferment, followed by shaping a batârd.  I couched it and left it for final proofing for one hour as I preheated my oven to 450°F.  I presteamed the oven, loaded the batârd and steamed with a cup of boiling water thrown on my lava rocks, then followed this again in two minutes with another steaming.

Bake was for 15 minutes at 450°F, then 20 min. at 425°F, and finally 15 min. more at 400°F.

The loaf emerged from the oven looking nice.  I was pleased that my grignes had opened.  But the question that arose immediately in my mind was: So, would you do this again?  For the answer to that, I had to await a tasting.

Here are a couple shots of the bread:


One of the grignes and the crackly crust that developed:


The crumb was somewhat more closed than I expected, given a mere 40% rye. 


However, thinking about it, I realized that I used a much lower proportion of starter than Hamelman does in his recipes.  This was intentional - I wanted to devote more rye resources to my mash/soaker.  But I think if I did this again, I'd either find a way to raise the percentage of starter to around 30%, or, I'd up the yeast from 1% to 1.5% to compensate.

Notwithstanding, the crumb is in no way what I would call dense; it's very moist and it does in fact have a sweetness I haven't been able to realize with a hot soaker.

So, would I do this again?  Maybe.  If I had a day with nothing to do but putter around the house and stir my mash hourly, yeah.  But it's a time intensive method I've utilized, and I would be more likely to repeat this on a frequent basis if I could find a better way (i.e., less labor intensive) way of cooking the mash.

But when all is said and done, there is nothing quite like sitting down at day's end, with some fresh rye spread with good goat's cheese, and a Catoctin Creek Roundstone Rye old fashioned.  Ahhh, the blessings of rye and mash!


Larry

wally's picture
wally


Now that summer is in full blaze in the Washington, DC area, I've banished my rye and white levain starters to my refrigerator, where they seem to mournfully regard me whenever I open the door.  This past weekend as I was gazing on them I realized they hadn't been fed in the better part of a week and were probably getting cranky.  So I temporarily liberated them from their frosty clime and after an hour or so they were both bubbling and ready to be fed.  But as I started to toss a good portion of both it dawned on me I was about to waste a lot of levain for the lack of a plan.

Now, one thing I learned from TFL that has been driven home daily in a commercial environment is that you don't just toss a bit of this and a smidge of that together in creating a loaf of bread.  Everything is planned, everything is weighed, always.  But it was late and I wanted to just feed my starters and be off to bed, so I grabbed an empty container and a tablespoon and proceeded to throw a couple tbls. of both levains together, along with a handful of rye and one of Sir Galahad which I reckoned came to probably half a cup together, and enough water to create what looked like it might be a 100% starter.  And went to bed.

The next morning I found my mixed-starter healthy and looking for a new home, so I decided to create something on the fly.  At this point I did weigh the mixture which came to 240g.  So with that in mind I decided to construct a loaf that would have a hydration of 68% - making it easy to work with - and where the mixed starter comprised 25% of total dough weight.  Again, an easy number to work with.

Some quick computing, and I came up with the following:

Ingredient      Baker's Percent      Weight
Flour                       100%                       565 g
Water                       68%                        384 g
Salt                            2%                           11 g

Total                       170%                    960 g

All of which was especially convenient since total weight was just over 2 lbs - a nice size boule for my banneton.

Since I already had 240 g of levain, I did some 'guesstimating' based on the previous evenings couple-of-this-and-a-handful-of-that and decided that the compositon of the levain was probably in the neighborhood of 50 g starter, 95 g flour and 95 g water.

With those numbers in hand it was then easy to determine my final dough mix, which I decided would incorporate 20% whole wheat flour:

Sir Galahad             80%                355 g
KA WW                   20%                  90 g
Water                      58%                264 g
Salt                           2%                    11 g
Levain                     25%                240 g
Total                                             960 g

Desired dough temp is 76°-78°F.

I employed an autolyse with the flours and water for 30 minutes, and then added the levain and salt and mixed on speed 1 for 3 minutes, on speed 2 for 2 minutes and speed 3 for another 3 minutes. 

[Long aside] If I were utilizing a commercial spiral mixer instead of my poor Hamilton Beach this would be an overmixed bread. But frankly, I'm beginning to doubt that most kitchen stand mixers are even capable of overmixing in the sense of over-oxygenating dough and consequently wiping out its carotenoids.  In fact, I'm finding that I can either do a very extended mix on speed 1 only, or an abbreviated one using speed 3.  On speed 2 the dough just tends to form a ball around the hook and it just goes round and round, which isn't really contributing to gluten development I think.  By contrast, with my mixer, on speed 3 the dough is forced down the hook and gradually begins to slap the sides of the mixer which is an outcome you look for using a commercial mixer, signifying gluten development.

Bulk fermentation was 2 1/2 hours, with two folds at 50 minute intervals.  I pre-shaped a boule, allowed it to rest for 20 minutes, and then did final shaping, placed in a well-floured banneton, and proofed for 1 1/2 hours.  Because it was now early afternoon Saturday and blazing hot, I decided after this shortened proofing period to retard the loaf in my refrigerator for about 4 hours or so, until the afternoon's heat began to dissipate, making it bearable to have the oven on in my kitchen.

After a little more than 4 hours in the refrigerator the dough came out to a preheated oven at 430° F (my oven seems to run hot, so I stepped down the temp from the 460° temperature I'd otherwise bake at.

Pre-steamed, loaded the boule, and then steamed immediately and again after 2 minutes.  Total bake time was 50 minutes.


For an accidental loaf I'm pleased with the outcome.  It developed a nice crackly crust as it sang once out of the oven, and the crumb is moist and open - but not too open (it's easy to forget that not everything is supposed to resemble ciabatta :>)


This makes a nice sandwich bread.  It's moderately sour, which in my case probably reflects the impact of the rye starter more than the white one.  Lesson learned: easy way to avoid just tossing some extra starter down the drain, and an opportunity to make up a formula on the fly.

--Larry


wally's picture
wally

This past weekend I decided to revisit a favorite bread of mine - Polish Country Bread. Although I don't have Daniel Leader's "Local Breads" I've scrounged together a recipe from web searches that seems quite similar so far as I can tell. It's a 15% rye, where the entirety of the rye is in the starter. The hydration is 71% which I believe may be slightly lower than Leader's.

You can find my formula and thoughts on this variation of Leader's bread here on my website.

Lately, however, I've discovered the virtues of hot rye soakers in terms of the added sweetness they bring to rye breads, so I decided to attempt a variation-on-a-variation of his classic that still keeps all the rye within the starter - and the added soaker.

This necessitates a mixed levain bread since some of the rye is being removed from the levain to the soaker.

To make things easy (for me) I rearranged the formula so that the final dough would be essentially the same mix, with the single difference that the water weight would be reduced to offset the water used in the soaker.

2 x 1.5# loaves

Overall formula:                  Bakers Percent
Bread flour             733 g              85%
Rye flour                128 g               15%
Water                     610 g               71%
Salt                           16 g             1.90%

Mixed levains:    Flour         Water         Levain

White levain            56 g            56 g          21 g
Rye levain               56 g             56 g          11 g

Soaker:

Rye flour                  67 g
Water                      132 g

Final mix:
Sir Galahad/AP      733 g
Water                      356 g
Salt                            16 g
Levains                    256 g
Soaker                     199 g

Mixing:
The levains should be mixed 12 - 14 hours prior to use (depending on temperature, time may be decreased or increased. In DC just now, my levains are 'cooking' by 10 hours).

For the soaker, which should be made up at the same time as the levains, boil water and pour over rye, mixing until well incorporated. (Note: My last hot rye soaker used equal amounts of water and rye and almost immediately turned into a hard, dense, mass. Doubling the water helped noticeably, and next time I may triple the water as a percentage of flour.)

The next day I mixed together the water, levains and soaker, and then added flour and salt. Once I had a shaggy mass I covered the dough and allowed to sit for 30 minutes. (This is not a standard autolyse in that the levains and salt were added immediately. But I wanted to make certain that both levains and the soaker were well-dispersed from the get-go, so I decided to break with tradition and do an autolyse after all the ingredients were incorporated.)

After the rest, I mixed on speed 1 for 3 minutes, then on speed 2 for 2 minutes, and finally on speed 3 for 2 minutes. I've added speed 3 because this dough wants to climb up my hook and I've found that by increasing the speed it stays lower in the bowl and more quickly shows gluten development (slapping against the sides of the bowl).

Bulk fermentation is 2 hours, with two folds at 40 minute intervals. After preshaping and resting briefly, form into boules or batârds. Couche or proof in bannetons/brotforms for 2 - 2 ½ hours. Preheat oven to 460°F, presteam, and load loaves, steaming immediately and again after 2 minutes.

Bake at 460° for 15 minutes, and then reduce heat to 440° for another 30 - 35 minutes.

I'm still struggling to get my cuts to stay open in my (steam) leaky gas oven, as evidenced by the finished loaves. And my chevron slashing technique is in need of a lot more practice.


However, the crumb is nice and open and moist, and I really love the flavor of this bread. The hot soaker definitely brings additional sweetness. And this is absolutely sandwich bread. It recalls to my mind Jimmy Breslin's old Piels Beer commercials where he admonished us: "It's a good drinking beer!"

Well, this is a good eating bread!

EDIT (Jan. 23, 2011): My thanks to RonRay who pointed out in a message that my Overall Formula is incorrect in terms of Bread Flour weight and thus, overall hydration.  He correctly surmised that I had forgotten to factor my white levain into the overall bread flour weight. 

Actual figures for Overall Formula should be:

Bread flour: 799 g

Rye flour: 130 g

Water: 616 g

Salt: 16 g

This yields a dough with a hydration of 66%, NOT 71%.  My inclination would be to increase the hydration to at least 68%, which would entail increasing the water in the Final Mix from 356 g to 372 g.

Thanks again RonRay for an eagle eye!

wally's picture
wally

Now that we've had a brief respite from oppressive heat here in the Washington, DC area I've turned my oven on again to take advantage of this fleeting opportunity.  It's been awhile since I've baked some ryes, so this seemed a good time to get my hands sticky again.

I decided on Hamelman's 80% Rye with a rye soaker; but my curiosity got me to wondering what that recipe might be like if I reduced the percentage of rye to 60%, but held the other ingredients constant.  So began an experiment in rye profiles.

Hamelman's 80% rye with soaker has a hydration of 78%, and the rye levain is 37% of the overall dough weight, while the soaker constitutes 22% of dough weight.  His soaker is equal parts rye and boiling water, so you immediately find yourself struggling to mix a thick, thick, paste.

In addition to the levain, he calls for 1.5% yeast.

I mixed both the levain and soaker about 10 hours before I did my final dough mix, because respite or not, my kitchen tends to stay around 76° - 78°F in the summer, so things happen sooner rather than later.

The next morning my rye sour was definitely ready - you could hear noises below the rye-floured surface as it worked.  The soaker had the wonderful aroma of a rye mash, which is one of the attractions of this bread - its wonderful sweetness.

The mix was for about 10 minutes total, all on speed one of my Hamilton Beach.  It resembled mud and was even stickier, as per usual.  The bulk fermentation is only 30 minutes, followed by air-shaping and a final proof of a little over 50 minutes.  (On my last pas de deux with this rye I went for a longer fermentation and was rewarded with a collapsed loaf that had an air pocket beween the crust and crumb that miners could crawl through.  Chastened I decided underproofed was a better bet.)

I air-shaped one loaf as a batârd and the other as a boule.  I heavily rice floured both my couche and banneton, and followed that with a heavy dusting of rye flour.  Despite my efforts, the boule found a minor sanctuary in a part of the banneton's cloth.  While I slashed the batârd I decided to go au naturel with the boule and bake it seam side up.

Both were baked with steam (such as my gas stove will retain) at 460° F for 15 minutes, after which I reduced the temperature to 425° F for another 30 minutes.

I left both loaves to cool and wrapped them in linen overnight. 

The boule showed its cracks from the dough's seams, along with it's bald spot from becoming too attached to the banneton.  Oh well.   I don't have a shot of the uncut batârd because I seem to have attacked it prematurely.  In any event, the crumb seems to me to have the profile typical of my bakes of 80% ryes. 

Definitely a cocktail bread and one I particularly enjoy with a good goat's cheese.

The next day, I decided to replicate the previous bake, but this time decreasing the percentage of rye to 60%.  The other departure was my decision to step down the hydration slightly, to 75% from 78%.  In all other repects the procedure was the same - both the levain and soaker were identical.  The only difference was in the final mix where the percentage of bread flour was higher, that of rye correspondingly lower, and the hydration stepped down just a bit.  The mix time was about 9 minutes, 5 on speed 1 and 4 on speed 2.  There was evidence of gluten formation at the end of the mix.

The bulk fermentation in this case was extended to 45 minutes.  Shaping took place on my counter, and while the dough coming out of my mixer felt as sticky as the previous day's dough, it was much easier to shape after its fermentation.  I again created one boule and one batârd  and let them do a final proof of 60 minutes.  Bake temperatures and times were the same.

Here's a shot of them out of the oven.

And one of the crumb.

Ok, so to the profiles, which not surprisingly, would seem to reflect the differences in the overall proportions of rye - 80% vs. 60%.

Here are a couple shots of the boules side-by-side, along with slices taken from the respective batârds.


Both, for my taste, are cocktail type rye breads.  I think even the 60% is a bit heavy as a sandwich bread except for a dyed in the wool rye bread aficionado.  And I find myself favoring the 60% in terms of tenderness of the crumb.  With both, however, the sweetness imparted by the soaker makes them truly flavorful breads.


wally's picture
wally


I love English muffins, not only for breakfast but as a sometime lunch mate (ok, so I like tuna melts). But they pose a quandary for me: my usual recipe is easy to work with and handle, but produces muffins with a rather tight crumb. And let's face it, English muffins are all about nooks and crannies, so this won't do.

There are, of course, lots of recipes for English muffins that are based on dough with a batter consistency that produces wonderful open crumb. But these necessitate using either muffin rings or accumulated empty tins of canned tuna. Frankly, my kitchen already has too much stuff and I'm not about to begin assigning a shelf to empty StarKist cans. Plus, I want a formula that can be used in a bakery where production might involve a hundred or more on a daily basis. For that, EM rings (or empty tuna cans) aren't the answer.

So after a lot of playing with the hydration in this recipe I think it's reached a point where the dough is both hydrated enough to produce those wonderful nooks and crannies we all love, yet still amenable to shaping. (Hydration is 70%.)

One of the nice things about this particular recipe is that the levain constitutes over 30% of the dough weight, so it brings a tremendous amount of flavor to the muffins.

This will produce six, 3.5 oz/99 g English muffins, and a smidge of leftover dough.

Levain: Mixed 12 - 14 hours prior to final dough
Flour   .15 lbs/67 g
Water  .15 lbs
Levain .15 lbs

Final dough:
Flour   .59 lbs/266 g
Water  .34 lbs/155 g
Salt      .02 lbs/7 g
Instant dry yeast ¼ tsp/1 g
Levain .45 lb/202 g

Mix: DDT = 76° F
Add levain to water, then add dry ingredients and mix on speed 1 for approximately 3 - 4 minutes. Mix an additional 3 - 4 minutes on speed 2 until moderate gluten development. (With my fairly weak Hamilton Beach I'll sometimes go to speed 3 for a minute if the dough insists on climbing up the dough hook).

Place dough in a lightly oiled bowl, cover and allow to ferment for 1 ½ hours.

On a well-floured surface, divide dough into 3.5oz/99 g pieces. I roll these by turning the floured side up, and using the stickiness of the non-floured dough which is now side-down to let me create apricot-sized pieces.

Place rounded dough balls on a well-semolina-dusted pan with ½" sides. (They don't need to be ½", but for purposes of shape, you don't want to use either a flat sheet pan or one with, say, 1" sides). Leave sufficient space between them so that they can spread out without touching. Spray tops of dough with Pam and then tightly wrap the pan with plastic crap (dmsnyder's most apt description). The tight wrap with plastic will allow the dough to rise out versus up during its final proof, thus creating nicely shaped rounds of the appropriate size. (Also the reason for a pan with sides!)

Proof for 1 hour.

Heat electric skillet to 400° F and very lightly oil. Place muffins, semolina side down, in the pan, being careful not to overcrowd. (The dough will be very sticky, so the method I've adopted which allows me to handle without misshaping them in the process is to lightly wet my finger tips and then pick them up and place them in the skillet.)


Cook (I'm so used to saying bake this seems unnatural) 8 minutes - 6 minutes at 400° F and 2 minutes at 350°F. Turn and cook another 7 minutes at 350° F. Place on wire racks to cool.  (Below on left, a cut muffin, on the right, a 'forked' one.)


I'm pleased with the openness of the crumb that this recipe achieves - and without the hassle (to me at least) of having to use molds to keep the muffin shape.

And now, on a very warm Washington, DC evening, salade niçoise à la English muffin.


Larry


Pages

Subscribe to RSS - wally's blog