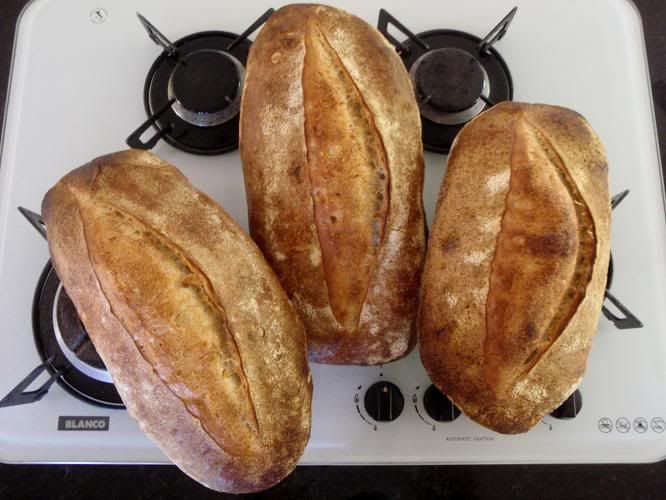
The Fresh Loaf

A Community of Amateur Bakers and Artisan Bread Enthusiasts.

Shiao-Ping's blog

Shiao-Ping's picture
Shiao-Ping

At SFBI, we did a 100% Spelt bread using dry instant yeast.  To soften the bitterness taste of spelt flour, we did a poolish as the preferment for this bread.  The result was very pleasing.  Two things about that spelt bread I found worthy of a mention from my own perspective: 

(1) The weak gluten in spelt flour is such that its mixing technique needs a bit of attention.  Its protein may be high (14.2% according to the bag of my organic spelt wholemeal flour), but a lot of it is not gluten forming protein.  However, while it is a weak flour, its gluten will happen fast (sounds counter-intuitive, doesn't it); and therefore, we need to mix faster when we are working on the spelt flour.  Towards that end, at SFBI, we used the double hydration method to try to get the gluten developed at an early stage before all recipe water is added.  (For a description of double hydration, please see my post on Chocolate Sourdough)  Also note that to mix faster does not mean that we use a vigorous mixing or kneading motion because spelt is a fragile flour. 

(2) The spelt poolish after it's been fermented shows a lot of foams on the surface.  The froth resulted from the weak flour unable to trap in gasses produced by the yeasts as seen below: 


                                                       Didier Rosada's thumb, Artisan III at SFBI, August 2009  

Theory aside, I have had no luck with the double hydration method using my bread machine.  So, with this 100% Spelt Sourdough, I used my old trusted hand method.  As well, I made another Pain le Levain with 20% Spelt flour that I posted yesterday to practice on my scoring and to see if I could get better grigne.  I suspected that the scoring in that earlier bake was difficult because I inadvertently incorporated too much water into the dough when I was stretching & folding my doughs with wet hands (the dough ended up much higher hydration than Hamelman's 68%).  I have found grigne almost not possible with wetter doughs. 

So, here are the two spelt sourdoughs:


My Formula for 100% Spelt Sourdough  

First levain build - day 1, night or early evening 

  • 3 g starter (I used my usual white starter at 75% hydration, but at this quantity, any starter you have at any hydration will do.)
  • 10 g spelt flour (I used 90% white spelt flour and 10% whole spelt flour)
  • 11 g water

Second levain build - day 2, morning

  • 24 g starter (all from the first levain build)
  • 48 g spelt flour (I used 90% white spelt flour and 10% whole spelt flour)
  • 48 g water

Final levain build - day 2, late night

  • 120 g starter (all from the second levain build)
  • 155 g spelt flour (I used 90% white spelt flour and 10% whole spelt flour)
  • 155 g water

Note: as the ratio of flour to starter is less than 1. 5 times, if your room temperature is very warm, you'll need to do this levain built as late as possible for the next day's dough mixing.

Final dough - day 3, very early morning

  • 430 g Spelt starter @ 100% hydration (all from the final levain build)
  • 224 g water
  • 387 g organic white spelt flour (90% of final dough flours)
  • 43 g organic wholemeal spelt flour (10% of final dough flours)
  • 12 g salt
  • Extra spelt flour for dusting

Total dough weight 1.1 kg and dough hydration 68%

  1. In my big mixing bowl, I first put in the starter, then poured a little of the formula water, stirred to combine, then a little more of the water, stirred to combine, then a little more of the water, and stirred, until all water was thoroughly mixed into the starter.  (I have found this way my starter works very well for me; it is as if all of the little microorganisms are woken up to do their morning aerobics.)
  2. I put in the rest of the ingredients and stirred them just until they were combined and no dry flour was visible; more work than that at this stage was not necessary.
  3. Autolyse 25 minutes
  4. First set of stretch & folds (I did 100 strokes, more than my usual, to try to build up dough strength.  I wet my hands to do the S&F's so the dough doesn't stick to my fingers.)
  5. After 30 - 40 minutes, the 2nd set of S&F's was done (I did another 100 strokes.  The dough felt silky and smooth, and quite elastic (there was good gluten development.)
  6. After another 30 - 40 minutes, I did the 3rd set of S&F's (100 strokes again).
  7. Dusted some spelt flour on the work bench.
  8. 30 minutes from the last S&F's, I pre-shaped the dough by way of a minimalist S&F's so that I could pick up the whole dough easily with one hand and dump it on the floured surface (right side was against the flour, ie, seam side was up).  Cover.
  9. Rest for 15 - 20 minutes.  In the mean time, a linen lined basket was dusted with flour.
  10. Shaped the dough first by gathering the edges of the dough to the centre, turned the dough over (so that the seam side was now down), then shaped it into a very tight ball.  Placed it in the proofing basket.  Up to this point, bulk fermentation had been about 2 and a 1/2 hours.
  11. Proof for another 2 hours (and in the mean time, I planned when the oven was to be turned on for pre-heating).
  12. Bake with steam at 230C / 450 F for 20 minutes and another 25 minutes at 220 - 210 C.


It was quite a cold morning (for a spring time) when the dough was bulk fermenting and proofing.  While I was putting on a sweater to keep myself warm, it never entered into my mind that my dough might need extra flour time because of the low temperature.  It was almost as if that I wanted to behave myself by sticking to a set formula - ie, bulk fermentation 2 and 1/2 hours and proofing 2 hours.  This is the reason why formulas don't always work because there are a lot of details that are not spelled out but which are critical.  A time-table of bulk fermentation of x number of hours and proofing of x number of hours is on the basis of a certain dough temperature and ambient temperature perimeter as well as the amount of the pre-fermented flour as a percentage of the total flours, etc.  While we may know those base temperatures and percentages very well, we may not be quick enough to adjust for our scenarios, which incidentally is never exactly the same as the last one. 

Because of the low temperature, the fermentation should have been at least 1/2 to one hour longer.  The crumb could have been more open, I believe, if the yeasts in the levain had been given a longer time to work.  The effect may be more apparent in the 20% spelt levain bread below (and I would like to come back to this point again).


Despite the above, this 100% spelt levain bread has a lovely crumb flavor.  Because of the way the levain was built up and its hydration, the acidity is very well balanced with the nutty flavour of the spelt flour.  I didn't taste the bitterness, very often associated with spelt.  The sourness is less than medium strength to me.


My formula for the 20% Spelt levain bread - please refer to my post yesterday.

To adjust for the fact that I normally dip my hands in water before I stretch & fold the dough, I did 1% less hydration in this dough.  As well, I did 100 strokes at each set of S & F's, trying to build up more dough strength for the "grigne" that I was looking for (but was unable to get in that last bake).  These two being the only adjustments, see how different the profile and the crust of this bread look compared to those posted yesterday:   


When the dough was loaded onto the baking stone, it was about 3 - 4 cm in height; it rose to about 12 - 13 cm in its oven spring.  I think the 100 strokes of S&F's were doing the trick.


For signs of good fermentation, I look at the cell structure of the crumb, especially the area where there was no visible big holes - I think the parts where there are no holes tell more story about the fermentation than the area where there are a lot of holes.  In the crumb shots above: 

(1) where there are no holes (big or small), you see that the cell structure is quite dense; and

(2) where there are holes, they are not all there to register the presence of yeast fermentation, but they could possibly be there due to the way my hand stretch and folds the dough - it is possible that I had simply folded in too much air than I should have. 

The somewhat dense cell structure (where there are no holes) tells me that the fermentation probably did not happen at the optimum temperature, given the time in which the levain had to work.  From this I learned that, even with the same formula, each bread is a new situation to be assessed independently in terms of its action plans regarding dough strength and fermentation.   

It is a flavorful bread just the same with very mild acidity.  If I could get yesterday's cell structure with today's crust and grigne, it would be a near perfect world for me.


Shiao-Ping

Shiao-Ping's picture
Shiao-Ping

I find Hamelman's Pain au Levain formula very attractive (page 158 of "Bread").  A friend asked if I could do spelt sourdough for her.  I thought I would try 20% spelt flour to start with.  Essentially I took Hamelman's Pain au Levain with Whole-Wheat Flour formula (page 160 of "Bread") and substituted spelt for whole-wheat flour.  But I have no confidence in my bread machine to mix and knead the dough properly, so I made two versions to compare: one by hand, my way; and the other by machine, exactly as detailed in Hamelman's book.   

Formula

First levain build - 8 to 12 hours before final levain build 

  • 5 g starter
  • 14 g bread flour
  • 9 g water


Final levain build - 12 hours before final dough mixing 

  • 130 g bread flour
  • 9 g stone-ground organic medium rye flour
  • 85 g water
  • 28 g mature culture from above (@ approx. 60% hydration)


Total levain 252 grams.  Reserve 28 grams for future use; with the balance of 224 grams, I split it by two (ie, 112 grams each), one for the dough to be made by hand, and the other for the dough to be made by my bread machine. 


Final dough - the quantity below is to be split by two as above 

  • 549 g bread flour
  • 37 g stone-ground organic medium rye flour
  • 181 g organic spelt flour (of which 1/2 is wholemeal spelt flour)
  • 532 g water
  • 17 g salt
  • 224 g of levain from above


Total weight 1.54 kg to be split into two of 770 grams each; dough hydration 68%


Major differences in the two methods are as follows:

(1) Autolyse:  With the hand mixing version, I autolyse all ingredients, whereas with the other version, salt and levain are not mixed in until after the autolyse. 

(2) The levain: In Hamelman's machine version, the levain is cut up in chunks and spread on top of the dough to mix. With my hand version, I diluted the levain thoroughly with the formula water before adding the flours in to mix.  As a result, the levain in the hand version acts more vigorously.   This means that fermentation happens faster in the hand version (see below).

(3) Fermentation:  Temperature of both of the doughs was roughly 76F as recommended by Hamelman in his book.  Bulk fermentation was 2 and a 1/2 hours and proofing was 2 hours.  An interesting thing was that at the end of this fermentation time, I felt the two doughs with my finger - the one that was mixed and kneaded by bread machine felt just right, however, the hand version dough felt slightly over-proofed, very bubbly, gassy and fragile.

(4) Baking:  I baked the hand version dough first (and placed the other into the refrigerator to wait for its turn).  

(5) Scoring:  My scoring for the hand version dough was shocking; the other one was easier for me as it was in the refrigerator for half an hour.


It is very obvious that that the hand version pain au levain has a more open crumb.  Hamelman says of Pain au Levain with Whole-Wheat Flour that "the bread has a clean flavor and a balanced acidity" this would apply to the two Pains au levain here with 20% Spelt as well.  The flavour is really lovely.


It is very easy to over-ferment the dough.  If dough temperature is higher or lower than the recommended 76F (24.5F) due to ambient temperature, fermentation time should be adjusted.


Shiao-Ping

Shiao-Ping's picture
Shiao-Ping

I was taking shots of the moon cakes for this post and was late collecting my son from his sport; when I arrived, he said to me, "Mum, do you love me?"  Seeing my stunned face, he added, with a grin, "I was the last to be picked up!"

Somehow I felt that another post about the full moon was in order ... because of that remark about the Chinese excellence in astrology, or not!  The Chinese lunar calendar was formalized thousands years ago.  Recently I have learned a big word from my husband - to recalibrate.  Something that is as old as the Chinese lunar calendar may be in need of some sort of recalibration!  In recent years a few friends of mine and I have found that the moon is fuller the next day after the Moon Festival.  I know nothing about astrology.  What I have just said may well be taken as an excuse to eat more moon cakes!

I came to my favourite Taiwanese grocery store in "Little Taipei" in Brisbane looking for good moon cakes to buy.  I was chatting with a lady there and I found out that she is the boss's wife.  I asked her which are the good ones to buy.  She asked me, "Are they for you, or for giving away as a present?" - the latter means moon cakes with good looking packaging and wrapping but may not be of the best quality, while the former means good quality and good tasting moon cakes for own consumption.  She pointed at those she got for herself.  I could not pass by a lead like that.


Assorted moon cakes from "Little Taipei" in Brisbane - lotus paste on the top left, red bean paste (very dark brown color) in the centre, and savory ham & nuts to the top right

And below are the "moons" - salted duck egg yolks. 


These have been the traditional flavours since I was a little kid.  In recent times there have been new flavours being developed because of the affluence in consumers and the popular new flavours have been chocolate and other tastes under the Western influences.  Because I was in no mood for the troubles in making the moon cakes, I decided I would try incorporating a very traditional moon cake ingredient - red beans - into my sourdough.  This is a can of the cooked red beans that I used (made in Japan):


In addition to the Red Bean Sourdough, I made Cocoa Cranberry Sourdough Rolls.  So, here below is the goodies I made for the Moon Festival for my kids and myself, quite a Western concoction:


My formula for the Red Bean Sourdough

  • 240 g starter @ 75% hydration
  • 240 g bread flour
  • 157 g water
  • 170 g cooked red beans from the can above (45% of total flour) * see step 5 below
  • 7 g salt
  • Extra rice flour for dusting

Total dough weight 810 grams and total dough hydration (approx.) 69% 

  1. Mix all ingredients by hand
  2. Autolyse 40 minutes
  3. Mix in the red beans by way of stretch & folds (this serves as the 1st set of S & F's; I did close to 100 strokes)
  4. After 30 minutes, perform the 2nd set of S & F's
  5. After another 30 minutes, perform the 3rd set of S & F's (* At this point my dough still felt very extensible, no strength whatsoever.  I decided something was wrong - I went and checked the can of red beans for its composition and found that its sugar was 38%!  This meant the sugar level in my dough was 17% flour.  When sugar is more than 12 - 15% of flour, it is best to add it in stages or starter may have difficulty performing.  It's too late now so I proceeded as normal.)
  6. After another 30 minutes, do the 4th set of S & F's
  7. After another 30 minutes, pre-shape the dough to a tight ball (I had to use a lot of flour on the work bench as the dough was extremely slack and sticky.)
  8. Rest 15 minutes and shape it to a boule and place it in rice flour dusted basket
  9. Proof for one hour in room temperature then place it in the refrigerator for overnight retarding (I did 10 hours.) Note: By the tiime I put the dough into the fridge, it had hardly risen.  Fortunately, after 10 hours of retardation, the dough had risen nicely, more than doubled.
  10. Next morning, just before baking, stencil any way you like, score, then bake with steam at 230 C for 35 minutes


It is strange that for that much sugar this sourdough actually does not taste sweet.  It tastes quite sour (I would say, slightly less than medium strength sourness), and therefore I felt no guilt at all to have a slice of this with a handsome topping of extra red beans from the can!  Yum (to a Chinese).


My formula for Cocoa Cranberry Sourdough Rolls

  • 350 g starter @ 75% hydration
  • 350 g bread flour
  • 60 g cocoa powder
  • 240 g water
  • 30 ml or 2 tbsp oil
  • For cranberries: 80 g dried cranberries + 60 g Kirsch + 20 g sugar, soak for as long as you can, up to a couple of weeks, in the refrigerator
  • 12 g salt

Total dough weight 1.2 kg (to be divided into 8 pieces of 150 grams each) and total dough hydration (approx. ) 75%


  1. Bulk fermentation 3 hours with 4 sets of stretch & folds
  2. Proofing one hour
  3. Retardation 10 hours
  4. Bake with steam @ 220 C for 25 minutes (I baked 4 pieces at a time while the other 4 resting in the refrigerator)


This Cocoa Cranberry Sourdough Roll is really lovely to have.  So far I have found the cocoa powder (and for that matter, chocolate) very easy to work into a sourdough.  The crust is very crispy.  

I asked my daughter if people would find so many pictures in one post nauseating. She said without hesitation, "No, people would just think you are a lunatic."  My daughter is one who cannot tell a lie (what you see is what you get).

There had been a big patch of dark cloud hanging over the north-eastern side of the sky, determinant not to let me see the moon tonight.  As I was signing off this post, I went to my balcony to have one last look, and there it was - brighter and fuller than last night!  And here it is - the last photo of this post: 


Shiao-Ping              

Shiao-Ping's picture
Shiao-Ping

In a couple of weeks' time I will be visiting my favourite tea houses in Taipei and Kaohsiung, Taiwan.  Oolong tea has become a drug to me; the first sip of this green tea very early in the morning before the whole household stirs, whilst seeing the sun rise, is like heaven to me.  My tea is my ticket to heaven.

Today is one special day for all of the Chinese in the world - the Moon Festival, or the Mid-Autumn Festival (more like the Mid-Spring Festival for me down under).  This festival has been celebrated since the 7th century in the Chinese Tang Dynasty.  None of the stories, or legends, as to how and why this festival came into being has ever sounded credible to me.  I hadn't thought of it before but now I think perhaps this festival began more as a way of showcasing the ancient Chinese excellence in astrology, because this day, the 15th day of the eighth month in the Chinese Lunar calendar, is considered the day when the moon is the fullest and brightest each year.

The Chinese poet, Lee Bai or Li - Bai (701 - 762) in Tang Dynasty, died from trying to scoop the full moon out of the lake while drinking and dancing to the moon, a drowned drunkard basically.  The following is one of his poems that I love the most; I had it written in mad running style Chinese characters for me; while he drank wine, I drink tea:


I made a sourdough, intending to have it with Chinese sausage in a sort of open sandwich tonight to celebrate the full moon.  I used the "trinity" for Chinese stock pot - soy sauce, sugar & garlic (and I threw in sesame oil too) to flavour this sourdough:


When I was stirring my starter in the soy sauce mixture trying to break it up, I thought I must have poisoned the little beasties - there was absolutely no sign of life.  And sure enough, the dough, after 4 hours of fermentation, was flat as a pancake, dead as a door knocker!  Fortunately, it sprang up in the oven, maybe by 50 - 75%.  The raw garlic was so potent that while it was in the oven baking, I felt sorry for my poor neighbours.  I couldn't even say I liked the smell.  I don't know why I put in so much raw garlic in the first place - maybe I was trying to make a statement.  It really is not good form to be biting into a piece of bread so full of garlic; I mean, not on a night of beautiful full moon!


My Formula

  • 350 g starter @ 75% hydration
  • 350 g bread flour + 1 tsp Chinese five spices
  • 190 g water
  • 30 ml sesame oil
  • 15 g dark soy sauce
  • 20 g sugar
  • 6 cloves of garlic, minced (two cloves should be plenty)
  • 6 g salt

Total dough weight 1.1 kg and total dough hydration 70%


Shiao-Ping

Shiao-Ping's picture
Shiao-Ping

My son has been singing a song called Down Under.  Listening to this song with his i-pod ear-phones, he dances out of his room as he comes into my kitchen to check if there are any goodies to snack on.  I asks him what song it is; he says, Mum, this song is iconic and it goes:

Traveling in a fried-out combie
On a hippie trail, head full of zombie
I met a strange lady, she made me nervous
She took me in and gave me breakfast
And she said,

Do you come from a land down under?
Where women glow and men plunder?
Cant you hear, cant you hear the thunder?
You better run, you better take cover.

Buying bread from a man in Brussels
He was six foot four and full of muscles
I said, do you speak-a my language?
He just smiled and gave me a Vegemite sandwich
And he said,

I come from a land down under
Where beer does flow and men chunder
Cant you hear, cant you hear the thunder?
You better run, you better take cover.

Lying in a den in Bombay
With a slack jaw, and not much to say
I said to the man, are you trying to tempt me
Because I come from the land of plenty?
And he said,

Oh! do you come from a land down under? (oh yeah yeah)
Where women glow and men plunder?
Cant you hear, cant you hear the thunder?
You better run, you better take cover.

And he is so stingy; he wouldn't let me take a photo of him dancing.

Driving my kids home from their tennis yesterday afternoon, I was getting an earful of suggestions from them as to how to do an Aussie Sourdough.  My son said there's got to be Vegemite and my daughter said there's got to be some gold or green color (they are the colors Australia wears in international sports).  And so I said, there's got to be jacaranda somewhere because it's the jacaranda season now (the saying goes, if when jacarandas are in bloom and you haven't started studying for your exams, you are in trouble).  And here is our Sourdough Down Under: 


My Formula

  • 350 g starter @75% hydration
  • 350 g Australia's Laucke's Wallaby unbleached bakers flour
  • 70 g Kraft (new) Vegemite, diluted in 35 g water (Note: this new product contains yeast extract from barley (30%) and cream cheese (28%) with caramel flavor and salt.)
  • 200 g water
  • 30 ml (ie, 2 tbsp) olive oil
  • 6 g salt (less salt than normal as there is salt in Vegemite)
  • 157 g pistachio, roasted (I had 250 grams sitting on my stove to cool off, everybody went past the nuts and ate some; by the time I was ready to mix them into the dough, barely 2/3's left.)   This is the "green" color that I can think of for this sourdough.  At the last minute I coated the nuts with one tablespoon of olive oil (just before they were to be mixed in) as I was afraid that the roasted nuts might draw some hydration out of the dough.
  • Extra rice flour for dusting the proofing basket

Total dough weight 1.2 kg and total dough hydration (approx.) 75%


  1. Mix all ingredients (except the pistachio nuts) by hand
  2. Autolyse 40 minutes
  3. Perform the first set of stretch and folds, about 30 - 40 strokes
  4. After 45 minutes, do the 2nd set of stretch and folds and at the same time mix in the nuts
  5. After another 45 minutes, do the 3rd set of stretch and folds
  6. After another 45 minutes, do the 4th set of stretch and folds (and this will serve as the pre-shaping)
  7. Rest 20 minutes
  8. Shape into a boule and place in a rice flour dusted and linen lined basket
  9. Proof in room temperature for an hour then place the dough into the refrigerator for retardation (I did 8 hours)
  10. Bake the next morning with steam at 240 C for 20 minutes and another 20 minutes at 220 C.

I think my starter did not like the foreign elements from the Vegemite.  Every kid in Australia knows that Vegemite is a yeast product which contains Vitamin B.  But it is also heavily loaded with preservatives; it can sit safely in your pantry for a long, long time.  My dough had hardly risen when I put it into the refrigerator (maybe only 50%).  There wasn't much oven spring either (probably another 50%).  If I had done this sourdough before, I would most likely have spiked it with some dry instant yeast.

But the aroma was strong!  The whole house smelled delicious when the baking was going on.


It is a beautiful night tonight, clear and lots of stars.  My husband had just had a dip after a few hours work in the backyard and he called everybody out to see the moon.  In a couple of nights, it will be the Chinese Moon Festival, the 15th of August in the Lunar calendar when the moon will be the fullest and brightest.  I reckon there are more stars visible in the southern hemisphere than in the north; at least that is the case in Asia, where I grew up, lots of industries and, sadly, pollution.

My kids love today's bake and so do I.  My husband said the stencil looks like Australian aboriginals' art work on their cave walls (the latter was considered one of the earliest form of recoding of human history).

You could hardly call pistachio Australian; but roasted, their nutty aroma compliments the rich flavor of Vegemite very well.  I will have no problem having a slice of this toasted with some cheese over a glass of Australian red.  Yum yum ....


Shiao-Ping 

Shiao-Ping's picture
Shiao-Ping

We made olive bread at Artisan II course, SFBI, using double hydration method (see this post for a description of double hydration).  At the time I felt the bread came out a bit dense because, with the double hydration method, you actually end up mixing the dough for quite a long time.  The method is supposed to help build up the dough strength before any add-ins are incorporated into the dough. 

With this Olive & Rosemary Oregano Sourdough, I wanted to experiment if I could first build up the dough strength with stretch & folds by hand, then incorporate the olives and herbs.  What I did was after the usual autolyse of 30 minutes, I did the first set of stretch & folds, waited 3o minutes, then mixed in the add-ins by way of the 2nd set of stretch & folds.  Perhaps because this dough was lower hydration than my usual dough (which is well over 70%), I found that some strength and good elasticity had already developed towards the end of the first set of stretch and folds.  So, I was happy to incorporate the olives and herbs at the 2nd set of stretch and folds.  

My kids are on school holiday this week; it's a week day today but felt like a Sunday for us.  Here is the sourdough we enjoyed at today's lunch table.     


My Formula

  • 704 g starter @75% hydration
  • 412 g water
  • 60 ml or 4 tbsp of olive oil (note: 4 tablespoonfuls of olive oil is 60 ml but not 60 grams; it is about 40 to 44 grams in weight. The SFBI formula that we worked on at the Artisan course does not use olive oil.)
  • 704 g bread flour
  • 17 g salt (I used only 1.5% of total flour because there is also salt in olives.)
  • 280 g pitted kalamata olives, rinsed in water and drained (I used 25% of total flour)
  • Chopped rosemary (I used only a sprig of 20 cm in length; this turned out to be on the light side, you could easily have 2 to 3 times amount of what I used).
  • Chopped oregano (I used only 3 sprigs; this also turned out to be too little, you could at least triple the amount I used. Also note the SFBI formula uses Thyme, not rosemary or oregano.)
  • Extra Whole Wheat flour to coat the olives (just before olives are to be incorporated into the dough); this is said to prevent the olives from being meshed during mixing, but I don't find it necessary.

Total dough weight 2.16kg (to be divided into two pieces); total dough hydration 70% (note: SFBI formula is 66% hydration) 


  1. Mix all ingredients (except the olives and the herbs) by hand
  2. Autolyse 30 minutes
  3. Do the first set of stretch and folds of 30 - 40 strokes
  4. After 30 minutes, incorporate all the olives and herbs at the 2nd set of stretch and folds
  5. After another 40 minutes, perform the 3rd set of stretch & folds
  6. After another 40 minutes, divide the dough to two pieces and pre-shape to tight balls
  7. Rest for 20 minutes
  8. Shape to tight balls
  9. Proof for 2 hours then place in refrigerator to retard (I did 18 hours)
  10. Bake next morning with steam at 230 C for 20 minutes and 220 C for another 20 minutes


Some thoughts on this bake:

(1) The dough was slightly over-fermented as there was not very much oven spring.  From the time the dough was mixed to the time it went into the fridge, it was 5 hours.  Adding the 18 hours retardation, total fermentation was 23 hours.  This normally would not be too much, but I wonder if my active starter has meant that I should shorten the proofing time before the dough gets into the refrigerator.

(2) 5% olive oil increases the keeping quality of the sourdough; the bread stays fresh longer and toasts beautifully.  The oil gives the crumb a very light texture.


Shiao-Ping

Shiao-Ping's picture
Shiao-Ping


                                                                               SP's Country Sourdough


And let's slice them ...


 Now I found something ... 


And this ...


                                   Lovely crumb to me                                        but this is slightly on the dense side and gummy, why?


A wake-up call:

I recall when I was mixing my starter in the water for the final dough, I felt tiny little lumps of dough in my hands but I was unable to break them up because they were too many.  I used a trick that I learned from making custard when there were lumps - by pushing the starter through a sifter, I managed to get rid of most big lumps, but there were still many very tiny ones.  I got tired of trying to get rid of them, so I proceeded as normal.  Those lumps would most likely have been formed during the 2 hour final levain expansion (see my post here for details of Chad Robertson's sourdough timeline) - I did not mix the starter thoroughly with the flour and water.  And these lumps, however small, became the gummy part of the crumb!  (I may be wrong but that's what I think it was.)

A myth: The longer the fermentation, the better it is for the sourdough.  No, it depends on how time is spent, not how much time there has been.

With this sourdough, I learned something new.  What happened was when I was trying to get rid of the lumps, my hands were stirring the starter in the water for quite a long time (15 to 20 minutes at least).  I had never seen so many bubbles appearing in the water as if all of the wild beasties were woken up from their sleep and were doing their morning exercises.  This would not have meant anything to me, had it not been the fact later on that the fermentation seemed to have advanced in quite a fast pace even though the dough temperature was under 20C / 68F.  (I wish Debra of the Frankendough could help me out here.)

Anyway, with the fermentation kicking along, I decided I wanted to do an experiment, and that is, to really work the dough with my stretch & folds in such a way as to really build the dough strength.  I dipped both of my hands in water (to prevent sticking) and, with one hand pressing the centre of the dough, the other hand grapping a corner of the dough and folding onto itself, I stretched & folded the dough quite vigorously for at least 30 to 40 times at each set of S&F's until the dough felt elastic.  I did 3 sets of S&F's within one and a half hours and within that time the dough expanded quite a lot.  In normal circumstances I would have done a 4 hour bulk fermentation as in my post of Chad Robertson's country sourdough; but in this instance, I decided one and a half hours were enough (the dough temperature stayed under 20C).  I divided the dough into three pieces and pre-shaped them twice as they were very soft and even though I pre-shaped them to very tight balls each time they relaxed and spread out completely.  I shaped them to tight batards and only proofed for half an hour, compared to 2 hours previously when I did my Chad Robertson's.  Retardation was only 9 hours.

This morning before I baked them, the doughs were as flat as pancakes, but in the oven, they rose like hills:


What I learned in this bake is that the dough strength (built up from the vigorous stretch & folds) helped in the volume (the oven spring, the open crumb, etc).


Time for some food,


And pack up the rest,


Shiao-Ping 

p.s.  The minor variations I made in the formula here compared to the one in My Imitation of Chad Robertson's Country Sourdough were: (1) 72% hydration; (2) 5% of total flours in rye flour; and (3) total dough weight 3 kg.

Shiao-Ping's picture
Shiao-Ping

The best Walnut Sourdough that I've ever had was from Tartine Bakery in San Francisco.  Imagine a rustic Country Sourdough studded with whole walnuts and no compromise on the open crumb.  To me a simple sourdough like walnut sourdough is not something that can be easily made well; in fact, I've found any sourdough with add-ins hard to make really well.  Once I find a method that works for me, I am normally eager to try the new method on doughs with add-ins.  This was what happened when I found James MacGuire's hand-mixing technique.  He permanently expelled my fear of hand mixing.  I had used his method on walnuts and mixed dried fruits and quite liked the result at the time but was wondering subsequently if it was possible to achieve a more open crumb.   I know the emphasis on an open crumb may sound pretentious at times but I am just a housewife with free time and mental space.  If there is something I still find room for improvement and I am still interested enough, I'll keep trying.

With this post I have used the method I've recently learned from The Bread Builders about Chad Robertson's sourdough timeline and applied it by hand on my own formula.  One of these days I will write to him to seek for confirmation but for now I will amuse myself with one more bake along the same line as my previous 4 posts. 


My Formula 

  • 716 g starter @ 75% hydration
  • 71 g stone ground organic medium rye flour (10% of final dough flour)
  • 645 g organic unbleached flour (90% of final dough flour)
  • 593 g water
  • 450 g walnuts (40% of total flours, including that from starter), toasted
  • 22 g salt
  • Extra medium rye flour for dusting

 Total dough weight 2.5 kg and total dough hydration 80%


  1. First break up the starter in water in a big bowl by hand
  2. Stir in all the ingredients except walnuts (record the time when this is done)
  3. Autolyse 45 minutes (longer than I normally would, to make sure the flour has a good chance to bind with the water before the disruptive walnuts come in)
  4. Spread half of walnuts on a work bench, dump the sticky dough on top of it, then spread the other half of walnuts over the dough
  5. Start mixing in the walnuts by a series of folding motions with a dough scraper from the side to the centre, then
  6. Place the sticky dough back to the big bowl, and start the first set of stretch and folds by hand or with the plastic scraper
  7. Do another 3 sets of stretch and folds in the next 3 hours or so (note: total bulk fermentation is 4 hours counting from the time ingredients except walnuts are mixed until division/pre-shaping; the ideal dough temperature for me is 18 - 21C / 65 - 70F, if your dough temperature is higher due to warmer weather, shorten fermentation time accordingly)
  8. Divide into three pieces of 830 g each and pre-shape each to a log
  9. Rest for 15 minutes and in the mean time dust linen with medium rye flour
  10. Shape into batards
  11. Proof for 45 minutes (as my room temperature had risen and the dough temperature registered 25 C / 77 F, I put the dough into the refrigerator to start retarding)
  12. Retard for 17 hours (or 8 hours minimum)
  13. Bake the next day with steam at 230 C for 20 minutes and another 20 minutes at 220 C.


With the high hydration and rye flour, the dough fermented quite well earlier on.  There was very noticeable fermentation activity even before the second set of stretch and folds.  With my room temperature rising, the dough was at a risk of being over-fermented.  On hindsight, the bulk fermentation could have been shorter.

Also, I went crazy with walnuts.  Even though it is nice to have such a "deluxe" quantity, there is really more chewing than necessary when you bite into a slice.

The 80% hydration is about right because of the added nuts.  A couple percentages more hydration would be fine too.

Other than the above, this walnut sourdough is quite alright, no where compared to Tartine's though.  What's in your memory is always the best.

Shiao-Ping

The following is updated on 21st Septermber: I found these pictures of very rustic sourdoughs from Tartine Bakery in my files, including their Walnut Sourdough, and would like to share them:


      I believe the one in the front to the right is the Walnut Sourdough


                                   Walnut Sourdough

Their sourdoughs appear to be very high hydration to me.


Shiao-Ping's picture
Shiao-Ping

Have you ever used shop-bought bread pre-mixes to make sourdoughs?  I have several unfinished bread mixes at home from those days when I used bread machine to make pan breads; they are all reaching their use-by dates and I really don't want to waste them. 

The Multigrain Bread Mix I have is soy (10%) and linseed (5%), whole rye, maize polenta, in addition to unbleached wheat flour.  It has many "dough conditioners" added in: ascorbic acid, enzyme, emulsifier, etc., to assure of its performance.  And the salt (2.4%) has also been added in.  The box says its protein is 12.6%.  All that you need to add is water and yeast, and way you to.  For a home sourdough there is nothing wrong with using it (I am not concerned with my label!).

This is how my multigrain bread-mix sourdough has turned out:


My formula 

  • 700 g mature white starter @75% hydration (ie, 300 water + 400 g flour)
  • 700 g Australia's Laucke Multigrain Bread Mix
  • 8 g salt (for the flour portion of the starter)
  • 492 g water

Total dough weight 1900 g and total dough hydration 72% 


  1. Mix by hand
  2. Autolyse 30 minutes
  3. Bulk fermentation 3 hours with 5 folds every 30 minutes
  4. Proof for one hour
  5. Retard in refrigerator for 14 hours
  6. Bake with steam as usual


Using bread pre-mixes to make sourdough is quite a fool-proof way to make a nice tasting bread. 

Shiao-Ping

Shiao-Ping's picture
Shiao-Ping

Very soon it will be Celtic New Year (see my Van Morrison post).   It doesn't mean anything to me except that here in Australia spring is in full swing, spring is the season for new growth and that's what you get after New Year .  Here in Brisbane Hong Kong Orchid trees are towards the end of their flowering season; when their flowers have all fallen, Jacaranda will be in full bloom.  I put on my joggers, went around my neighborhood and took these photos of Hong Kong Orchid trees:


Yesterday while I was watering my husband's baby avocado tree in the backyard, in amongst Polly our dog's droppings, I saw little bell shaped purple flowers; I lifted my head and was surprised to see one of our jacarandas is showing the new season's color.  Very soon my one and only surviving rose bush will be blooming, and when all the jacaranda flowers have fallen, roses will be in full bloom.

I'd like to celebrate spring by this Ancient Grains Sourdough (anticlimax?).  Safa, our instructor at Artisan I, SFBI, once told us he made a 7 x 7 sourdough, which has 7% Teff flour and 7% spelt flour.  He calls it 7 x 7 because it is easier to remember.  He said a small percentage of Teff flour gives a pleasing sweetness to the bread.  Teff is the smallest grain in the world and compared to other grains, it has a much larger percentage of bran and germ.  My idea of this Ancient Grains Sourdough indirectly came from him.  I added buckwheat flour which I bought from Ferry Building in San Francisco last month, together wiith Teff flour.  The whole grain buckwheat is ground into flour with little black specks that come from the ground seed hull.  This is how traditional buckwheat flour has been made for hundreds of years.  All three grains are considered "ancient grains."  

I noticed the dough seemed to be quite "volatile" as there were a lot of bubbles happening at very early stage of the fermentation.  There must be more enzymes in the dough because of the bran and germ from the whole grain ancient flours than just plain white flour.  I ended up doing more stretch & folds with this dough to try and slow down the enzymatic activity.   And here is my Ancient Grains Sourdough (Sourdough 7 x 7 x 7):


Formula for My Ancient Grains Sourdough

For a description of Chad Robertson's method as decribed in Daniel wing and Alan Scott's The Bread builder, please see  my previous post.

Two nights before bake day - first stage of levain build-up

  • 62 g starter @ 75% hydration
  • 124 g bread flour (i.e. two times starter amount for me; I do not know what ratio Chad Robertson uses.)
  • 94 g water

Mix and ferment for 6 - 8 hours at 18C / 65 F (depending on your room temperature, you may need shorter or longer fermentation time for your starter to mature)

The morning before bake day - second (and final) stage of levain expansion

  • 280 g starter @ 75% hydration (all from above)
  • 280 g bread flour (I use one time starter amount in flour but I do not know what amount Chad Robertson uses)
  • 210 g water

Mix and ferment for two hours only.

Formula for final dough

  • 770 g starter (all from above)
  • 770 g bread flour
  • 54 g spelt whole meal flour (7% of bread flour)
  • 54 g whole grain buckwheat flour (7% of bread flour)
  • 54 g whole grain Teff flour (7% of bread flour)
  • 630g water
  • 25 g salt
  • Extra rice flour and bread flour mixture for dusting

Total dough weight 2.35 kg and total dough hydration 70%

  1. In a big bowl, first put in water then put in the starter. Break up the starter thoroughly in the water with your hands.
  2. Add all ingredients and stir with a wooden spoon to combine for 1 - 2 minutes.  (Take down the time when this is done; this will be your start time for calculating the 4 hour bulk fermentation.  Starting from this time, your dough is fermenting. The preferred room temperature is 18 - 21C / 65 - 70F. You may need to adjust your dough temperature by using cooler or warmer water.)
  3. Autolyse 20 - 30 minutes
  4. Start the first set of stretch and folds in the bowl by grabbing the edge of the dough with one hand and fold to the centre onto itself (10 - 20 times) while rotating the bowl with the other hand as you go. The hand folding serves as mixing. As you stretch and fold, try not to tear the dough; only stretch as far as it can go.
  5. After 30 minutes, do the second set of stretch and folds. You will see that this dough is very easy to work with and the fermentation seems to be under way quite nicely as there will be some bubbles already forming in the dough. At the end of the folds, the dough will feel silky and smooth and almost leave the side of the mixing bowl. (The dough appears to be quite "volatile." Because of the activity that seems to be taking place inside the dough, I made a mental note to come back to it for the next set of stretch and folds very soon.)
  6. When you fold, be mindful that the bottom of the dough is the right side of the dough; and the right side of the dough always remains at the bottom in the bowl.   *See note below.
  7. After another 30 minutes, do the third set of stretch and folds. You will see that the dough is very active in that there seems to be a lot of fermentation already going on as the dough feels quite bubbly and has expanded quite a lot by the time you do the third S & F's. (So right there and then you know that more stretch & folds will be necessary to slow down their activity.)
  8. After another 30 minutes, repeat the stretch & folds. 
  9. After another 60 minutes, do the fifth set of stretch & folds.
  10. After another 30 minutes (that will be the end of the 4 hour bulk fermentation and the start of the 2 hour proofing), pre-shape the dough to a very tight ball as follows: First sprinkle some flour on your work bench and some flour at the edge of the dough (ie, in between where the dough meets the bowl); scrape the dough out onto the bench, trying as much as you can to land the right side of the dough (which is at the bottom) onto the floured bench. Gather the sides of the dough to the centre, flip the whole thing over (so now the right side is on the top) and pre-shape to a tight ball. You will see that the dough is very wobbly and after 10 minutes resting on the bench, it will have completely spread out. I decided to do another pre-shape. I flipped it over, gather the sides to the centre, flipped it over again, then shaped it tight again.
  11. Dust your linen-lined basket or banneton with a mixture of bread and rice flours.
  12. After another 10 minutes resting, shape the dough and place it into your basket for proofing. Cover.
  13. My room temperature is 18 - 21C / 65 - 70F; if your room temperature is cooler or warmer than that, adjust your proofing time accordingly.
  14. At the end of the 2 hour proofing, place the dough into the refrigerator for retarding (minimum for 8 hours; I retarded mine for 16 hours).

* Note on the right side of the dough:  Since I started doing what I thought was Chad Robertson's sourdough procedure by hand, I recalled an incident during my Artisan III class.  My team had  members who worked in commercial bakeries and one day, towards the end of our first speed mixing for a dough, a team member switched the spiral mixer to the reverse gear to try to pick up some dough stuck on the side of the wall.  Our instructor saw it and told us never to do that; he said that you can do reverse gear only at the beginning of the mixing process when the ingredients are still being incorporated.  The reasoning is:  once the gluten structure has started to form in a certain direction, it is not advisable to do anything to alter or disrupt that direction.   Therefore, my thinking is when I am hand-mixing and folding the dough, I want to keep that "direction" in tact.

Bake Day

  1. Bake the boules cold (ie, straight out of the refrigerator). Just before baking, sift flour on the dough and score it or stencil it any way you like. Once the dough is loaded onto the baking stone, steam the oven with 1 cup of boiling hot water.
  2. Bake at 220C / 430F for 30 minutes, then turn the oven down to 200C /390F (or higher if you wish for a darker crust) and bake for another 25 - 30 minutes.
  3. Cool completely before slicing.


       The dough spreads out enormously and fills my whole baking stone (measuring 34 cm x 34 cm)

       with a little bit hanging out on the side of the stone.

This is an unusual sourdough.  It is quite sour (medium strength sourness) even though I used the same starter as for my other Chad Robertson sourdough.  I can only surmise that it is because of the ancient whole grain flours that I used here.  The enzymes in the flours must have sped up the fermentation process quite a lot such that the dough was far more fermented than that other sourdough I made, hence more sourness.  The sourness is more of an acidic, rather than lactic, acidity.  


The texture is very different from that other sourdough, too.  The texture of sourdough made from white bread flour is normally tender, whereas this one is quite "robust," as if the crumb has "strength" when you bite into it and is quite chewy.  The comparison is a bit like the difference between red wine made with shiraz (syrah) grapes (very "robust") and other red wine made with merlot or cabernet sauvignon (more "mellow").  It is very moist just the same. 

I couldn't taste the sweetness that Safa mentioned of Teff flour but it has a very interesting nutty flavor.  

The crumb is very open, as open as what I can hope for.  As the dough had a lot of enzymatic activity during fermentation and spread out enormously (not keeping its shape), I wonder if cutting down the hydration to say 67% would make it more manageable and at the same time not hurt its open structure.

Chinese collects stones or rocks which show formations of nature.  My uncle Chang has a rock which looks like a mountain.


         My bread mountain                                 Bread mountain -other view 1                 Bread mountain - other view 2


                                                                 This ancient grains sourdough is delicious.

Shiao-Ping

Pages

Subscribe to RSS - Shiao-Ping's blog