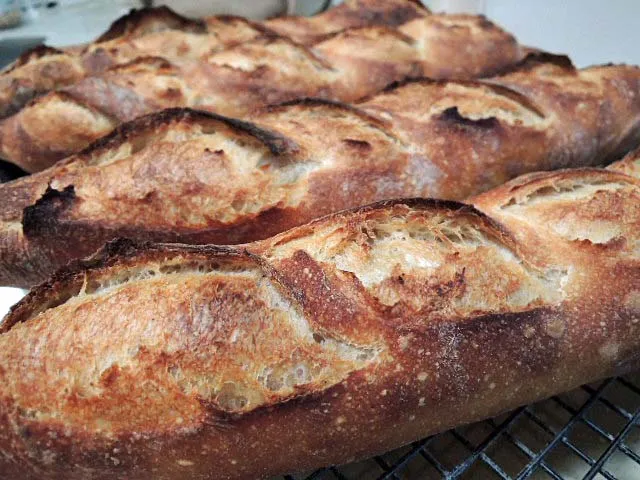
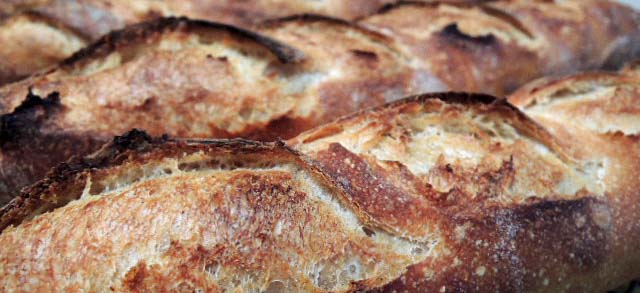
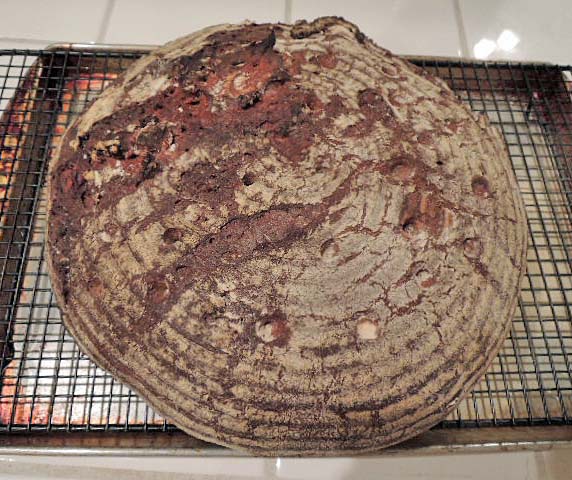
The Fresh Loaf

A Community of Amateur Bakers and Artisan Bread Enthusiasts.

dmsnyder's blog

dmsnyder's picture
dmsnyder

Miche made with High-extraction Flour

March 20, 2013

I have been meaning to bake another miche for some weeks. Yesterday, I made one. It is quite similar to the one on which I blogged in This miche is a hit!  All the flour in both the levain and the final dough was Central Milling T85 flour. The differences were: I did the initial mix in my Bosch Universal Plus, rather than by hand. I scaled it to 2 kg, and I omitted the toasted wheat germ.

The miche was baked with steam at 450ºF for 15 minutes, then at 425ºF convection for another 45 minutes. I left it in the turned off oven with the door ajar for another 30 minutes. After cooling on a rack for 3 hours, I wrapped it in baker's linen and let it rest for 24 hours before slicing it.


The crust was crunchy and the crumb was tender. The flavor was wheaty and sweet with a moderate sourdough tang. Very tasty. Highly recommended.

David 


dmsnyder's picture
dmsnyder

Jewish Sour Rye Bread

March 15, 2013

As some of the TFL old-timers may recall, I started baking bread again about 7 years ago, in part because I had a craving for Jewish Rye Bread, and I had no local source. One of the first baking books I bought was George Greenstein's Secrets of a Jewish Baker, and found that his recipe for “Jewish Sour Rye” produced just what I had hoped. However, Greenstein provided ingredients only in volume measurements. In October, 2008, after making this Jewish Sour Rye quite a few times, I weighed all the ingredients and have been using those measurements ever since.

Today, I baked this bread again. The formula I have been using makes two good-sized loaves of 750 g each. I am providing baker's percentages for the convenience those who might wish to scale up or down.


Total dough ingredients

Wt. (g)

Baker's %

Medium rye flour

375

44

Bread or First Clear flour

480

56

Water

615

72

Instant yeast

7

0.8

Salt

12

1.4

Caraway seeds

11

1.3

Altus (optional)

1/2 cup


Cornmeal for dusting parchment

1/4 cup


Cornstarch glaze


Total

1500

175.5

Notes: I have always used First Clear flour in the past. Today, for the first time, I used Bread Flour (14% protein). I did not use altus today.

Traditionally, Jewish Sour Rye is made with white rye flour. I found I much prefer the fuller flavor of medium rye flour.

If you have a rye sour, build it up to a volume of 4 cups or so the day before mixing the dough. If you do not have a rye sour but do have a wheat-based sourdough starter, you can easily convert it to a white rye starter by feeding it 2-3 times with rye flour over 2-3 days.


Rye sour ingredients

Wt. (g)

Baker's %

Medium rye flour

365

100

Water

365

100

Active rye sour

20

20

Total

750

220

  1. Dissolve the rye sour in the water in a large bowl.

  2. Add the rye flour and mix well.

  3. Cover the surface of the sour with a thin layer of rye flour.

  4. Cover the bowl and ferment until the dry flour forms widely spread “islands.” If necessary, refrigerate overnight.


Final dough ingredients

Wt. (g)

Bread or First Clear flour

480

Water (80ºF)

240

Salt

12

Instant yeast

7

Caraway seeds

11

Rye sour

750

Altus (optional)

1/2 cup

Total

1500


Method

  1. In a large bowl or the bowl of an electric mixer, dissolve the yeast in the water, then add the rye sour and mix thoroughly with your hands, a spoon or, if using a mixer, with the paddle.

  2. Stir the salt into the flour and add this to the bowl and mix well.

  3. Dump the dough onto the lightly floured board and knead until smooth. If using a mixer, switch to the dough hook and knead at Speed 2 until the dough begins to clear the sides of the bowl (8-12 minutes). Add the Caraway Seeds about 1 minute before finished kneading. Even if using a mixer, I transfer the dough to the board and continue kneading for a couple minutes. The dough should be smooth but a bit sticky.

  4. Form the dough into a ball and transfer it to a lightly oiled bowl. Cover the bowl and let it rest for 15-20 minutes.

  5. Transfer the dough back to the board and divide it into two equal pieces.

  6. Form each piece into a pan loaf, free-standing long loaf or boule.

  7. Dust a piece of parchment paper or a baking pan liberally with cornmeal, and transfer the loaves to the parchment, keeping them at least 3 inches apart so they do not join when risen.

  8. Cover the loaves and let them rise until double in size. (About 60 minutes.)

  9. Pre-heat the oven to 500F with a baking stone in place optionally. Prepare your oven steaming method of choice.

  10. Prepare the cornstarch glaze. Whisk 1-1/2 to 2 Tablespoons of cornstarch in ¼ cup of water. Pour this slowly into a sauce pan containing 1 cup of gently boiling water, whisking constantly. Continue cooking and stirring until slightly thickened (a few seconds, only!) and remove the pan from heat. Set it aside.

  11. When the loaves are fully proofed, uncover them. Brush them with the cornstarch glaze. Score them. (3 cuts across the long axis of the loaves would be typical.) Turn down the oven temperature to 460F. Transfer the loaves to the oven, and steam the oven.

  12. After 15 minutes, remove any container with water from the oven, turn the oven temperature down to 440F and continue baking for 20-25 minutes more.

  13. The loaves are done when the crust is very firm, the internal temperature is at least 205 degrees and the loaves give a “hollow” sound when thumped on the bottom. When they are done, leave them in the oven with the heat turned off and the door cracked open a couple of inches for another 5-10 minutes.

  14. Transfer the loaves to a cooling rack. Brush again with the cornstarch glaze.

  15. Cool completely before slicing.


The crust was chewy as was the crumb. I have never been able to get the classic crackly crust that Sour Rye should have. The flavor was very good, with a mild sour tang and just enough caraway flavor to my taste. However, there was a flavor note missing, again, to my taste, because of my having substituted bread flour for first clear. Although KAF sells first clear flour, Hamelman never prescribes its use, even in his formula he likens to Jewish Rye. I prefer this bread made with first clear, based on today's experience, but it is really good with bread flour too.

David

Submitted to YeastSpotting

Addendum: On March 7, 2014, I amended the baking temperatures and timing. The higher temperature and shorter baking time yield a darker, crisper crust which I prefer. There also seems to be less frequent bursting of the loaves.

dmsnyder's picture
dmsnyder

San Francisco-style Sourdough Bread with Walnuts and Dried Sour Cherries

March 12, 2013

On March 3, 2013, I blogged about the San Francisco-style bread with Walnuts and Figs I had baked. More recently, SallyBR tried that formula, substituting dates for the figs and found it to be very good. Today, I baked another version this time substituting dried sour cherries for the figs. The formula was otherwise the same. The procedures were different only in my treatment of the levain which was adapted to my scheduling needs.


Total Dough Ingredients

Bakers' %

Wt (g)

AP flour

76

416

WW Flour

8

46

Bread flour

14

78

Medium rye flour

0.7

4

Water

69

378

Salt

2

11

Stiff starter

12

66

Walnuts

18

98

Dried sour cherries

18

98

Total

217.7

1195


Stiff levain

Bakers' %

Wt (g)

Bread flour

95

78

Medium rye flour

5

4

Water

50

41

Stiff starter

80

66

Total

230

189

  1. Dissolve the starter in the water. Add the flour and mix thoroughly until the flour has been completely incorporated and moistened.

  2. Ferment at room temperature for 6 hours.

  3. Refrigerate overnight.


Final dough

Wt (g)

AP flour

416

WW Flour

46

Water (80ºF)

337

Salt

11

Stiff levain

189

Walnuts

98

Dried sour cherries

98

Total

1195


Method

  1. In a stand mixer, mix the flour and water at low speed until it forms a shaggy mass.

  2. Cover and autolyse for 30 minutes

  3. Coarsely chop or break apart the walnut pieces and toast them for 8 minutes in a 300ºF oven. Allow to cool.

  4. Add the salt and levain to the autolyse, and mix at low speed for 1-2 minutes, then increase the speed to medium (Speed 2 on a KitchenAid) and mix for 5 minutes. Add flour and water as needed. The dough should clean the sides of the bowl but not the bottom.

  5. Add the walnuts and the cherries to the dough and mix at low speed until well-distributed in the dough. (About 2 minutes)

  6. Transfer to a lightly floured board, do a stretch and fold, and form a ball.

  7. Place the dough in a lightly oiled bowl and cover tightly.

  8. Ferment at 76º F for 2 1/2 to 3 hours with a stretch and fold at 50 and 100 minutes.

  9. Divide the dough into two equal pieces.

  10. Pre-shape as rounds and rest, covered, for 10 minutes.

  11. Shape as boules or bâtards and place in bannetons. Place bannetons in plastic bags.

  12. Proof at room temperature (68-70º F) for 1-2 hours.

  13. Cold retard the loaves overnight.

  14. The next morning, proof the loaves at 85º F for 2-3 hours.

  15. 45-60 minutes before baking, pre-heat the oven to 480º F with a baking stone and steaming apparatus in place.

  16. Transfer the loaves to a peel. Score the loaves as desired, turn down the oven to 460º F, steam the oven, and transfer the loaves to the baking stone.

  17. After 15 minutes, remove the steaming apparatus, and turn down the oven to 435º F/Convection. (If you don't have a convection oven, leave the temperature at 460º F.)

  18. Bake for another 15 minutes.

  19. Turn off the oven, and leave the loaves on the stone, with the oven door ajar, for another 15 minutes.

  20. Transfer the loaves to a cooling rack, and cool thoroughly before slicing.

The crust was crunchy, and the crumb was chewy. The bread is moderately tangy. It is delicious with bursts of tartness when you bite into a cherry. This is a very good bread. Personally, I prefer the version with figs, but your taste my be different.  My wife likes the cherry version better, but she says, "I like them both. Yummmm..." My recommendation: Try both. 

David

Submitted to YeastSpotting


dmsnyder's picture
dmsnyder

San Francisco-style Sourdough Bread with Walnuts and Figs

March 3, 2013

I like sourdough breads with nuts and dried fruit, but not very often. They are enjoyed as something special and “different,” but I much prefer an unadulterated San Francisco-style sourdough or Pain au Levain as my daily bread. Well, it has been quite some time since I made a sourdough bread with dried fruit and nuts, and I have developed a craving.

This year, the quality of locally grown dried Calmyrna figs has been outstanding. I've been going through a pound of them every 10 days or so for the past several months. I would eat even more, but my gut wouldn't take it. (Let's just point out that dried figs are an excellent source of soluble fiber.)

I have made walnut bread with my San Francisco-style sourdough several times, and it has been delicious. Therefore, I decided to make a bread based on my San Francisco-style Sourdough with walnuts and dried figs. I took the baker's percentages of the nuts and figs from Hamelman's formula for Hazelnut-Fig Levain.


Total Dough Ingredients

Bakers' %

Wt (g)

AP flour

76

416

WW Flour

8

46

Bread flour

14

78

Medium rye flour

0.7

4

Water

69

378

Salt

2

11

Stiff starter

12

66

Walnuts

18

98

Dried figs

18

98

Total

217.7

1195


Stiff levain

Bakers' %

Wt (g)

Bread flour

95

78

Medium rye flour

5

4

Water

50

41

Stiff starter

80

66

Total

230

189

  1. Dissolve the starter in the water. Add the flour and mix thoroughly until the flour has been completely incorporated and moistened.

  2. Ferment at room temperature for 16 hours.

Final dough

Wt (g)

AP flour

416

WW Flour

46

Water

337

Salt

11

Stiff levain

189

Walnuts

98

Dried figs

98

Total

1195


Method

  1. In a stand mixer, mix the flour and water at low speed until it forms a shaggy mass.

  2. Cover and autolyse for 30 minutes

  3. Coarsely chop or break apart the walnut pieces and toast them for 8 minutes in a 300ºF oven. Allow to cool.

  4. Coarsely chop the dried figs, rinse in cool water, drain and set aside.

  5. Add the salt and levain to the autolyse, and mix at low speed for 1-2 minutes, then increase the speed to medium (Speed 2 on a KitchenAid) and mix for 5 minutes. Add flour and water as needed. The dough should clean the sides of the bowl but not the bottom.

  6. Add the walnuts and the figs to the dough and mix at low speed until well-distributed in the dough. (About 2 minutes)

  7. Transfer to a lightly floured board, do a stretch and fold, and form a ball.

  8. Place the dough in a lightly oiled bowl and cover tightly.

  9. Ferment at 76º F for 2 1/2 to 3 hours with a stretch and fold at 50 and 100 minutes.

  10. Divide the dough into two equal pieces.

  11. Pre-shape as rounds and rest, covered, for 10 minutes.

  12. Shape as boules or bâtards and place in bannetons. Place bannetons in plastic bags.

  13. Proof at room temperature (68-70º F) for 1-2 hours.

  14. Cold retard the loaves overnight.

  15. The next morning, proof the loaves at 85º F for 2-3 hours.

  16. 45-60 minutes before baking, pre-heat the oven to 480º F with a baking stone and steaming apparatus in place.

  17. Transfer the loaves to a peel. Score the loaves as desired, turn down the oven to 460º F, steam the oven, and transfer the loaves to the baking stone.

  18. After 15 minutes, remove the steaming apparatus, and turn down the oven to 435º F/Convection. (If you don't have a convection oven, leave the temperature at 460º F.)

  19. Bake for another 15 minutes.

  20. Turn off the oven, and leave the loaves on the stone, with the oven door ajar, for another 15 minutes.

  21. Transfer the loaves to a cooling rack, and cool thoroughly before slicing.


The crust was crunchy. The crumb was stained by the walnuts and, perhaps, somewhat by the figs. The flavor was very good, mildly sour sourdough with hits of nutty and figgy yumminess. The nuts and figs are sparse enough so the good bread flavor still comes through. This is a bread I could make a meal of. I think it will also be great with a thin spread of butter or cream cheese or with a tangy gorgonzola or sharp cheddar.

 This bread is delicious and highly recommended.

David

Submitted to YeastSpotting 


dmsnyder's picture
dmsnyder

In October, 2011, I baked a bread I called “pugliese capriccioso.” The formula was based on my best understanding derived from reading formulas in American books of what typical breads from Apulia are like. I baked another version, differing in the use of a firm starter (biga), in February, 2012. I remain unbiased by personal experience of the authentic bread, but the breads were good. Several other TFL bakers have made these breads, and all those reporting found them good as well.

More recently, I baked Hamelman's “Durum Bread,” which is 100% durum flour. I didn't like it as well as my pugliese, but my posting stimulated some interesting discussion regarding this type of bread and has prompted me to try a re-formulated pugliese capriccioso, using a higher percentage of durum flour.

My new formula uses a stiff biga made with bread flour (12.7% protein). Fifty percent of the flour is “fancy (finely milled) durum.” Forty percent of the flour is pre-fermented. Hydration is 80%


Total Dough Ingredients

Wt (g)

Baker's %

Bread flour

180

36

AP flour

70

14

Fine durum flour

250

50

Water

400

80

Salt

10

2

Active starter (50% hydration)

36

7

Total

946

189


Biga Naturale Ingredients

Wt (g)

Baker's %

Bread flour

180

100

Water

90

50

Active starter (50% hydration)

36

20

Total

306

170

  1. The day before baking, mix the biga.

  2. Ferment for 8 hours at 70ºF.

  3. Refrigerate overnight

Final Dough Ingredients

Wt (g)

AP flour

70

Fine durum flour

250

Water

310

Salt

10

Biga naturale

306

Total

946


Method

  1. Take the biga out of the refrigerator and let it warm up for about an hour.

  2. Mix the water and flours to a shaggy mass, cover and autolyse for 20-60 minutes.

  3. Sprinkle the salt over the dough and add the biga in chunks.

  4. Mix at Speed 1 for 1-2 minutes until the ingredients are well-mixed.

  5. Mix at Speed 2 for about 10 minutes. The dough will be quite slack. It will almost clean the sides of the bowl and form a ball on the dough hook, but a large portion of the dough will still be on the bottom of the bowl.

  6. Transfer the dough to a lightly oiled bowl with a tight-fitting cover.

  7. Ferment at 76ºF for 2 1/2 to 3 hours with a stretch and fold at 40, 80 and 120 minutes.

  8. Divide the dough into two equal pieces. Pre-shape into balls and let the dough rest for 10 minutes to relax the gluten. (This wasn't much of an issue. The dough was extremely relaxed and extensible.)

  9. Shape the pieces as tight boules and place them seam-side down in floured bannetons.

  10. Place the bannetons in a food-safe plastic bag or cover with a damp towel. Proof the boules at 85ºF until the dough springs back slowly when you poke a finger into it. (About 2 hours)

  11. 45 minutes before baking, preheat the oven to 500ºF with a baking stone and steaming apparatus in place.

  12. Transfer the loaves to the baking stone, seam-side up, steam the oven and turn the temperature down to 460ºF.

  13. After 12 minutes, remove the steaming apparatus. Bake for another 14 minutes or until the loaves are done. The crust should be nicely colored. The internal temperature should be at least 205ºF.

  14. Leave the loaves on the baking stone with the oven turned off and the door ajar for another 10 minutes to dry the crust.

  15. Transfer the loaves to a cooling rack. Cool completely before slicing.

These loaves are about half the size of my previous pani pugliesi. One will be gifted to my Italian language teacher who grew up in Palermo and loves bread, I am told. I'm eager to hear her assessment of my pugliese's authenticiy.

These smaller loves have the appearance of miniature versions of the larger ones, with similar crust color and texture. The crust was firm when they were first taken out of the oven, but it softened as the breads cooled. I was hoping the folds would open some with oven spring. That's why I baked them seam-side up. They opened up a bit on one loaf. They probably would have opened more if I had under-proofed a bit.


Slicing revealed the crumb was moderately open – less so than the pugliesi made with 25% durum, more so than the 100% durum loaf, although that had lower hydration also. The dough had been quite yellow, but the baked crumb was less yellow.

The crust was thin and chewy. The crumb was tender and cool-feeling. The flavor was not as sweet as the previous pugliese versions, but the crust in particular had a nuttier flavor. This bread was more enjoyable eaten with other foods than alone, in my opinion. I am curious how the flavor will develop over the next couple days.

David

Submitted to YeastSpotting

dmsnyder's picture
dmsnyder

Durum Bread from Bread by Jeffrey Hamelman

The second edition of Hamelman's Bread includes 40 new recipes. This is the first of the new recipes I have made. Hamelman writes that this formula for “Durum Bread” is the best of a series of “test batches” he made some years ago. He does not describe it further and does not identify it as an Italian-style bread, although it does bring to mind Italian breads made with durum flour.

To me, the most remarkable features are that Hamelman's “Durum Bread” is 90% durum flour. (Bread flour is used in the liquid levain feeding.) It is a high-hydration dough at 80%. It uses both a yeasted biga and a liquid levain. Hamelman recommends a bassinage technique (“double hydration") be used for mixing.


Overall formula

Wt (g)

Baker's %

Durum flour

900

90

Bread flour

100

10

Water

800

80

Salt

20

2

Yeast

5

0.5

Total

1825

182.5


Biga

Wt (g)

Baker's %

Durum flour

300

100

Water

195

65

Yeast

0.3

0.1

Total

495.3

165.1


Liquid levain

Wt (g)

Baker's %

Bread flour

100

100

Water

125

125

Mature liquid culture

20

20

Total

245


Final dough

Wt (g)

Durum flour

600

Water

480

Salt

20

Yeast

5

Biga

495.3

Liquid levain

225

Total

1825.3


Procedures

  1. Mix the biga and ferment for 12-16 hours. It is ripe when domed and just starting to recede in the center. Note that, because of the great ability of durum flour to absorb water, this biga is firmer than the usual “firm levain.”

  2. Mix the liquid levain at the same time as the biga and let it ferment for the same time. Note: My levain ripened faster than the biga, so I refrigerated it for a couple of hours to let the biga “catch up.”

  3. In the bowl of a stand mixer, add all but 1/3 cup of the final dough water along with the liquid levain and mix to disperse the levain. Then, add the biga cut in 5 or 6 pieces, and mix at slow speed to dissolve it somewhat. Then add the remaining durum flour, yeast and salt. Mix at slow speed for 2 or 3 minutes to combine the ingredients then at Speed 2 for about 6 minutes to develop the gluten. Scrape the dough off the hook and make a well in the middle of it. Pour the reserved water in the well, lower the hook, and mix at low speed until the water if fully incorporated. The dough will be quite loose.

  4. Transfer the dough to a lightly oiled bowl and cover tightly.

  5. Ferment the dough for about 2 hours with stretch and folds at 40 and 80 minutes.

  6. Divide the dough into two equal pieces and pre-shape them as balls. Let them rest, covered, for 20 minutes or so to relax the gluten.

  7. Shape the pieces as boules or bâtards and place in bannetons or en couche. Proof, covered, for about 1 hour.

  8. Pre-heat the oven to 500ºF for 1 hour with baking stone and steaming apparatus in place.

  9. Turn down the oven to 450ºF. Transfer the loaves to a peel, score the loaves, steam the oven and transfer the loaves to the baking stone.

  10. After 15 minutes, remove the steaming apparatus and continue to bake for another 23 minutes or so. (After the first 15 minutes, I continued baking at 425ºF with convection for the remainder of the time.) The loaves are done when the crust is nicely browned, the loaves sound hollow when thumped on the bottom and the internal temperature is over 205ºF.

  11. Transfer the loaves to a cooling rack and cool for 1-2 hours before slicing.


The loaves had a somewhat crisp, chewy crust. The crumb was less open than I expected, but I think this may be characteristic of bread made with mostly durum flour. Maybe it has to do with the quality of gluten in this flour.

The flavor of the bread was distinctive. I don't know how to describe it, but it was like that of the other breads I have made with durum flour. I was thinking it was not a flavor I especially like, until I tried it dipped in olive oil with a little balsamic vinegar. That was spectacular! It was a magical combination of flavors that was delightful. It made me wonder about using this bread in other characteristic Italian ways – as garlic bread or toasted and eaten with a hearty ribollito soup.

I gave one of the loaves to a friend who grew up in a village near Rome. I am awaiting her assessment with the greatest interest.

David 

Submitted to YeastSpotting

dmsnyder's picture
dmsnyder

Somehow, I had overlooked the formula for Whole Wheat Multi-grain bread in Hamelman's Bread. Thanks to Khalid (Mebake) for calling it to my attention! When he named it his favorite bread, I knew I had to try it.

This is a 50% whole wheat bread made with a liquid levain and added instant yeast. It has a soaker of mixed grains and seeds. I found I had to add about 15 g of water to the dough during mixing to achieve a medium consistancy. 

The dough weighed a bit over 2 kg. My wife has been wanting some soft, whole wheat rolls for sandwiches. I thought this formula might make rolls she would like, so I made four 3.5 oz rolls in addition to two 840 g bâtards.

I baked the rolls first at 480 dF for 12 minutes and cut one for sampling. It had a sweet, wheaty flavor. The crust softened with cooling. The crumb was firm and chewy. My wife judged it suitable for its intended purpose. 

The bâtards were baked at 460 dF for 15 minutes. At that point, the crust was already getting dark. I lowered the oven temperature to 415 dF and baked for another 23 minutes.

The bâtard crust was somewhat crunchy. The crumb was more open and more tender than that of the rolls.

The flavor of the bâtard was more complex than that of the roll. It has no perceptible sourness and a slightly sweet, wheaty flavor like the roll. It is indeed a delcious whole wheat bread and one I will definitely make again. I expect it to make wonderful toast and sandwiches.

Thanks again, Khalid!

David

dmsnyder's picture
dmsnyder

I wanted to make some baguettes today. I had some excess active firm starter. I usually make sourdough baguettes with a liquid starter, and my best sourdough baguettes take two to three days to make, but why not try a formula for one day baguettes with firm starter?

I decided

  1. To make 3 ficelles weighing 200 g apiece.

  2. At 70% hydration.

  3. Using 25% pre-fermented flour.

  4. And to use a bit of instant yeast to have the baguettes done before dinner time.


Total dough

wt. (g)

Baker's %

AP flour

323

93

WW flour

17

5

Medium rye flour

9

2

Water

245

70

Salt

7

2

Instant yeast

1/8 tsp

0.5

Total

601

172.5


Firm levain

wt. (g)

Baker's %

AP flour

46

70

WW flour

13

20

Medium rye flour

7

10

Water

33

50

Firm starter

33

50

Total

132

200


Final dough

wt. (g)

AP flour

262

Water

201

Salt

7

Instant yeast

1/8 tsp

Firm levain

131

Total

601


Procedures

  1. Mix the firm levain and ferment for 12-14 hours at 70º F.

  2. Mix the flour and water in the final dough to a shaggy mass and autolyse for 30 minutes.

  3. Add the salt, yeast and the firm levain is 12 pieces to the dough and mix thoroughly. Transfer to a clean, lightly oiled bowl and cover tightly.

  4. Ferment at 70º F for 2-2 1/2 hours with folds at 40 and 80 minutes. The dough did not double but showed many tiny alveoli. (Visible through the walls of my glass bowl.)

  5. Divide into 3 equal pieces and pre-shape as balls or logs.

  6. Rest for 20 minutes.

  7. Shape as baguettes.

  8. Proof at 70º F for 45-60 minutes.

  9. Transfer the loaves to a peel and score as desired.

  10. Bake at 460º F with steam for 12 minutes then in a dry oven for another 8-10 minutes. Note: These are light and thin loaves. For larger baguettes, the baking time would need to be increased to a total of 22-25 minutes. If a lighter-colored crust is desired, the oven temperature should be decreased to 450º F.

  11. Cool for 30 minutes (at least) before eating.

 I treated each of my three baguettes differently, as seen. I made one into an epi de blé, one into a seeded baguette and one was made as a traditional baguette.


The crust was crisp and the crumb was tender – just a bit chewy. The crumb structure was nice and open. The flavor was good, but not great. There was no perceptible sourdough tang and less sweet flavor and less complexity than I want in a baguette.

I think this formula, with the added yeast, resulted in a short fermentation that did not allow for full flavor development. In addition, the levain I used had been taken from my refrigerated stock starter and only fed once. 

My judgement is that this formula is worth playing with. Next time, I will use a starter that has been fed at least twice and will omit the instant yeast.

David


dmsnyder's picture
dmsnyder

This is certainly one of the most delicious breads I've ever tasted. It is amazing for its complex, wholesome taste. It also has always had astonishing oven spring and bloom for me. I'm not sure why.

I suppose I need to acknowledge that brother  Glenn recently posted his beautiful bake of this bread, if only to claim another instance of Snyder Bros. Synchronicity and deny competitiveness. I did watch out for pixies. They played no role in the baking of this bread. They may be responsible for how much of it my wife ate at dinner, but I do believe that was attributable to how delicious this bread is. 

And, from last week's bake of Hamelman's Pain au Levain with WW, here's a point for Varda:

Happy baking!

David

dmsnyder's picture
dmsnyder


What is scoring?

Scoring” is the word used to describe the cuts made in a loaf of bread before it is baked. Some breads are not scored. For example many loaves baked in pans are not. However, almost all free-formed “hearth breads” are scored.

When is scoring done?

Scoring is generally performed just prior to loading the loaves in the oven. French rye breads (pains de siegle) are sometimes scored right after shaping, before proofing.

Why are breads scored?

Intentionally creating a weak spot on the surface of the loaf prevents the loaf from bursting at weak spots created during shaping.

The type of scoring performed controls the direction in which the bread will expand during “oven spring.”

The pattern of cuts made, the angle at which they are made and the depth of the cuts influences the rate of expansion and the formation of an “ear” - a raised flap of crust at the edge of a cut.

The pattern of cuts can create a pleasing visual pattern on the surface of the loaf. While there are some very traditional patterns, for example for baguettes, the baker can use the scoring pattern to identify the type of bread or to create an unique pattern that identifies the loaf as coming from his or her oven.

The effects of scoring on loaf shape are discussed in more detail below.

What do you use to score bread?

The blade used to score bread is often referred to as a lame (pronounced “lahm.”) This is simply a French word with means “blade.” Breads may be scored with straight or curved razor blades, either held in the hand or mounted on a handle. Scoring may be performed with other sharp, straight blades, even with a straight razor. Some bakers prefer serrated blades.

For some types of scoring, a straight blade is preferred. Straight bladed knives are preferred for cuts made with the blade held perpendicular to the loaf's surface. This sort of cut is generally used for round loaves (“boules”). For other types of scoring, a curved blade works better. Curved lames are generally used for long breads like baguettes which are scored with cuts parallel to the long axis of the loaf.

Video on Choosing a Blade: http://youtu.be/vF7eFluzHXc

How are the cuts made?

The scoring stroke should be firm, rapid, smooth and decisive. For the beginner, it may help to take “practice swings” or to visualize the movements and totally focus one's attention before making the cuts. Understanding the functions of scoring and the effects of the variables described can help, but there is no substitute for experience. In this respect, scoring bread is no different from an athletic skill or any other art or craft. (Tourist: “Please, sir, can you tell me how to get to Carnegie Hall?” New Yorker: “Practice, practice, practice.”)

The cuts should generally be 1/4 to 1/2 inch deep. A wet, sticky dough requires a more shallow cut than one would make in a dryer dough.

Scoring a boule (round loaf)

The angle the blade of the knife makes with the surface of the loaf is important in determining how the cut will open up. If you want the cuts to spread equally from the cut and to open quickly, as is traditional with round loaves (boules), the knife should be held vertically – at 90 degrees to the surface of the loaf.

Video on Scoring a Boule: http://youtu.be/gnL7mvR9wFg


Besides the “tic-tac-toe” pattern, boules can be scored with diamond patterns, simple crosses or much more elaborate and creative patterns.

Miche scored with a diamond pattern

Scoring a long loaf (bâtard)

If you want the cuts to spread more slowly and create an “ear,” as is generally desired with long loaves (baguettes and bâtards), the knife blade should be held at a shallow angle with the surface of the loaf, at about 20-30 degrees or so. Many find using a curved blade helps make this type of cut. The blade is held with the concave surface facing up (away from the loaf). A flap of dough is created that will lift up to create an “ear” as the loaf expands and, by lifting gradually, slows the expansion of the loaf. This prolongs the time during which new areas of dough are exposed to the direct heat of the oven and results in greater overall expansion – a larger “bloom.”

Video on Scoring a Bâtard: http://youtu.be/UC5HLCWAyMo


Bâtards


Baguettes

The effect of scoring on loaf shape

Michael Suas, in his book "Advanced Bread & Pastry," provides some information about how scoring patterns influence loaf shape. Scoring is not just to make a visually pretty design on the top of a loaf. It is also how the baker controls the direction in which the loaf expands. This impacts the shape of the loaf cross section (rounder or more oval), the height of the loaf and, for a boule, whether it stays round or ends up more oblong.

According to Suas, long loaves like bâtards and baguettes are traditionally scored parallel to their long axis. This may be a single long cut or multiple cuts that are almost parallel and overlap somewhat (for ¼ to 1/3 of their length, generally). This pattern promotes sideways expansion of the loaf, resulting in an oval cross section when the loaf is sliced.


Baguette showing overlapping cuts, almost parallel to the long axis of the loaf

For breads with high-rye content which have lower gluten and less oven spring, the traditional objective is to encourage a higher rise in the oven spring resulting in a rounder cross section. This is achieved by "sausage" or "chevron" cuts.

"Sausage cut" on the left. "Chevron cut" on the right.

Boules are scored in a variety of patterns with differing effects on how the loaf expands. The common "tic-tac-toe" pattern and a simple cross will direct the expansion upward. More complex patterns like diamonds result in a relatively flatter loaf.

One of most interesting effects is that scoring a boule with multiple parallel cuts encourages expansion at a right angle to the cuts. This results in an oblong loaf shape.

 Two boules scored differently. Note the effects of the scoring pattern on the final shape of the baked loaves.

What's the point of an ear? Controlled bloom!

This topic is not about the auricular anatomy of elves (or Vulcans). It's about scoring breads.

Scoring loaves creates a visually pleasing pattern, and it helps control the expansion of the loaf as it bakes.

What Suas called "the classic cut" is parallel to the long axis of a baguette or a bâtard. The cut is made with the blade at a shallow angle to the surface of the loaf. The cut should be shallow - about 1/4 inch deep. Paradoxically, this shallow cut results in the flap lifting better than a deeper cut would, thus forming a nice "ear." Hamelman (pg. 80) points out that "a deep cut will simply collapse from its own weight."

The angle of the blade is important. "If the angle is not achieved and the cut is done with the blade vertical to the loaf, the two sides of the dough will spread very quickly during oven spring and expose an enormous surface area to the heat. The crust will begin to form too soon - sometimes before the end of oven spring - penalizing the development of the bread. If the cut is properly horizontal, the sides of the loaf will spread slower. The layer of dough created by the incision will partially and temporarily protect the surface from the heat and encourage a better oven spring and development." (Suas, pg. 116.)

These photos illustrate nice "ears," but they also show that the bloom occurred slowly, as it should. Notice that the color of the crust in the opening has 3 distinct degrees of browning, decreasing from right to left. The darker part on the right obviously opened first and was exposed to the direct heat of the oven for longer. If the bloom occurred too rapidly, it would have a more even coloration.

In summary, in order to achieve an optimal bloom in baguettes and bâtards, one must attend to 3 variables when scoring them:

  1. The cuts should be almost parallel to the long axis of the loaf.

  2. The blade should be held at about a 30 degree angle to the surface of the loaf.

  3. The depth of the cut should be shallow - about 1/4 inch.

Variable shading of the bloomed crust confirms that the desired slow but prolonged opening of the cut during oven spring occurred.

A final word

This tutorial focused on the mechanics of scoring, but the other steps in bread making impact the behavior of the cuts you make and the final appearance of your loaves. In fact, every single step, from your choice of ingredients and their proportions – your formula – to how you steam your oven plays a role in how your cuts will open. Your best looking loaves will result from a series of choices that are mutually dependent, where how you score a loaf takes into account the other choices you have made about the formula, mixing, fermentation, shaping, proofing and baking.

Happy baking!

David

Pages

Subscribe to RSS - dmsnyder's blog