The Fresh Loaf

A Community of Amateur Bakers and Artisan Bread Enthusiasts.

dmsnyder's blog

dmsnyder's picture
dmsnyder

Miche, Pointe-à-Callière

I haven't made this one in a while. It is still a favorite. I made it with Central Milling's "Type 85 Organic, unmalted" flour. I retarded the firm levain overnight, but the bread was baked on the same day the final dough was mixed.

Episodic supervision and taste testing were provided by granddaughter, Naomi.

Miche, Pointe-a-Calliere, crumb

Tasting notes

Crunchy-chewy crust. Chewy crumb. Sweet, nutty, wheaty flavors with moderate sourdough tang, tasted 18 hours after baking. Naomi, who doesn't eat the crust on bakery bread, 1. Asked for a second slice. 2. Finished both slices to the last crumb and said the crust was her favorite part. 

David

Happy baker/grandfather

dmsnyder's picture
dmsnyder

We are back home (as of last weekend) from a week with 18 Snyder family relatives in Ft Bragg, a few days in Prague and 4 days  with 62 of Susan's family members, coming from 7 countries, in Warsaw, Poland.

At Glenn's Ft Bragg house, we had Glenn's home-made pastrami on my sour rye breads and many more yummy breads from Glenn's and my ovens. And Glenn's pastries, which were delicious. In Warsaw, we were so involved with socializing and with events the reunion organizers had scheduled, there was no time to explore bakeries. However, the fresh-baked bread assortment for breakfast at the Warsaw Marriott was almost "worth a journey." There were both French-style breads and pastries and Eastern European-style multi-grain and whole grain breads. Every one I tried was excellent. 

Back home, I refreshed my stock starter last weekend, revved it up Thursday evening and baked a couple loaves of San Francisco-style Sourdough yesterday. It was good.

David

dmsnyder's picture
dmsnyder

I just had to share: Brother Glenn teaching granddaughter, Naomi, to shape bagels.

David

dmsnyder's picture
dmsnyder

This was my second bake of Phil's (PiPs) Desem. His beautiful blog entry on this bread can be viewed here: Honest bread - 100% whole-wheat desem bread and some country bread. As with my first bake, I modified Phil's procedure somewhat, using CM fine ground organic whole wheat flour rather than fresh-ground white WW flour and machine mixing. While I baked directly on a stone last time, today I baked in Lodge 4 qt. Cast Iron Dutch ovens.

Desem crust close-up

The general appearence of the loaves was pretty much the same between the two baking methods. I understand that Phil is contending with the special challenges of a gas oven, but, for me, baking on the stone directly is easier than wrangling hot and heavy DO's. 

Desem crumb profile

Desem crumb close-up


I cut the desem loaves 3-4 hours after baking. The crumb structure was very satisfactory, but it was somewhat gummy. Hansjoakim (see below) raised an excellent question: Would the desem benefit from a 24-36 hour rest before slicing, like a high-percentage rye does? I wonder.

The flavor of the desem, tasted when first sliced was very assertive - sweet whole wheat with a moderate sour tang. The sourness had decreased the next morning when I had it toasted for breakfast. It was very nice with butter and apricot jam.

I also baked a couple 1 kg loaves using the SFBI Miche formula. (See Miche from SFBI Artisan II - 2 kg) I altered the flour mix. The final dough was made using half KAF AP and half CM Organic Type-85  flour.

We had some of this bread with dinner. The crust was crunchy and the crumb was soft but chewy. The flavor was complex - sweet, wheaty and mildly sour. I have made this bread using the original SFBI formula, with all CM Type-85 flour and with the mix I used today. I'd be hard pressed to say which I prefer. They have all been delicious.

I'm happy with today's bakes.

David

dmsnyder's picture
dmsnyder


One of my thoughts in purchasing a Brød & Taylor Folding Proofer was that I would be able to make Three-Stage Detmolder rye breads with more precise temperature control than I could otherwise achieve. After using this device for fermenting other starters, fermenting doughs and proofing loaves over the past couple of months, I my first rye by the three-stage Detmolder method employing the Folding Proofer this weekend.

My one previous bake of a Detmolder 3-stage rye was almost 3 years ago. (See: http://www.thefreshloaf.com/node/12742/hamelman039s-70-3stage-rye-sourdough) I do recall that bread as having a delicious, sweet, earthy, complex flavor. The bread I baked this weekend was the very similar 80% Three-Stage Rye from Bread. This bread has an hydration of 78%. 37.8% of the flour is pre-fermented.

As described by Jeffrey Hamelman in Bread (pg. 200), this method, developed in Germany, “develops the latent potential of a mature rye culture through a series of builds,” each of which optimizes the development of yeast growth, lactic acid and acetic acid production, respectively. The builds differ in hydration, fermentation temperature and length of fermentation.

Hamelman calls the three stages or builds “Freshening,” “Basic Sour” and “Full Sour.” The first build encourages yeast multiplication in a moist paste fermented at a moderate temperature. The second build is much firmer and is fermented for a long time at a relatively cool temperature to generate acetic acid. The third build is, again, moister, and it is fermented at a warm temperature for a short time. This build is to increase the lactic acid content of the sour. After that, the final dough is mixed.


Freshening

Wt (g)

Baker's %

Medium Rye flour

8

100

Water

12

150

Mature rye culture

4

50

Total

24


Ferment 5-6 hours at 77-79º F.


Basic Sour

Wt (g)

Baker's %

Medium Rye flour

100

100

Water

76

76

Freshening sour

24

24

Total

200


Ferment 15-24 hours at 73-80º F. (Shorter time at higher temperature.)


Full Sour

Wt (g)

Baker's %

Medium Rye flour

270

100

Water

270

100

Basic sour

200

74.1

Total

740


Ferment 3-4 hours at 85º F.


Final Dough

Wt (g)

Medium Rye flour

422

High-gluten flour

200

Water

422

Salt

18

Instant yeast (optional)

8

Full sour

740

Total

1810

Procedures

  1. Mix all ingredients 4 minutes at Speed 1 then 1-1 1/2 minutes at Speed 2. DDT=82-84º F. (Note: Hamelman's times are for a spiral mixer. If using a KitchenAid, I double these mixing times.)

  2. Bulk ferment for 10-20 minutes.

  3. Divide into 1.5-2.5 lb pieces and shape round.

  4. Proof about 1 hour at 85º F.

  5. Dock the loaves. Bake for 10 minutes at 480-490º F with steam for the first 5 minutes, then lower temperature to 410º F and bake 40-45 minutes for a 1.5 lb loaf and about 1 hour for a 2.5 lb loaf.

  6. Cool on a rack. When fully cooled, wrap in linen and let rest for at least 24 hours before slicing.

These loaves scaled to 807 g. After baking and cooling, each weighed 700 g.

Crumb and loaf profile

Slices

I sliced the bread after it had sat, wrapped in linen, for 24 hours. The crust was chewy, and the crumb was moist and tender. The flavor was very mellow and balanced. It was not as sweet as I remember the 3-stage 70% rye being, but that was 3 years ago(!). The sourdough tang was present but subdued. A lovely flavor.

I had been planning on leaving the loaves unsliced for another 12 hours, but my wife decided she wanted rye with smoked salmon as an appetizer for dinner. How could I refuse such a tempting proposition?

Delicious!

I also made a couple loaves of Hamelman's Pain au Levain today. As simple and straight-forward as it is, this is one of my favorite breads.

Pain au Levain bâtards

Pain au Levain crust

Pain au Levain crumb

 David

Submitted to YeastSpotting

dmsnyder's picture
dmsnyder

Exactly 3 years ago tomorrow, I blogged about a batch of straight dough baguettes I had made rather impulsively. (See: http://www.thefreshloaf.com/node/11925/baguette-surprise-and-challenge) They were surprisingly good being yeasted, not sourdough, and having no pre-ferment. Several other TFL members tried my formula with pretty good success. I attributed these baguettes' very nice flavor to the flour mix I used – 90% AP and 10% white whole wheat.

Although I had intended to make these again, three years have gone by … somehow. Last week, TFL member adrade posted a reply to that 3 year old blog, having made these baguettes and finding them good enough (or maybe just fast enough) to make repeatedly. This has prompted me to make some straight dough baguettes again, this time with a somewhat different flour mix and different dough mixing method.


Ingredients

Wt (g)

Baker's %

KAF AP flour

435

87

Central Milling Organic T85 flour

65

13

Water

350

70

Sea salt

10

2

Instant yeast

4

0.8

Total

864

172.8


Method

  1. Mix flours and water to a shaggy mass.

  2. Cover and let sit for 20-60 minutes.

  3. Add yeast and salt and mix at Speed 1 for 1-2 minutes then at Speed 2 for 7 minutes.

  4. Transfer the dough to a lightly floured board. Form it into a ball, and put it in a lightly oiled bowl. Cover tightly.

  5. Ferment for 2 hours at 75º F with a stretch and fold on the board at 45 and 90 minutes.

  6. Divide the dough into 3 equal pieces. Pre-shape as rounds or logs.

  7. Cover the pieces with a towel and let the gluten relax for 10-20 minutes.

  8. Shape into baguettes.

  9. Proof on a linen couche, smooth-side down, covered, for about 45 minutes.

  10. 45-60 minutes before baking, pre-heat the oven to 500º F with a baking stone and steaming apparatus in place.

  11. Transfer the loaves to a peel, making sure the smooth side is now facing up, and score them.

  12. Turn the oven down to 480º F. Steam the oven and load the baguettes onto the baking stone.

  13. After 12 minutes, remove the steam source. Continue to bake for another 8-10 minutes.

  14. When the baguettes are fully baked, turn off the oven, and transfer the baguettes to a cooling rack.

  15. Cool for at least 30 minutes before serving.


These are not the most beautiful baguettes I've ever made. The two on the left were too close to each other on the stone and stuck together. I am not sure why the cuts didn't open better. The prime suspect is under-steaming. Yet the crust was thin and very crisp. The shininess suggests adequate steam, so I'm not sure what happened.

The crumb was rather dense, as it was when I made straight dough baguettes the last time. Maybe they needed a longer fermentation. Maybe I de-gassed the dough too much in shaping. The crumb was pretty chewy but not to excess.

On the other hand, the flavor of these baguettes was totally classic – very sweet and a bit nutty. I enjoyed some with my dinner omelet and more this morning with butter and a tart plum jam. Tonight, another baguette will serve for hamburger buns. French toast Sunday is possible, if I don't make sourdough pancakes.

I think baguettes made with a straight dough are worth tweaking. It's a good tasting and versatile bread that can be whipped out in 4-5 hours. Next time, I'll increase the whole grain flour content some and extend the bulk fermentation. And get a new velvet glove.

 David

dmsnyder's picture
dmsnyder

Yeah. French makes everything seem fancier. Anyway, today I made three kinds of bread from the San Francisco-style Sourdough dough I've been playing with for the past couple months.

The dough was basically version 6. I put my stock starter through 3 builds of 75% AP and 25% WW at 50% hydration. The builds were fed at approximately 12 hour intervals, and the third build was cold retarded for about 14 hours then fermented at 85 dF for 3 hours before mixing the dough to make 2 kg. After dividing and shaping, all products were cold retarded again before final proofing and baking.


Boule made with 1 kg of SF-style SD dough

Boule crumb 

Boule crumb close-up

Mini-baguettes made with 250 g of SF-style SD dough each.

Baguette crumb

These breads had a very crunchy crust and a complex, moderately sour flavor. The flavor was more like the version 4 bake than the last version 6 bake. It had a distinct milky, lactic acid element as well as the sharper acetic acid tang. Very, very yummy. I am happy that this formula and method are delivering consistant results for me.

The remaining 500 g of dough was divided into two pieces, shaped into balls and put in Ziploc sandwich bags along with a tablespoon of olive oil, then refrigerated for 24 hours.

Mozzarella, tomato, mushroom pizza

Pesto, mozzarella, mushroom pizza

Pesto, mozzarella, mushroom pizza close-up

The pizza was fair. The crust was chewy. My wife liked the flavor of the crust. I prefer a really thin, cracker-crisp crust. However, it's nice to know this dough makes fair pizza crust. If you like chewy rather than crisp, this may be for you.

Happy baking!

David

dmsnyder's picture
dmsnyder

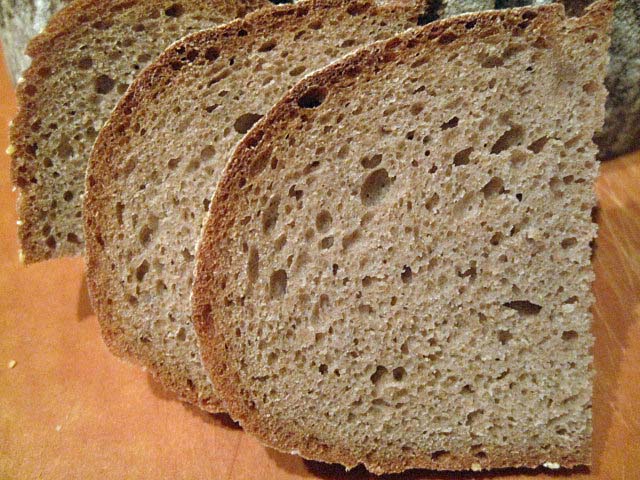
In October, 2008 I posted a formula for Greenstein's Jewish Sour Rye which converted his recipe, which was written in volume measurements, to ingredient weights. I have made this bread many times since, but I've never bothered to calculate the baker's percentages for the formula. I decided to do so today and thought I would post the procedures as a tutorial on “baker's math” for new baker's and others who have just never gotten comfortable with this very valuable tool.

Here is the formula I wrote in 2008.

Ingredients

Wt (g)

First Clear flour

500

Water (80-199ºF)

240

Sea salt

12

Ripe rye sour (100% hydration)

750

Instant yeast

7

Altus (optional)

1/2 cup

Caraway seeds

1 T

Cornmeal for dusting parchment


Cornstarch glaze


Converting the formula to baker's math

Baker's math is a method of expressing the quantity of all ingredients, always expressed as weights, as a proportion of the total flour in the formula. This provides a way of comparing formulas and of easily converting them to make a larger or smaller batch of dough. By convention, the total flour is always 100%. If your formula uses more than one type of flour, their total is 100%. So, to use a simple baguette-type dough as an example, the formula might be:

Ingredients

Baker's %

AP flour

100

Water

65

Salt

2

Instant yeast

1

Total

168

Note that the total is over 100%. This is confusing to many initially. Get used to it. This total baker's percentage is an important number, as you will soon see. Again, this formula does not tell you how much of any ingredient to use, so far, only their proportionate amounts. In fact, knowing these proportions gives you all the information you need to make any amount of dough you need for a bake, whether its 500 g or 100 kg.

We have the ingredient amounts for a “batch” of Greenstein's rye bread, and we want to calculate the baker's percentages, so we can make a bigger (or smaller) batch of dough than the original recipe produces.

This bread uses a rye sour – a rye sourdough starter. When working with a pre-ferment like a poolish or a rye sour, there are two ways of representing it in baker's math. One is to treat it a distinct ingredient, like water or salt. The other is to break the pre-ferment down into its flour and water content and add the flour to the total flour and the water to the total water in the formula. These two approaches are equally accurate, but the second approach provides the more accurate representation of the dough characteristics, especially in regard to hydration. In the following table, I have used the second approach.

The rye sour is 100% hydration. That means that the amount of water in it is exactly equal to the amount of water (water = 100% of total flour.) So, 750 g of rye sour consists of 375 g of rye flour and 375 g of water. Therefore, for example, the total water in the dough consists of the 375 g from the rye sour plus the 240 g added to the final dough.

Total Ingredients

Wt (g)

Calculations

Baker's %

First Clear flour

500

Total flour =500+375=875. 500/875=57.

57

Rye flour

375

Total flour =500+375=875. 375/875=43.

43

Water (80-100ºF)

615

Water/Total flour=615/875=70

70

Sea salt

12

Salt/Total flour=12/875=1.4

1.4

Instant yeast

7

Yeast/Total flour=7/875=0.8

0.8

Total

1509


172.2

Now we can see that the original recipe makes 1509 g of dough. (Well, it is actually more because the weight of the caraway seeds and altus, if used, is not included in these calculations.) Adding up the Baker's percentages, you have 172.2. Think of this as meaning that the dough consists of 172.2 “parts,” 100 of which is flour, 70 of which is water, etc. Recall that these numbers represent the relative amounts of each ingredient.

Scaling the recipe

Now, let us assume you want to make Greenstein's Jewish Sour Rye, but you want to make 600 g loaves, and you want to make two of them. So you will need 1200 g of dough. 

Since you know your formula consists of 172.2 parts, to determine the weight of each ingredient needed to make 1200 g of dough, what you need for your calculations is the weight of each part. If the total is 1200 g, you get this by dividing 1200 g by 172.2 parts. This equals 6.97, rounded off. This number is called “the conversion factor.” Now we can calculate the amounts of each ingredient in 1200 g of dough. Weights are rounded to the nearest gram.

Total Ingredients

Baker's %

Calculations

Wt (g)

First Clear flour

57

57x6.97=397

397

Rye flour

43

43x6.97=300

300

Water (80-100ºF)

70

70.6.97=488

488

Sea salt

1.4

1.4x6.97=10

10

Instant yeast

0.8

0.8x6.97=6

6

Total

172.2


1201


What this way of representing the formula does not show is how much rye sour you have to build. However, we know from the original recipe that the weight of the rye sour is 1.5 times the weight of the First Clear flour (See the first table, above.) So, for the 1200 g of dough, we will need 1.5x397=595 g of Rye Sour. In the bread books written for professionals, for example, Hamelman's Bread and Suas' Advanced Bread and Pastry, the formulas have separate tables for “Total Dough” which takes the second approach described above and another for “Final Dough” which takes the first approach. You get the best of both worlds. The “Final Dough” would be as follows:

Final dough ingredients

Wt (g)

Baker's %

First Clear flour

397

100

Water (80-199ºF)

191

48

Sea salt

10

2.4

Ripe rye sour (100% hydration)

596

150

Instant yeast

6

1.4

Total

1200


Altus (optional)

1/2 cup


Caraway seeds

1 T


Cornmeal for dusting parchment


Cornstarch glaze


You can see that, while this representation of the formula is more helpful for making the final dough, the Baker's Percentages distort the ingredient proportions. They make the dough look like it has a lower hydration than it really does, and it makes the amounts of salt and yeast seem very high.

Baker's math is an invaluable tool. Once you understand the basic approach and scale a few of your favorite recipes, it becomes easy to use. After a while, if you use it regularly, it becomes intuitive. You will find yourself doing it in your head as you look at new recipes. You can use it for modifying recipes you want to tweak. It will make you a better baker. It is not yet known if it prevents senile dementia, but I bet it helps. I'll let you know, if I remember to.

Addendum 5/1/16: I just found a very good Baker's Math reference on the King Arthur Flour web site. Here is a link to it: Baker's percentage

Enjoy!

David

dmsnyder's picture
dmsnyder

When I started baking bread again about four years ago, one of my principal reasons was to bake a good Jewish Sour Rye, a favorite bread I could not get locally. Greenstein's Secrets of a Jewish Baker was one of the first bread books I acquired, and I found his Jewish Sour Rye Bread at least as good as any I could remember eating.

His book was criticized by a number of TFL members for providing only volume measurements for ingredients. So, in October, 2008, I made the Sour Rye, carefully weighing the ingredients. I've used that formula since with consistently good results. I still love this bread.


Ingredients

Wt (g)

First Clear flour

500

Water (80-199ºF)

240

Sea salt

12

Ripe rye sour (100% hydration)

750

Instant yeast

7

Altus (optional)

1/2 cup

Caraway seeds

1 T

Cornmeal for dusting parchment


Cornstarch glaze


Notes on Ingredients

  • Rye Sour A sourdough starter or levain fed with rye flour is called a “rye sour.” Note that all the rye flour in the formula is pre-fermented. Traditionally, Jewish Sour Rye or New York-style Deli Rye is made with white rye flour. This is the equivalent of white flour milled from wheat. The bran and germ is removed, and the flavor is much milder than whole grain rye flour. I happen to like the flavor of whole grain rye and for years have used either dark rye or medium rye rather than white rye flour in this bread. If you use white rye, you may want to reduce the water, since this is less absorbent flour.

  • Building the rye sour If you make rye bread frequently, it is worthwhile keeping a rye sour. Otherwise, you can build one starting with a wheat or mixed flour starter. When I am going to be making this bread, I generally build up my rye sour in three feeding, at least doubling the volume with each feeding. I wrote a tutorial on “the care and feeding of a rye sour” which illustrates some of the special techniques involved. (See: Greenstein's Sourdough Rye (Rye Sour) care and feeding, illustrated.)

  • Altus This is “old bread.” It's origin is said to have been a way for the baker to recycle the rye bread he hadn't sold the day before, but, besides being a thrifty practice, the incorporation of some old bread in the dough is felt to enhance both the flavor and texture of rye bread. Its use is optional but recommended. To prepare altus, take a few thick slices of previously baked rye bread. Cut them into cubes and put them in a small bowl, covered with water. After a few hours, squeeze the water out of the bread and add it to your dough before mixing it.

  • Instant yeast As with many sourdough breads, the addition of commercial yeast makes the fermentation and proofing times more predictable. However, it is not necessary to make good bread. Since so much of this bread's flavor comes from the rye sour, I don't think the addition of yeast has any adverse impact on the quality of the bread. I generally use it.

  • Cornstarch glaze Dissolve 1 1/2 – 2 T cornstarch in 1/4 cup cold water. Heat 1 cup of water to a boil in a small sauce pan. Slowly pour the dissolved cornstarch into the boiling water, whisking constantly. Continue to stir until it is somewhat thickened. Remove from heat and reserve.

    Note on the formula: This formula was derived from the recipe provided by Greenstein, with ingredient volume measurements only. If you are interested in the formula including baker's percentages of ingredients, I have written a tutorial on baker's math, using this formula as a model. The baker's percentages can be found there. (See: Baker's Math: A tutorial )

Method

  1. If you have a white rye sour, build it up to a volume of 4 cups or so the day before mixing the dough. If you do not have a rye sour but do have a wheat-based sourdough starter, you can easily convert it to a white rye starter by feeding it 2-3 times with white rye flour over 2-3 days.

  2. In a large bowl or the bowl of an electric mixer, dissolve the yeast in the water, then add the rye sour and mix thoroughly with your hands, a spoon or, if using a mixer, with the paddle.

  3. Stir the salt into the flour and add this to the bowl and mix well.

  4. Dump the dough onto the lightly floured board and knead until smooth. If using a mixer, switch to the dough hook and knead at Speed 2 until the dough begins to clear the sides of the bowl (about 20 minutes). You may need to add a few tablespoons additional First Clear flour to get the right dough consistency. Add the flour, if needed, as early as possible in the mix. Add the Caraway Seeds about 1 minute before finished kneading. Even if using a mixer, I transfer the dough to the board and continue kneading for a couple minutes. The dough should be smooth but a bit sticky.

  5. Form the dough into a ball and transfer it to a lightly oiled bowl. Cover the bowl and let it rest for 15-20 minutes. Even after this short period, the dough is significantly less sticky.

  6. Transfer the dough back to the board and divide it into two equal pieces.

  7. Form each piece into a pan loaf, free-standing long loaf or boule.

  8. Dust a piece of parchment paper or a baking pan liberally with cornmeal, and transfer the loaves to the parchment, seam side down, keeping them at least 3 inches apart so they do not join when risen.

  9. Cover the loaves with plasti-crap or a tea towel and let them rise until almost double in size. (About 60 minutes.)

  10. Pre-heat the oven to 375F with a baking stone in place optionally. Prepare your oven steaming method of choice.

  11. Prepare the cornstarch glaze. Whisk 1-1/2 to 2 Tablespoons of cornstarch in ¼ cup of water. Pour this slowly into a sauce pan containing 1 cup of gently boiling water, whisking constantly. Continue cooking and stirring until slightly thickened (a few seconds, only!) and remove the pan from heat. Set it aside.

  12. When the loaves are fully proofed, uncover them. Pull the sides of the parchment apart to separate the loaves from each other. Brush them with the cornstarch glaze. Score them. (3 cuts across the long axis of the loaves would be typical.) Transfer the loaves, still on the parchment, to the oven, and steam the oven.

  13. After 5 minutes, remove any container with water from the oven and continue baking for 30-40 minutes more.

  14. The loaves are done when the crust is very firm, the internal temperature is at least 205 degrees and the loaves give a “hollow” sound when thumped on the bottom. When they are done, leave them in the oven with the heat turned off and the door cracked open a couple of inches for another 5-10 minutes.

  15. Move the loaves to a cooling rack and brush again with the cornstarch glaze.

  16. Cool completely before slicing.

Parchment paper on peel, folded down the middle and dusted with coarse corn meal

Loaves on parchment. Note the fold separating the loaves and the rolled up towels supporting the sides of the loaves.

Loaves covered for proofing.

Crumb

Crumb close-up

I let the final build of the rye sour get really ripe. In fact, it was starting to collapse when I mixed the final dough. The resulting bread was extremely sour and very delicious. If you don't like very sour rye bread, either use the sour when it is younger, or, if your timing demands, you can refrigerate it over-night, until you are ready to mix your dough.

 David

Submitted to YeastSpotting


dmsnyder's picture
dmsnyder

My series of San Francisco-style sourdough bread bakes has featured several variations of levain elaboration, leaving the final dough ingredients and procedures essentially constant. Today's variation involved using a firm starter to activate the stock starter and building the stiff levain which is mixed in the final dough in three steps, rather than two. In addition, rather than retarding an intermediate build, I retarded the stiff levain.

You may also note that the activation and intermediate builds used a flour mixture of 75% AP and 25% WW flour. Re-reading my class notes from the SFBI Artisan II workshop, I was reminded that this was the feeding mixture recommended by the SFBI instructor. I thought I would give it a try. 

Feeding the starter twice in 24 hours demonstrated a dramatic increase in the leavening power of the starter. The second feeding expanded dramatically faster than the first. And, even though the total fermentation time (not counting the overnight retardation) of the stiff levain was shorter than previous versions, it was very nicely expanded.

I started with my stock refrigerated 50% starter that had been fed last weekend. That feeding consisted of 50 g active starter, 100 g water and 200 g starter feeding mix. My stock starter feeding mix is 70% AP, 20% WW and 10% whole rye flour. 

I activated the starter with a feeding of 20 g stock starter, 25 g water, 37 g of AP and 13 g of WW flour. This was fermented at room temperature for 16 hours. I then built an intermediate starter using 40 g of the activated starter, 50 g of water, 75 g of AP and 25 g of WW flour. This second build was fermented at room temperature for 12 hours. I then mixed the stiff levain.

Stiff levain

Bakers' %

Wt (g)

for 1 kg

Wt (g)

for 2 kg

Bread flour

95

78

157

Medium rye flour

5

4

8

Water

50

41

82

Stiff starter

80

66

132

Total

230

189

379


  1. Dissolve the starter in the water. Add the flour and mix thoroughly until the flour has been completely incorporated and moistened.

  2. Ferment at room temperature for 6 hours, then refrigerate for 14 hours.

  3. Take the levain out of the refrigerator and ferment at 85ºF for 3 hours.

Final dough

Bakers' %

Wt (g)

for 1 kg

Wt (g)

for 2 kg

AP flour

90

416

832

WW Flour

10

46

92

Water

73

337

675

Salt

2.4

11

22

Stiff levain

41

189

379

Total

216.4

999

2000

Method

  1. In a stand mixer, mix the flour and water at low speed until it forms a shaggy mass.

  2. Cover and autolyse for 90 minutes

  3. Add the salt and levain and mix at low speed for 1-2 minutes, then increase the speed to medium (Speed 2 in a KitchenAid) and mix to get early window paning. (This took about 10 minutes.) Add flour and water as needed. The dough should be rather slack. It should clean the sides of the bowl but not the bottom.

  4. Transfer to a lightly floured board and do a stretch and fold and form a ball.

  5. Place the dough in a lightly oiled bowl and cover tightly.

  6. Ferment at 76º F for 3 1/2 to 4 hours with a stretch and fold at 50 and 100 minutes.

  7. Divide the dough as desired. (Note: I had made 2 kg of dough which I divided into 1 1 kg piece and two 500 g pieces.)

  8. Pre-shape as rounds and rest, covered, for 10 minutes.

  9. Shape as boules or bâtards and place in bannetons. Place bannetons in plastic bags.

  10. Proof at room temperature (68-70º F) for 2-3 hours.

  11. Cold retard the loaves overnight (12-14 hours).

  12. The next morning, proof the loaves at 85º F for 3 hours. (If you can't create a moist, 85 degree F environment, at least try to create one warmer than “room temperature.”)

  13. 45-60 minutes before baking, pre-heat the oven to 480º F with a baking stone and steaming apparatus in place.

  14. Transfer the loaves to a peel. Score the loaves as desired, turn down the oven to 460º F, steam the oven, and transfer the loaves to the baking stone.*

  15. After 15 minutes, remove the steaming apparatus, and turn down the oven to 435º F/Convection. (If you don't have a convection oven, leave the temperature at 460º F.)*

  16. Bake for another 15 minutes.*

  17. Turn off the oven, and leave the loaves on the stone, with the oven door ajar, for another 15 minutes.

  18. Transfer the loaves to a cooling rack, and cool thoroughly before slicing.

*Note: I baked the two smaller boules first – 15 minutes at 460ºF with steam, then 15 minutes at 435ºF convection bake. I then baked the 1 kg boule after reheating the oven for 25 minutes – 15 minutes at 450ºF, then another 25 minutes at 430ºF.


San Francisco-style Sourdough, large boule

San Francisco-style Sourdough, large boule crumb

San Francisco-style Sourdough, small boule

San Francisco-style Sourdough, small boule crust close-up

San Francisco-style Sourdough, small boule crumb

San Francisco-style Sourdough, small boule crumb close-up

The appearance of the loaves was like those previously baked, as were the crust and crumb structure. However, the flavor had a prominent sourdough tang. This bread was quite similar to the bake I blogged on March 19, 2012 (See: My San Francisco Sourdough Quest, Take 4)

This is the crunchy crust, chewy crumb, moderately sour loaf I was after … at least it's close. I cannot say it replicates the “Wharf Bread” from Parisian Bakery I ate in San Francisco years ago. It has a less sweet, more whole grain flavor. The crust is thicker and crunchier. The crumb structure is more open. But it's a keeper. This is the one I'll be making from now on ... or until I can't resist tweaking it further.

I think it would go great with Dungeness crab!

David

Submitted to YeastSpotting

Pages

Subscribe to RSS - dmsnyder's blog