The Fresh Loaf

A Community of Amateur Bakers and Artisan Bread Enthusiasts.
Franko's picture
Franko


Last week my wife Marie asked me if I could make her a loaf of Spelt bread without using any regular wheat flour in it since she has problems digesting typical wheat based breads. Up till now she's been buying a spelt bread available at our local supermarket that's one of those flash frozen par-baked things that have become so common in supermarket bakeries these days. Not being a bread purist, she been quite happy with it despite my looks askance, but I wonder if maybe some of the things I've been learning from TFL and discussing with her might have rubbed off. At any rate I've been wanting to make a bread for her that she could enjoy, and happy she asked me since spelt is a grain I've never used previously and was interested to try it out.

Richard Bertinet's new book 'Crust' has a recipe for a pure spelt bread in it which I showed to Marie, and she thought it sounded fine, but asked if I could include some nuts and/or seeds, maybe some oatmeal as well for a little variety. I think if she hadn't asked me first I would have suggested it, as the recipe seemed a little plain for our tastes. I picked up a bag of 100% whole grain spelt flour from our local health food/organic grocery that's milled by Nunweiler's Flour Co out of Saskatchewan, and a certified organic mill. They have a line of various whole grain flours including, dark rye, buckwheat, as well as whole wheat and AP. Link included below for anyone interested, although I doubt you would be able to find it outside of Canada.


Bertinet's formula is pretty straightforward other than using a poolish of spelt flour, which I made up the night before, as well as an oatmeal soaker to be included in the final mix. Next morning I toasted some sesame, sunflower and pumpkin seeds in a 380F oven for about 8 minutes, and let them cool before proceeding with the mix. I thought I might have to increase the flour ratio somewhat because of the extra water I included to the formula from the oatmeal soaker but the oatmeal absorbed almost all the water, contributing little to the overall mix, with just the water called for in the recipe being added. The dough had a bulk ferment of an hour, followed by a light rounding and a 15 minute rest, then shaped and placed in a floured brotform. The rise took just under an hour, which after having made long rising levain style breads for the last few bakes kind of took me by surprise. I think it made a good loaf, but more importantly Marie really likes it, saying it has so much more flavour and texture than the stuff she was buying from the store, which I told her was a result of having used a preferment in the mix. The technical details aside, it seems I'll be making this bread on a regular basis from here on, the only change being to increase the percentage of seeds by double or more. Recipe and photos below.

Note: the recipe below has been edited from the originaly posted formula due to some errors and miscalculations recently brought to my attention. My apologies for any confusion this may have caused anyone.

Franko

Richard Bertinet's Spelt Bread-adapted and halved

Ingredients

%

Kg

Poolish


Spelt flour

100

250

Water

100

250

Instant yeast

1

2.5


Oatmeal Soaker


Oatmeal

100

125

Warm Water

100

125


Final Dough


Spelt Flour

100

250

Mixed toasted sesame, sunflower,and pumpkin seeds

24

120

Poolish

202

502.5

Oatmeal Soaker

50

250

Salt

2

10

Water

64

70

Instant Yeast

1

2.5

Total Weight


1205


Mix Poolish ingredients together and rest overnight in the fridge.


Combine poolish with remaining ingredients and mix on 1st speed for 3-4 minutes. Mix on 2nd for 2 minutes then knead on counter for 2-3 minutes, or just until the dough is smooth and uniform. Put the dough in a lightly floured bowl , cover, and let rest/bulk ferment for 1hr. Dough temp 71F-74F .


After the dough has rested for an hour , remove from the bowl and round it lightly and let rest for 15 minutes, then shape as desired. Preheat oven and stone to 500F .


**Note: this dough rises very quickly and should be monitored very closely during the final rise. It is easily overproofed. The times and temperatures listed below are based on my kitchen environment at the time and my oven. Adjust accordingly to your own situation at the time of final proof and baking.

Let dough rise approx. 30-40 minutes. then slide the loaf onto your hot stone, with normal steam and bake for 10 min. Turn the heat down to 440 for 25-30 minutes or until the bottom of the loaf sounds hollow when tapped . Cool on wire racks for 6 hours or more.


saumhain's picture
saumhain

Well, first thing, thank you all for the feedback to the previous entry. I do realize that working is no excuse for leaving my whole family without tasty bread) I am now looking on the way to adapt some of my favourite recipes to new schedule and to practice out those which fit in it.

Concerning the book... As my sister said, "now you've got something to do for the next hundred of years". This is oh so true. Obviously it won't take me that long to try out all the recipes (or at least those which I find the most exciting) but the book is definitely worth studying thoroughly. I especially got carried away with the idea of making croissants with starter (the whole viennoiserie section is indeed marvellous) and hazelnut squares. Though I might want to start with something less challenging, and learn the theory first)


GSnyde's picture
GSnyde

Three bakes this weekend—from the lean to the…not!  All were good to eat, and all contributed to my learning process.

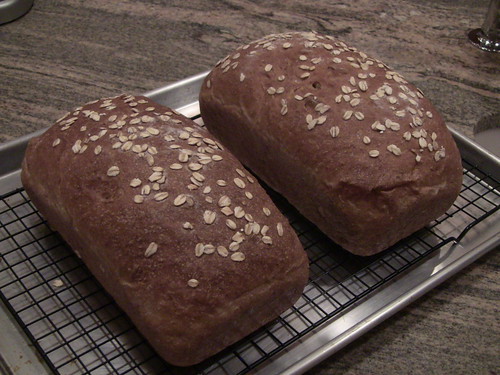
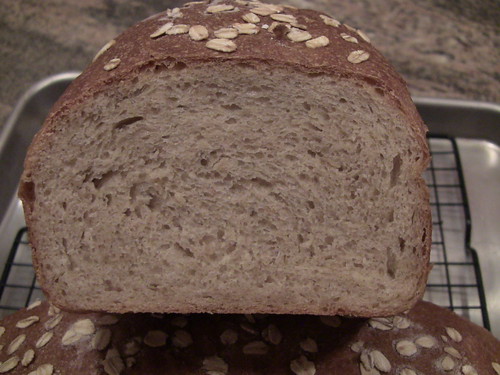
Honey-Oatmeal Sandwich Loaf

In my quest for a good multi-grain sandwich bread, I decided to try Oatmeal-Cinnamon-Raisin bread (Floyd’s recipe from Hamelman posted here: http://www.thefreshloaf.com/recipes/cinnamonraisinoatmealbread), but without the raisins and cinnamon.  It is a very large recipe—made for three 8.5 x 4.5 pans—from which I made two loaves in 9 x 5 pans.  The oat soaker had very little free water and the dough was too dry to blend with the prescribed quantity of liquid (honey, oil, water and milk), so I added about another half cup of water.  It was still the densest dough I’d made and very hard to mix by hand.  But it came together after about 15 minutes of on-and-off folding and resting.

The large quantity of yeast did the job of loosening up the dough ball in the first ferment, and it pre-shaped and shaped nicely.  The loaves came out very well.  Very much the texture I was looking for, moist but not squishy.  It was great for toast and for BLTs.  This formula would make good hamburger buns, I think.  My one adjustment, besides the added water, would be to increase the salt by 25% if doing this recipe without the raisins and cinnamon.  The recipe is simple and the whole process only takes about four hours from start to sandwich.

IMG_1664

IMG_1666

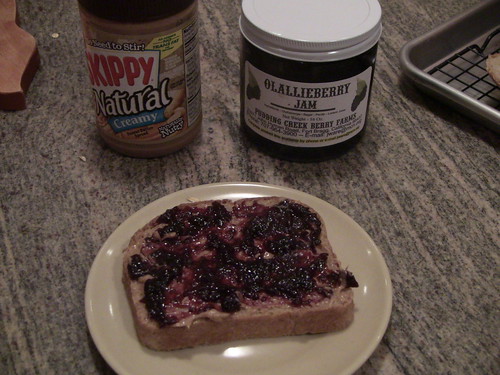
This bread passed the PB&J test with flying colors.

IMG_1667


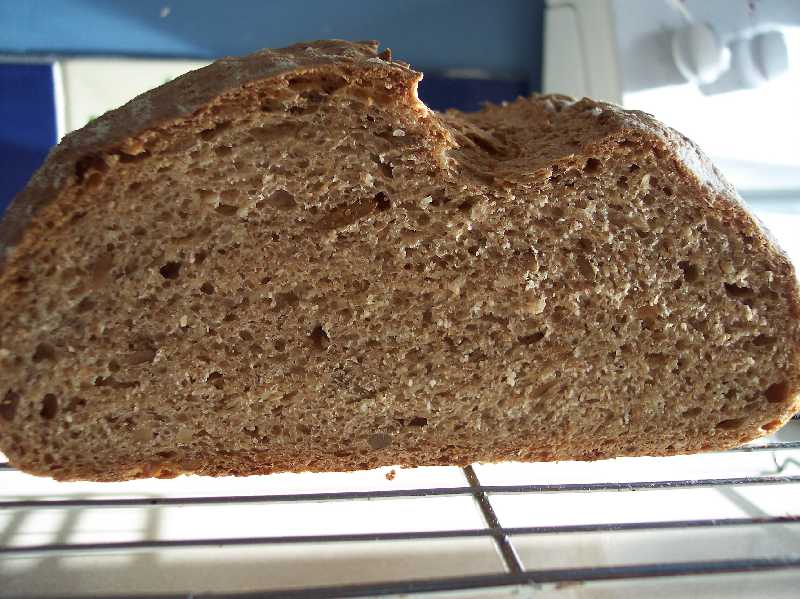
Anis Bouabsa Ficelles

After my first try at baguettes—using San Joaquin Sourdough—came out pretty well, I decided to try a higher hydration dough.  Going for the crispy crust and open crumb, I settled on the Anis Bouabsa formula Brother David has posted (http://www.thefreshloaf.com/node/9839/ficelles-made-anis-bouabsa039s-baguette-formula”).  What an adventure for a near-novice!  The headline for this story could be “Everything went wrong except the results”.

I mixed the dough easily, a complete texture contrast to the Oatmeal bread.   The dough was very sticky and almost batter-like for the 10 minutes or so of hand-mixing.   With each stretch-and-fold-in-the-bowl, the dough got a bit more cohesive and silky, but was still very loose.  With a bit of flour on the board and my hands, I managed to do the last two stretch-and-folds with the majority of the dough cohering in the dough ball.  Then, into the cold fridge for 18 hours (I didn’t have 21 hours to play with).

The next afternoon the single-handed Three-Stooges-Meet-Molten-Gumby-Snake routine began.  I read that one should use no (or very little) flour on the board in shaping baguettes.  Because the dough was super-gluey, my choices were to flour the board and my hands or to maul the poor defenseless breadlings into indescribably grotesque deformations.  I chose flour.  Even so, each little (180g) dough glob was a handful.  The pre-shaping was fairly simple, with help from a dough knife.  Then I rested them on a rice flour/AP flour mix on the board for an hour.  In final shaping, I tried to use a light touch, but found myself spending most of my effort in keeping the globs together and off my hands.  They eventually got formed into more-or-less cylindrical shapes, about 13” long.  Extremely extensible.  Wrestling the semi-liquid snakes onto my improvised couche (parchment atop a big flour sack towel) was comical.   I had visions of the snake extending to 20 or 30 feet and wrapping my entire kitchen in its gluey grip.  But dusting them all over with the rice flour blend did the trick, and the ficelles did not stick too much to me or the plastic wrap.

IMG_1668

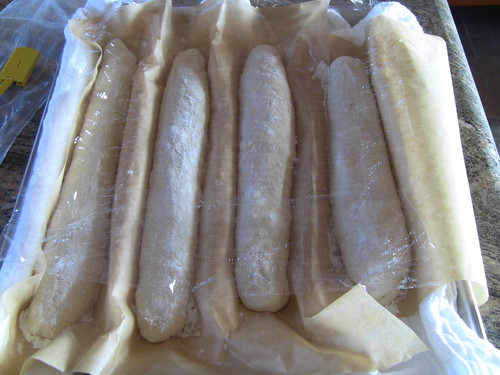
Scoring was likewise a mess.  The sharp and wetted lame continually dragged the sheath of the ficelles.  That maneuver will take more practice.  Then, when I tried to load the ficelles, on parchment, from the “couche” to a cookie sheet to the baking stone, the four snakes would not fit nicely on the stone with all the parchement.  So, while the oven temperature dropped, I scissored away some of the parchment, arranged the snakes on the stone, steamed, and slammed shut the oven door.  I was sure the bread would be as far from my ideal as the process was.

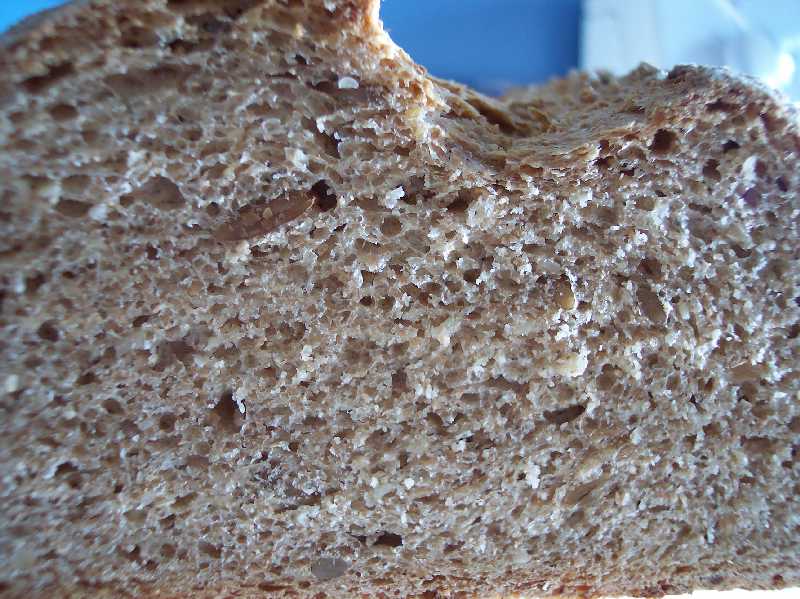
Wrong!  Though not much grigne, there was good oven spring.

IMG_1672

IMG_1671

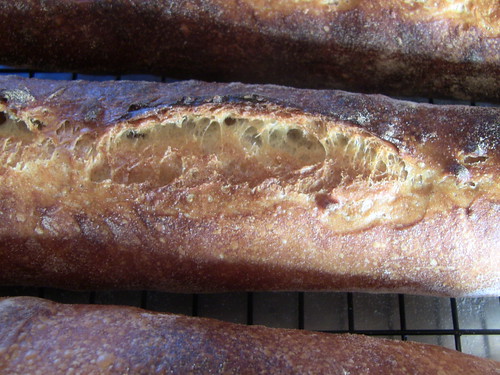
And the crumb was exactly what I was going for—holey but with some substance to chew.

IMG_1676

IMG_1678

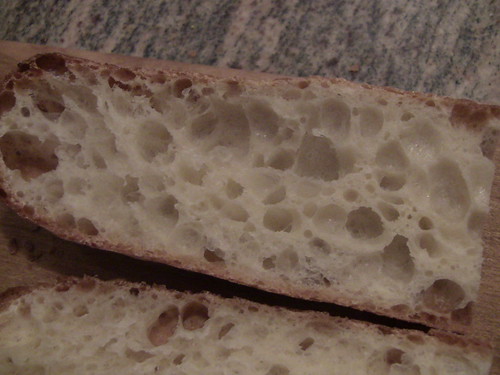
The texture is wonderful. Very crisp thin crust, with a creamy crumb.  My wife says it is the perfect baguette except she prefers some sourness. So, my next baguette experiment will be a slightly lower hydration dough with levain.

Pizza, Pizza, Pizza!

After the pizza discussion on my last blog post, I had to try a totally lean pizza dough, with just flour, water, yeast and salt.  I used the PR Neo-Napalitano recipe but with no honey or oil.   We had guests over and made two pesto and sausage pizzes, one with fresh corn and one with tomato.  The fresh corn and sausage combo is a winner.  Our guests loved the baguette and the pizza.  They think I'm a baker [heh heh].

IMG_1679

IMG_1680

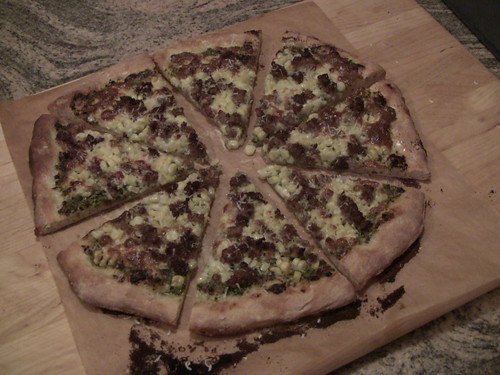
The pizza's outer handle wasn't as puffy as the enriched recipe, but the texture was excellent.  Next pizza will be with real 00 flour.

So all told, it was a weekend of baking variety.   Some lean, and some not.  If I’d made cinnamon rolls, too, I would have hit for the cycle.

Glenn


breadsong's picture
breadsong

Hello, This Ciabatta is made using a double flour addition/double hydration technique, with thanks to SteveB - breadcetera!
Here's a link to SteveB's recipe and technique: http://www.breadcetera.com/?p=162

I did three stretch and folds during bulk fermentation (not following SteveB's instructions here!), thinking it might help add some air bubbles.
Apart from these S&F's and "gently" rolling the dough over onto the peel I tried not to handle the dough, for fear of degassing it. 
SteveB's instructions are to divide the dough but I baked it as one big ciabatta.
The bread puffed up nicely in the oven. I was hoping to find beautiful holes like Steve's when I sliced the loaf, but I still have room for improvement. I love how the bread looks and smells. Tasting will have to wait for another day.


Regards, breadsong


teketeke's picture
teketeke

 I started to make a wild yeast sourdough starter on 21st August this year ( from here -- http://www.thefreshloaf.com/node/233/wild-yeast-sourdough-starter) and my first sourdough was Susan's one.

 http://www.wildyeastblog.com/2007/07/08/my-new-favorite-sourdough/

You can see my sourdough diary here ---  http://www.thefreshloaf.com/node/19544/my-sourdough-diary

I couldn't solve the problem for a while until I saw Vogel's blog---  http://www.thefreshloaf.com/node/19742/next-level 

After I use the technique ( take some dough and put it into a glass ),  I don't make any rubbery-slipper bread anymore. I also use finger test too. That is very helpful.

---This week-----

I tried some recipe that are posted here and they became my favorite.

1) Simple white sourdough loaf that was posted by Daisy-A. 

http://www.thefreshloaf.com/node/19923/bread-art-heritage-katy-and-rebecca-beinart039s-work-and-simple-white-sourdough-tin-loafi

Again, I made another one that I used soaker that I didn't plan to do.  I was trying to make 70% rye that is posted by hasjoakim but I found mold in the sponge next morning so that I used the soaker for this loaf. It came out nice bread.  I felt that I need 1-2g more salt to this loaf when I tasted. 


Thank you, Daisy!  When I shape this loaf, I give the dough tension like this video.

 http://www.youtube.com/watch?v=tpUi8jS9jQY There are a moment that we can't see what he is doing but you will see at the end. :)


2) I make nut-sourdough that is posted by hansjoakim.  My husband loves this bread,So do I! 


I used walnuts instead of Hazelnuts but it was very good although I scorched the surface. I will make this bread again. Thank you, hansjoakim. 


3) 5 Grain levain bread by Hamelman: I really love this bread. But I can't shape it nicely. As you see the picture, The gloom looks like a bump after a child hit his or her head on the wall or something.  I used the shaping method by Hamelman's book.  Please let me know if you have some ideas to solve this.

Thank you for reading, everybody.

Happy baking,

Akiko


Paul Paul Paul Paul Paul Paul Paul Paul Paul Paul Paul Paul's picture

Two questions about dealing with dough

October 11, 2010 - 4:48pm -- Paul Paul Paul ...
Forums: 

I have a double whammy here.


Alright so I've been making bread lately (along with everyone else in the forum), and I've been having a few problems, about scoring bread, and refrigerating bread. First, about the scoring, i use our biggest knife, and spray it with pam, but it still get a lackluster score in the bread and ends up deflating it. Any help?

breadsong's picture
breadsong

Hello, I've been wanting to make croissants for years. hansjoakim's recent post and getting a copy of Ciril Hitz's Baking Artisan Pastries and Breads spurred me into action.
I tried using a tutove rolling pin for the first tri-fold. I had some dough/butters layers happening, then unhappening, as the pictures show - poor temperature control & butter likely being too cold. For final shaping, I don't think I rolled the dough thin enough; triangles were cut somewhat unevenly; this all shows up in the final proof and bake. The kitchen was warm this morning due to other baking - I don't think this helped things either so the final proof happened in a cooler part of the house...but I still had butter leaking out during the bake.
I'll call these "The Good, The Bad and The Ugly".  Husband happily munched away anyway!  Regards, breadsong


Yuval35's picture

Brioche Question

October 11, 2010 - 1:45pm -- Yuval35

Hello,

recentlly i am trying to improve my brioche skils.

I made 2 classic brioche receips but unfortuantlly the dough wasn`t rise enough.

finally i found another receipe from KAF which was very good in a matter of texture but the flavors was poor( in my opinion).

anyway i was searching the web for other brioche receips and found several differences and methods.

1. some of them are not using any liquid instead of butter and eggs and some of them using around 1\4 to 1\2 water\milk\orange juice.

eat.bread's picture

CSB or CSA for Bread

October 11, 2010 - 12:30pm -- eat.bread
Forums: 

Hello wise bakers,

I recently had the idea of starting a mini bread CSA out of my home in the Boston area.  I'm a stay at home mom and am having so much fun baking bread out of my home and my friends  and other moms want in on the bread.

Has anybody explored this at all, know the legalities or anything else?

I'd love any advice, guidance and tips!

Thanks,

Emily

OttovonBrot's picture

Trying to improve my bread

October 11, 2010 - 11:40am -- OttovonBrot
Forums: 

I have been making bread by hand on and off for 5 years or so. The last year or two has been more off than on and I am trying to change that. This last weekend I decided to dive back in and made an Italian wheat bread from Caroline Fields "The Italian Baker." I have the general techniques down and am really looking for advice on how to improve the crumb, crust and overall texture of my bread.

Pages

Subscribe to The Fresh Loaf RSS