The Fresh Loaf

A Community of Amateur Bakers and Artisan Bread Enthusiasts.
Chausiubao's picture
Chausiubao

Hamburger buns, finally; again

My last journey into the recesses of my memories of pride and egotism brought out many a story of my declarations with respect to hamburger buns. “White bread is easy,” I declared to the world, but my heart having been shattered into a million pieces I return here to accomplish now what I could not then! That subsequent attempt resulting in a consecutive shattering of my heart, I return again undaunted in my quest for a good hamburger bun!

What I will say about my last attempt at hamburger buns via pain de mie was that the buns were both improperly proofed and slightly overbaked. The final product was both dense and tough. It is also possible that skinning over of the dough during the oven pre-heat cycle also hindered oven spring, contributing even more to the problem. That in mind, I've made a few changes to both my formula and my approach.


Here is my hypothesis: enriched white bread doesn't rely on fermentation for flavor, therefore focusing on flavor in the production of aforementioned enriched white bread is wasteful. Rather, these breads rely on the ingredients they contain, namely sugar, dairy, and other additions, so these ingredients should play first fiddle in the formula and the method of preparation. I have doubled the yeast in this particular incarnation of pain de mie to this end, no doubt I will need to refine this change over time.

In my previous attempt I was cold proofing the final shapes. I was hoping the sealed space of my oven was enough to facilitate the proofing of the buns. I believe I was wrong! So I'll throw in a boiling pot of water and see how that helps things along. Additionally, I baked the hamburger buns for 18 minutes at 400 F. This might have been excessive, considering the dough has much higher surface area compared to before, the dough will bake much faster. Perhaps, 400 F for 12 minutes, or 350 F for 20 minutes. Then again, I would imagine, a lower temperature would dry out the dough, so a fast, hot bake seems like the better option. I'll try 400 F for 10 minutes and see where that takes me. A secondary note to add to that is that a full bake doesn't mean the dough should be fully colored, as you could see in the last batch of hamburger buns. Ultimately what I am saying is, more yeast, warmer proof, and a shorter bake should give me better results compared to last time!

After an hour of bulk fermentation, division, rounding, and a rest, the shapes are flattened, maintaining the round shape.

This is about 30 minutes of final proofing in my oven with a steaming pot of water to provide heat. In the end, the dough was proofed about 45 minutes before they went into the oven.

A little less then 10 minutes in a 375 F oven, baked with steam, and double panned to prevent overbrowning on the bottoms.

And the final product, once out of the oven, brushed with heavy whipping cream and allowed to cool. Much better then last time, the first picture posted.

I admit, 3% yeast might have been overkill, and it was. But the results were quite attractive. Somewhere between 2% and 3% will get me where I want to be. Additionally the proof temperature definitely helped a lot, as did avoiding the skin from forming on the dough while it was exposed to the dry air outside the oven. This time, it took a mere 10 minutes to bake at a temperature of 375 F. I had to double pan the buns in order to prevent excessive browning on the bottoms, but it was well worth it. I declare this a success! I'll have to make burgers tomorrow.


swifty's picture

baking on a ceramic smoker type cooker

November 9, 2011 - 5:43pm -- swifty

Having looked at the available post on the web site, I felt something waas missing.

I have a primo ceramic smoker cooker that has some ceramic plates between the charcoal and the grill as an insert. I plan remove the grill and use  firebrick as a 2nd layer then add  a pizza stone on top. I want to cerate a heat sink to ensure results similar to a brick oven. 

suzyr's picture
suzyr

Reinhardts Ciabatta

Ciabatta- 3 small loaves or 2 large

3 1/4 cups of Mature Poolish ready for final dough

3  cups of bread flour

1 3/4 tsps of salt

1 1/2 tsp of instant yeast

6 tab to 3/4 cup of water room temp

In mixing bowl add poolish with all of the ingredients.  Blend well til flour is hydrated well. Continue to mix for 5 minutes with paddle, til dough comes away from the sides.  This is very sticky dough, if it isn’t you need more water.  They suggest starting with 6 tab and up to 3/4 cup of water.  I used it all.

Prepare counter top with flour, add dough on top and pat down with floured hands. Let rest 2 minutes and then proceed to stretch and fold procedure. Then cover for 30 minutes and repeat process.  Then cover again and proof for 1 and half hours to 2 .   Then proceed to cut into 2 pieces and place in a couche. Proof for 60 minutes then bake in preheated oven with steam at 500 and then turn down after 30 seconds. Bake for another 15 minutes.

sitkabaker's picture

Scoring Baguettes-can't get it right!!

November 9, 2011 - 1:54pm -- sitkabaker

I have been trying to score baguettes but I continue to have a problem with sticky scoring. My blade is sharp and I am at the right angle. I have been proofing on a simulated couche made with parchment paper. I am wondering if using a linen couche would draw just enough moisutre out to make it easier....any suggestions??

ppschaffer's picture

Avoid wheat? Wheat Belly by William Davis, MD

November 9, 2011 - 1:38pm -- ppschaffer
Forums: 

Wheat Belly by William Davis, MD, published this year strongly condemns modern wheats: Dr Davis writes that wheats have been so extensively hybridized and genetically modified that they no longer remotely resembles ancient (healthful) wheats. Therefore, he says, avoid modern wheats, organic or not, like the plague...  I'm not a food scientist but, frankly, I am surprised by his assertions.  Any comments by food scientists or other knowledgeable individuals?

OldWoodenSpoon's picture
OldWoodenSpoon

Last night brought the fourth in this series of attempts to bake a proper loaf of this wonderful tasting bread.  In short, this bake offered only incremental improvement over previous efforts, but the essential problem still remains unresolved.  In this bake one of the two loaves promptly caved in upon removal from the baking pans for cooling.  This happened within 60 to 90 seconds of removing the loaves from the pan.  It happens quickly enough that you can watch the sides pull in.  In this bake, however, only one of the loaves did this.  That might be progress.

The changes for this bake were as follows:
1)  No malt at all this time.  I dropped the malt because I do not have non-diastatic malt on hand, although it is required by the formula.  There is considerable discussion of the topic of malt in the posts on my prior bakes if you want to catch up there.
2) King Arthur All Purpose flour (11.7% protein)  I concluded, correctly I think, that this is not a flour issue but I made the change to clear up a troubleshooting checklist item.  Other bakers (see previous posts) have produced excellent loaves of this bread with other flours.
3)  More careful attention to tracking dough temperature.  The initial target dough temperature of 78F was achieved after combining all the ingredients in the initial mix.  I was surprised at the "friction factor" input by my Bosch mixer though, and ended up with a final dough temperature going into bulk fermentation of 91F.  With a 14 1/2 minute mix that's almost a degree per minute.  It ended up much higher than I expected, and proves I do not use my mixer very often.  If I did I'd have been more aware of this beforehand.  In the end I don't think it mattered.
4) A thorough degassing of the dough by hand kneading several strokes on an unfloured board after 40 minutes of bulk fermenation that doubled the dough.  The dough doubled again compared to the initial post-mix volume in another 35 minutes.
5) Aggressive degassing prior to shaping, and shaped by tightly rolling up the dough and sealing only the bottom seam, tightly.
6) I preheated my oven for 45 minutes at 375F prior to loading, and reduced to 350F immediately upon loading.  I also verified my oven temperature as accurate prior to loading.  My oven holds the temperature set on the control panel.

Observations:
The first and biggest point that I noticed, when rounding for the bulk rise, was that this dough seemed drier and stiffer than in previous bakes.  I wished I had added more water to loosen it up, but it was, I thought, too late by then.  This was even more apparent at the degassing during bulk, and I really paid for it in trying to shape the dough.

Shaping, especially trying to pre-form the dough into the requisite rectangles prior to rolling up, was made difficult by the lack of extensibility in this dough.  It was very like working with a big, heavy rubber band.  I could stretch it out, with difficulty, but it would pull back immediately if I let go.  It was very difficult to pre-shape, even after a 30 minute rest after dividing.  (Is this a result of holding out the malt, even the wrong type?)  Due to the dryness of the dough it was also difficult to seal the seams.  After finally getting the bottom seams to seal I elected to just leave the ends open.  I really missed the silky suppleness of this dough in previous bakes.

Final proofing took longer, as I expected, due I'm certain to the degassing and second bulk rise.  Instead of taking 45-60 minutes, these were not ready to bake until 75-80 minutes after shaping.  I proofed these on a bookshelf waist high and a few feet from the wood stove.  The thermometer on that shelf read 75F for the entire time period (good wood stove!).  This is the same place I proofed attempt #3 the previous evening.

Here is the pictorial record:

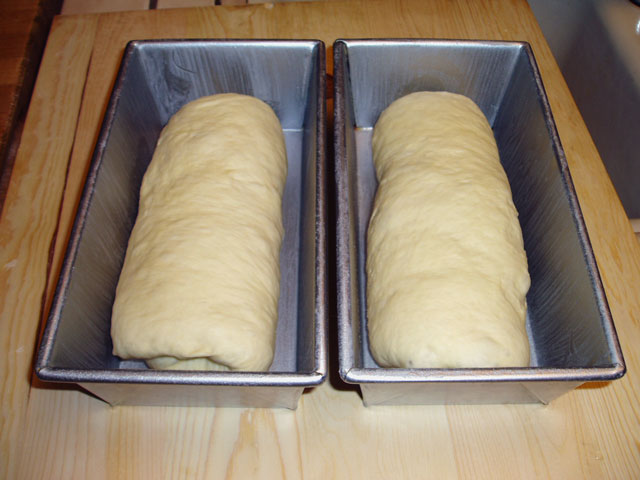
Shaped, panned and ready for final proof.

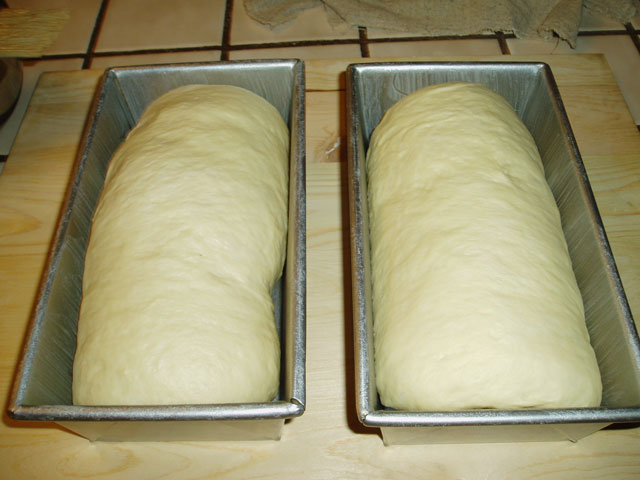
Proofed and ready for the egg wash and slash.

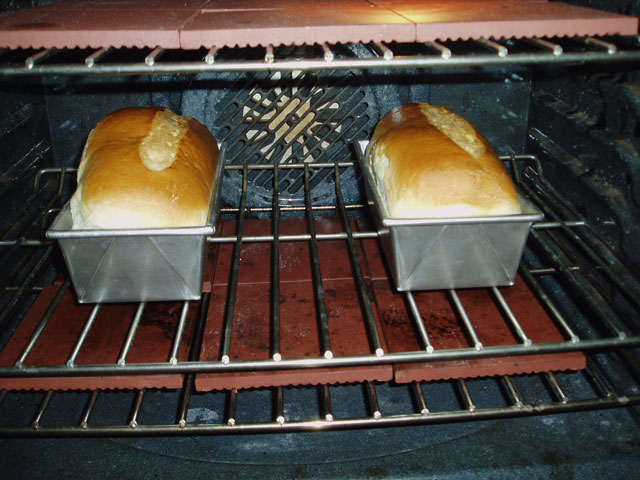
This shows the relative positions in the oven, and the uneven spring/shape and orientation.
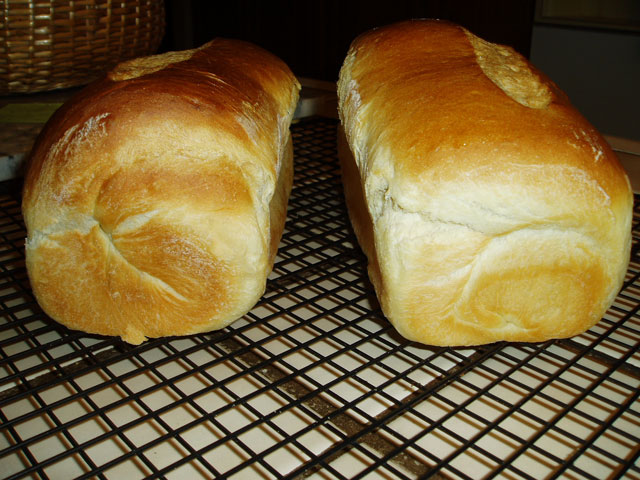
Finished loaves.

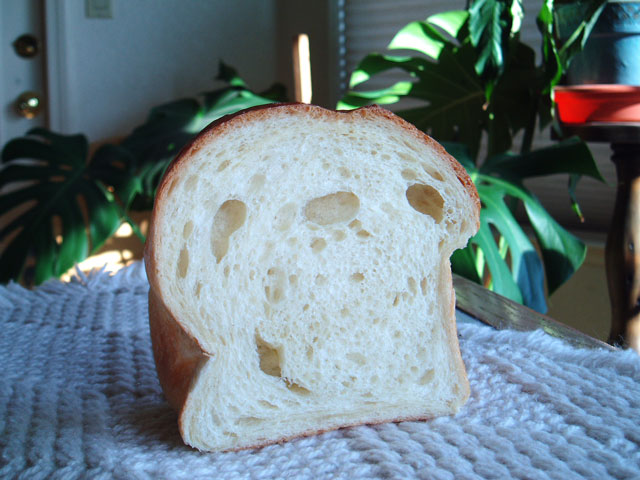
The cross-section shows some much larger holes in the crumb than were present in previous bakes.  It also makes clear that the sides of this loaf caved in, one more than the other, once again.  This cave in only happened on one of the two loaves though.  This shot does not show it, but this loaf also had some side-wall compression expressed in a doughy strip just inside the crust, but not as much as previous bakes.  The other loaf looks quite nice, and I will gift it to a neighbor.  We have plenty, trust me.

So, some forward progress is made, but not a lot.  The dough did not seem dry during the mix as I checked the gluten development, but it certainly was apparent when I tried to round the dough for bulk fermentation.  I am unsure about why this dough was so elastic.    I think that if I can resolve those issues I can do a better job of shaping and so better control the spring of the loaf.  The degassing and second rise in bulk fermentation seems to have controlled the oven spring.  I think this bake produced far more normal spring in the oven than any of my previous attempts.  Thanks go to MiniOven and Andy for that!

I will bake this yet again, but not until next week.  I have other commitments for the next few evenings, and I need a break too.  Perhaps just some time to reflect and back up out of the leaves will give me a more productive view of the forest on this one.  I think I will bake some sourdough this weekend, just to do something different as well.

Thanks for stopping by!
OldWoodenSpoon


Juicegoose's picture

First Olive Loaf results

November 9, 2011 - 8:51am -- Juicegoose

This is an update to my original post on a topic of olive loafs. Read it below for that discussion.

This afternoon I cooked my first artisan olive loaf bread here are my thoughts and hopefully you guys can dish out some pointers.

1. Even though I attempted to get my oven to 475 the closest it got was 400 until i turned on the broiler to get it higher. This pretty much ticked me off.

yy's picture

Looking for an Italian pandoro mold

November 9, 2011 - 7:57am -- yy

Hi everyone

I've been looking all over the internet for an Italian pandoro mold that's available in the U.S. or that ships to the U.S. for a reasonable price. Most of what's available seems to be of the Portuguese variety, which has deeper pleats and a wider flare. The photo below shows what I'm looking for (taken from mwilson's blog at staffoflife.wordpress.com)

Pages

Subscribe to The Fresh Loaf RSS