The Fresh Loaf

A Community of Amateur Bakers and Artisan Bread Enthusiasts.

Most bookmarked

DanAyo's picture
DanAyo

123 Sourdough No Knead - Do Nothing Bread

123 Sourdough, No Knead - Do Nothing Bread   Originated by Flo Makanai and submitted by dabrownman 

 A simple recipe with simple procedures. Did you know that you don’t have to knead dough to get great bread. And you don’t need a mixer or really any other tools. But an inexpensive digital scale that weighs grams would be a worthwhile investment. HERE is an example.

 The bread is called 123 Sourdough because the ratios are 1 part Levain, 2 parts water, 3 parts flour, and 2% salt. Let’s choose 100 grams of Levain for this example. So if the Levain is 100g then 2 parts water would be 2 X 100 or 200g water. The flour is 3 parts (remember 123) so 3 X 100 is 300g of flour. Now a tiny bit of math to calculate the required salt. Since the formula calls for 2% salt, you would multiply 0.02 X 350 and you get 7. So 2% times the total weight of the flour, which is 350g equals 7g of salt. Now, if you are paying close attention you should be questioning the 350g of flour. 3 parts of flour is 100 X 3. Where did the extra 50g come from? The Levain is 100% hydration, meaning equal parts of flour and water. Therefore 100g of Levain contains 50g of flour. Salt is calculated as 2% of the total flour in the formula, which is 350g. 

 These instructions assume that you already have an established starter that is active and ready to go. If you don’t have a starter and would like to make one HERE is link that might interest you. Teresa Greenway takes you through the day by day experience of making a starter.

 Make the 1 part levain (for this example of 100g) by taking 10g of starter and mixing equal weights of 45g flour (either All Purpose or Bread Flour) and 45g water in a bowl and cover with plastic wrap and place in a warm spot for 12 hours or until it doubles .

 Put 2 parts water (200g) in a large mixing bowl.  Add the prepared 100g of levain and mix with a spoon until levain dissolves in the water - about 15 to 20 seconds.   Add in 3 parts flour (300g) and 7g of salt.  Mix everything together for about a minute or two in large bowl with a spoon or hands making sure there is no dry flour and everything looks Kosher even if you are not Jewish :) There is no need to knead this dough, thus the name “No Knead - Do Nothing”

 Place bowl in plastic grocery bag.  Make bag air tight by closing with a simple knot.  Let dough double in volume - an estimate of 4 to 6 hours.  Watch the dough not the clock.

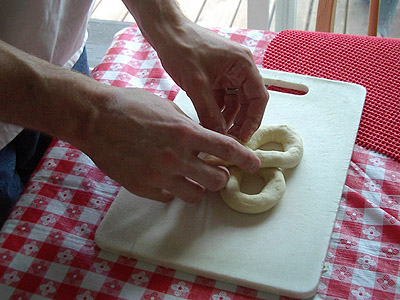
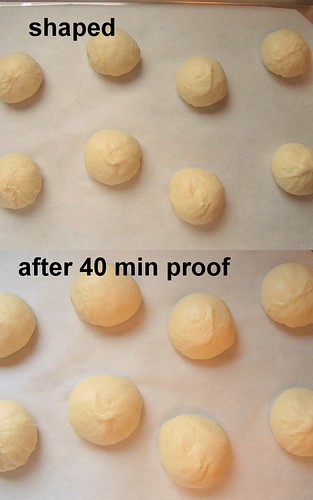
 Turn the dough out on counter, gently pat out big bubbles, round into ball with hands and cover with the over turned mixing bowl. 15 minutes later, round into tight ball again and put ball into a proofing basket (a bowl will work) lined with a smooth floured cloth with seam side of the dough facing down.  Place container back into the plastic grocery bag again and tie as before.

 Let it proof 1-2 hours till it reaches 90% increase in volume.  Watch the dough not the clock again.  Click HERE for a video showing how to perform a finger polk test. Preheat your oven to 450F with the Combo Cooker inside 45 minutes after you place your dough in basket to proof.

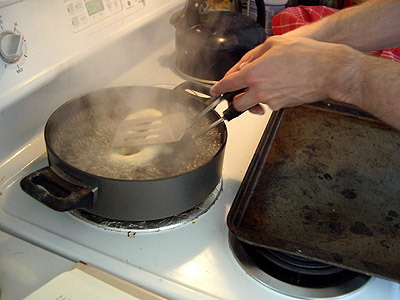
 Gently dump the dough into the preheated cast iron combo cooker, (optional - Spritz dough with water from spray bottle),  cover with the deep lid and put in the 450F oven for 15 minutes of baking with the lid on.

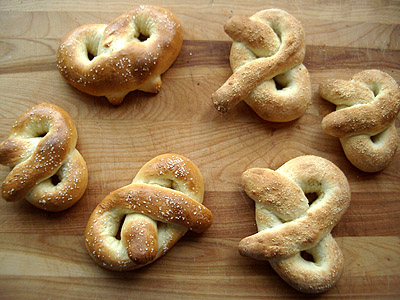
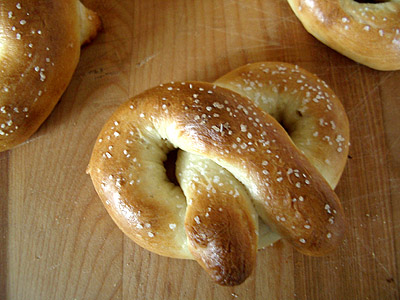
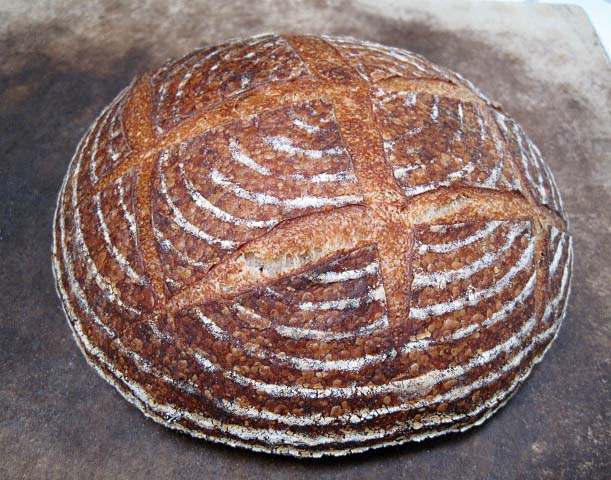
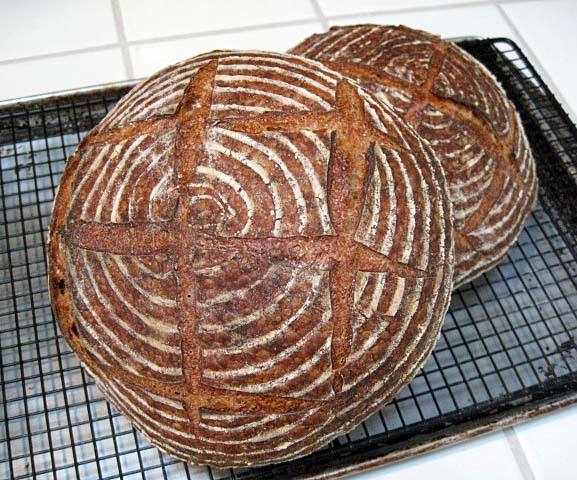
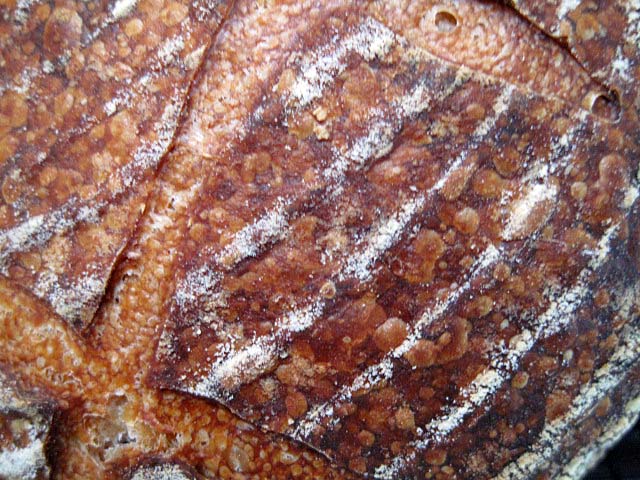
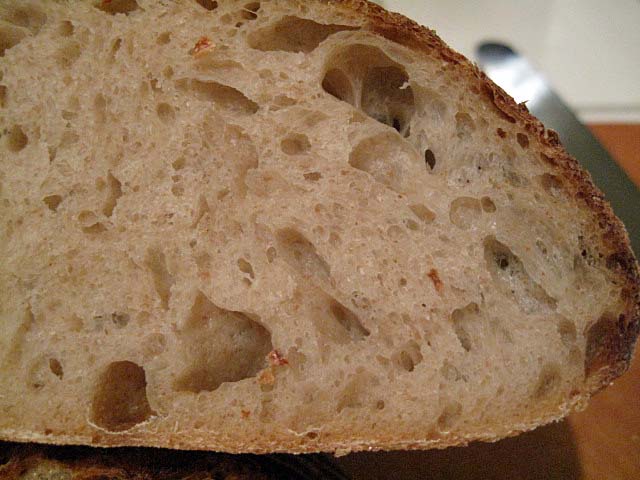
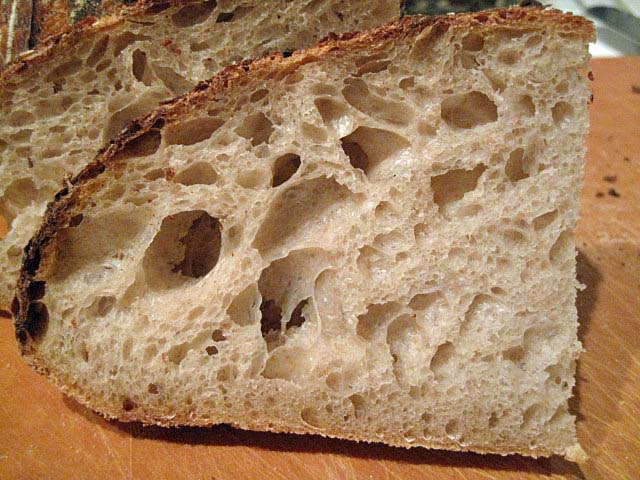
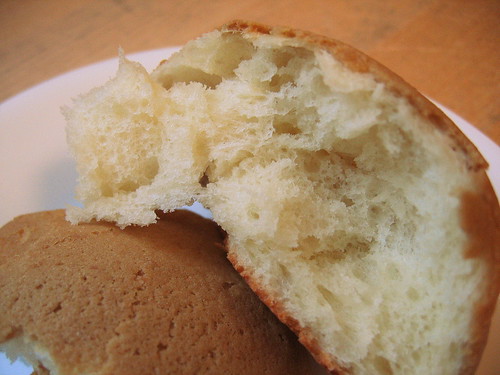
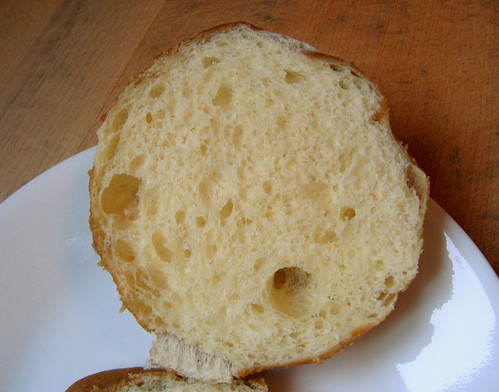
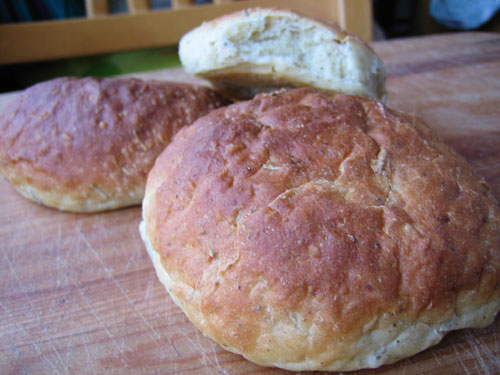
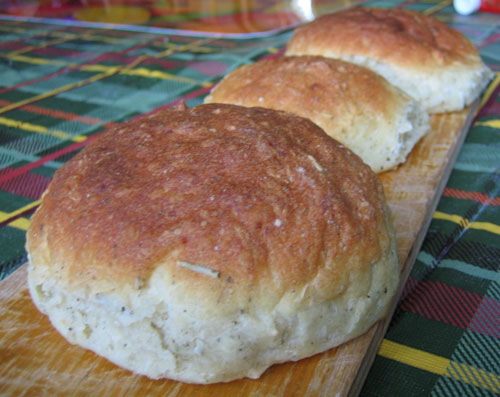
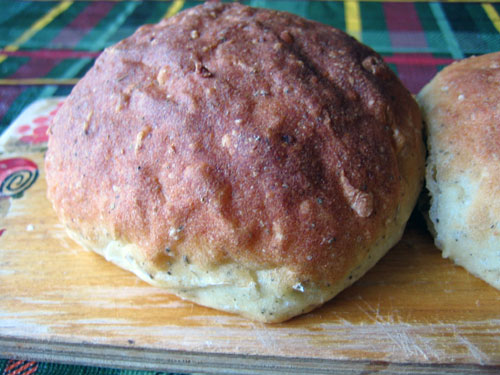
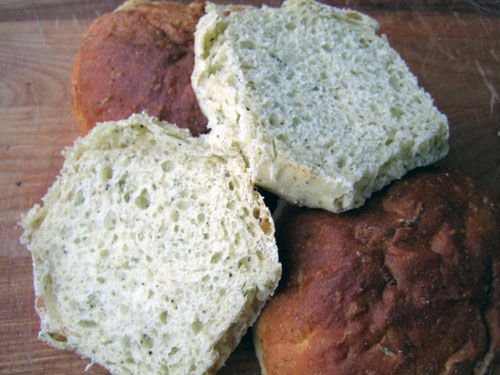
 After 15 minutes remove lid and bake about 12-15 more minutes until bread is nicely browned, cracked open and blistered.  NOTE - since the seam was placed up in the cooker, you should have beautiful, natural looking cracks. Remove bread from Cooker and move it to a wire cooling rack. Let it cool for 2 hours before slicing on a cutting board with a serrated bread knife or just tear off hunks to eat.

 Optional - You can check temperature if you want with instant read thermometer.  When it reads 208 F- 210 F on the inside it is done. If you don’t have a thermometer you can tap the bottom of the loaf and it should make a hollow sound.

 Exercise caution when placing the dough in the hot cast iron pot.  Most of all, enjoy a nice loaf of bread that you made and was easy as pie.

 It you don't have a combo cooker preheat a baking sheet or jelly roll pan.  Dump dough out on parchment paper on a peel and transfer to the pan.  Cover with the stainless steel bowl or some other oven proof large pot.  If you have a baking stone use that in place of the baking sheet. If you choose to bake your bread without a cover (Dutch Oven, Combo Cooker, etc) you can get outstanding results using a technique called Mega Steam. Click HERE to to learn more.


Fully documented 123 SD bake with images can be seen HERE.


 Happy baking


Nice tools to have, but none are necessary. 

Digital Scale

Dough Knife

These links are examples, and not an endorsement for a particular item.


emkay's picture
emkay

Mexican buns aka coffee cookie buns aka rotiboy buns

The Chinese like soft and fluffy white breads. The whiter, the better. It might explain why something called Hong Kong flour exists. The HK flour is bleached and low in protein so that the resulting bread is super white and super soft. I don't really mind if my Chinese breads turn out white or not. So I just use what I have on hand which is Central Milling's Artisan Bakers Craft, a 10.5% protein, organic, malted, unbleached flour. The results are definitely more off-white than white. Soft and fluffy is easy. Enrichments such as butter, egg and milk will do the trick. Using a tangzhong aka water roux helps with the softness and keeping quality.

mexican_bun_crumb_1

This bun is a purely Asian creation. It doesn't seem to have anything to do with Mexico although buns with a cookie-like topping are reminiscent of conchas. I don't know who invented it first and I have no idea why the Chinese like topping breads with a cookie batter, but it's pure genius. The cookie melds with the bread dough and creates a thin, crispy, cookie-ish layer. Depending on the ingredient ratios in the cookie batter, the layer can be fused with the bread and cannot be peeled off. Or if the cookie batter is stiffer, the baked layer can be peeled or flaked off the bread and eaten separately which is the way I did it as a child when eating boh loh bao aka pineapple buns (which have no pineapple in it at all).

I used instant espresso powder in my cookie topping, but instant coffee powder can be used instead. You can leave out the coffee and have a plain vanilla topping. I used a tangzhong milk loaf for my buns. They turned out super soft, fluffy and shreddable. The topping was crisp on day one, but softened considerably by day two.

mexican_bun_proof

mexican_bun_swirl

mexican_bun_baked

I left a few without topping. The topping weighs down the bun a bit so the topped ones spread out instead of up.

mexican_bun_crust

The bottom of the bun.

mexican_bun_bottom

The crumb.

mexican_bun_crumb_2

mexican_bun_crumb_3

Bakers' percentages for the bun dough

100% flour*, 75% whole milk*, 10% sugar, 12.5% egg, 1% instant dry yeast, 1.5% salt, 10% butter

[* 5% of the total flour was used in the tangzhong. TZ ratio was 1:5 flour to milk.]

Bun dough recipe

To make the tangzhong: In a saucepan whisk 20 g AP flour into 100 g whole milk until it's pretty smooth. Cook over medium heat, whisking constantly, until the mixture reaches 149F/65C. It should be pudding like. Allow the tangzhong to cool before using it in the dough.

380 g AP flour

200 g whole milk, 85-90F

40 sugar

50 g egg

4 g instant dry yeast (SAF red)

6 g salt

40 g unsalted butter, softened

all of the tangzhong

  1. In a KA stand mixer, mix everything except the butter on speed 1 for 3 minutes.

  2. Add the butter and mix on speed 2 until all the butter is incorporated, about 2 -3 minutes.

  3. Bulk ferment at room temp until doubled, about 1 hour.

  4. Scale each bun at 55 grams. (I got 15 buns.)

  5. Proof on sheet pans at room temp for 30-45 minutes.

  6. Pipe cookie topping onto each proofed bun.

  7. Bake buns at 375F for about 15 mins or until golden brown. Best served warm.   

Coffee cookie topping

50g unsalted butter, softened

50g granulated sugar

50g egg, lightly beaten

70g AP flour

1 tsp instant espresso powder

1 tsp water

1/2 tsp pure vanilla extract

  1. Dissolve the espresso powder in the warm water and mix in vanilla extract. Set aside.

  2. Beat the butter and sugar until light and fluffy.

  3. Beat in the egg until well combined.

  4. Beat in the espresso mixture.

  5. Add the flour and mix until just incorporated.

  6. Transfer topping to a pastry bag fitted with a round pastry tip.

  7. Store in the refrigerator until needed. (Can be made 2 day in advance.)

  8. Allow the topping to soften a bit at room temp for about 5 or 10 minutes before piping it onto the proofed buns.

 :) Mary

dmsnyder's picture
dmsnyder

Converting starter hydrations: A Tutorial. Or through thick and thin and vice versa


Questions regarding how to convert one kind of starter into another are frequently asked on The Fresh Loaf. The easy answer is to just take "a little bit" of seed starter and add enough flour and water to make a mixture of the desired thickness. This is fine and it generally works very well. However, sometimes a recipe calls for a precise hydration level levain and changing this, even a few percentage points, will make the dough consistency quite different from that intended by the formula's author. For those times, one needs to be more precise in making up the levain. 

To convert a starter of one hydration to a starter of another hydration - For example, if you have a 50% hydration starter and want to build a 100% hydration starter from it. 


Here's a general method for a precise conversion:

First, you need to know four things:

1. What is the hydration of your seed starter?

2. What is the hydration of your final starter?

3. How much of the total flour in your final starter comes from your seed starter?

4. How much (weight) final starter will you be making?

Second, you need to calculate the total amount of flour and the total amount of water in your final starter.

Third, you need to calculate the amount of flour and the amount of water in the seed starter.

Fourth, you can now calculate the ingredients of your final starter. They will be:

1. Seed starter

2. Flour (from seed starter plus additional)

3. Water (from seed starter plus additional)


So, let's see how this method works with some specific assumptions. 

The four things you need to know:

Assume you have a 50% hydration seed starter that you want to use. Assume you want to make 100 g of a 100% hydration starter. And assume you want the seed starter to provide 25% of the total flour in the final starter.

Note: Using "Baker's Math," Flour is always 100%, and all other ingredients are proportionate to the flour. So, in a 50% hydration mix, the water is 50% (of the flour, by weight). If hydration is 125%, the water is 125% (or 1.25 times) the flour.

To calculate the total amount of flour and water in your final starter:

Flour (100 parts) + Water (100 parts) = 100 g

So, the 100 g of starter is made up of 200 "parts." The weight of each part is calculated by dividing the total weight by the number of parts. So, 100 g /200 parts = 0.50 g.  This number is sometimes called "the conversion factor."

Then, since there are 100 parts of flour, its weight is 100 parts x 0.5 g = 50 g.

The total water in the final dough is 100 parts x 0.5 g = 50 g.

To calculate how much flour will come from the seed starter and how much will be added to make the final starter:

We now know that the total flour in the final starter will be 50 g. But we decided that 25% of this flour is going to come from the seed starter. This means that the seed starter must contain 50 g x 0.25 = 12.5 g of flour, and the flour added to this to make the final starter will be 50 g - 12.5 g = 37.5 g.

To calculate the total weight of the seed starter and the weight of water in the seed starter:

We now need to calculate how much seed starter it takes to provide 12.5 g of flour, and how much water is in this amount of seed starter.

If the seed starter is 50% hydration, it contains 100 parts of flour and 50 parts of water. We know then that the amount of water is 50 parts water/100 parts flour = 0.5  parts of the flour.  Since we already know that the flour has to weigh 12.5 g, then the water must weigh 12.5 x 0.5 = 6.25 g and the total weight of the seed starter is the sum of the water and flour or 12.5 g of flour + 6.25 g of water = 18.75 g.

To calculate the weight of water that must be added to the seed starter to make the final starter:

Now we can calculate how much water must be added to the seed starter to make the final starter. It is the total water in the final starter minus the water in the seed starter or 50 g - 6.25 g = 43.75 g.


Now we know "everything!" To make 100 g of 100% hydration starter, beginning with a 50% hydration seed starter, we would mix:

1. 18.75 g Seed Starter.

2. 37.5 g Flour

3. 43. 75 g water


This method can be used to build any amount of starter of any hydration using a seed starter of any (known) hydration. 


David


dmsnyder's picture
dmsnyder

Baguette crumb - 65% hydration dough

Some time ago, Pat (proth5) posted her formula for baguettes. This was in the context of our "great baguette quest" of some months back. We were playing with higher hydration doughs and cold fermentation à la Gosselin and Bouabsa.

Pat's formula is levain-based and employs a 65% hydration dough. She has insisted repeatedly that, while higher hydration is one route to a more open, holey crumb, fermentation and technique in shaping the baguettes are at least as important and that good technique can achieve the desired open crumb even with a dryer dough.

Okay. It was past time I tested my own technique against Pat's claim.

Pat's formula is as follows:

This is for two loaves at a finished weight of 10.5 oz each

.75 oz starter

1.12 oz flour

1.12 oz water 

Mix and let ripen (8-10 hours) 

Bread

All of the levain build

10.95 oz all purpose flour

.25 oz salt

6.6 oz water 

Dough temperature 76F 

Mix to shaggy mass (Yes! Put the preferment in the autolyse!) – let rest 30 mins

Fold with plastic scraper  (30 strokes) – repeat 3 more times at 30 min intervals 

Bulk ferment at 76F for 1.5 hours – fold

Bulk ferment at 76F 2 hours

Preshape lightly but firmly, rest 15 mins

Shape.  Proof 1 hour or so

Slash

Bake with steam at 500F for about 20 mins


I followed this except I baked at 480F. I used Whole Foods 365 Organic AP flour. The result was an excellent, classic baguette with a crunchy crust and cool, creamy crumb. It was slightly sweet with imperceptible sourness when eaten just ... well, almost ... cooled.

Here's  the crumb:

I'll let you draw your own conclusions.

Thanks, Pat!

David

potato rosemary rolls

Thanksgiving in the States is coming up soon. These rolls would make a wonderful accompaniment to the banquet table, though they are simple enough that they can go along with any night's dinner. They make amazing hamburger buns too.

Potato Rosemary Rolls Makes 18 small rolls or 12 hamburger sized buns 1 potato, cooked and mashed 1 lb (3 1/2 cups) bread or all-purpose unbleached flour 3/4 - 1 cup water 2 teaspoons instant yeast 2 teaspoons salt 1 tablespoon butter 1 tablespoon dried rosemary or 2 tablespoons fresh rosemary 1 teaspoon ground black pepper 1 teaspoon ground sage leaves

Cook the potato until soft, either by boiling or baking in the oven or microwave. For this batch I chopped up and boiled the potato. I then reserved a cup of the potato water to add to the loaf, figuring it had additional nutrients and starches that would help my loaf.

Mash the potato. Removing the skin prior to mashing is optional: if you are using tough skinned potatoes like russets I would suggest removing them, but with soft skinned potatoes such as yukon gold or red potatoes I typically leave them on. The chopped up skin add nice color and texture to your rolls.

Combine the flour, mashed potato, yeast, salt, pepper and herbs in a large bowl. Add 3/4 cups water and knead or mix for 5 to 10 minutes, adding more water or flour until a consistency you are comfortable working with is reached. I added close to a full cup of water and ended up with an extremely sticky dough that was difficult to work with. I was only able to shape the rolls by repeatedly dipping my fingers in flour. The end result was wonderful though.

(I encourage amateur bakers to push the limit of what they think they can handle, moisture-wise. More often than not you'll be pleasantly surprised with the results, though you can go too far and end up baking a pancake, which I've done more than once.)

potato rosemary rolls

Place the dough in a greased bowl, cover the bowl with plastic wrap or a moist towel and let the dough rise until it has doubled in size, typically 60 to 90 minutes.

Remove the dough from the bowl, gently degas it, and shape it. For rolls or buns you can weigh them if you like or just eyeball them. I cut racquetball sized chunks of dough (larger than golf balls, smaller than tennis balls) then rolled them into balls in my well-floured hands. I placed them on a baking sheet covered with parchment, placed the entire sheet in a plastic trash bag, and set it aside to rise for approximately an hour again.

While the dough rose, I preheated the oven to 375 degrees.

If you have a spritzer, spray the top of the rolls with water right before placing them in the oven. Place them in the center rack and bake them for 10 minutes. Rotate the pan 180 degrees and bake them for another 10 to 20 minutes, depending on size. My large hamburger bun sized rolls took close to half an hour to bake. You'll know they are done when the bottom of the rolls is solid and slightly crispy. If you have a probe thermometer, check the temperature inside one of the rolls. When the internal temperature is approaching 200 degrees F, they are ready to pull out of the oven.

potato rosemary rolls

potato rosemary rolls

Allow the rolls to cool before serving. They keep very well too, so you could bake them a day or two ahead of time and still serve them for Thanksgiving.

Related Recipe: Kaiser Rolls.

Potato Rosemary Rolls

Floydm's picture
Floydm

English Muffins

Today I tried making English Muffins for the first time. They turned out pretty good:

I think I made the dough a little too dry, so I didn't get the big holes inside that you want, but they still tasted good.

I used the recipe from Beth Hensberger's Bread Bible. I may try another next time, but no complaints about this recipe.

Traditional English Muffins

1/4 cup warm water (105 - 115 degrees)
1 tablespoon (1 package) active dry yeast (or a little less than a tablespoon of instant yeast)
Pinch of sugar
4 to 4 1/2 cups unbleached all-purpose flour
2 teaspoons salt
1 egg
1 1/4 cup warm milk
2 tablespoons melted butter
Cornmeal (for dusting)

If using active dry yeast, combine the water, yeast, and a pinch of sugar in a small bowl and let stand until foamy, about 10 minutes. If using instant yeast, as I did, you can just mix the yeast in with the flour and omit this first step and the sugar.

Combine 2 cups of the flour and the salt in a large bowl. Make a well in the center and pour in egg, milk, butter, and yeast mixture. Mix until creamy, about 2 minutes. Add the remaining flour 1/2 cup at a time, stirring in each time, until you have a soft dough that just clears the sides of the bowl.

Turn the dough out onto a floured work surface and knead for 3 to 5 minutes. Return the dough to a clean, greased bowl, cover with plastic wrap, and allow the dough to rise until doubled in size, about 90 minutes.

Sprinkle a work surface with cornmeal. Pour the dough out of the bowl and onto the surface. Sprinkle the top of the dough with cornmeal and then roll the dough into a rectangle about 1/2 inch thick. Use a large round cookie cutter or an upside down drinking glass to cut the muffins out of the dough.

Heat a large skillet over medium heat. Place the muffins onto the skillet and let the bake for 5 to 10 minutes until quite dark before flipping.

An optional step, if you are concerned about baking them all the way through (which I was), is to have your oven heated to 350. After baking the muffins on the griddle for 5 minutes on each side, place them on a cookie sheet and place them into the oven for an additional 5 to 10 minutes. This assures that they are baked through.

Enjoy!

pretzel shapingThe other day I was reading Jeffrey Hamelman's recent book Bread: A Baker's Book of Techniques and Recipes when I came across his pretzel recipe. His recipe requires a pate fermente overnight, a long fermentation, and a bath in a solution of water and lye, which means rubber gloves and goggles are required.

"Rubber gloves and goggles and caustic fluids to make a batch of pretzels?!? You've got to be kidding me," I thought.

The next day I found myself flipping through another baking book when I stumbled across another pretzel recipe. No caustic bath. No preferment. Not even an initial fermentation: simply mix everything together, shape the pretzels, and bake them; beginning to end, under an hour.

So which is it? Is it necessary to make the preferment and use lye to make decent pretzels at home? Do you even need to ferment the dough to make passable pretzels, or can you just jam them into the oven?

Find out below.

By the way, the other baking book I was looking at was Breaking Bread with Father Dominic 2. Not a bad little book. I gather that it is out of print, but if you see a cheap used copy at the local bookstore it might be worth picking up.

I didn't follow his recipe exactly, but it provided a nice balance to Hamelman's recipe.

The Experiment

There was no way I was going to try the lye bath at home. Maybe to make world class, authentic German pretzels that is necessary, but for a half dozen pretzels at home? Forget about it.

I decided to try make pretzels with an initial fermentation and without. I also tried boiling them briefly in water, egg washing them, and just baking them dry. If any of those methods could produce something reasonably like the soft pretzels I've had before I'd be happy.

The Recipe

I buy my yeast in a jar so that I can measure out as much or as little as I want (well, that and it is cheaper when you bake as often as I do). If you are using yeast from a packet, you can either use half a packet or double the recipe and use an entire packet (at least the packets they sell in the grocery stores in the US... international bakers will have to do their own conversion).

If you are using instant (AKA Rapid Rise or Bread Machine) yeast, you can just mix the yeast in with the rest of the dry ingredients before adding the warm milk and it'll activate fine. If you are using active dry yeast, mix it into the warm milk along with the malt powder (or brown sugar) and give it 5 to 10 minutes to activate before incorporating it into the dry ingredients.

Pretzels

Makes 6 large pretzels
1 teaspoon instant yeast
1 tablespoon malt powder or brown sugar
2-3 cups all-purpose unbleached or bread flour
1 teaspoon salt
1 cup warm milk (approximately 110 degrees, which is 1 minute in my microwave)

Combine all of the ingredients in a bowl and mix together until it forms a ball. I start with 2 cups of the flour and mix it together until it forms something like a thick batter, then add more flour a handful at a time until it'll form a nice ball that I can knead by hand.

Either use an electric mixer to mix the dough for 5 minutes or remove it from the bowl and knead it by hand for 5 to 10 minutes until the dough begins to get smooth and satiny.

If you are going to ferment the dough (more information on whether this set is necessary below), return the ball of dough to a clean, greased bowl, cover with plastic wrap, and set it aside to rise until it has doubled in size, approximately an hour.

If you fermented it, degas the dough gently before moving on to the next step.

Before shaping, start preheating the oven to 425 degrees.

Cut the dough into 6 pieces. Roll each one into a short log, cover with a towel, and let the dough relax for 5 to 10 minutes. After it has relaxed you should be able to roll it out and stretch again fairly easily.

pretzel logs

After taking this photo, I let them relax again and then gave each a third roll and stretch session before they were as long and thin as I wanted (about 15 inches long and about as big around as my index finger). They'll nearly double in width while baking, so it is ok to roll them out quite thin.

pretzel shaping

Shaping pretzels is simple, once you get a hang of it. Place a rope of dough on the work surface in front of you. Take each end in a hand, loop the dough away from you, and bring the ends back toward your stomach, crossing them about an inch above the rope. Apply a little bit of pressure to make the loops stick together, but not too much because you don't want then to flatten out.

Pretzels don't appear to need to rise again before baking, so you just need to figure out how you want to prep them for the oven. Here are the options I tried:

To boil them: If you want to boil them, bring a pot of water to a boil. Dunk each of the pretzels into the boiling water for 5 seconds, then place them onto a baking sheet and sprinkle with coarse salt (I use the kosher stuff that is easy to find at the grocery store) or other toppings.

pretzel shaping

I used a pair of spatulas to hold the pretzel in place while holding it under water.

To eggwash them: Simply place them on a baking sheet, brush them gently with an egg that has been whisked, then sprinkle with coarse salt or other toppings.

To bake them (mostly) dry: Sprinkle or spritz them with a little bit of water so that the toppings will stick, then sprinkle with coarse salt or other toppings.

Place the baking sheets into the oven. It took around 15 minutes for my pretzels to get golden and brown. Remove from the oven and eat immediately.

Results

pretzels done

We definitely thought the boiled pretzels (on the left) were better than the pretzels that had just been spritzed with water (on the right). The spritzed ones were dry and had a slightly french bread like crust. Crust like that is good on french bread but not so good on soft pretzels.

I liked the boiled pretzels more than the eggwashed pretzels, my wife preferred the eggwashed pretzels better. The eggwashed ones rose considerably more in the oven than the boiled ones, so they were quite soft and fluffy. The boiled ones were still soft, but they were a little denser and chewier.

Truthfully, I couldn't tell the difference between the batch that I let ferment for an hour and the batch I baked immediately. If I were tasting them side by side with no toppings I probably could detect a slight difference. But at least when I eat soft pretzels they are a medium for other flavors (salt and mustard), either method produces an adequate pretzel.

pretzel alone

And the lye bath? At least for the home baker I can say with confidence that you can skip it.

Defender of the lye bath? Or have any other insight into proper pretzel making? Please comment!

Pretzels

dmsnyder's picture
dmsnyder

My San Francisco Sourdough Quest, Take 4

I almost decided not to bake this past weekend, but I activated some starter, thinking I might make some sourdough pancakes for breakfast Sunday. But, then, there was this starter, and I thought maybe I'd bake something or other. Well, I might as well have some fresh-baked bread for Sunday dinner, and it had been a while since I'd given a loaf to my next door neighbor who really appreciates my breads. I guessed I'd make some San Francisco-style sourdough to share.

I didn't want to be completely tied to the time-demands of my dough, so I relaxed the rigorous procedures with which I had been working to accommodate the other things I wanted to do. I expected the bread to be “good” but maybe not quite as good as last week's bake.

To my surprise and delight, the bread turned out to be the best San Francisco-style sourdough I had ever baked. So I am documenting what I did and hope it's reproducible. And I'm sharing it with you all. The modifications in my procedures were determined by convenience of the moment. This was sort of “a shot in the dark that hit the bullseye.”

So, here are the formula and procedures for this bake:

I started with my stock refrigerated 50% starter that had been fed last weekend. This feeding consisted of 50 g active starter, 100 g water and 200 g starter feeding mix. My starter feeding mix is 70% AP, 20% WW and 10% whole rye flour.

I activated the starter with a feeding of 40 g stock starter, 100 g water and 100 g starter feeding mix. This was fermented at room temperature for 16 hours, then refrigerated for about 20 hours. I then mixed the stiff levain.

Stiff levain

Bakers' %

Wt (g)

for 1 kg

Wt (g)

for 2 kg

Bread flour

95

78

157

Medium rye flour

5

4

8

Water

50

41

82

Stiff starter

80

66

132

Total

230

189

379

  1.  Dissolve the starter in the water. Add the flour and mix thoroughly until the flour has been completely incorporated and moistened.

  2. Ferment at room temperature for 16 hours.

Final dough

Bakers' %

Wt (g)

for 1 kg

Wt (g)

for 2 kg

AP flour

90

416

832

WW Flour

10

46

92

Water

73

337

675

Salt

2.4

11

22

Stiff levain

41

189

379

Total

216.4

953

2000

Method

  1. In a stand mixer, mix the flour and water at low speed until it forms a shaggy mass.

  2. Cover and autolyse for 120 minutes

  3. Add the salt and levain and mix at low speed for 1-2 minutes, then increase the speed to medium (Speed 2 in a KitchenAid) and mix for 5 minutes. Add flour and water as needed. The dough should be rather slack. It should clean the sides of the bowl but not the bottom.

  4. Transfer to a lightly floured board and do a stretch and fold and form a ball.

  5. Place the dough in a lightly oiled bowl and cover tightly.

  6. Ferment at 76º F for 31/2 to 4 hours with a stretch and fold at 50 and 100 minutes.

  7. Divide the dough into three equal pieces. (Note: I had made 2 kg of dough.)

  8. Pre-shape as rounds and rest, covered, for 10 minutes.

  9. Shape as boules or bâtards and place in bannetons. Place bannetons in plastic bags.

  10. Proof at room temperature (68-70º F) for 1-2 hours.

  11. Cold retard the loaves overnight.

  12. The next morning, proof the loaves at 85º F for 3 hours. (If you can't create a moist, 85 degree F environment, at least try to create one warmer than “room temperature.” For this bake, I took two loaves out of the fridge and started proofing them. I took the third loaf out about an hour later and stacked it balanced on top of the other two. I did one bake with the first two loaves and a second bake with the third loaf.)

  13. 45-60 minutes before baking, pre-heat the oven to 480º F with a baking stone and steaming apparatus in place.

  14. Transfer the loaves to a peel. Score the loaves as desired, turn down the oven to 460º F, steam the oven, and transfer the loaves to the baking stone.

  15. After 15 minutes, remove the steaming apparatus, and turn down the oven to 435º F/Convection. (If you don't have a convection oven, leave the temperature at 460º F.)

  16. Bake for another 15 minutes.

  17. Turn off the oven, and leave the loaves on the stone, with the oven door ajar, for another 15 minutes.

  18. Transfer the loaves to a cooling rack, and cool thoroughly before slicing.


Note: Because these loaves were smaller than those baked in “Take 3,” the oven temperature was hotter , and the baking time was shorter. I also wanted a slightly darker crust, which this modification accomplished.

The crust was thick and very crunchy but not “hard.” The crumb was more open than my last bake. The crust had a sweet, nutty flavor. The crumb had sweetness with a definite whole grain wheat overtone and a more pronounced acetic acid tang. It had a wonderful cool mouth feel and was a bit more tender than the last bake.

This bread was close in flavor and texture to the best tasting bread I've ever had which was a half kilo of pain de campagne cut from an absolutely huge miche in Les Eyzies, France some 15 years ago. It's a taste I've never forgotten and often wished I could reproduce.

I need to make me a miche like this!

David

Submitted to YeastSpotting 

Shiao-Ping's picture
Shiao-Ping

Gérard Rubaud Miche

I dedicate my Gérard Rubaud Miche to MC.

(I wish that it could be transported across the Pacific Ocean to reach the other shore.)


It was one of those soulful Van Morrison nights.  The music in my tea room could not be any louder; any louder, the gods of silent teapots would have protested.  John Donne was in the air.  Van Morrison, my muse, dreamt of this miche for me.... 


I have neglected my teapots for the longest time now.  They have not been polished for ... dare I reveal ... a year?  Sounds criminal.  Just as well, with all that flour coming out of the surface of the miche, do I need to bother dusting my teapot stands?


Gérard Rubaud starter (re-sized to 2% of his formula as recounted HERE in MC's blog; my figures are for a final dough yield of 1.9 kg, you are welcome to half my quantity again)

First build

  • 6 g ripe stiff starter (at this quantity, any starter you've got going is fine, preferably not liquid starter)
  • 8 g water
  • 14 g flour (2 g WW, 1 g spelt, 1 g rye, and 10 g plain flour)

Note: Gérard Rubaud's starter hydration averages 55.5%.  The main thrust of his starter is three refreshes and built with the same flour compositions as for his final dough; ie. 30% whole grains flours (60% wheat, 30% spelt, and 10% rye) and 70% all-purpose flour.

At 30 degree C, this build took 10 1/2 hours for me (overnight temperature might have dropped to 24 - 25 degree C in my kitchen).

Second build

  • 28 g starter (from the first build above)
  • 16 g water
  • 30 g flour (5 g WW, 3 g spelt, 1 g rye, and 21 g plain flour)

At 30 degree C, this build took 6 hours for me..

Third build

  • 74 g starter (from the second build above)
  • 56 g water
  • 100 g flour (18 g WW, 9 g spelt, 3 g rye, and 70 g plain)

Note:  Watch your starter fermentation carefully, depending on your room temperatures.  As flour (fresh food) is not even 1.5 times the starter, it is very easy to over-ferment at this stage.  It was not an issue for the previous two builds as the yeast adjusted to the new flour compositions and began its activity slowly.  

At 30 degree C, this build took 4 hours for me (and it was already too long because when I touched my starter, it shrank back very quickly; 3 1/2 hours would have been better).  It rose 2 1/2 times.

Gérard Rubaud Final Dough

Main points about the final dough construction are (1) final dough flour is 30% whole grain flours and 70% all-purpose flour as for starter; (2) starter is 25% of final dough flour (ie, 25% baker's percentage); and (3) overall dough hydration is 80%.

  • 230 g starter (all from the third build above)
  • 920 g flour (165 g WW, 83 g spelt, 28 g rye, and 644 g plain flour)
  • 772 g water (every 10 -11 g of water is 1% dough hydration; feel free to reduce water if you wish)
  • 20 g salt

Total dough weight was 1,920 grams (minus 150 g as pâte fermentée = 1,770 g, see below) and overall dough hydration was 80%. 

Note:

(1) I did double my own formula here (both starter and final dough) because I wanted to do a stencil with Gérard Rubaud initials and I wasn't sure if it would be successful. 

(2) I reserved 150 grams from each dough and I had 300 grams as pâte fermentée (old dough) in total from the two doughs. I wanted to try a Poilâne style of miche.  Giovanni has done extensive research on Poilâne Miche.  Without going into the specifics, all that I wanted to do at this stage was to use Gérard Rubaud's stiff starter and dough with the addition of a reserved old dough to make a miche and see what happens, which I did.  

(3) So, in total I made three x my own formula here at two separate occasions, the last being a Gérard Rubaud Miche with pâte fermentée.  

Procedure - without pâte fermentée

Gérard Rubaud autolyse flour and water, then he cuts up his stiff levain into small pieces and adds them to the autolysed flour and water mixture.  However, the way I did the bread in this post was that I first diluted my starter with water, then I added flour and salt into the diluted starter, then I followed the procedure below.

  1. Autolyse 20 minutes.
  2. Five sets of S&F's of 30 strokes each at 30 minutes intervals.  
  3. At the end of the last S&F's, section off a piece of dough weighing 150 grams (and placed it in the fridge) to be used as pâte fermentée (more below).
  4. Pre-shape and shape, then place the dough in the fridge for overnight retarding.  (My room temperature was 30 degree C.  It was exactly three hours from the time the ingredients were mixed to the time the shaped dough was placed in the fridge.  You may need longer depending on your dough temperature and room temperature.  Gérard Rubaud does not like to retard dough, but I did 9 hour retarding for convenience).
  5. The next morning, stencil, then score the dough.  Pre-heat your oven to as hot as it can go.  Bake with steam at 230 C for 50 minutes.


       Gérard Rubaud Miche (without pâte fermentée) 


Only one of the two miches that I made is shown here, as the stencil of the other one was completely smeared.  The proved dough of that one was quite high (its profile was like a tall hill); when I placed the stencil on its surface and dusted flour on it, the flour did not sit well on the surface.  I knew there might be problem but went ahead any way.  I should have tried to press the stencil closer to the surface of the dough before I dusted flour.

Notwithstanding the above, the aroma was most amazing when the miche was being baked.  When the oven door opened, the whole house was filled with the wonderful whole grains roasting fragrance.

The loaves cooled down to have the cracks all over their surface - the top and all around the sides.  Part of the reason for that is because these are very high hydration doughs, but more because I tend NOT to leave my dough in the oven with the oven turned off for the last 5 - 10 minutes of baking as many of TFL home bakers do.  I tend to give my dough full but shorter bake.  The extreme difference in temperatures inside and outside the oven results in the crackling effect on the crusts.


With this Gérard Rubaud formula, I am witnessing the most amazing crumb that I have never seen before.  It has a translucent quality about it.  It is almost as if each and every particle of the flour had been fermented and each and every cell of the dough has been aerated.  I have never seen anything quite like it.  It is light and yet a slice of it on you palm feels a weight, a substance.  While the crumb looks translucent, it has a sheen as if it is oily (but it is not).  You can clearly see the specks of the whole grain flours in the crumb.  Had I not made this bread myself, I would not have believed that 30% whole grain flours would give me a crumb like this. 

So that is the texture.  What about the flavor?  I cannot tell you any single flavor.  No one taste stands out.   I cannot say that it is sour because sourness does not stand out.  The taste is very "creamy" if I may use that word.  The creaminess and the sourness are beautifully balanced. 

MC said of her Rustic Batard that it tastes more whole grains than Gérard's and she wondered if temperature had made a difference as Gérard's bakery is a good 15 degree F warmer than her place.  Now, my miche does NOT taste whole grains or wheaty at all.  I cannot single out a wheaty taste, but it is there, blended in with all the other flavors.  I wonder if my high temperature indeed had made a difference in this.  Or, put another way, had MC bulk fermented and proved her Rustic Batard in a proofing box to control temperatures, would she have gotten a closer taste in her Rustic Batard to Gérard's.


Procedure - with pâte fermentée

(Note: the formula is exactly the same as above except with the inclusion of 300 grams of pâte fermentée)

Follow the procedure as for miche without pâte fermentée except for the following:

  1. One hour after the dough was mixed (ie, at the end of the second set of S&F's, section off a piece of dough weighing 300 g ( reserve it as future pâte fermentée);
  2. Total fermentation time is shorter by 1/2 hour because fermentation happens faster with this dough.  (From the very first set of S&F's, you can already see some strength in the dough because of the acidity from the pâte fermentée.  To me, this is quite something, considering the way I mix my dough is that there is no kneading whatsoever, merely stirring to hydrate the flours.) 
  3. As this is a slightly bigger dough (1,920 grams as opposed to 1,770 grams), bake it for one hour. 


        Gérard Rubaud Miche (with pâte fermentée)


I learned something in this bake:  that sourdough pâte fermentée will give you extra dough strength because of the acidity in the old dough (provided it is not over-fermented to start with).  I am amazed at the volume that I get in this miche.  (Let's recap: this dough went through 2 1/2 hours of fermentation at room temperature of 30 degree C, then went into the refrigerator for 9 hour retardation, then baked at 230 C for 1 hour. That's all.) 

The taste of this miche is a lot sourer than the previous miche.  


This has been a very fulfilling exercise for me.   Thank you, MC, for the wonderful experience.


Shiao-Ping

ehanner's picture
ehanner

Norm's NY Style Onion Rolls-OMG- GREAT!

Norm's Onion Rolls
Norm's Onion Rolls
Onion Crumb
Onion Crumb

First off I have to say, stop what ever you're doing now and run to a store to pick up some dry onions so you can make these up tonight. This is an amazing recipe and your home will smell like heaven of roasting onions. Norm, I wish I could shake your hand in person. This is a home run (sorry about the Mets) and the recipe you posted worked perfectly for me, first time. I made a dozen batch and was planning on sharing with the next door neighbors but the sun got in my eyes and I didn't get to it lol.

There are several versions of this recipe on the site and I think I should show the link that I believe was corrected by the baker himself. This batch uses 32 Oz of flour and will make 12-4Oz rolls just like the ones shown above. For clarity, here is the recipe as I made it.

One last thought. Be sure to save the water from hydrating the onions and use it as part of the dough water. The improvement in flavor is amazing. To be honest I forgot that step until I was about to mix the dough. The water had so much aroma I threw the whole liquid part out and started over with the onion water. It only cost me an egg and a small amount of oil and yeast. It was well worth the extra effort.

I hope you enjoy this gift from our friend Norm.


Onion Roll Recipe -- per Norm

Topping:
1/4 c. dehydrated onion flakes
1T poppy seeds
1/4t salt
1T oil

Soak the onion flakes in boiling water until they're fully hydrated, then drain and add other ingredients; set aside until you need them. (BTW, according to Norm, you can also use this same topping for bialys). SAVE THE ONION WATER FOR USE LATER IN DOUGH

Dough:
32oz bread or first-clear flour (I used bread flour)
16oz water Use all of the water from hydrating the onion plus make up to 16 Oz.
1.5oz beaten egg
1.5 oz sugar
0.5 oz malt syrup/powder
1.5 oz vegetable oil
0.6oz salt
0.3oz active dry yeast (or equivalent cake/instant yeast) (2 teaspoons IDY)

1. Mix the water/malt/yeast and egg/oil separately; blend dry flour salt and sugar in mixer or by hand;

2. Add the liquids to the flour/sugar and hydrate well. This is a very stiff dough that will work either your back or your Kitchen Aid very hard.

3. Knead for about 10 min until the dough is very smooth and elastic, then set aside and let rise until doubled in bulk.

4. Turn dough, which will be incredibly silky, onto a dry board (no additional flour) and punch down, shape into 3-4 oz boules and let rest, covered, for at least 20 min.

5. Norm suggests spreading the topping onto the work surface and then pressing the boules flat into discs about 1/4"-1/2" thick. This works fine IF you let the dough rest, covered for at least 20 minutes as Norm suggests.

6. Preheat the oven to 450, Cover the rolls and let fully proof until about doubled in size. Just before loading into oven, press a dimple with your thumb in the center. Bake on parchment with a light spritz of water into the oven until they're nice and brown -- 20 minutes in my oven on a sheet pan.

Pages