The Fresh Loaf

A Community of Amateur Bakers and Artisan Bread Enthusiasts.

Most bookmarked

dabrownman's picture
dabrownman

Sprouting and Malting Primer

The 25% extraction sprouted multi grain bran sifted from the 75% extraction sprouted flour.

The little green rosettes will make your muffins taste bettah and sprouted grains will make your breads taste bettah too!  Sprouting is way easier than making bread so it is perfect for Lucy and I to do for just about every bake ……and a great way to turn a 3 day sourdough bake into a 5 day one – also perfect for us retired folks looking for something to do.


Make sure you re using hulled grains if you don’t like hard to digest fiber and roughage in your flour.   I’ve seen sprouting directions out there saying to soak the grains in water for 24 hours for the first step.  Don’t do it.  You are trying to sprout them – not drown them which is what you will likely do if you soak them for 24 hours.  You want to keep grain genocide far away from you.  The first step is to weigh the grains to be soaked.


After a 4 hour max soak in water you have to put them n something so that they can sprout, you can easily rinse and drain them every 8-12 hours so that the mold is kept at bay, keep light out so no green shoots stay white instead of turning green and the cool humid air in.


I found a plastic cheese mold with small colander holes in the bottom to let the whey out when forming and pressing cheese which is also perfect for sprouting grain..  it was a bargain a 50 cents at Goodwill.


You can buy sprouting gadgets and containers online, at health food stores and in some ethnic markets too.  Many folks just use a mason jar with the solid lid removed and substitute a screen to let water out when they rinse the grain and just keep it in a dark place.


What you are trying to do is replicate how the seeds would normally germinate in the ground.  Damp – not wet, dark – no light and cool – not hot or cold.  64-70 F works  best but since you are only going to be sprouting for 24 hours total or so from when the first soaking water hits the seeds,  a bit warmer won’t mold the seeds  just rinse them more often.,


This 5 grain mix took different times for each variety to chit but no worries - it is all close enough.

After soaking, I drain the seeds in the cheese mold and rinse them in water, shake out the excess water, cover in plastic wrap and a kitchen towel to keep out the light.  I repeat this every 8- 12 hours until the seeds chit.  Different seeds chit at different rates with rye being the fastest and some ancient grains being the slowest but they all close enough to sprout together which is what I do’


Once the first white rootlets break through the seed bran shell it is called ‘chitting’ and you are now done with sprouting to make sprouted flour and ready to dry the grains.  Once the grain has chatted, I dry it in a dehydrator at 105 – 110 F for 3 hours and 30 minutes with the seeds spread pout thinly, on a single layer on the trays. 


You will know that you are done drying them enough, so they won’t clog up your mill, when they weigh about the same as they did when you first weighed them before soaking.  Once dry you can mill them and sift them like you do any flour.  Your taste buds will reward you for taking the time to make sprouted flour for all kinds of things. 

If you don’t have a dehydrator I used to dry my grain outside in the AZ but you have to figure out a way to keep the birds from eating it.  I used the broiler pan from the mini oven with the seed on the bottom covered with the vented broiler top.  I have also dried them in my mini convection oven where the lowest temperature was 150 F.  With the door ajar the seeds never got over 140 F. 

Some will say that this is too high a temperature and kills off the enzymes you are trying to promote but brewers have always been right, They use the same grain and enzymes to extract all the sugar from the starch in the grain to make beer at the fastest rate and the best temperature to do so – 150 F.  So keeping it under 150 F will do the trick.

Time to make white & red malts when the seed shoot is the length of the seed p here are two pictures showing when the seeds are finished malting

Now if you sprout your grain, in this case rye or barley, for 4 or 5 days until the shoot, not the 3 rootlets that first chit out of the seed, is the length of the seed itself then it is ready to dry to make rye malt or barley malt.  This much longer time requires more rinsing and cool temperatures to keep the mold at bay.

Once dry at 105 F you can just grind into white diastatic malt, below right, or you can take the temperature up to 325 F like the seeds above to brown them to make red non diastatic malt, below left.


 Both malts above were made from the same malted berries 

If you dry this grain at low temperature you have white, diastatic malt and if you dry it at higher temperature up to 325 F you have red, nondiastatic malt – both of which are fine bread ingredients for all kinds of reasons.

Happy Sprouting and Malting


WoodenSpoon's picture
WoodenSpoon

Lavender&Honey Levain with Salt Crusted Crust.

The other day I noticed that the lavender bush in fornt of my house was blooming, so I figured hey why the heck not. the day before baking I mixed 5g of chef with 5g rye 35g bf and 40g cold water. I let this ferment for around 12 hours then 100g bf and 100g warm water to 50g of the elaborated chef, I let this ferment for around five or six hours then added it to my flour and water and autolysed for around an hour, then i added my lavender buds and honey and proceeded with slap and folds until the dough was properly developed., I then bulk fermented for two or so more hours, shaped and rolled the loaf in a mixture of very corsely ground Himalayan salt and blue cornmeal then proofed it for another two hours. then I baked it on the shy side of an hour at 450 then flipped it out of the pan and browned it up for another few minutes... hot dang it smells so darn good and the salt on the crust really goes well with what could otherwise be a pretty overwhelming flavor.

  • 441g BF
  • 29g Rye
  • 30g AP
  • 175g Levain
  • 47g Raw Honey
  • 11g Fresh Lavender
  • 11g Salt
  •   Corse Salt&Blue Cornmeal for rolling.
dmsnyder's picture
dmsnyder

Scoring Bread made with high-hydration dough

Scoring hearth loaves made with high hydration doughs is a challenge. Expressions of frustration with this in TFL postings are not rare. Much good advice regarding how to accomplish nice scoring of wet, sticky dough has been offered, but it is scattered. So, I thought I would share my own advice on this subject in one place.

These two bâtards are San Joaquin Sourdoughs. (For the formula and procedures, please see San Joaquin Sourdough: Update. Today's bake was different only in that I used just 100 g of 100% hydration starter.) The effective hydration of this dough is 74.5%. It is a sticky dough and a good test of one's shaping and scoring abilities. Yet, as you can see, it is possible to get nicely shaped loaves from this dough with cuts that bloom nicely and form impressive ears.


The key points in achieving this are the following:

A Key Point

  1. Gluten must be well-developed by mixing and fermentation. Good dough “strength” is important for crumb structure, but also for successful shaping. It is even more critical in wet doughs, because these tend to spread out and form flat loaves if their shape is not supported by a good, strong sheath of gluten.

  2. Pre-shaping and shaping can add to dough strength through additional stretching of the dough in the process of forming the loaves. A wet dough like this needs to be tightly shaped. This is a challenge, because it also has to be handled gently. Rough handling will result in excessive de-gassing and a dense loaf. It will also tend to make the dough stick to your hands more. When it sticks, it tears and makes weak spots in the loaf surface which are likely to burst during oven spring. The goal is to form the tight gluten sheath by stretching the dough and sealing the seams while avoiding downward pressure on the dough pieces being shaped. “An iron hand in a velvet glove.” Dough sticking to your hands can be decreased by lightly flouring your hands, wetting them or oiling them. However, the most helpful trick is to touch the dough lightly and as briefly as possible each time.

  3. The loaves need to have lateral support during proofing. This is to prevent them from spreading out. Support can be provided by a banneton (proofing basket) or on baker's linen or parchment, where folds in the couche material, sometimes reinforced with rolled up towels or the like under the material, provide the support. (I suppose the “ultimate support” is provided by a loaf pan.)

  4. The ideal material to support proofing loaves is absorbent. Baker's linen, cloth-lined bannetons and floured, coiled cane brotformen all absorb some moisture from the surface of the loaves in contact with them. This makes that surface a bit less sticky and easier to score without the cut edges sticking to the blade excessively. (I do not want the loaf surface so dry it forms a “skin.”) I like to proof loaves with the surface I am going to score on the absorbent material. This means baguettes and bâtards are proofed smooth side down (seam side up). Note that baking parchment is not absorbent, so, while advantageous for other reasons, it is not ideal for this purpose.

  5. Loaves should not be over-proofed. A greatly over-proofed loaf may actually collapse and deflate when scored. Short of that, it will still have less oven spring and bloom. This is a relatively greater problem with high-hydration doughs which are more delicate to start with. I find the “poke test” as reliable as any other criterion for when a loaf is ready to bake. However, it is not quite as reliable with very wet doughs. Neither is the degree of dough expansion. You just have to learn through experience with each formula when it is perfectly proofed.

  6. Loaves should be scored immediately after transferring to a peel and immediately before loading in the oven. Letting high-hydration doughs sit too long on the peel is asking them to spread out, especially if they have been scored ,which disrupts the supportive gluten sheath.

  7. The wetter the dough, the shallower the cuts. This is not as critical for boules, but, for long loaves like baguettes and bâtards, if you want good bloom, and especially if you want good ear formation, The cuts need to be very shallow (about 1/4 inch deep) and at an acute angle (30-45 degrees). A deeper cut creates a heavy flap that will collapse of its own weight and seal over, rather than lifting up to form an ear as the cut blooms open. The cuts made on the loaves pictured here were barely perceptible on the unbaked loaf surface. Resist the temptation to re-cut!

  8. Minimize dough sticking to the blade and getting dragged, forming a ragged cut. The cuts need to be made swiftly and smoothly, without hesitation. A thin, extremely sharp blade is best. Some find serrated blades work well for them. I find a razor blade on a bendable metal handle works best for me. The cuts are made with the forward end of the blade only, not the whole length. Some find oiling or wetting the blade lessens sticking. I have not found this necessary.

  9. Humidify the oven with steam during the first part of the bake. This delays firming up of the crust which would restrict the loaf from expanding (oven spring) and the cuts from opening (bloom).

Most of these points apply to scoring in general. I have indicated where there are differences or special considerations applying to high-hydration doughs.

Finally, a mini-glossary:

Scoring refers to the cuts made on the surface of the loaf prior to baking. The primary purpose of scoring is to create an artificial weak spot and direct expansion of the loaf to it so the loaf doesn't burst at some random point. Secondarily, the scoring pattern influences the final shape of the loaf. And lastly, the pattern of cuts can be decorative and, if unique, can serve as a “signature” for the baker.

Oven spring is the expansion of the loaf when exposed to oven heat.

Bloom refers to the opening up of the scoring cuts during oven spring. The French term for this is grigne.


Ear, when pertaining to bread, is a flap of crust that separates from the surface during oven spring and bloom.

For additional information regarding scoring and a more basic introduction to this topic, please see The Scoring Tutorial Also, excellent examples of shaping and scoring can be found in videos on youtube.com, particularly those made by Ciril Hitz, and on the King Arthur Flour web site. I have not found any that address the peculiar challenges presented by higher-hydration doughs, however.

Happy baking!

David

txfarmer's picture
txfarmer

Sourdough Hokkaido Milk Loaf - a classic shreddable soft bread


Some facts first:

- Hokkaido is a place in Japan.

- Hokkaido Milk Loaf is THE most classic/common/well-loved sandwich bread in Asia. It's enriched with milk, heavy cream, butter, egg, milk power, and quite a lot of sugar - which makes it richer than most Asian soft sandwich bread recipes, pushing toward brioche territory. The finished loaf is very tall, very soft, rather rich tasting.

- Hokkaido Milk Loaf has nothing to do with the place Hokkaido. Nothing. Well, other than the name.

- Hokkaido Milk Loaf is usually made with dry yeast, a sample recipe can be found here using straight method: http://schneiderchen.de/237Hokkaido-Milky-Loaf.html, many TFLers have also done this bread successfully.

My notes:

- I adapted the recipe to use SD only. In fact it was over a year ago that I first attempted, since then, I have gone through many iterations on ingredient ratios, fermentation schedule etc. This is my measuring stick on how well my SD sandwich bread method works. What I am posting below is the latest version. In the begining I reduced sugar/fat ratio, but now I know my SD starter is strong enough to take on what the original Hokkaido recipe calls for, so I have slowly raised fat/sugar ratio back up, now it's comparable to the dry yeast version. The bread has the classic rich flavor and soft texture of Hokkaido loaf, and a slightly tangy taste thanks to SD starter.

- Like other soft sandwich breads, the success of this bread relies on intensive kneading. Please see the following two previous posts about this topic:

http://www.thefreshloaf.com/node/20669/sourdough-pan-de-mie-how-make-quotshreddablyquot-soft-bread

http://www.thefreshloaf.com/node/23061/extremely-sourdough-soft-sandwich-bread-most-shreddble-soft-velvety-ever

- The same dough can be used for rolls and other breads. Other than the sandwich loaf, I also made some rolls filled with chocolate hazelnut paste. I didn't specify ratios for the filling because I winged it, using whatever was on hand. I like to over fill the rolls with filling, which means lots of coca/hazelnut/sugar mixture, AND lots of softened butter to absorb it.

- Comparing to my previous soft sandwich breads, you might notice that baking temperature is higher (400F rather than 375), I find it gives a better lift to the bread.


SD Hokkaido Milk Loaf

Note: 19% of the flour is in levain

Note: total flour is 250g, fit my Chinese small-ish pullman pan. For 8X4 US loaf tin, I suggest to use about 270g of total flour. For KAF 13X4X4 pullman pan, I would suggest using about 430g of total flour.

Note: for the rolls, I used a 8X8 square tin, and 340g of total flour.


- levain

starter (100%), 13g

milk, 22g

bread flour, 41g

1. Mix and let fermentation at room temp (73F) for 12 hours.

- final dough

bread flour, 203g (I used half KAF bread flour and half KAF AP flour for a balance of chewiness and volume)

sugar, 33g

butter, 10g, softened

milk powder, 15g

egg whites, 38g

salt, 4g

milk, 74g

heavy cream, 63g


1. mix until stage 3 of windowpane (-30sec), see this post for details.

2. rise at room temp for 2 hours, punch down, put in fridge overnight.

3. takeout, divide, round, rest for 1 hour. shape as instructed here for sandwich loaf. For rolls, roll out the dough into 16X12in (quite thin), mix together coca, toasted hazelnut, and sugar in a blender, first brush the dough with lots of softened butter (LOTS), then spread on coca/hazelnut/sugar mixture (again, LOTS), roll up, cut off two ends, then divide into 9 pieces, and put in 8inch squre pan.

4. rise at room temp for about 6 hours. For my pullman pan, it should be about 80% full; for US 8x4inch pan, it should be about one inch above the edge. The dough would have tripled by then, if it can't, your kneading is not enough or over.

5. for sandwich loaf, bake at 400F for 45min, brush with butter when warm. for rolls, bake at 400F for 25min.


Thanks for all the protein, fat, and sugar in the dough, the bread should be very tall - if not, more kneading is needed.


With enough (but not too much) kneading, and proper fermentation, the crumb should be velvet soft.


Same for the rolls. The rich taste of the dough matches well with the filling.


I am sure I will keep tweaking the recipe, since I just can't leave a good thing alone. :P


Sending this to Yeastspotting.

dmsnyder's picture
dmsnyder

San Joaquin Sourdough: another variation produces the best flavor yet.


My San Francisco Sourdough starter from sourdo.com is now two weeks old. I made another pair of my San Joaquin Sourdough breads with it yesterday. I modified my formula somewhat. I used a 60% hydration starter fed with AP flour only. I increased the amount of starter by 50%. I used KAF AP flour for the dough. I used no added instant yeast.


Ingredients

Weight

Baker's Percentage

Firm starter

150 gms

30.00%

KAF AP flour

450 gms

90.00%

BRM Dark Rye flour

50 gms

10.00%

Water

360 gms

72.00%

Salt

10 gms

2.00%


Procedure

  1. Mix the firm starter (1:3:5 – Starter:Water:Flour). Let it ferment at room temperature for 12 hours.

  2. Pour the water into a large mixing bowl. Add the starter and dissolve it in the water.

  3. Add the flours and mix to a shaggy mass. Cover tightly and let it sit for 20-60 minutes.

  4. Sprinkle the salt over the dough and mix thoroughly using the “stretch and fold in the bowl” technique. Let it rest for 30 minutes.

  5. Repeat the “stretch and fold in the bowl” for 30 strokes 2 more times at 30 minute intervals.

  6. Transfer the dough to a lightly floured board, and do one stretch and fold.

  7. Form the dough into a ball and place in a lightly oiled bowl. Note the volume of the dough. Cover the bowl tightly. Let it rest for 30 minutes.

  8. Repeat the stretch and fold on the board. Reform the dough into a ball and replace it in the bowl.

  9. Allow the dough to continue fermenting until the volume has increased 50%.

  10. Cold retard the dough for about 20 hours. (The dough had more than doubled and was full of large and small bubbles.)

  11. Take the dough out of the refrigerator and immediately transfer it to a lightly floured board.

  12. Divide the dough into two equal pieces and pre-shape them into logs or rounds, depending on whether you want to make boules or bâtards. Cover the pieces with plasti-crap and let them rest for 60 minutes. (Give them a shorter rest if the kitchen is very warm. You don't want them to expand very much, if any.)

  13. Pre-heat the oven to 500ºF with a baking stone and your steaming method of choice in place.

  14. Shape the pieces and place them in bannetons or on a couche. Cover the loaves and proof them until they have expanded by 50-70%. (30-45 minutes)

  15. Pre-steam the oven. Then transfer the loaves to a peel (or equivalent). Score them, and load them onto your baking stone.

  16. Turn the oven down to 460ºF.

  17. After 12 minutes, remove your steaming apparatus. Turn the loaves 180º, if necessary for even browning.

  18. Continue to bake the loaves for another 15-18 minutes or until their internal temperature is 205ºF.

  19. Turn off the oven, but leave the loaves on the stone with the oven door ajar for another 7-10 minutes to dry the crust.

  20. Transfer the loaves to a cooling rack.

  21. Cool the loaves completely before slicing.


The loaves were already singing when I took them out of the oven. The crust developed crackles, which can be credited to the use of AP rather than higher gluten flour and the drying in the oven (Step 19., above).


The crumb was nice and open.


The crust was crisp when first cooled and crunchy/chewy the next morning. The flavor was sweet and wheaty, like a good baguette, with the barest hint of sourness. This was po

ssibly the best tasting San Joaquin Sourdough I've made. I think I'm going to stick with this version. Next time, I may use this dough to make baguettes.

David


Submitted to YeastSpotting


dmsnyder's picture
dmsnyder

San Joaquin sourdough two ways

San Joaquin Sourdough Two Ways

David Snyder

September 28 and October 2, 2017


Background

My San Joaquin Sourdough originated in Anis Bouabsa's baguettes which had won the prize for the best baguette in Paris in 2008. Bouabsa's baguettes departed from convention in utilizing a 21 hour retardation after bulk fermentation and before dividing and shaping. Jane Stewart (Janedo on TFL) and I initially modified Bouabsa's formula by adding a bit of rye flour and some sourdough starter for flavor. I then omitted the commercial yeast altogether and began using the modified formula to shape as bâtards. Over time, I have tweaked the formula and method in various ways, but have settled on the current one as providing the best product.

I most often make my San Joaquin Sourdough as bâtards of about 490 g, but I have used the same dough for baguettes quite often. I have also modified the formula in minor ways to make an “Italian bread,” and have used it for pizza too.

This week, I made two batches of San Joaquin Sourdough. One I used for bâtards. The other I made as “pains rustiques.”

Professor Raymond Calvel, the renowned French baking teacher and bread scientist, was the man who taught Julia Child to bake “French Bread,” the author of “Le Gout du Pain” and the inventor of the autolyse. Shortly before his passing in 2005, Professor Calvel visited the United States and taught at the Culinary Institute of America in upstate New York. The C.I.A. and the Bread Baker's Guild of America produced a series of videos which included interviews with Professor Calvel and documentation of his baguette formula and methods. These were available for downloading and also as VHS tapes at one time. Now, they are available on youtube. They are well-worth viewing for any serious baker.

On one of the tapes, almost as an aside, the narrator said Professor Calvel's personal favorite bread was what he called “Pain Rustique.” He made this with baguette dough, but, rather than shaping it in the traditional manner, the dough is simply cut into rectangular pieces with a bench knife, proofed and baked. I made this bread once a number of years ago, and it was very nice. It was similar to ciabatta in that it was very puffy with large air pockets.

Today, I made a variation on pain rustique, using San Joaquin Sourdough dough and methods, except for the shaping. Note: The formula used for these pains rustique was actually only 72% hydration. Based on my results, I would increase the hydration to 76% hydration (as in the formula below) or even higher for my next bake of this bread.

Formula 

Total ingredients

Wt (g)

Bakers %

AP Flour

479

89

WW Flour

33

6

Medium rye Flour

29

5

Water

412

76

Salt

10

1.8

Liquid starter

17

3

Total

990

180.8

9.2% of the flour is pre-fermented


Liquid Levain ingredients

Wt (g)

Bakers %

AP Flour

29

70

WW Flour

8

20

Medium rye Flour

4

10

Water

42

100

Liquid starter

17

40

Total

100

240

 1. Mix the levain by dissolving the liquid starter in the water, then add the flours and mix well.

2. Ferment at room temperature, covered tightly, until the surface is bubbly and wrinkled. (8-12 hours)


Final dough ingredients

Wt (g)

AP Flour

450

WW Flour

25

Medium rye Flour

25

Water

370

Salt

10

Liquid levain

100

Total

990


Method

  1. Dissolve the levain in the water, add the flours and mix to a shaggy mass. Cover and autolyse for 30 minutes.

  2. Add the salt and mix to incorporate.

  3. Transfer to a clean, lightly oiled bowl and cover tightly.

  4. Bulk ferment for 3-4 hours with stretch and folds in the bowl every 30 minutes for the first 2 hours, then a stretch and fold on the board after 2.5 hours. The dough should have expanded by about 50% and be full of small bubbles.

  5. Refrigerate the dough for 18-24 hours.

  6. Take the dough out of the refrigerator and transfer it to a lightly floured board.

    For Pains Rustiques

  7. Divide the dough into 6 equal pieces and pre-shape as logs or round.

  8. Cover the pieces and allow them to rest for 60 minutes.

  9. Stretch each piece to a rectangle 8-12 inches long, depending on the weight of each piece.

  10. Proof for 45 minutes, covered.

  11. Pre-heat the oven to 500ºF with a baking stone and steaming apparatus in place.

  12. Transfer the loaves to your peel. Turn down the oven to 480ºF. Score the loaves, if desired, and load them onto your baking stone.

  13. Bake with steam for 10 minutes, then remove your steaming apparatus and continue to bake for another 10-12 minutes.

  14. Remove the loaves to a cooling rack, and cool for at least 30 minutes before serving.


For Bâtards

  1. Divide the dough into two equal pieces.

  2. Pre-shape as rounds, cover and let rest for 1 hour.

  3. Shape as bâtards.

  4. Proof on linen or parchment, smooth side down for 45 minutes.

  5. Pre-heat oven to 500ºF with baking stone and steaming apparatus in place.

  6. Turn down oven to 460ºF.

  7. Transfer loaves to peel.

  8. Steam oven and transfer loaves to th baking stone.

  9. After 12 minutes, remove steaming apparatus.

  10. (If you have a convection oven, turn switch to convection bake and turn the temperature down to 435ºF). Bake for 18 minutes more in a dry oven.

  11. Transfer loaves to a cooling rack and let cool thoroughly before slicing.

Photo Gallery

San Joaquin Sourdough Pain Rustique


SJSD dough, fully fermented and ready to divide

Dough divided for Pains Rustiques

Pre-shaped

Shaped and proofed, ready to bake

SJSD Pains Rustique - some unscored, others scored in various ways.


San Joaquin Sourdough Pain Rustique crumb

San Joaquin Sourdough Bâtards

Pre-shaped piece

Shaped loaves proofing

Loaves proofed and ready to bake

San Joaquin Sourdough Bâtards

San Joaquin Sourdough Crumb

Enjoy!

David

IgorL's picture
IgorL

Multigrain sourdough with seeds

Well, Passover is over, and leavened bread is back, with the vengeance. :-) Today's creation: sourdough multi-grain bread with seeds. I wish Internet had the ability to transmit the emotion which crunchy crust elicits while one tastes a slice with good salted Irish butter. 

I started with same sourdough recipe I blogged before, which works well for me.  The only modifications were: I upped the percentage of whole wheat flour a bit, and also added about 1/2% of water because I figured that all the seeds would need it. The seeds included chia, which I understand likes absorbing water, so I could probably easily go with the whole extra 1% of water.  I'll try it next time.

For the seeds mix I used some arbitrary amounts of pumpkin seeds, sunflower seeds, flax, chia, white sesame, and rolled oats.  I toasted everything lightly on a dry pan, and let them cool completely before adding into the dough after fermentolyse phase, together with salt.  The total amount of seeds weighed after toasting was 88g.

I also sprinkled some oats inside the banneton before I put the dough inside, and a bit more along the sides of the dough ball, between it and the walls of the banneton.  The advantage turned out to be dual: I got oats stuck to the surface of my bread and baking perfectly crunchy, which is what I wanted.  Those same oats also kept the dough completely from sticking to the form, so it practically fell out on its own while I was inverting the form on the cooking sheet. 

Levain (100% hydration) - 50g starter, 50g warm water, 50g  KA WW flour, mixed in the morning and put in warm place.
Water - 315g
Flour - 400g Wegmans AP unbleached (I didn't have any BF on hand) + 50g  KA WW 
Salt - 10g
Flour total 450+75 (from levain) =525g
Water total 315+75 (from levain) =390g 

Baker's math:
AP flour - 81%
WW flour - 19%
Water - 74%
Salt - 1.9%
Various seeds - 1.7%


PiPs's picture
PiPs

Sesame Wholewheat + Red Gum Miche + 100% Wholegrain Spelt


Peering over my computer monitor I can see it is still raining. My computer lurks in the smallest room in our house with a single window that allows a narrow view through to another room and then another window before a tiny glimpse of the outside world finally emerges. My computer cave seems so removed from the country roads under expansive skies that I was travelling on the week before.

Some free time that week had allowed me the opportunity to spend a time out of the city in Pittsworth baking wood-fired breads with my friend Laurie. I always treasure the time spent with Laurie and Rhonda and try to breath in as much country air as I can possibly hold before making the trip back to my city home.


Arriving home I wanted to further pursue the wholegrain baking I have been working on—freshly milled flour, high hydration dough and sourdough starters. I had picked up a bag of richly coloured organic unhulled sesame seeds while out of town and this was to be the catalyst for a delicious bread. I am continuing the practice of retarding the wholegrain dough in bulk. Not only does this control the fermentation, but it also allows for an extended ‘wet time’ … this is always a good thing when baking with wholegrains.

The roasted seeds mixed through the wet dough add flavour, texture and a softness that remains for days after baking. This is bread that tastes and feels as good as it looks.


Sesame Wholewheat

Formula 6 x 750g

Overview

%

Weight grams

Levain build – 3 hrs 26°C


Starter

50

93

Freshly milled organic wheat flour

100

186

Water

64

120


Final dough  24°C


Levain

20

369

Freshly milled organic wheat flour

100

1846

Water

109

1938

Salt

2.5

46

Unhulled sesame seeds roasted

18

320

Hulled sesame seeds

As needed


Total


4519


  • Mix final starter and leave to ferment for 3 hours at 26°C
  • Roast sesame seeds for 10 mins. Turn occasionally to redistribute.
  • Mill flour and mix with water (hold back 10% of water) and autolyse for 20 mins.
  • Add starter to autolyse then mix in bowl for 5 mins. Add salt and remaining 10% of water and squeeze through bread to incorporate (dough will separate then come back together) then mix and squeeze a further 5-10 mins. The dough is very wet but should start to feel some strength by the end of this mixing.
  • Add roasted sesame seeds at the end of mixing.
  • Place in a fridge at 4°C for 15 hours. I gave the dough three folds at 30mins apart.
  • Increase or decrease the number of folds depending on the strength of your wheat.
  • Remove from fridge. Divide at 750g. Preshape.
  • Bench rest 45–60mins. Shape and roll the dough on a wet cloth and then hulled sesame seeds. Proof in couche or narrow basket.
  • Final proof was two hours at room temperature. Watch the dough!
  • Bake in a preheated oven at 250°C for 10 mins with steam. Reduce temp to 200°C then bake for a further 40 mins.


Laurie and I had a great bake in Pittsworth. For me it was an interesting experience going back and baking in a much smaller oven than I had been using at Chester Street. Size does make a difference :)

The day before the bake while the oven was full of fire, Laurie and I travelled out along straight flat roads to local biodynamic farmer Barry Bowden.  Barry is milling grains and selling flours under the name of Red Gum Milling. Laurie has been using Red Gum Milling flour for quite a few years now and I have always been a little jealous that he had such a great local resource at his disposal. Barry is an ingenious bloke … he has built his own milling and sifting equipment that sits within a large flour-coated shed on his farm.


Barry has been growing and milling all manner of biodynamic grains depending on the seasons and his clients requirements. His large industrial granite stone mill feeds into a rustic, almost steam punk looking sifter where two different streams of flour are produced depending on the screens he has in place. Even though the mill wasn't running at the time I found a bag of sifted bran and was impressed by the beautiful bran separation he could achieve. Puts my little Komo shredder to shame :)


I arrived back in Brisbane  a few days later with a few kilograms of Red Gum Milling’s ‘plain flour’and couldn't wait to bake with it. It is most definitely a high extraction flour, and although Barry couldn't give me an extraction level, I would guess that it was 80% or higher. It has lovely golden colour and fresh aroma but what surprised me most about this flour was its strength.

I started with a rough hydration level of 75% but quickly had increased this to 85% … this probably still wasn't enough. The finished bread was pretty chewy and the crumb was tough but delicious. Perfect for spreading butter :)


I have been baking a lot of wheat breads of late and I need to start diversifying. Spelt has been a long time challenge of mine, and although I have baked successful white spelt breads on a hearth, I find they are usually to dry for my liking. For me, it’s actually the colour of the spelt bran that is most appealing—rusty coloured bran that peels off nicely even in my little Komo mill.

The nicest spelt breads I have eaten have been baked in tins—and this seemed to fit nicely with my current method of baking wholegrain breads using lots of water. The tin supported the slack dough through it's final rise and pushed it further upwards during the bake.

This has been my go-to bread all week … I cannot get enough of it! The crumb is soft and moist—hardly comparable to the dry crumbly feeling that some breads seem to have.


100% Wholegrain Spelt

Formula 2 x 1350g tinned loaves

Overview

%

Weight grams

Levain build – 3 hrs 26°C


Starter

50

93

Freshly milled organic wheat flour

100

186

Water

64

120


Final dough - 24°C


Levain

20

245

Freshly milled organic spelt flour

100

1224

Water

100

1224

Salt

2.5

31

Total


2724


  • Mix final starter and leave to ferment for 3 hours at 26°C
  • Mill flour and mix with water (hold back 10% of water) and autolyse for 20 mins.
  • Add starter to autolyse then mix in bowl for 5 mins. Add salt and remaining 10% of water and squeeze through bread to incorporate (dough will separate then come back together) then mix and squeeze a further 5-10 mins. The dough is very wet but should start to feel some strength by the end of this mixing.
  • Place in a fridge at 4°C for 15 hours. I gave the dough three folds at 30mins apart.
  • Increase or decrease the number of folds depending on the strength of your wheat.
  • Remove from fridge. Divide and preshape.
  • Bench rest 45–60mins. Shape and proof in tins
  • Final proof was three hours at room temperature. Watch the dough!
  • Bake in a preheated oven at 250°C for 10 mins with steam. Reduce temp to 200°C then bake for a further 60 mins.


And it seems the word is out on the street that I am baking at home again … and this has meant quite a few ‘home sourdough’ have been baked for friends and family.

Happy baking to all ... I know I am!

Cheers,
Phil

hanseata's picture
hanseata

Aroma Bread - A Love Story


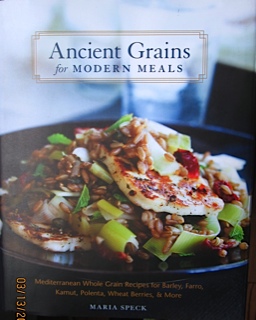
One of my most favorite cookbooks is "Ancient Grains for Modern Meals".

Award winning Author Maria Speck combines her German father's love for hearty grains, and her Greek mother's culinary talents in dishes that make you grab your shopping bag, hop on the bike or in the car, and drive to the next natural food store to buy those ancient grains, veggies and fruits for Maria's mouthwatering meals.

Normally I consider a cookbook worth its money, if it contains at least one recipe I really like to cook. "Ancient Grains" has so many, that I still haven't prepared all the ones I want to try. (No, I DON'T get a commission!)

 A few of the dishes are breads, among them the Aroma Bread. A no-knead bread by trade, its evocative name spiked my interest, and my love affair with the spicy loaf began.

"Ancient Grains" is very user friendly, with detailed, easy to follow instructions, no sophisticated culinary equipment needed. No-knead breads meet these expectations, a mixing bowl, a wooden spoon, a clean kitchen towel, a Dutch oven, and you are all set.

These low maintenance breads don't want you to slave over them, they are free spirits, and perfectly willing to go and develop themselves, if you give them enough time (and a little bit of yeast.) They show their gratitude by rising eagerly, and tasting better than many other loaves that had been kneaded, slapped and punched into submission.

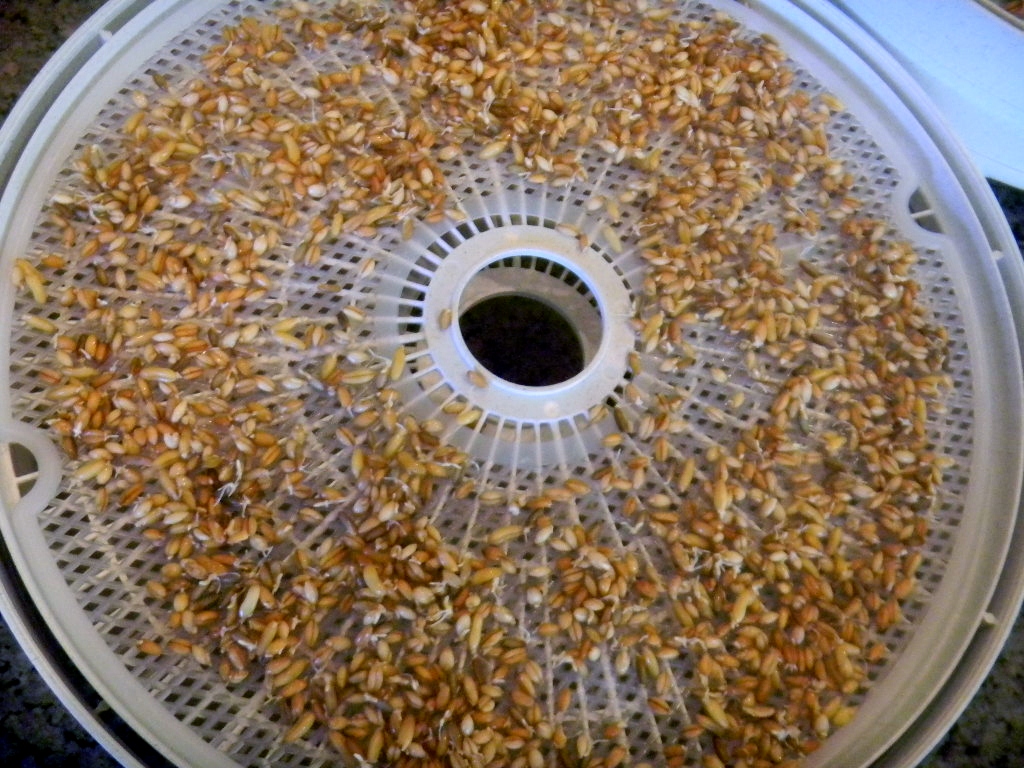
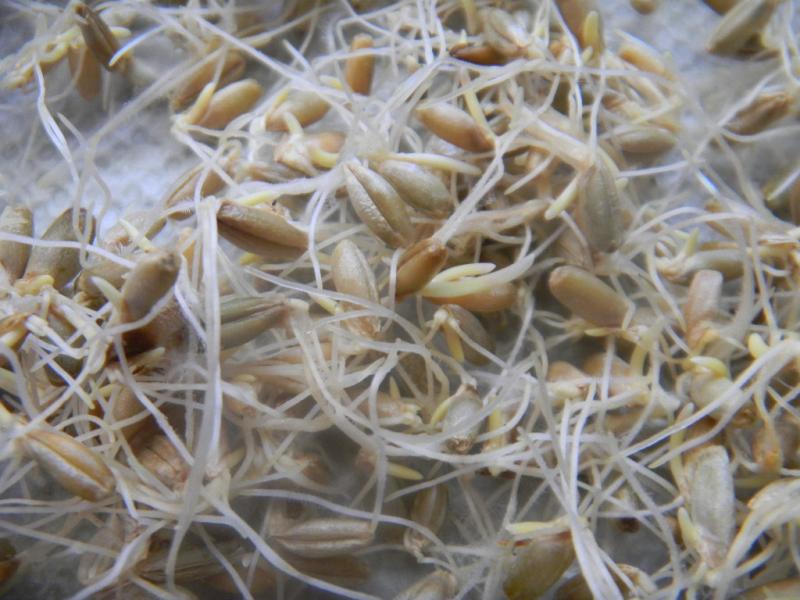
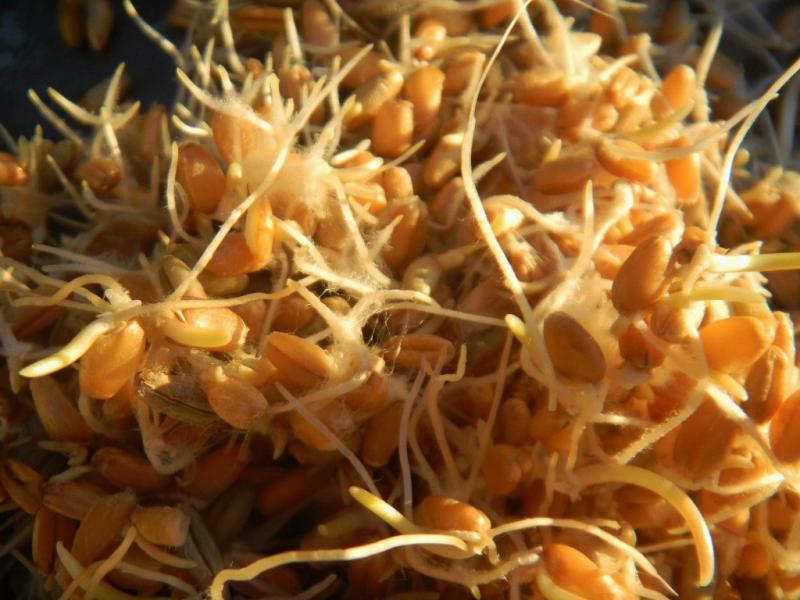
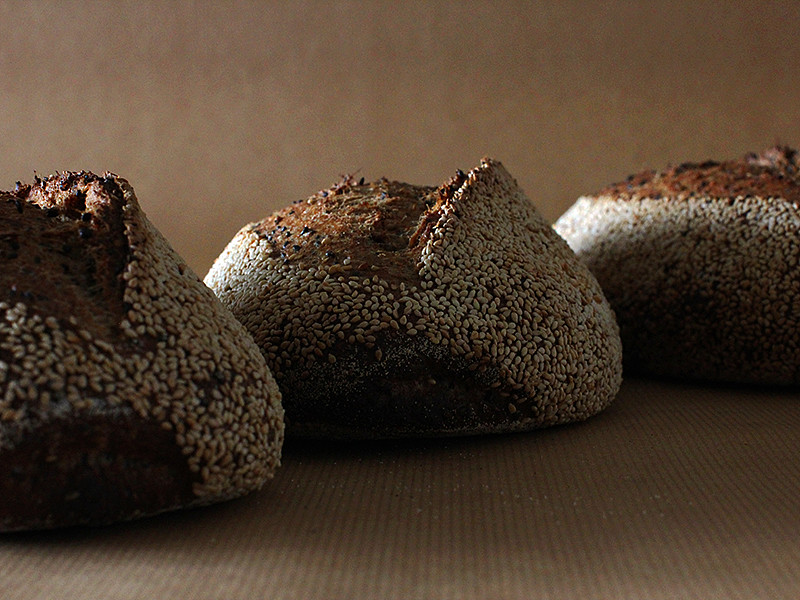
You have the choice between a crunchy, and an XX-crunchy Aroma Bread. If you opt for the super chewy, you need to soak whole grain berries for several hours, before mixing them into the dough. This is definitely no impulse bread, so plan to bake it 24 hours ahead.

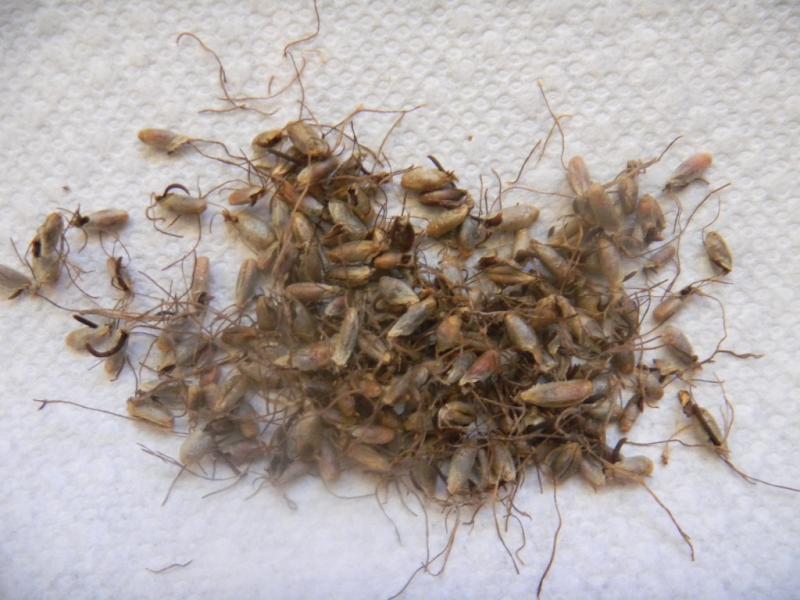
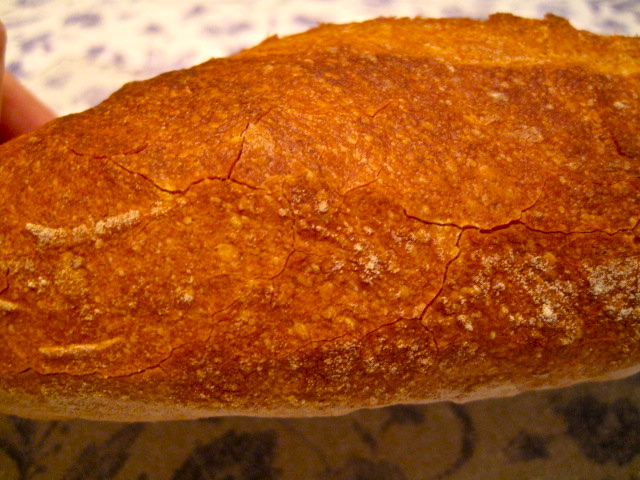
Maria called her loaf "Aroma Bread" for a good reason. This truly aromatic loaf is not for the faint hearted! But in our old home country Germany breads are often flavored with coriander, fennel and caraway, these herbs are even commonly referred to as "Brotgewürz" (bread spices.) You can use them whole, or coarsely ground.

Bread spices fennel, caraway and coriander

As easy as no-knead breads are to mix, handling wet dough always remains a bit of a challenge. And here comes the sticky wicket: the dough has to be shaped into a loaf, and transferred from the mixing bowl to a place where it can rise. And, after that, it has to be turned out into a piping hot Dutch oven.

That leaves you with two choices: either to lower the bread gently into the pot, risking nasty burns (aka Baker's Badge of Honor). Or you let it drop from a secure height - and have your bread sigh and deflate!

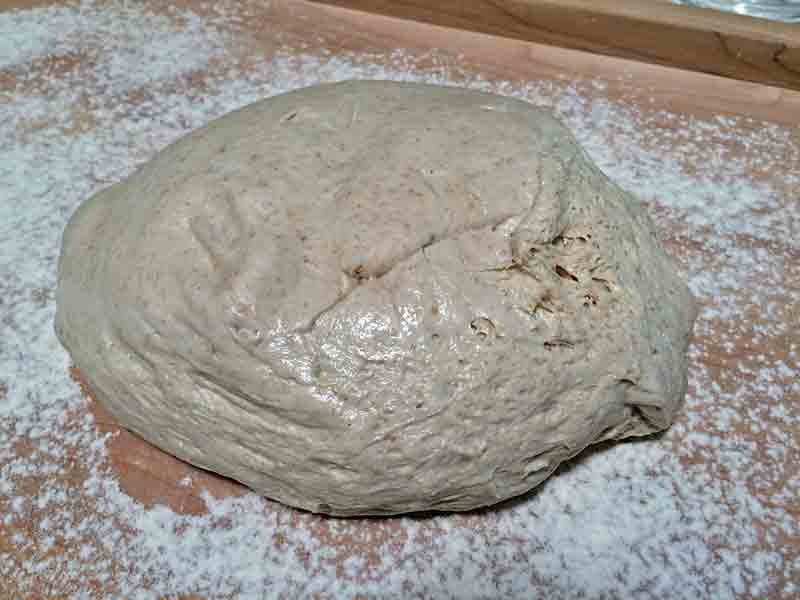
Maria solves the problem by having you scrape the bubbly fermented mass onto a well floured countertop (flour is your friend, creating a barrier between the sticky dough and its surroundings), so that you can fold it into a round.

Then you place the loaf on a floured kitchen towel, fold the corners over it, and, voilà, you have a cozy proofing place. Of course, it takes a rather amorphous shape from being bundled in a kitchen towel. 

My first bread went into a large, oval Dutch oven (I didn't have a smaller one), and eagerly spread to fill the void.

My first Aroma Bread - shaped like a roly poly!

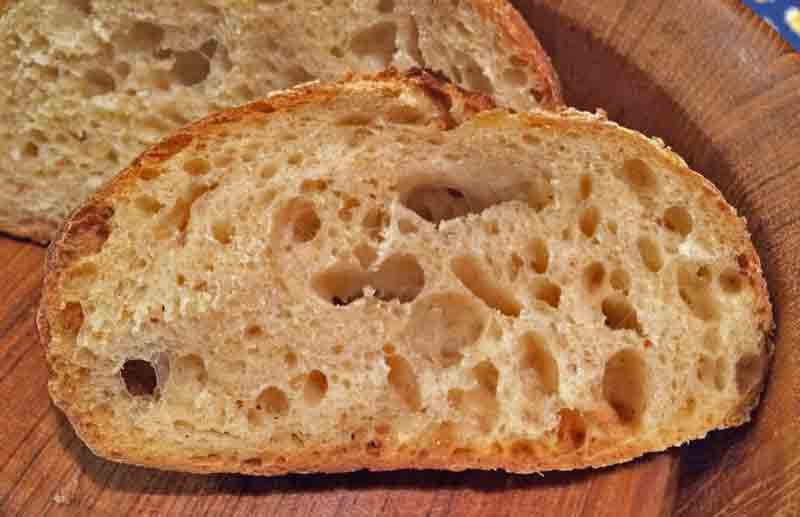
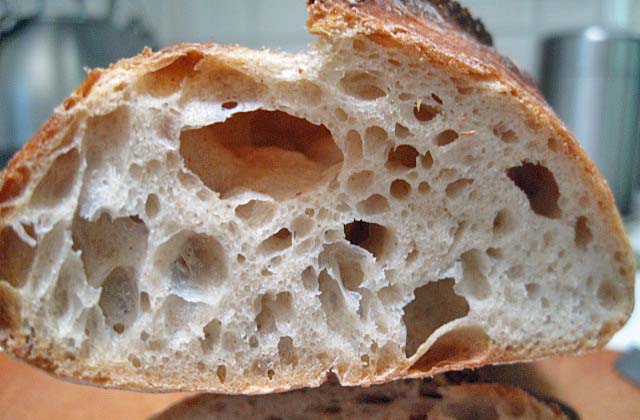
Baked into a rather flat loaf, it reminded me of those little things that scurry away when you lift a stone. But when I took the first bite, my eyes glazed over. My flat roly poly bread tasted awesome!

The next time I decided to set the bread more boundaries, changing its Armadillidiida appearance. Instead of proofing it simply in a towel, I used my pretty brotform to contain it.

Proofed in a rising basket, the bread is round but still...


It came out of the oven nice and round, but still... way too much room to spread during the baking.

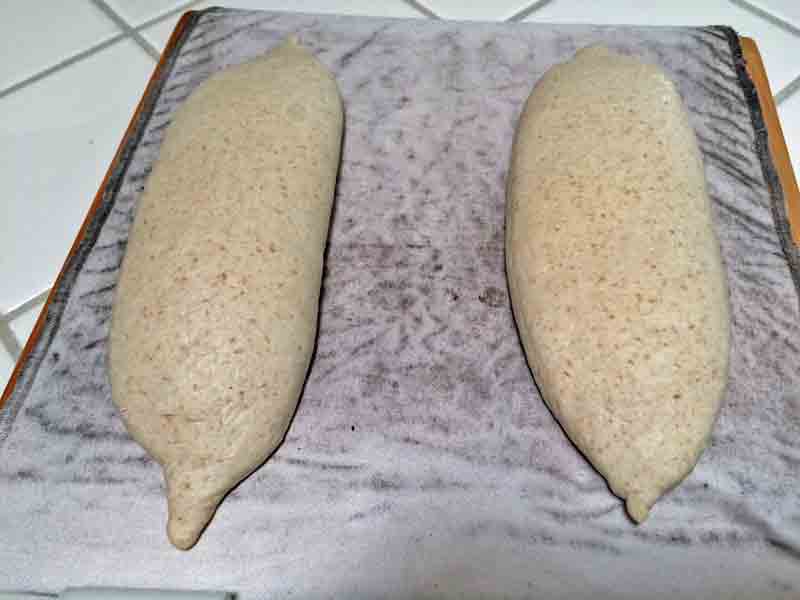
Alas! My main source for discounted kitchen gadgets, Home Goods, was letting me down when I needed it most. Still without the right sized pot, I decided to experiment with a free-standing, self- contained sourdough version, made with pre-doughs à la Peter Reinhart's "Whole Grain Breads".

Aroma Bread made as free-standing loaf (with sourdough)

My hearth baked sourdough loaf turned out beautiful. Though I couldn't find much difference in taste, this method is a good alternative for people who either have no Dutch oven, love wild yeasts, hate wet doughs, or prefer to bake their bread as free-standing loaf.

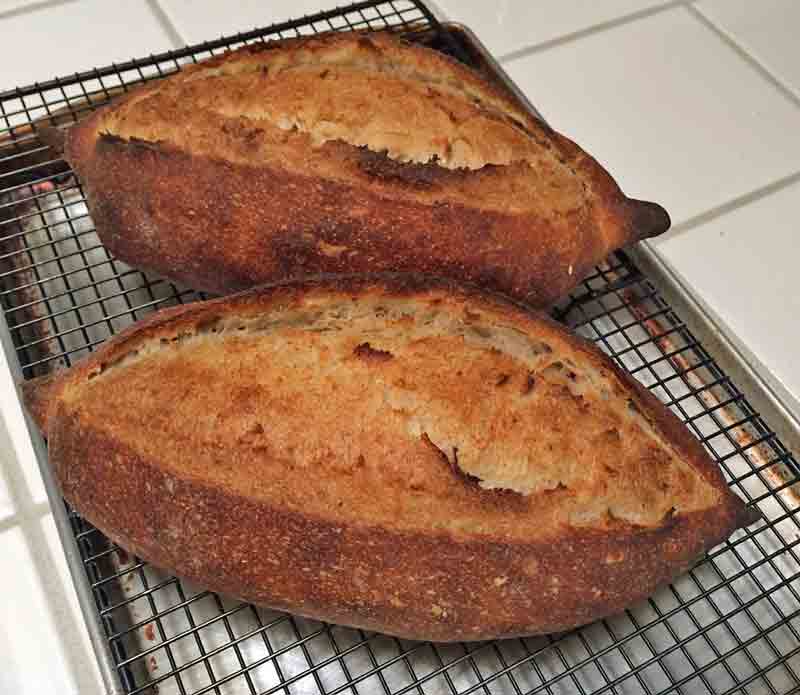
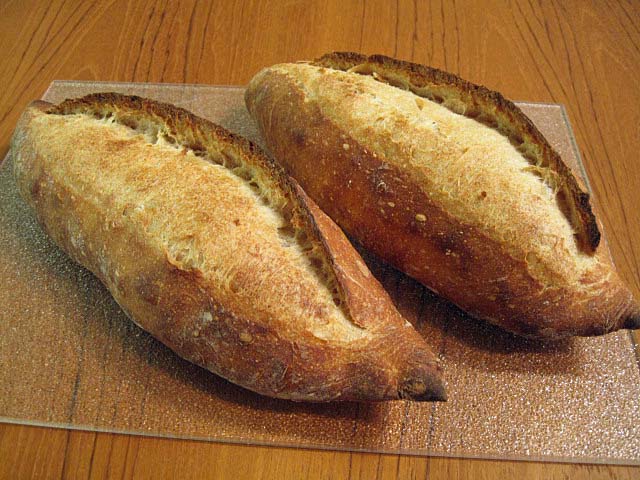
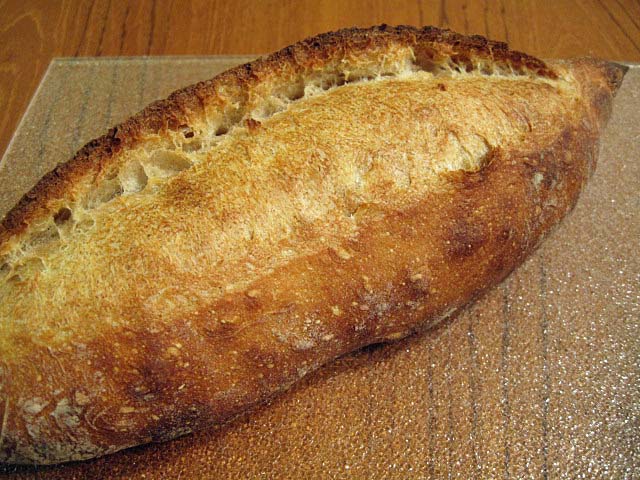
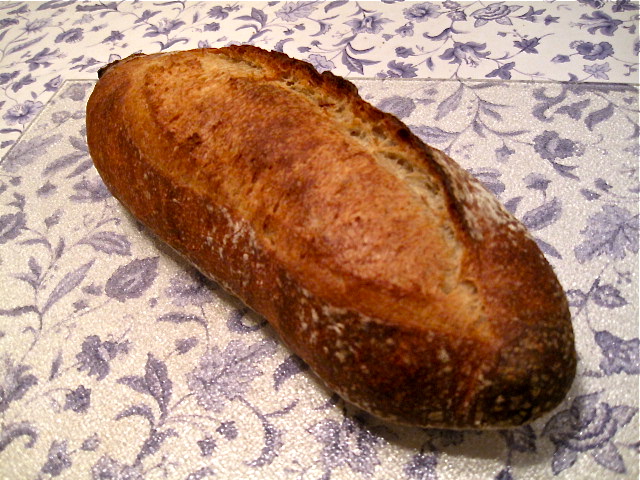
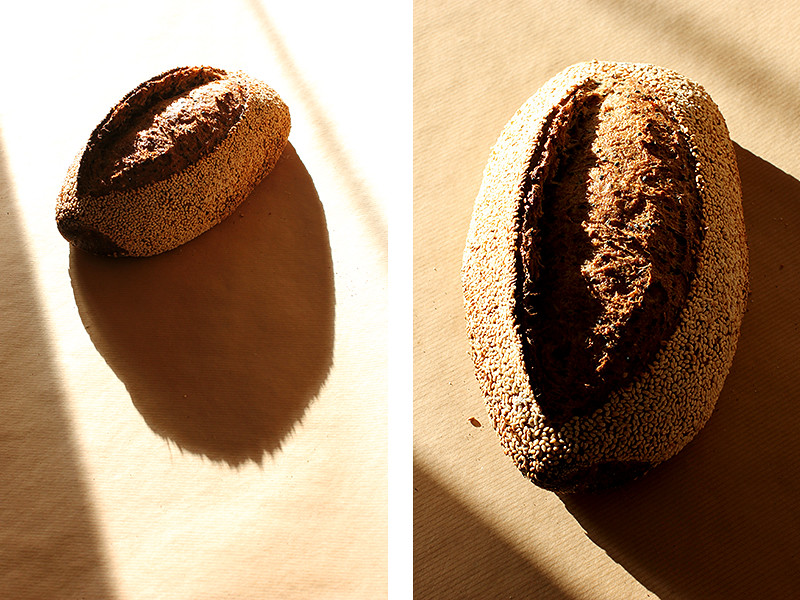
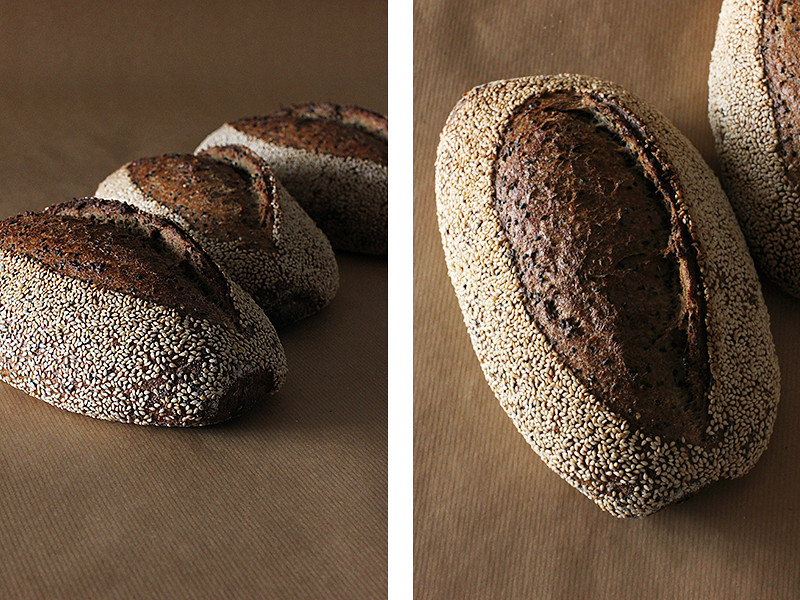
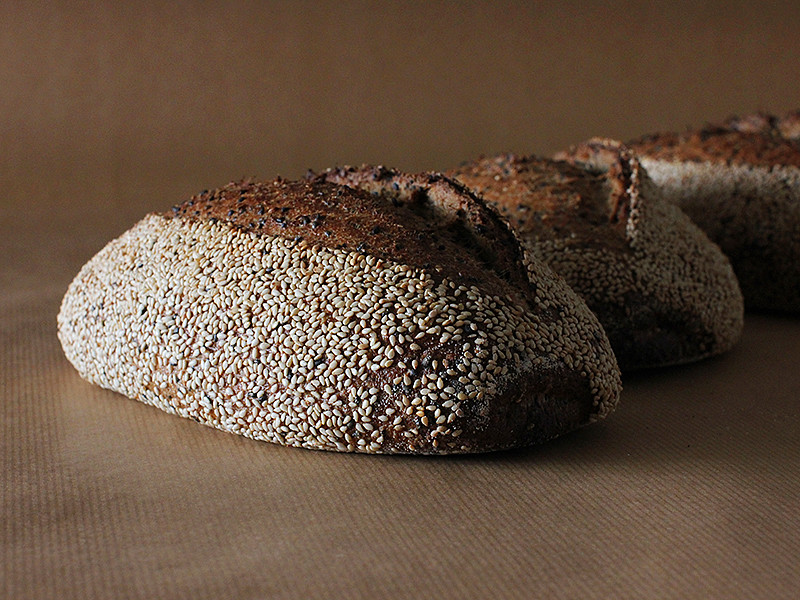
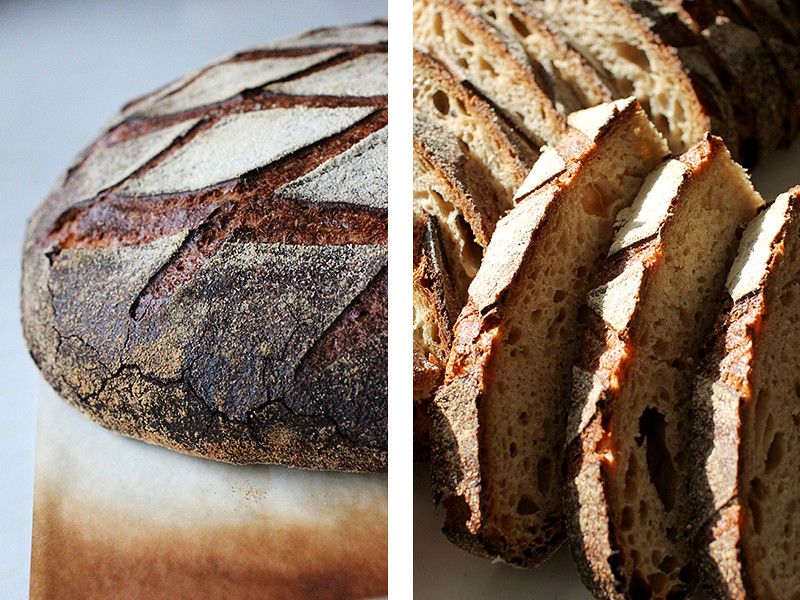
The next time I visited Marshall's (another treasure trove for kitchen stuff) I found a snazzy turquoise cast iron pot in just the right size - for half the price! And soon was mixing the ingredients for my fourth Aroma Bread - again the no-knead version.

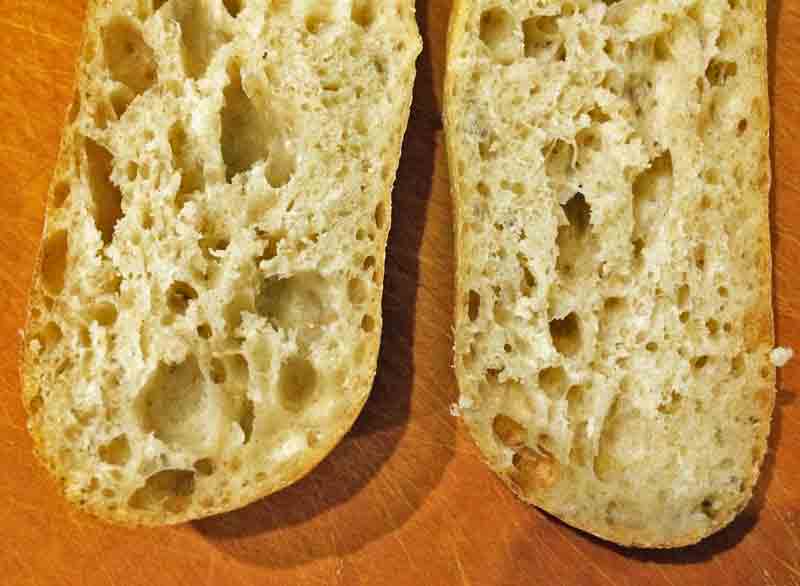
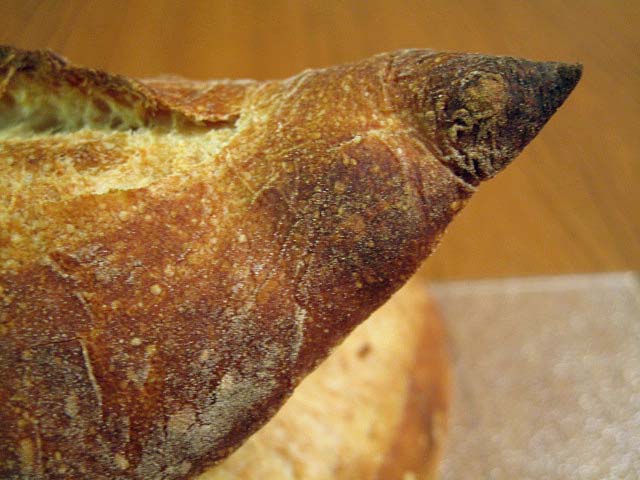
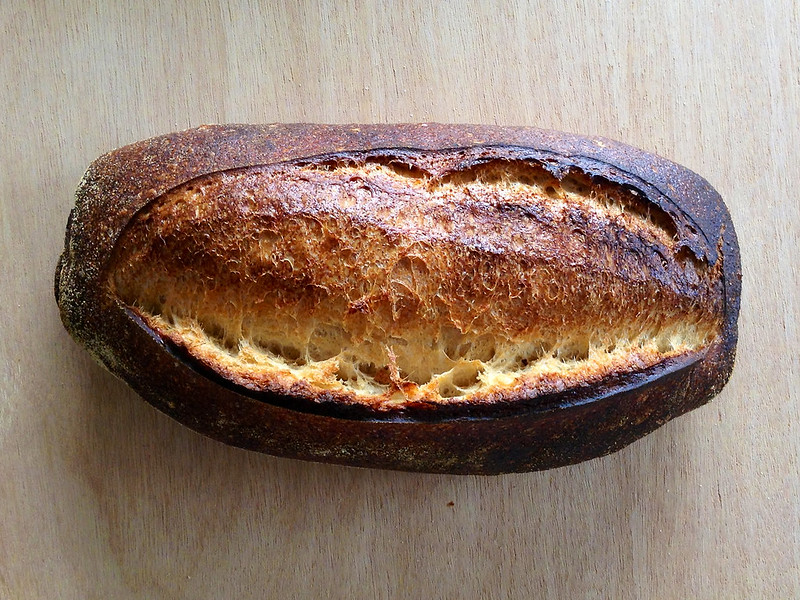
And out of the oven came (TATAAA!): the perfect Aroma Bread - looking just as good as it tasted!

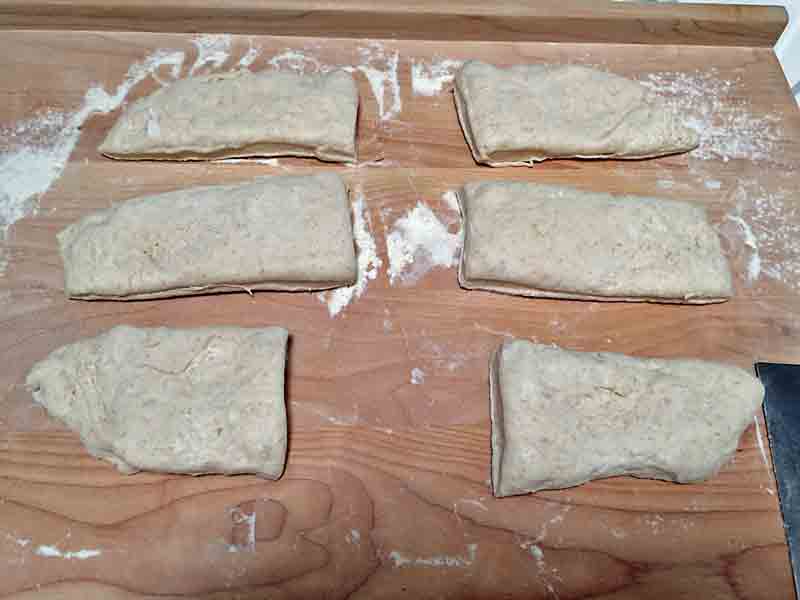
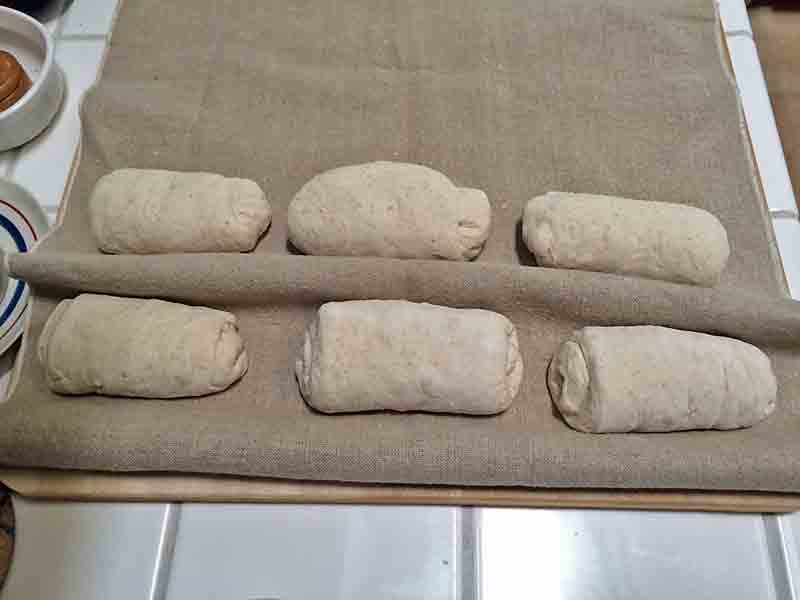
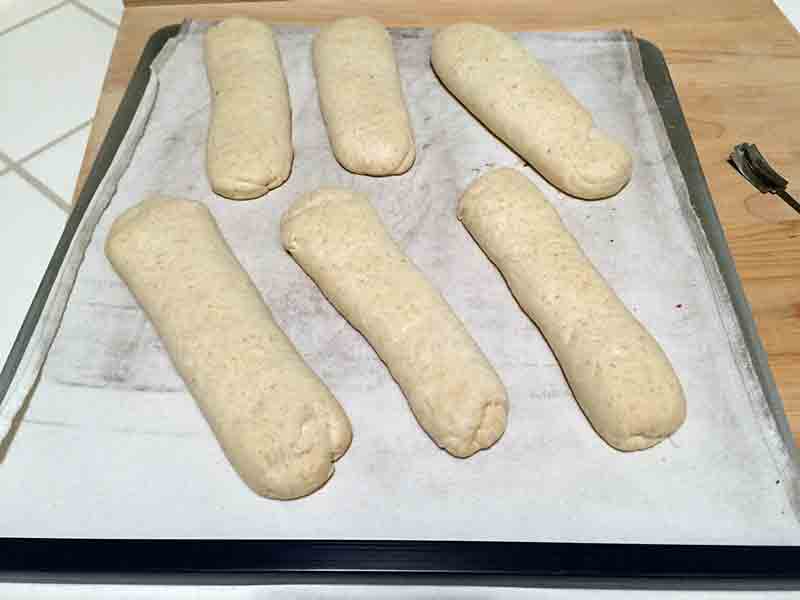
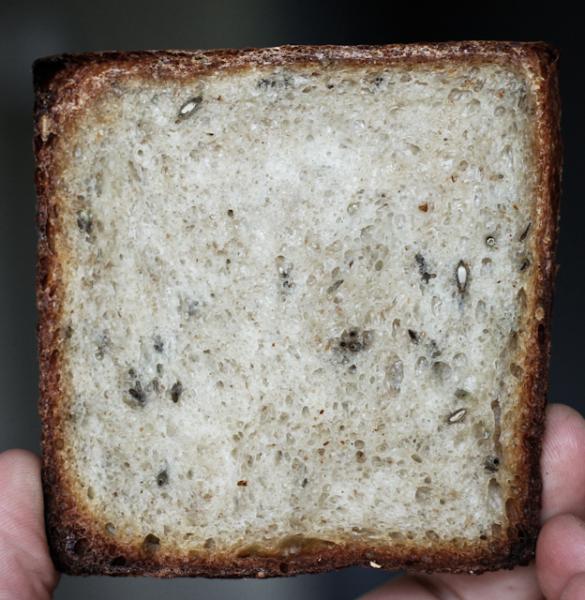
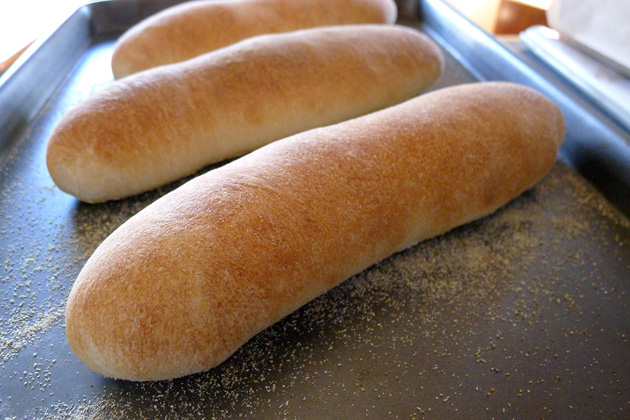
The last task left to do for inquiring minds, was to try the sandwich version of Aroma Bread, baked in a loaf pan. A cold cut-friendly shape, and the easiest way to make this wonderful bread. And it has an additional benefit: you can bake more than just one loaf at a time. (My customers will be happy!)

Aroma Sandwich Bread - the easiest version


COMMENTS:

  • If you use the optional whole grain berries (I made the bread with and without, both versions are great) add more salt: 9 g/0.3 oz instead of 7 g/0.25 oz. 
  • Instead of sunflower seeds you can also take pumpkin seeds (or a mixture of both.)
  • Toast the seeds, before adding them to the dough.
  • For an easier, risk free transport of the proofed bread into the hot pot, use a large piece of parchment paper as a sling to lower the bread gently into the pot. You don't have to remove it.


AROMA BREAD    1 (2-pound) loaf


Grain Berries (optional):

1/2 cup whole wheat, rye, kamut, or spelt berries

cold water, for soaking


Dough:

340 g/12 oz whole spelt flour (3 cups)

107 g/ 3.75 oz whole rye flour (1 cup)

  57 g/2 oz coarse or medium stone ground cornmeal (1/2 cup)

  67 g/ 2.35 oz sunflower or pumpkin seeds, toasted (1/2 cup)

  35 g/ 1.25 oz flax or sesame seeds, toasted (1/4 cup)

   2 tbsp. aroma spice blend*)

    7 g/ 1 1/2 tsp fine sea salt (or 9 g/0.3 oz if using whole grain berries)

    1 g/ 1/4 tsp. instant yeast

     all soaked whole grain berries (if using)

475 g/2 cups cold water

cornmeal, for sprinkling

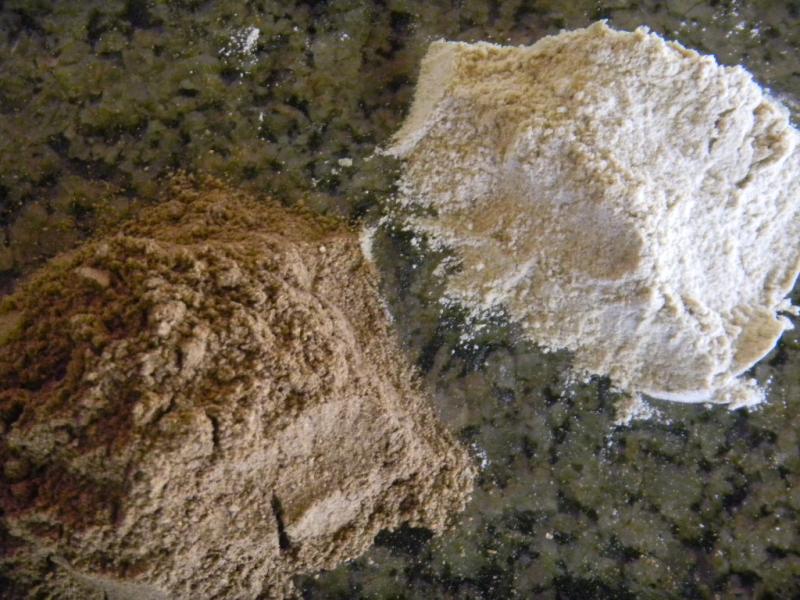
 *) Aroma spice blend: mix 6 tablespoons whole coriander seeds with 3 tablespoons each fennel and caraway seeds (enough for 6 loaves).
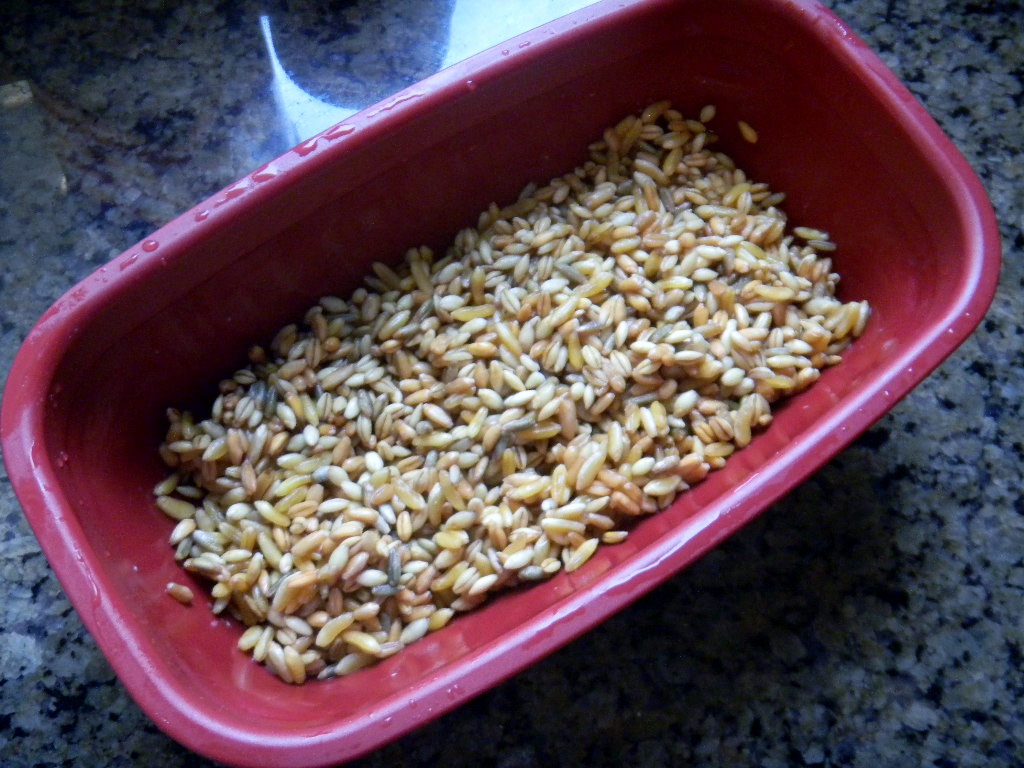
 

 DAY 1

In the morning, place whole grain berries in a bowl and cover with at least 1-inch cold water. Cover, and leave at room temperature to soak. Before using, drain them through a strainer (by the way, the soaking water is an excellent fertilizer for your plants.)

Mixed dough - I used black sesame seeds for a nice contrast

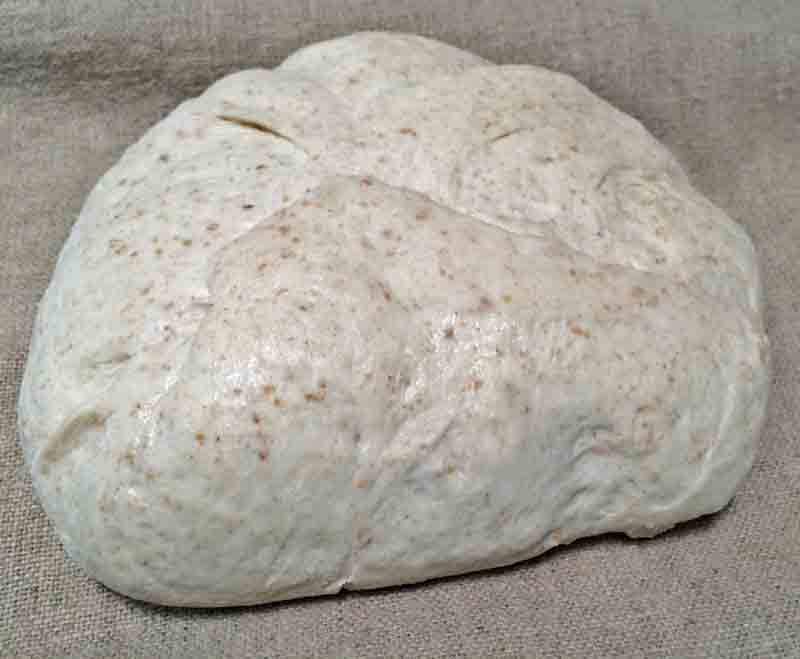
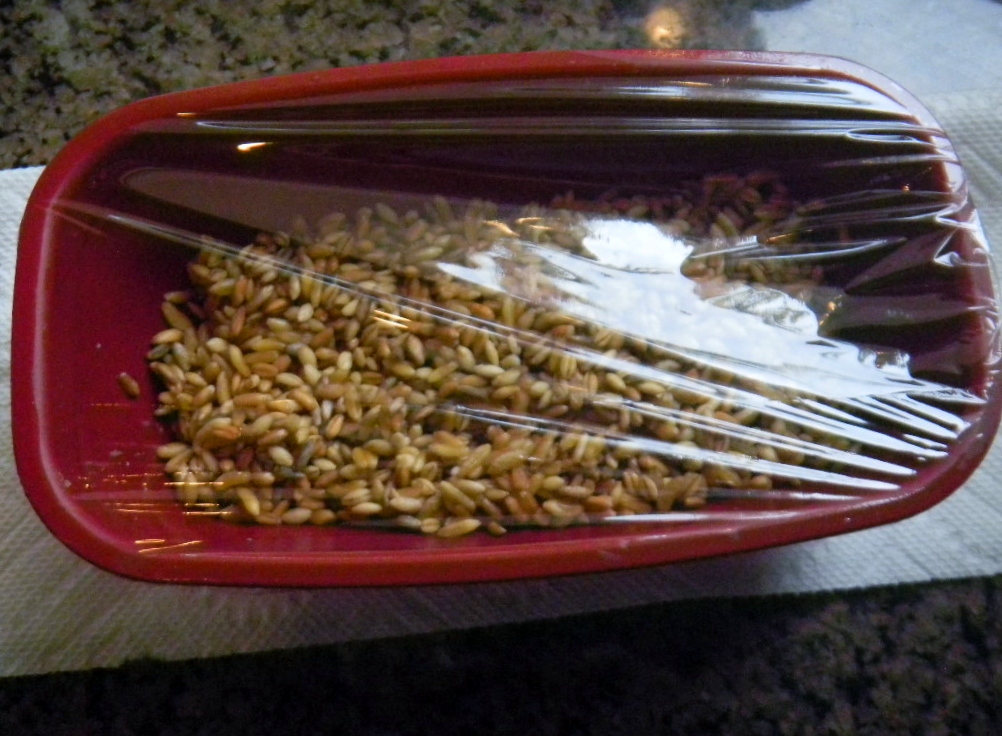
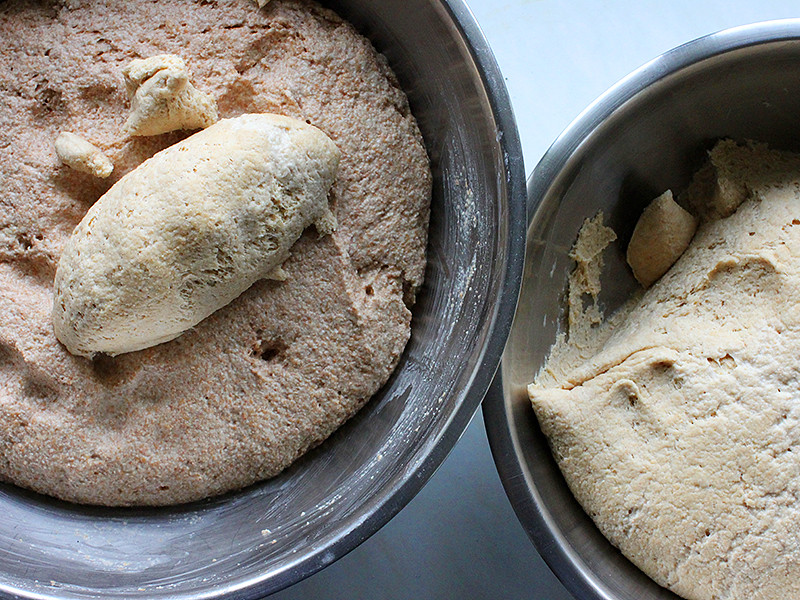
In the evening, whisk together all ingredients for the dough in a large bowl, except for soaked grain berries and water. Scatter grain berries on top, and add almost all the water. Stir with a dough whisk or wooden spoon until all flour is hydrated. (Dough will be wet and sticky, if not, add a bit more water.) Cover with plastic wrap, and let sit at room temperature to ferment for 12 - 18 hours.

Overnight the dough grows to a puffy, swollen mass

 DAY 2

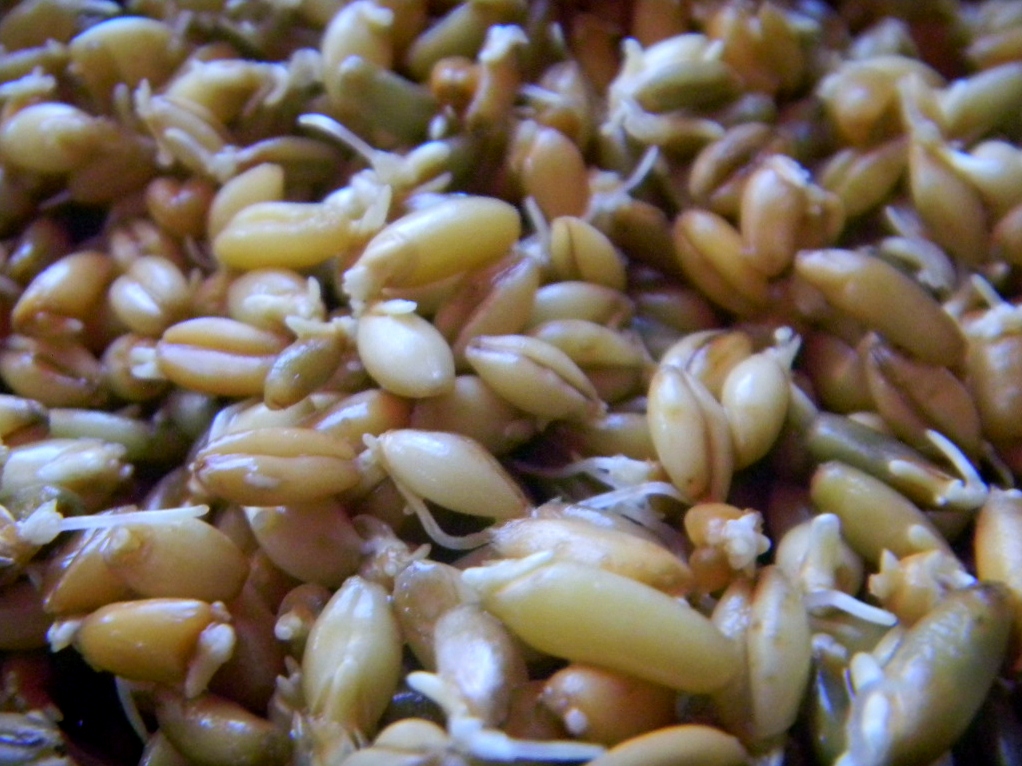
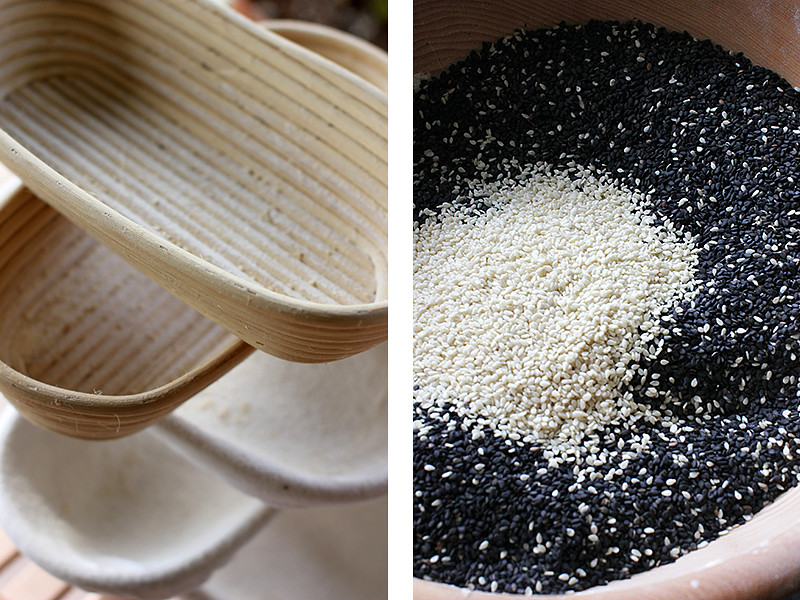
Use a rising basket, (or improvise by placing a clean kitchen towel over a basket or bowl.) Sprinkle with fine cornmeal (other flours work, too). Generously flour your work surface. Using a bowl scraper or rubber spatula, scrape the stringy, bubbly dough onto the work surface.

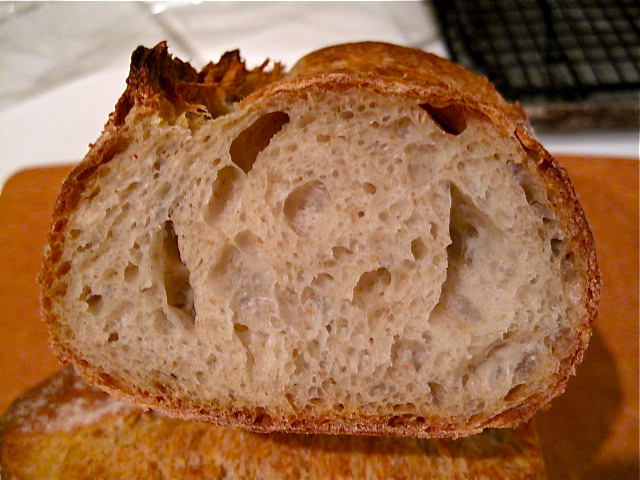
Scraping out the fermented dough you will see its spongy structure

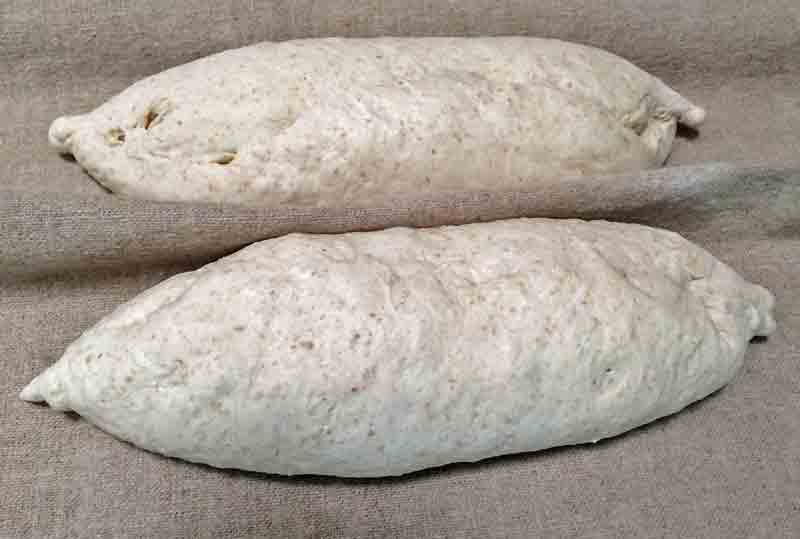
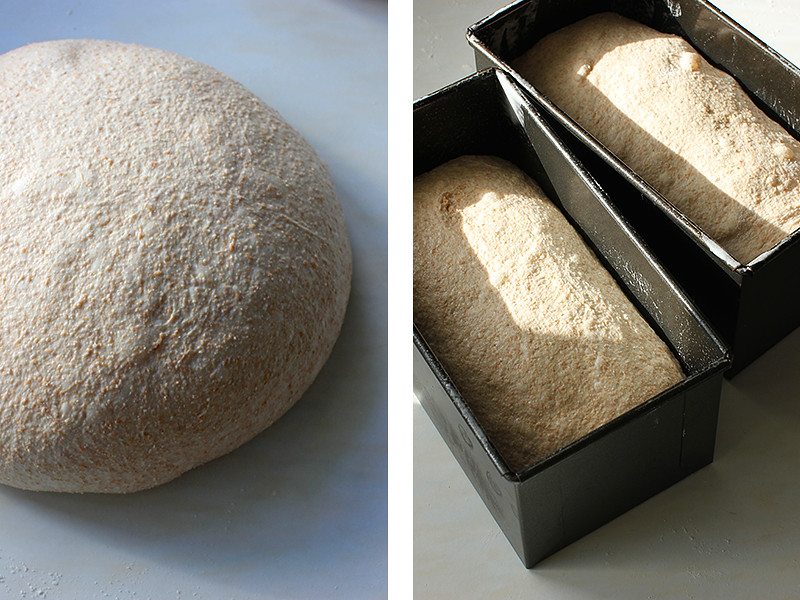
 With floured hands (or two oiled bench knifes or bowl scrapers), fold dough exactly 4 times, always towards the center, from the top, the bottom, the right and the left side. Turn the dough package around and place it, seam side down, into the towel lined rising basket. Sprinkle with cornmeal or flour, cover with a kitchen towel, and let it rise for about 1 hour.

After 30 minutes, position a rack in the bottom third of the oven, and preheat oven to 475ºF. Place a 4 1/2- to 5 1/2-quart cast iron pot or Dutch oven (with lid) on the rack to heat up.

When the dough has grown about 1 1/2 times its original size, poke it gently with your finger. The dimple should not fill up again (it can come back a little bit, but should remain visible). If not, wait another 15 minutes.

Fitting snugly in the Dutch oven, the bread will rise more than spread

Remove hot pot from the oven and open the lid. Gently turn out the proofed bread from the rising basket into the Dutch oven, seam side up, guiding it with your hand, (or turn it out onto a parchment paper and, holding the paper on both sides, gently lower the bread into the pot (with paper).

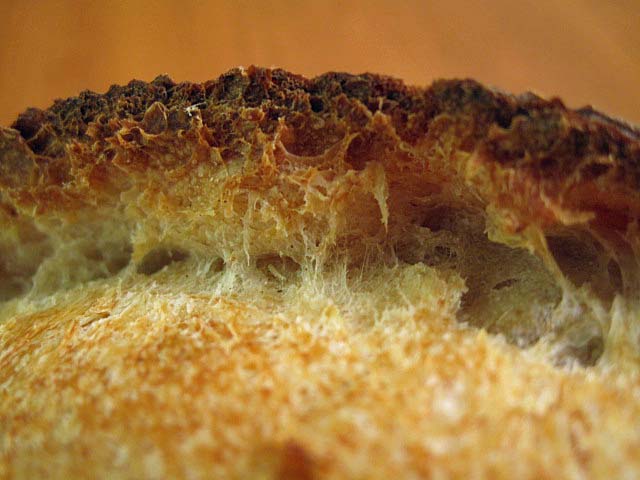
Cover with the lid, and bake for 30 minutes. Uncover, and continue baking for 20 - 25 minutes, until the loaf is nicely browned, sounds hollow when thumped on the bottom, and an instant thermometer, inserted in the middle, registers 200ºF.

Remove bread from cast-iron pot and transfer it to a wire rack to cool.


AROMA SANDWICH LOAF

Grease a 9 x 5-inch loaf pan with oil, and sprinkle it with 1-2 tablespoons of flax- or sesame seeds. After folding the risen dough, place it, seam side up, right in the prepared loaf pan. (My suggestion: brush top with water, and sprinkle it with more flax- or sesame seeds.) Let it proof as described.

Preheat oven only to 425ºF, placing an oven proof pan or broiler tray for steaming on a the lowest level to heat up.

When loaf is proofed, place in the middle of the oven, pour 1 cup boiling water in the hot steam pan , and bake loaf for 30 minutes. Remove steam pan, rotate bread 180 degrees for even browning, and  bake it for about 30 minutes more, or until it registers 200ºF.

Let loaf cool in the pan for 5 minutes, than turn it out onto a wire rack (if it sticks to the pan, loosen it with a butter knife or spatula.)


AROMA SOURDOUGH BREAD 

Starter:

64 g/2.25 oz rye mother starter (100%hydration)

205 g/7.25 oz whole spelt flour

124 g/4.4 oz lukewarm water


Soaker:

  57 g/2 oz coarse or medium ground cornmeal

  75 g/2.65 oz whole rye flour

  92 g/3.25 oz whole spelt flour

168 g/6 oz water

    4 g/0.15 salt


Final Dough:

   all soaker and starter

  43 g/1.5 ozwhole spelt flour

    5 g/0.2 oz salt

    1 g/1/4 tsp. instant yeast

  67 g/2.35 oz sunflower- or pumpkin seeds, toasted

  35 g/1.25 oz sesame seeds, toasted

    2 tbsp. aroma spice blend (see original recipe)

182 g/6.4 oz water, add more as needed


DAY 1

In the morning, stir together all ingredients for soaker. Cover, and leave at room temperature.

Mix all starter ingredients at low speed (or by hand) for 1 minute, until all flour is hydrated. Knead for 2 minutes at medium-low speed (or by hand.) Let rest for 5 minutes, then resume kneading for another minute. Cover, and leave at room temperature.

In the evening, mix all ingredients for final dough for 1- 2 minutes at low speed (or by hand) until all flour is hydrated. Knead at medium-low speed (or by hand) for 4 minutes, adding more water as needed. Dough should be very tacky and not dry to the touch. Let dough rest for 5 minutes, then resume kneading for 1 more minute. (Dough should be tacky, but not sticky.)

Gather dough into a ball, and place it in a lightly oiled bowl, turning it around to coat it with oil. Cover well, and place it in refrigerator overnight.


DAY 2

Remove dough from fridge 2 hours before using, to warm up. (It should have risen nicely overnight.)

Preheat oven to 500ºF, with bread stone and steam pan.

Transfer dough to lightly floured work surface, and shape into a round. Place boule, seam side down, in a floured rising basket. Sprinkle with more flour. Cover, and let it rise for 45 - 60 minutes, or until it has grown 1 1/2 times its original size, and a dimple stays visible when you gently poke it with a finger.

Turn bread out onto a parchment lined baking sheet (or use a peel) and place it in the oven, pour a cup of boiling water in the steam pan and reduce heat to 475ºF. After 10 minutes, reduce heat to 425ºF. Continue baking for another 10 minutes, rotate bread 180 degrees, remove steam pan, and bake for about 30 minutes more, or until it is nicely browned, sounds hollow when thumped on the bottom, and registers 200ºF.

Cool on wire rack.

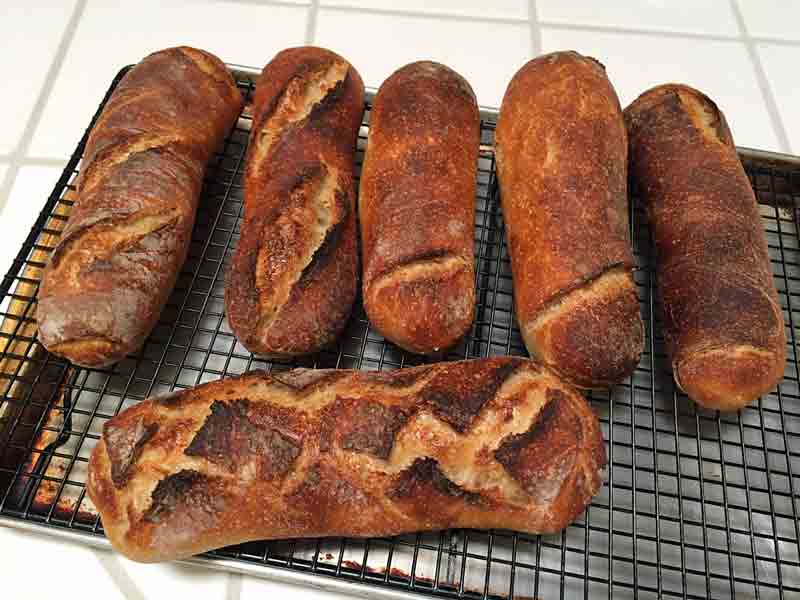
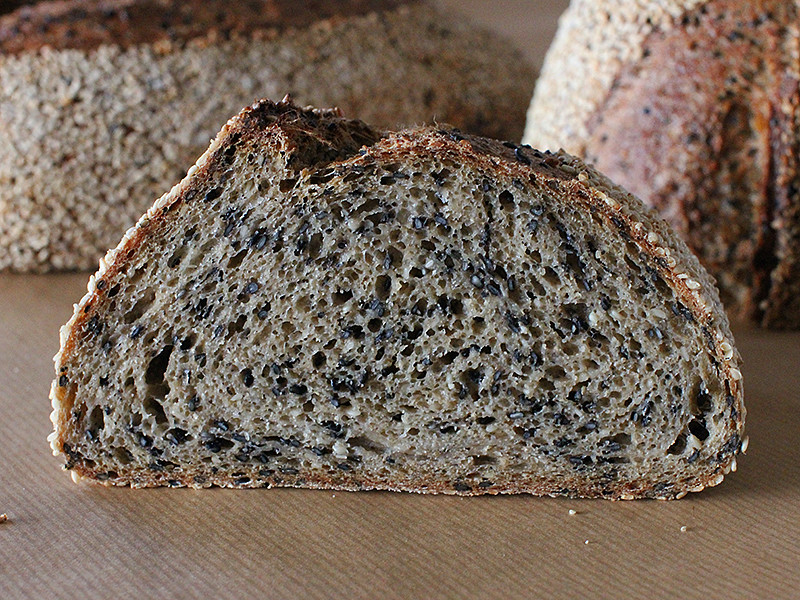
This Aroma Bread was made with whole kamut berries

 You can also follow Maria Speck on facebook or on twitter (I do!)

 (Reprinted with permission from Ancient Grains for Modern Meals by Maria Speck, copyright © 2011. Published by Ten Speed Press, a division of Random House, Inc.)

 Submitted to YeastSpotting

sortachef's picture
sortachef

Real Italian Hoagie Rolls

Homemade Hoagie Rolls fresh from the Oven


Real Italian Hoagie Rolls


After a week in the Philly area rediscovering my local sandwich joints, I came back to Seattle with the fresh taste of hoagie rolls lingering in my mouth. Over the next few weeks, with some hints from the folks at the Conshohocken Italian Bakery, I managed to replicate them.

I'd had Conshohocken Bakery's rolls at Pudge's, famous for steaks and hoagies in Blue Bell, PA. My first attempts came out more like baguettes, and so I tweaked the humidity and the flour content, but once I got close the cross-section of my rolls were not super round, and the bite was still too dense.

One morning I called the people at Conshohocken Bakery (voted #1 Italian bakery in the region) and told them what I was doing. Their head baker listened to my techniques and sorted a few things out.  

So here you go, sandwich rolls that are as close to authentic East Coast sandwich rolls as you're ever likely to get in a home kitchen. Call them what you want: torpedos, hoagie rolls, subs or zeps. In any case, I think you'll agree they make the best sandwiches around!


Makes 6 rolls, 9" long

14 hours for overnight rise (8 hours for fast rise)


2 teaspoons dry yeast (+ 1 teaspoon for fast rise)

4 teaspoons sugar

½ cup water at 100°


14 ounces (2 ¾ cups) unbleached all purpose flour

6 ounces (1¼ cup) High Gluten flour

2½ teaspoons salt

¼ teaspoon ascorbic acid, available as Fruit Fresh

2/3 cup whey*

2/3 cup water at 100°


½ cup extra flour for bench work

2 Tablespoons of cornmeal or semolina to coat pans


Necessary for producing high-rising rolls:

2 heavyweight cookie sheets or jelly roll pans

6 quarry tiles to line oven rack, or a pizza stone

A good spray bottle to create steam in your oven

A humid 80° environment


*To make whey: 32 ounces of plain low-fat yogurt will yield 2/3 cup whey in about 2 hours. Line a strainer with paper towels or several layers of cheese cloth and set it over a pan or shallow bowl. Pour in the yogurt, cover lightly and set it to do its stuff in the refrigerator. The whey will drain from the yogurt and collect in the bowl. Measure carefully before adding.

(The resulting strained yogurt is great drizzled with honey for breakfast. You can also mix it with shredded cucumber, salt, garlic and thyme to make tatziki - our favorite Greek dip.)


Make the dough: In a large mixing bowl, stir together yeast, sugar and ½ cup of warm water. Let sit for 10 minutes until foam forms on the mixture. Add 20 ounces of flour, salt, ascorbic acid, whey and water and mix to form a cohesive mass, scraping down the sides of the mixing bowl as necessary.

Knead for 10 minutes, using as little extra flour as possible to keep the dough from sticking to your counter and hands. Clean out the mixing bowl.


First rise: You can start these rolls in the morning (using an extra teaspoon of yeast in the dough) and let rise, lightly covered, for 4 ½ hours at room temperature. In order to have the rolls ready for lunchtime, however, it's best to make your dough the evening before and let it rise, covered, in a 55° environment overnight. Set the dough at room temperature for an hour or two in the morning before continuing. By this time either method will yield dough that has roughly tripled in bulk.


Second rise: Punch down the dough and turn it out onto a lightly floured work surface. Push the dough into a fat snake and fold it into thirds. Gently push the dough into a fat snake shape again, letting it rest for a few minutes as it resists. This method will elongate the gluten, yielding the best rolls. Fold in thirds, put back in the mixing bowl, cover lightly and let sit at room temperature (70°) for 1½ hours, until nearly doubled in bulk.


Shape the rolls: Turn the dough out onto a lightly floured work surface. Gently shape into a snake again, tucking the long outer edge over itself and squeezing in to the bottom seam by using your fingers. Your emphasis from here on out is to create a gluten cloak, a continuous skin on the top and sides of the rolls.

When the snake of dough is about 2 feet long, cut it in half. Form each half into an 18" snake and cut it into three equal pieces. You will now have 6 portions of dough, each weighing between 6 and 6½ ounces. Tuck into cigar shapes and let them rest for 15 minutes.

Sprinkle cornmeal onto the cookie sheets or jellyroll pans and have them handy. Warm your 80° humid environment. (See Creating an 80° Environment at the bottom of Aunt Marie's Dinner Rolls.) Your environment should include a pan of hot water.

After your rolls have rested, flatten them somewhat to expel the largest gas bubbles, and then fold them gently into torpedoes of dough that are 9" long. Pull the gluten cloak over each roll evenly and tuck into one long seam. Put three rolls on each pan, seam-side down onto the cornmeal.


Third rise and preheat: Let finished rolls rise for 1 hour to 1 hours 10 minutes in an 80° humid environment. Line the center rack in your oven with a pizza stone or quarry tiles and preheat the oven to 450° a half hour into this rise. Have a good spray bottle with water in it beside the oven.


Bake with steam: Put a pan of the fully risen rolls directly on the quarry tiles or pizza stone and quickly spray the hot sides and bottom of the oven with 6 or 7 squirts of water. Clap the door shut to keep in the heat and the steam. Bake rolls for 10 minutes without opening the oven door. Turn oven off for 2 more minutes, and then remove rolls to a rack to cool. (As oven temperatures and spray bottles vary, your results may as well. Rolls are ready when the crust is medium brown.)


Repeat with the other pan of rolls.


When rolls have cooled, split them and pile on your favorite sandwich ingredients. My favorite Ham Hoagie is shown below. Enjoy!


Many thanks to the Conshohocken Italian Bakery for advice on this recipe. If you live nearby, run - don't walk - to their bakery.


Copyright © 2011 by Don Hogeland.  For original post, sandwich stories and more photos go to  http://www.woodfiredkitchen.com/?p=1657


Ham Hoagie made the a Real Italian Hoagie Roll

Pages