HeiHei29er's blog
90% Biga Bread
Today's bake followed Abel's method posted here.
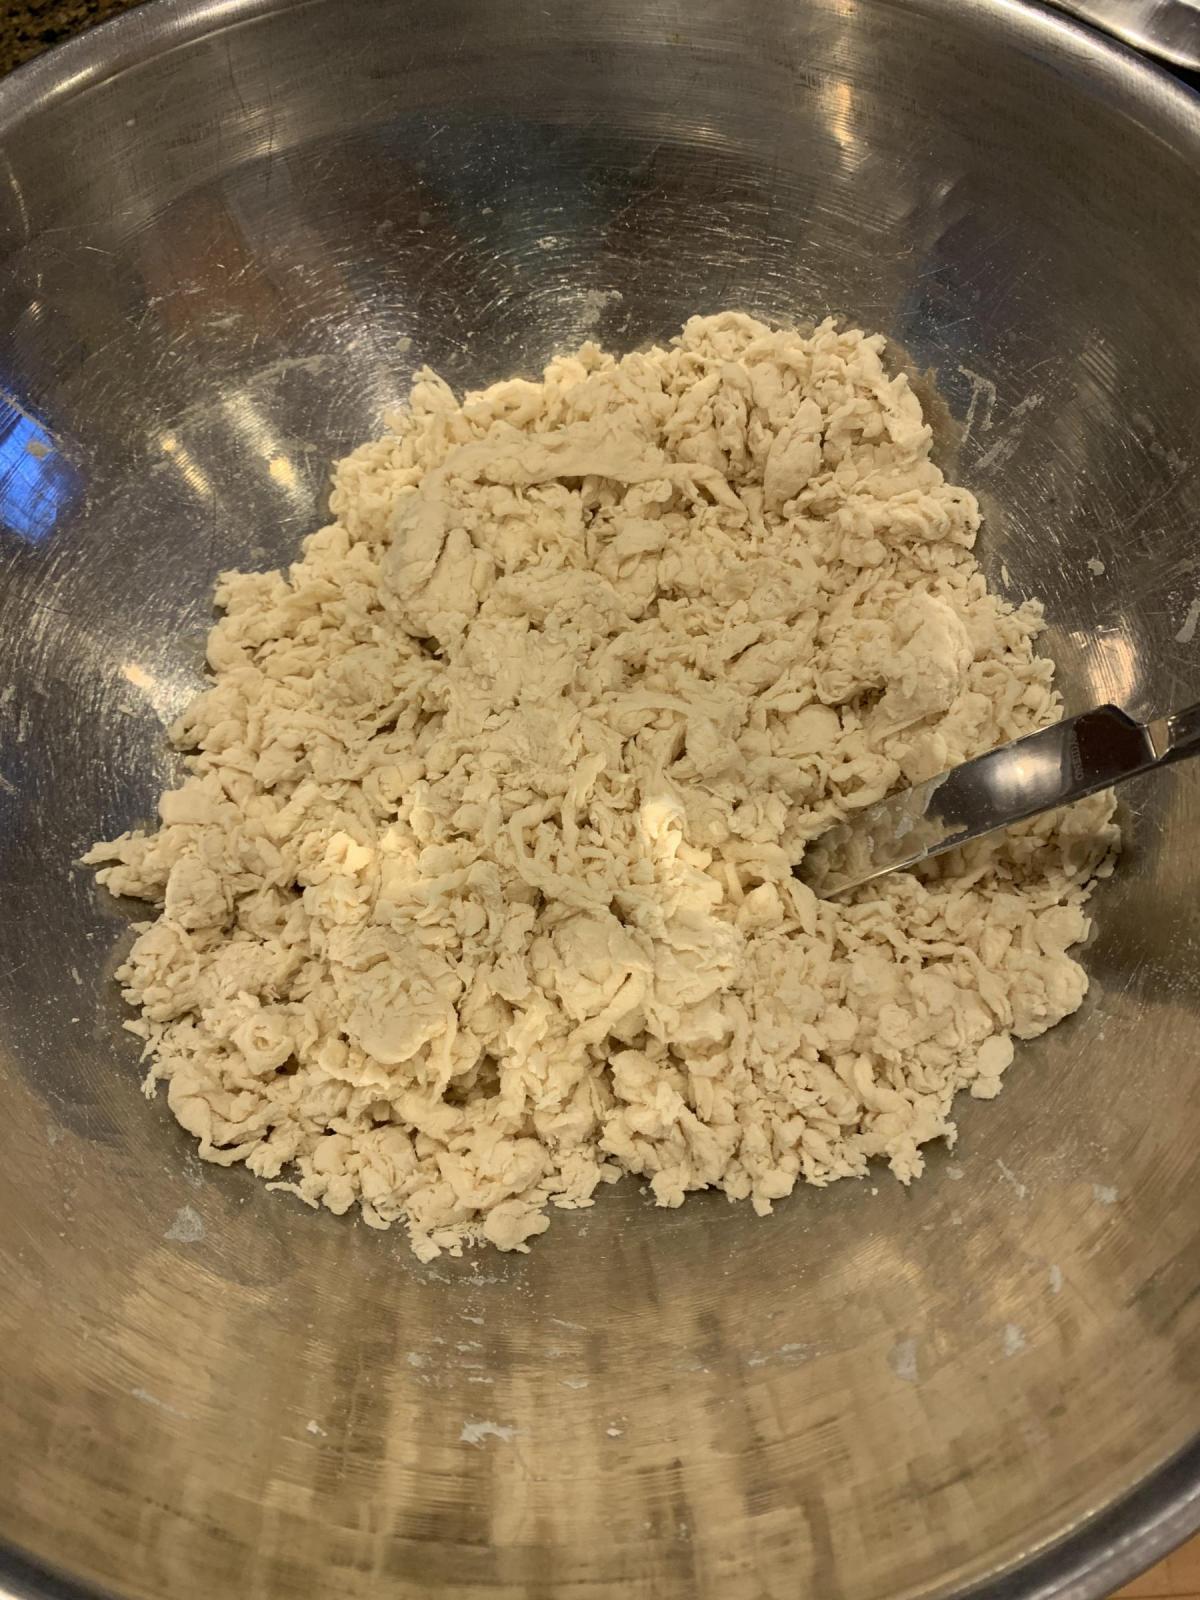
The biga prep went well. I put the flour in a large bowl and dissolved the yeast in the biga water. Water was added to the flour 2 tbsp at a time and gently stirred with a knife. I concentrated on pouring the water on dry flour to get as much distribution as possible. The biga was nice and crumbly with no gluten development.
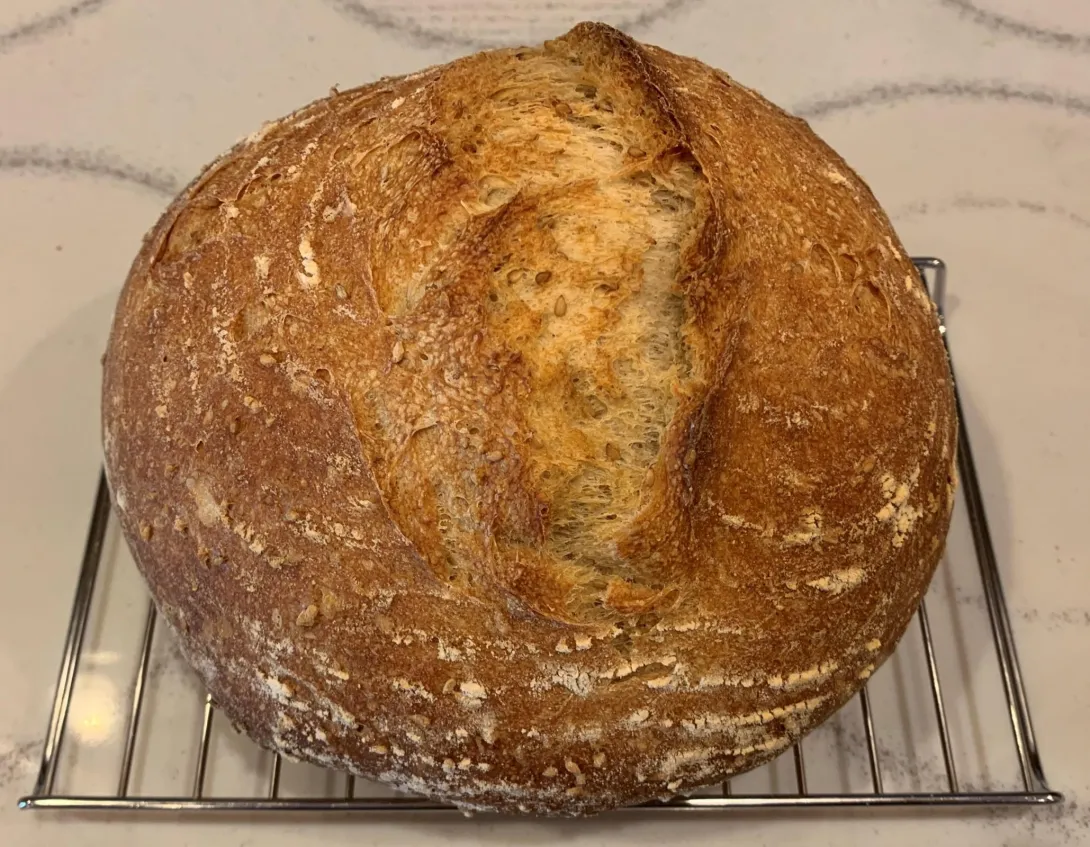
Country Sourdough with Black Emmer
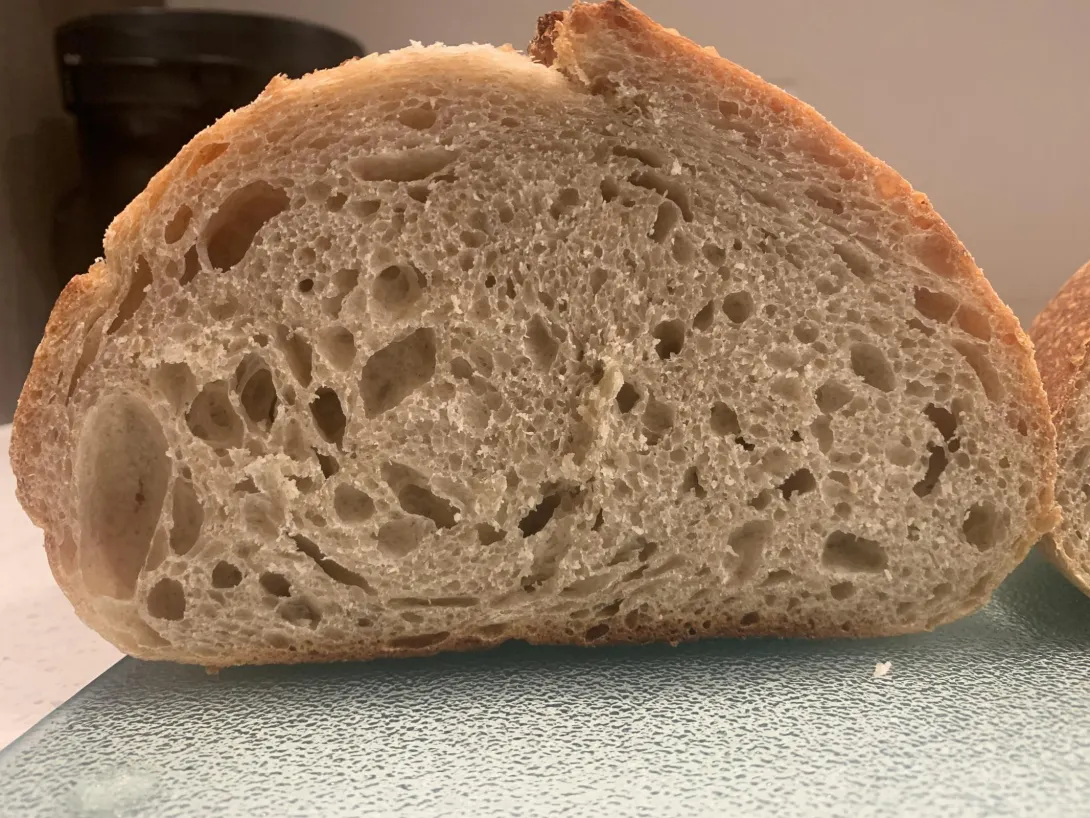
I recently picked up a Mockmill 200 and have started experimenting with fresh milled grain. I have a basic Country Loaf that I make with 15% whole grain. This bake used was my first time using Black Emmer from Janie's Mill. The baked loaf had a nice sour tang. I would say more acetic than lactic, but I'm not sure I can identify the difference yet. The sliced bread definitely had a tangy aroma. Took the loaf to a lunch work meeting and it went fast. :-)
Levain
67.5g Bread Flour
84.4g Water
13.5g Mature Starter
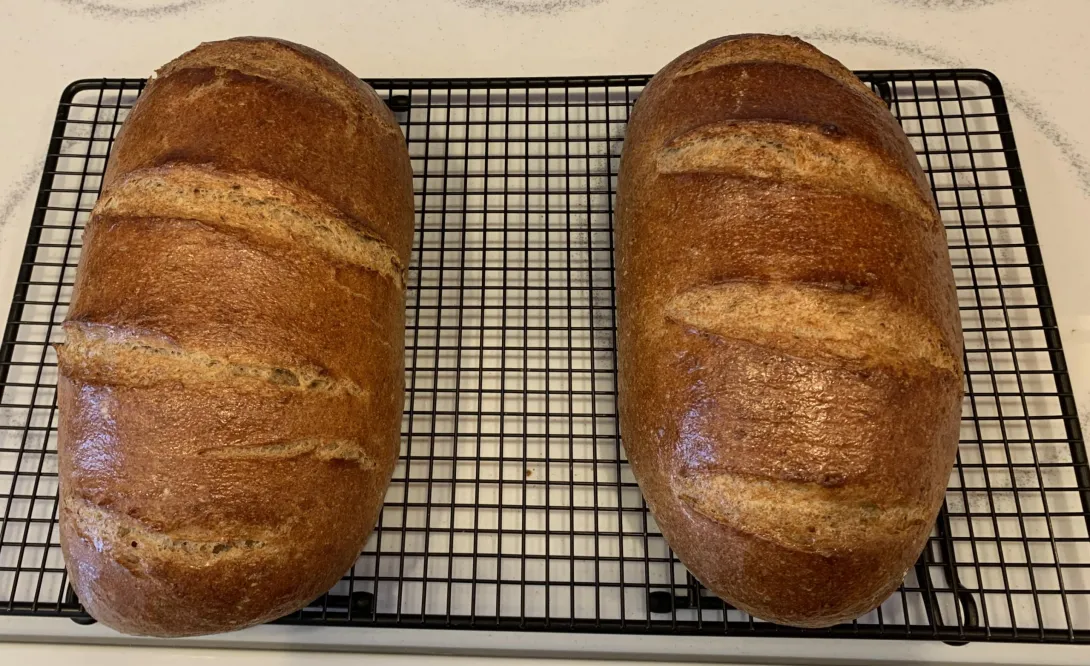
Potato Bread, Oatmeal Stout Sourdough, and Discard Chocolate Chip Cookies
Carmelized Golden Potato Bread
The basis for this bake is Hamelman’s Roasted Potato Bread from Bread (2nd Ed.). This is my second time making it with two tweaks that I thought were minor (but turned out to be a big difference) and also baked at a lower temp this time. I followed the recipe verbatim the first time I made it and used Mr. Hamelman’s suggestion of oven roasting the potatoes. The bread turned out very good.
100% WW Sandwich, Jewish Sour Rye Deli, and Overnight Sourdough with Kamut
Had the opportunity this weekend to make a couple of loaves that I've been wanting to try. First time breads are SO MUCH easier when you have a detailed method to follow, and I certainly have to tip my hat to Gavin for his explanation of Debra Wink's 100% WW loaf and David for the detailed method of his Jewish Sour
Honey Jasmine Rice and Ginger Root Porridge with Matcha
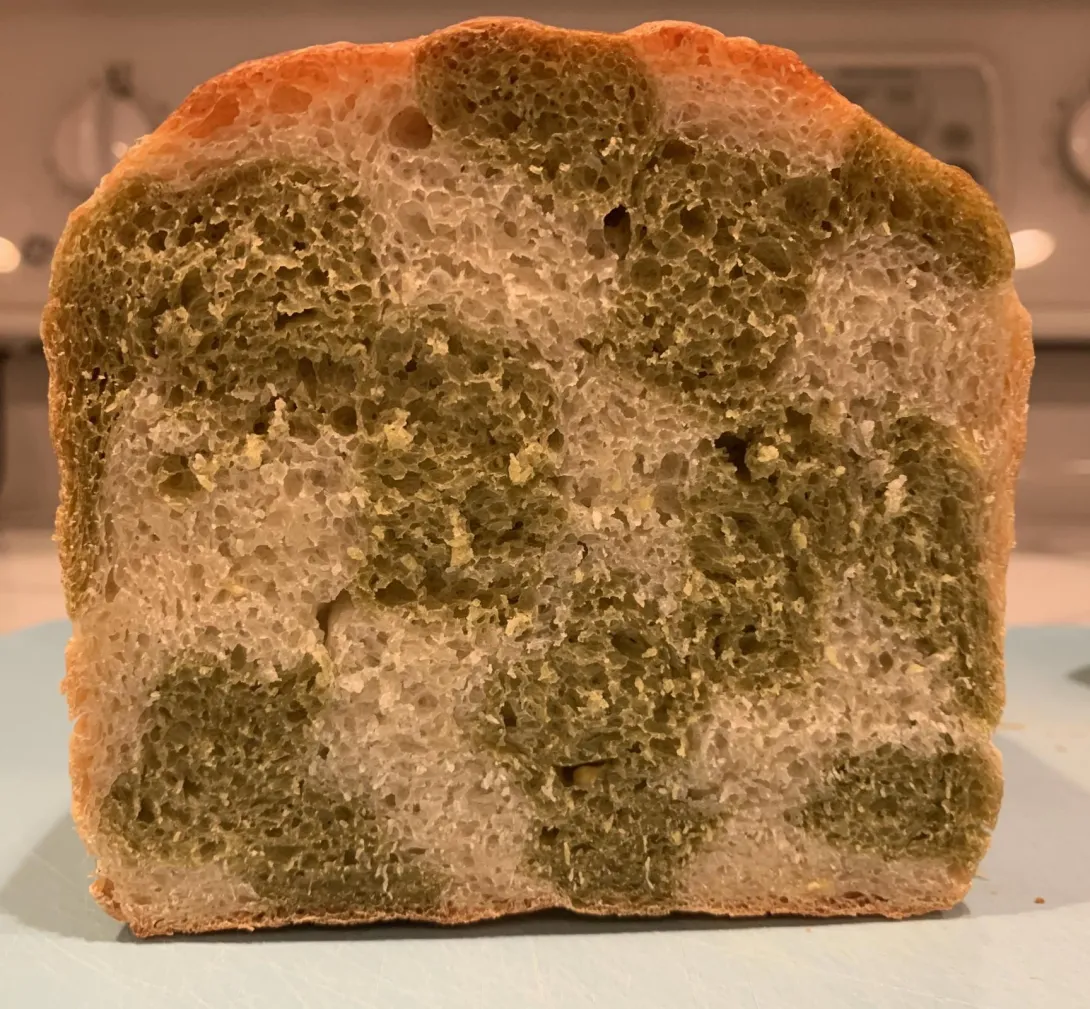
It's funny how you walk by something in a store a thousand times and never notice it. I had never heard of matcha until seeing it in Benny's and Kristi's bakes. Looking for some tea at the store and there it was. Had probably been there all along. So, I decided to get some and come up with a bake for it.
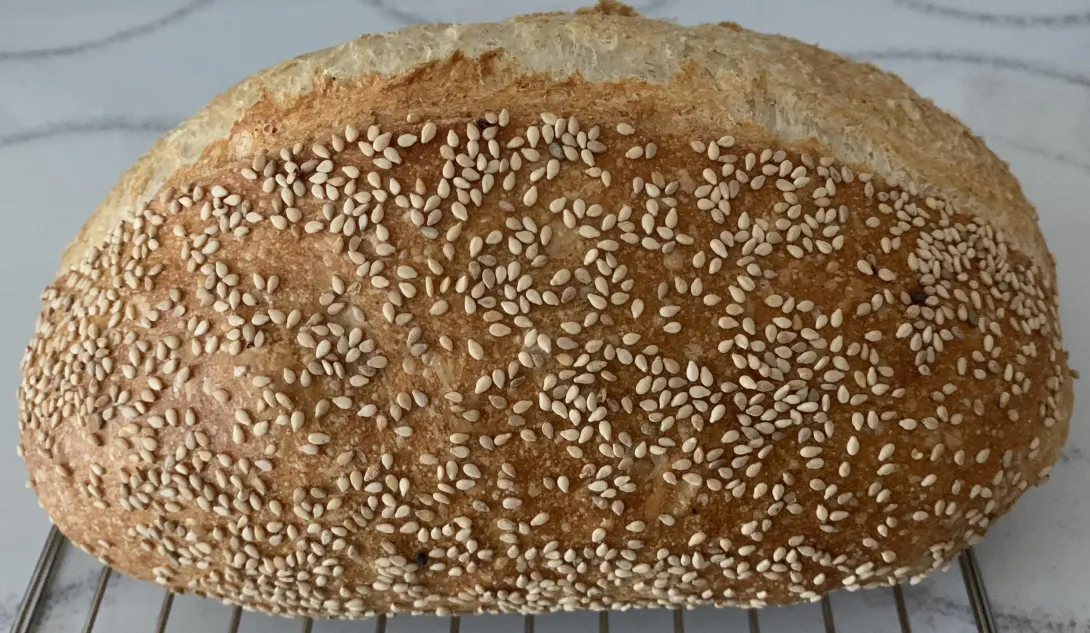
Honey Blonde Sourdough and How Scoring Affects Loaf Shape
Today's bake used a small inoculation a long, slow bulk ferment. I wanted to see what kind of flavor I could build with my new starter and a little blueberry yeast water in a dough that was over 90% AP/Bread flour. I added just a little bit of whole grain for flavor and color. Wanted to get a crumb color that was a pale blonde.
Makes 1 loaf
247g AP Flour
169g Bread Flour
11g Whole Wheat Flour
11g Semola Rimicinata Flour
6g Rye Flour
6g Barley Flour
225g Water
68g Blueberry Yeast Water
9g Sea Salt
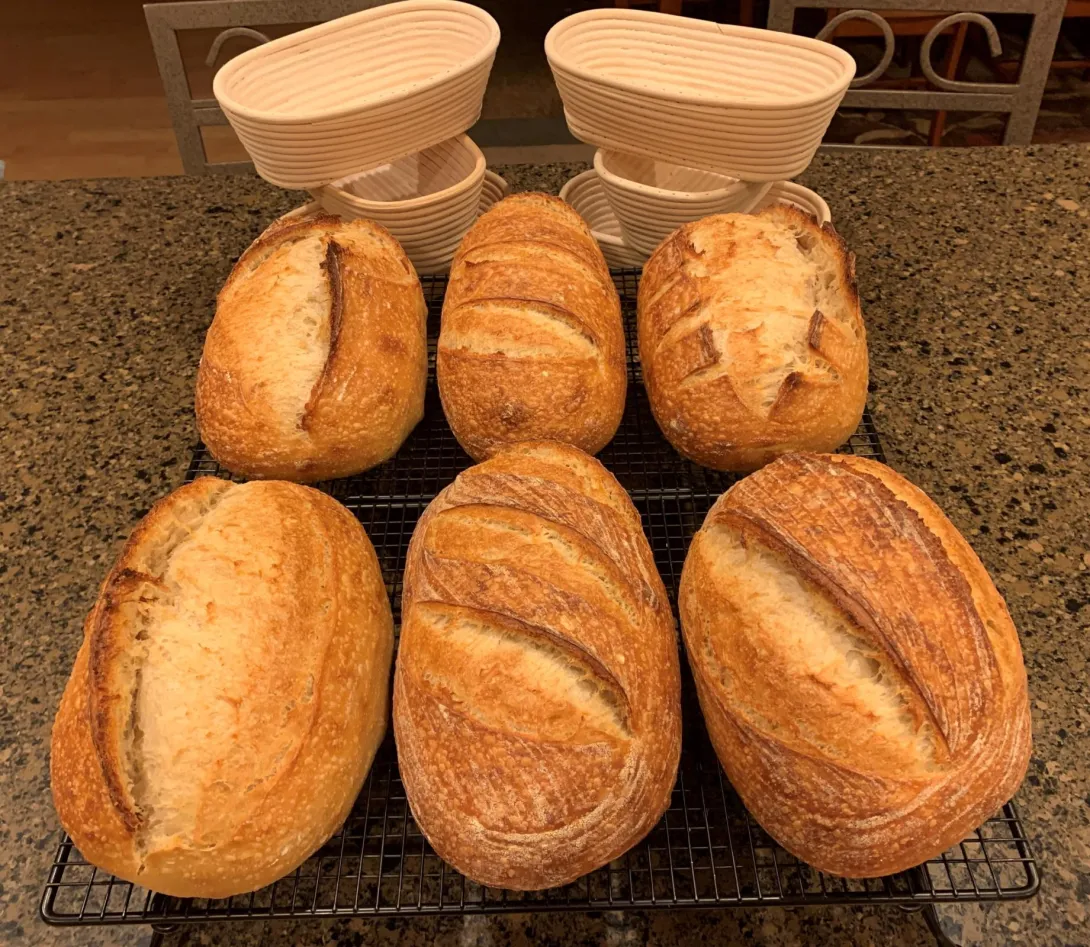
Vermont Sourdough / Maple Spelt and Barley Sourdough
I have been working on a new starter, and you can find details on that in my forum post. Yesterday's bake was the second bake using it, and so far so good!
Vermont Sourdough with a Cracked Rye Soaker
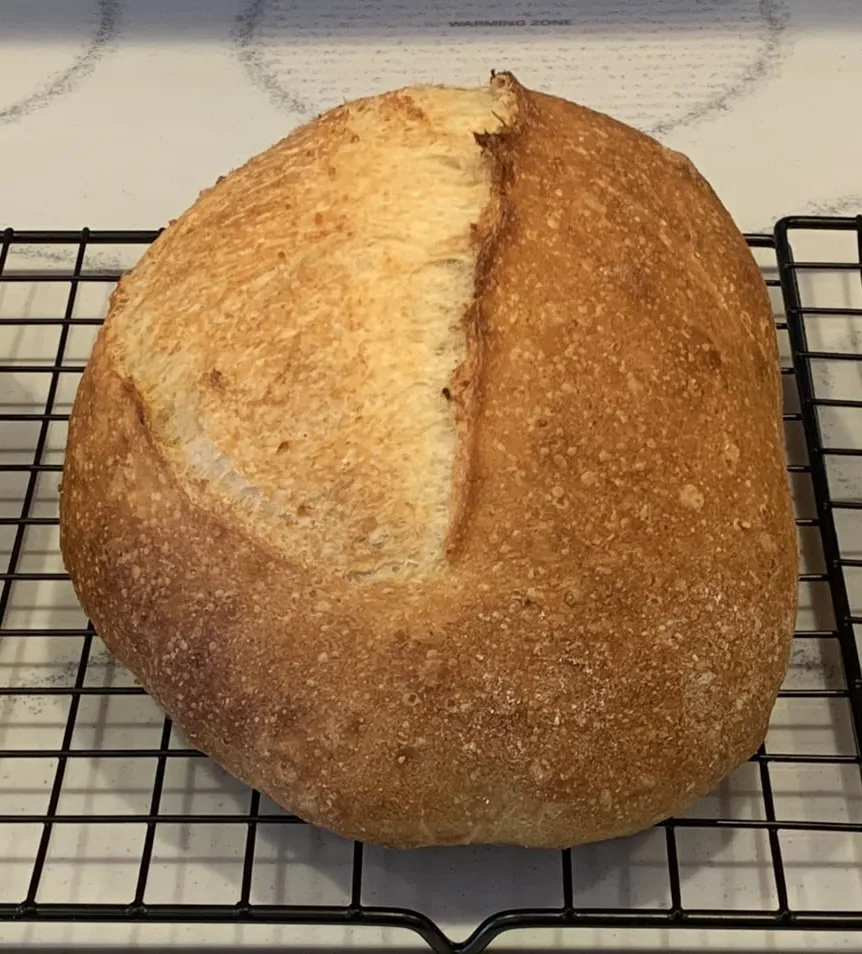
Sesame Sourdough - 1st loaf with new baking steel and new starter
Lots of firsts in this loaf, so not sure any conclusions can be drawn from any one part of it, but overall, the combination produced a really nice loaf (for me anyway).
- New recipe
- New shaping technique
- New DIY baking steel
- New starter (not really done yet, but I got impatient)
Recipe
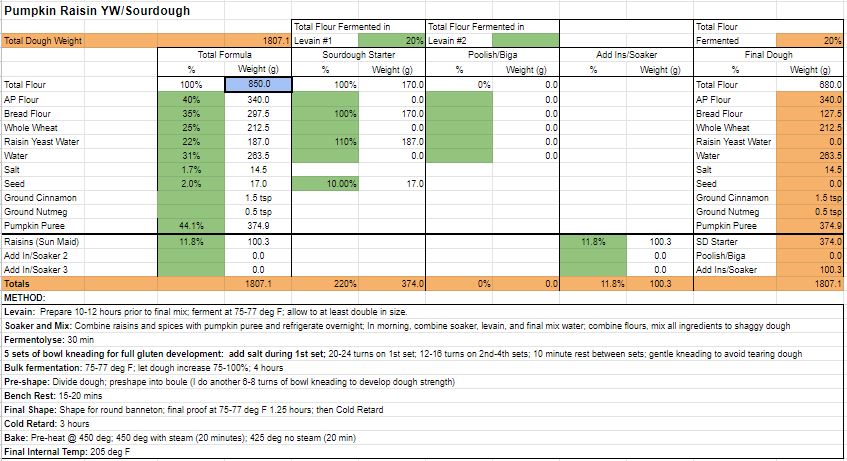
Pumpkin Raisin YW/SD

My wife made pumpkin bars this weekend, and she told me to use up the rest of the puree. So... New bread experiment time!
I used the recipe from wassisname as a starting point: https://www.thefreshloaf.com/node/35177/pumpkin-sourdough
I didn't have any pumpkin seeds handy, so I went with raisins instead and added a little cinnamon and nutmeg. Recipe below is for two loaves.