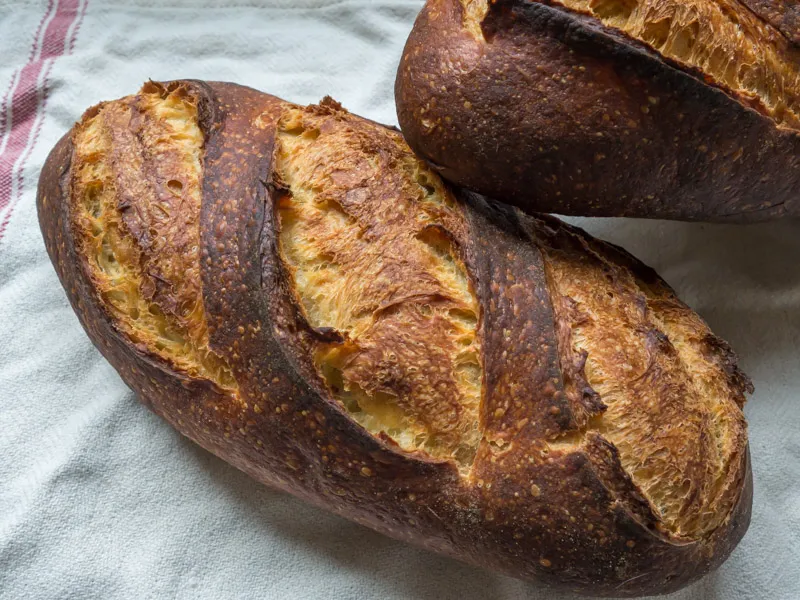
The Fresh Loaf

A Community of Amateur Bakers and Artisan Bread Enthusiasts.

breadforfun's blog

breadforfun's picture
breadforfun

That's a lofty title for a pretty basic post like this. The title actually refers to the name a book. But I'm getting a bit ahead of myself here.

For the past few years I have been fortunate enough to be able to attend the Slow Food Cheese festival in Bra, Italy. It's a biennial event where cheese-makers from all over the world are invited to share (and, yes, maybe sell) their artisan cheese. In 2019, the last time I went, they had a book pavilion where you can purchase many titles about the Slow Food movement. Among the books, tucked away in a corner, I found a book entitled "Il Mondo del Pane," which I translated (with my limited Italian-language knowledge) as The World of Bread.

The book is divided into several sections, each discussing different aspects of bread making like flours, methods of leavening, etc., as most bread books are. The largest section has brief discussions of breads from different areas, mostly in Italy, but some from the rest of the world, too. I think what intrigued me about the book was this section, which features a photo of a bread, followed by a description that generally includes the type of flour and leaven used. The breads that are described are not artisan bread, but are your everyday breads from local bakers that are available in each specific region. 

Since I got the book almost 2 years ago, my Italian language reading skills have improved to the point where I can understand much of what is written. I decided to try my hand at making one of the few recipes that are in the book, Pane Pugliese. You may have seen recipes for this bread before. Peter Reinhart has one in his book Crust and Crumb, and a slightly different version in The Bread Bakers Apprentice. Both use a large portion of biga (around 100 bakers-%). In the former he uses 100% bread flour. In the latter, he's a bit more loose suggesting a blend of bread flour and durum flour, ratio unspecified. 

For those who don't know (and forgive me if I'm stating the obvious here), Pugliese means "from the region of Puglia," often spelled Apulia in English. It is in southern Italy, the coastal region from the spur to the heel of the boot. There are many famous breads from the region including my favorite, Pane di Altamura, and its very close cousin Pane di Matera (which is actually not in Puglia but right over the border in Basilicata). The predominant grain in the region as in most of Southern Italy is durum wheat, Semola di Grano Duro. 

The recipe in Il Mondo del Pane is from the coastal town of Brindisi. It's only 6 sentences long.  It calls for 100% durum and a lievito madre (natural leaven) instead of a biga, plus just a pinch of commercial yeast. 

The simple recipe states:

  • Dissolve the lievito madre in the water, then add flour, yeast and salt. Work until you get a smooth and uniform dough. Leave to rest for 5-6 hours covered with a damp cloth. After 3 hours perform one fold.
  • Divide into 2 pieces about 1 kg each, shape as you like and rest for two hours at room temperature covered with a damp cloth.
  • Bake in an oven heated to 220˚C (430˚F), using a clay pot or spraying with water for steam for 45-50 min.

Since the recipe is written for Italian flour, which I have found to be much less thirsty than the Extra Fancy Durum from Central Milling that I use, I adjusted the hydration upwards.  The hydration of the lievito madre is not specified, so I randomly chose 100%. I made the lievito madre the previous night using my normal wheat-based starter that I keep at 67%H 1:10:10 and left it to ferment at room temperature for about 12 hours. Although it does not say so, I added an autolyse because EFD behaves much better with a long hydration time, in my experience. I worked the dough in a KitchenAid for about 10 min. using the dough hook and did the bulk ferment at around 72˚F. It makes two loaves which I preshaped gently, rested 15 min. then shaped into logs about 14-inch long. The final proof was at 72˚F, loaves sitting directly on a semolina-coated peel. The loaves baked for about 47 min. in a 430˚F oven on a stone with steam the first 12 min.

First cut of my loaf  

                       The first cut from my loaf                                           The loaf as pictured in the book

I think next time I will proof it in a couche. I considered it this time but was worried that the dough was too sticky. I shouldn't have worried, though, as an adequately floured couch would have been just fine. In retrospect, I should have baked them a little longer since the hydration was significantly higher than the written recipe, and that would have given a crispier crust. But overall, considering the relatively minimal information I started with, I'm quite happy with the bake.

And not incidentally, it tasted great!

-Brad


breadforfun's picture
breadforfun

It's been a while since I posted any of my breads, but two recent bakes, inspired by Michael Wilson's post about Semola Rimacinata are worth sharing. 

Some old timers on TFL might recall that every few years there is a flurry of activity about breads with this Durum flour and the bakers in Altamura who use it exclusively. I myself was obsessed years ago when I returned from a trip there, and I tried to achieve something like the Pane Altamura that I got there. I did get good breads but never mastered their shaping techniques. A few years later I tried again, but without trying to shape it like they do in Altamura.

Michael's approach is distinctly different from what I had inferred from watching italian videos and had been doing earlier. As he describes his method, the lievitazione or old dough is built at 60% hydration with 2% salt, and there is a long autolyse also at 60% hydration but without the salt. The final dough comes in at 80% hydration. The lievitazione is at 20% of the final dough flour. I won't attempt to repeat his description because he does such a good job of it.

The main differences between Michaels and my bakes are the flour source (mine is Central Milling EFD) and I did not store either the old dough or the lievitazione in water as he does (but it is something I'm likely to try next go-round). The first bake my fermentation and proofs were done at relatively low temperature, about 74˚F.  As Michael did, I developed the dough fully. This is after 8 minutes using a stand mixer at speed 2 with the spiral dough hook.

The first loaf was shaped into a boule. The crumb was not as open as I would have liked, but I'm pretty sure it was not sufficiently proofed.


For the second bake I increased the overall hydration to 83% and did a much longer final proof at 85˚F. This did yield a somewhat more open crumb, though I think there is still further to go.

As Michael points out, the dough is very tenacious and lacks extensibility. It is fairly difficult to work with. I went from 80% overall hydration for the first bake to 83% for the second bake, but there was no noticable difference in the dough consistency. However, there was a distinct difference in the texture of the crumb. In the first bake the crumb was somewhat chewy, almost too much resistance. The crumb of the second bake was very soft and offered very little resistance in the mouth. This is more like the Altamura style.

The taste for both was excellent, a bit nutty and subtly sweet. There was a gentle tang because I did not keep the lievitazione in water, but I didn't mind the sour. The next trials will have to wait until I can get more flour. Meanwhile, a shout-out to Michael for his great work with this flour.

 -Brad

breadforfun's picture
breadforfun

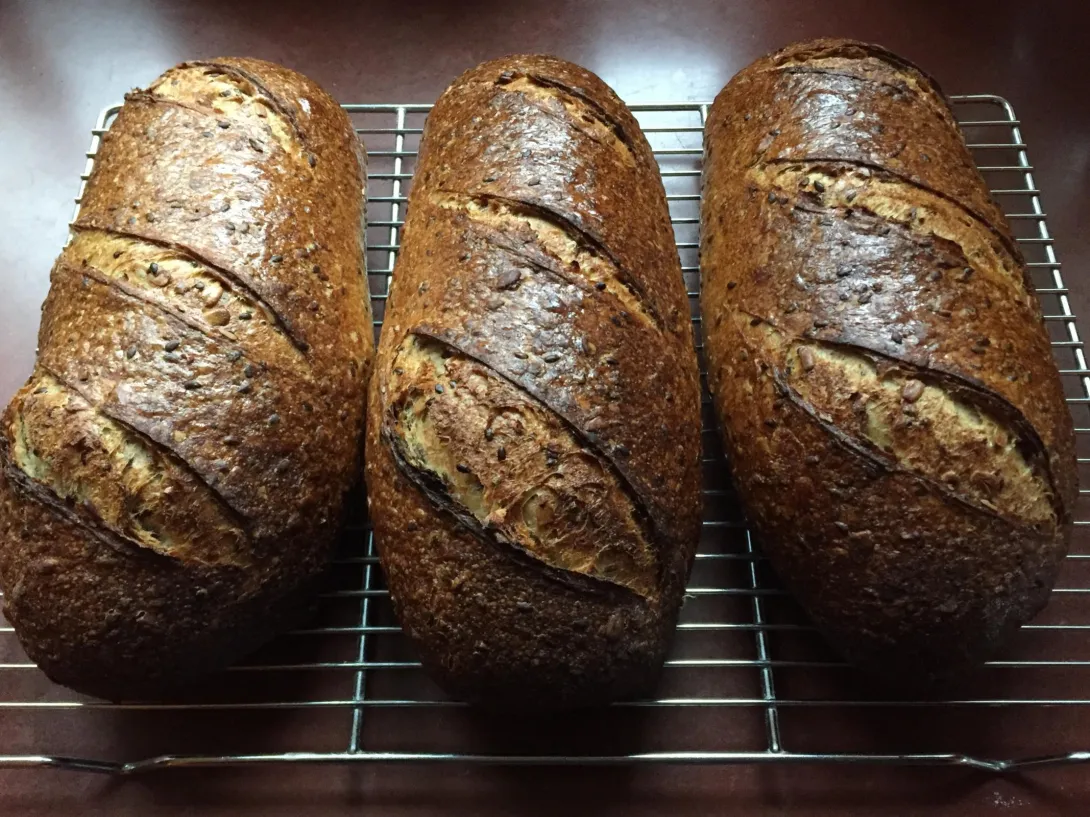
This morning I baked my version of Hamelman's 5-grain Levain. I think this is one of the best breads in Hamelman's book - it is tasty, it is easy to make, and it never fails. Needless to say, I make hardly any changes to the original recipe. Some of the details of my version are:
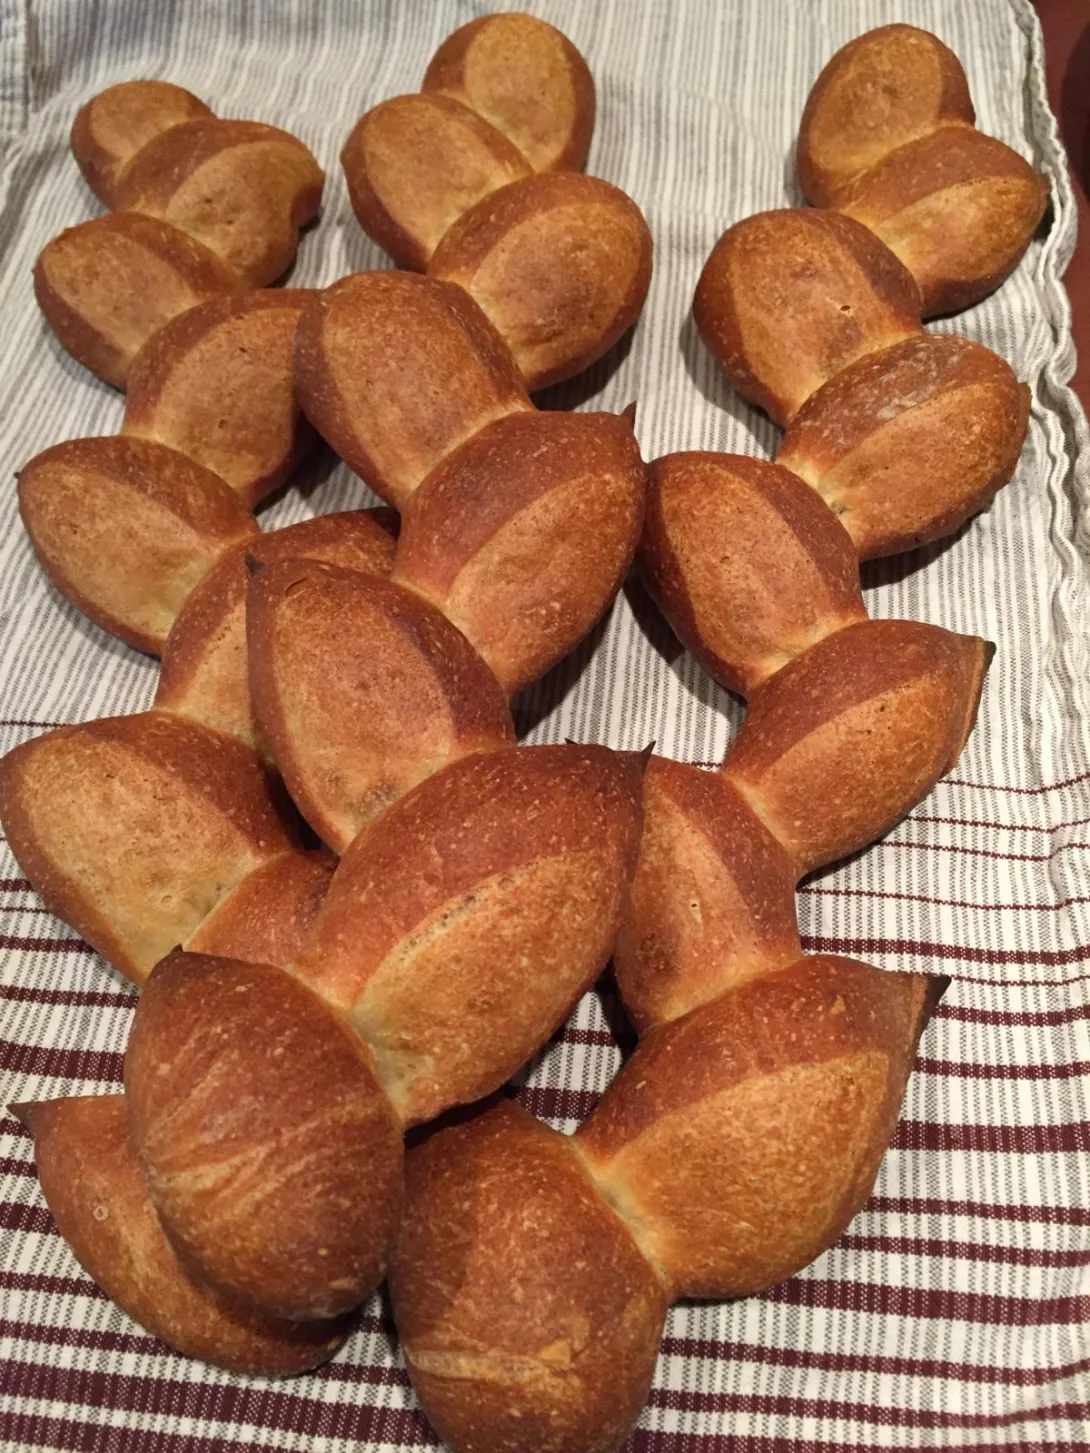
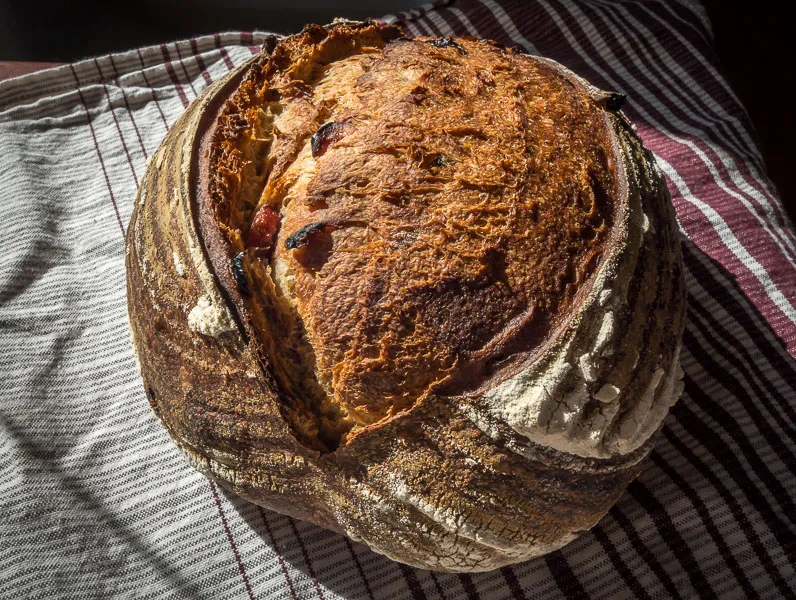
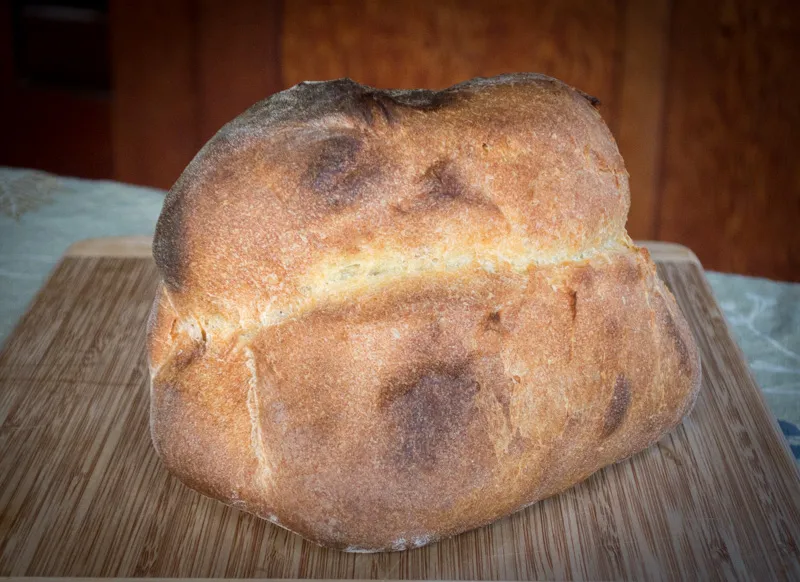
  1. Rye berries are coarsely milled into what would probably be called rye chops rather than cracked rye and the fine flour is not sifted out;
  2. I use rolled oats (Hamelman doesn't specify);
  3. Instead of water for the final dough I use the whey that I get from straining my own version of a "yogurt cheese;"
  4. A Kitchen Aid is used for mixing. The dough is scaled to make 3 loaves at 850-900 grams each, which pushes the limit in the KA (and probably doesn't help its longevity);
  5. Loaves are shaped into "logs" which keeps the slices nicely even sized for sandwiches;
  6. Dough is retarded in refrigerator at roughly 38˚F overnight and there is no IDY.

Some photos showing the progress of the bake follow.

    Cracked rye

               Cracked Rye before soaking                                    Levain after about 12 hours


                Soaker after about 12 hours                                         Dough after mixing


                     Divided and preshaped                                         Final shaping into logs


   On parchment and into a bag for retarding                   After 18 hours refrigerated retard


            Three shallow diagonal scores                                       During the steaming


                                                        The final product


Thanks @DanAyo for setting this up!

-Brad


breadforfun's picture
breadforfun

These are such fun I can’t believe I never made them before! I substituted about 15% milled and sifted hard white wheat for part of the bread flour and increased the hydration accordingly. 

Happy Thanksgiving everyone! 

-Brad


breadforfun's picture
breadforfun

First a shout out to JustJoel whose post lit a fire under me to get this post finished!


A few years ago I visited Puglia (Apulia) in Southern Italy, where I was introduced to grano arso.  Translated as "burnt wheat," it is the flour made from the few grain kernels remaining after the farmers burned the stalks in the fields but before they were plowed under to prepare for a new planting. The poor workers would collect these grains and use them to supplement their already meager subsistence by incorporating them into pasta and bread products. I was able to find and bring home a small amount of grano arso semola which was made from durum wheat. I used it in making some very good pasta, but did not have enough for bread. I tried to reproduce the flavor by roasting some extra fancy durum flour in a smoker for several hours. It worked, kinda sorta.

Fast forward to couple of weeks ago when I saw this article that rekindled my interest. The difference between now and a few years ago is that I have acquired a grain mill in the interim, so now I could roast whole berries and then mill them, which makes the process much more like the original.  I experimented with a couple of bread bakes using Italian emmer wheat (farro medio), which I had on hand (and I think is more flavorful than the hard white or red varieties of wheat berries).


Preparing the burnt wheat was a fairly straightforward process. I placed the berries in a single layer on a cookie sheet into an oven heated to 375˚F for 13-18 min.  The berries darkened considerably and started to smoke after around 10 min. I called them done when they were a light chestnut color, though I believe I could have roasted them even darker for more flavor. They were milled finely in a single pass using a Mockmill. The grains lost about 11% of their starting weight after roasting, probably mostly the loss of water from within the grain.

I assumed that the roasting process would destroy the glutens, so most of the flour was white and whole wheat with the grano arso contributing only to the taste and presumably not to the structure or texture.  I blended in about 13% of the total flour weight for the first bake.  The grano arso was also quite thirsty, so I kept adding water until it "felt right" and I reached almost 100% hydration. In retrospect, this was a bit too much water and although the gluten developed quite well and the crumb was very open, the loaf was a bit flatter than I had hoped.


This is what the first loaves and crumb looked like.  The crumb was extremely creamy, as you would expect with such a high hydration. The crust was good but softened fairly quickly. The taste of the grano arso was immediately apparent, not unlike burned popcorn, but in a nice way. In the crumb shot there are black specks that I believe are from the grano arso.  The loaf was very tasty, but I think the grano arso was a little too much and the sweetness of the other grains was overpowered. But I do love the rich coffee color the grano arso brings to the loaves.


For the next attempt I reduced the hydration a bit and also reduced the grano arso to under 8% to make the flavor a bit more in the background. This worked flavor-wise: the burnt flavor was more subtle so it paired well with more foods. I kept the salt low for these first bakes, but I think the grano arso can take a fair amount of salt, maybe up to 2.5%. 


I used a lower hydration because of the reduced grano arso, but I think I went a bit too far in the opposite direction.  The gluten was well developed but the crumb structure was not quite so open. I think between the two bakes I've seen the upper and lower limits of hydration, so the next bake will be somewhere in the middle. 

The two loaves on the left of this photo are made with grano arso. The other two are basically the same formula using einkorn flour that I made in case the first ones didn't work out.


There is a huge flavor range to explore here - different grains, different roasting times, different percentages depending on what it will be served with. I look forward to the challenge.

-Brad


breadforfun's picture
breadforfun

There are too many good breads to make! This weekend was my chance to be a copycat and try a couple of newly posted loaves plus one old standby.

The first loaf that intrigued me was Danni's Cranberry Pecan Orange Blossom Water sourdough, based on Lechem's original post. I don't usually bake with ingredients like Orange Blossom Water so it was my chance to experiment. Plus I thought the fruitiness would pair well with some strong, hard cheeses that we were sharing with friends for dinner. The results were everything I hoped for.


This time I omitted the pecans because our friends do not eat nuts, but I can see that they would be a very tasty addition. The crumb was a bit closed, but very creamy, and the sweetness of the cranberries and the fragrance of the orange blossom enhanced the cheeses. Definitely one to bake again!


The next loaf was Valentinaa's very showy Pane Incamiciato with its outer shell cut into petal-like features that curled around the loaf (and incidentally (note to self) worked very well as crackers). This was not as hard as I had imagined and the shaping went off without a hitch. The most difficult part was scoring just the outside shell, and you can see that most of my cuts hit the central loaf. It got lots of oohs and aahs, and the flavors were mild and unobtrusive. I don't have a crumb shot but it was fairly closed. Maybe the lower hydration is what helps keep the inside separate from the outside shell.


Finally, the old standby is (recently updated) David's San Joaquin Sourdough. So much as been written on TFL about this loaf, and it is one of the best, most reliable formulas out there. If you haven't tried it yet, you owe it to yourself to try.

Cheers!

-Brad

breadforfun's picture
breadforfun

It is becoming a theme of mine when I travel, I like to seek out excellent breads in the new location, something shared, no doubt, with many other TFLers. It also has become something of an obsession that when I find a special loaf I try to reproduce it. Such is the case with this bread.
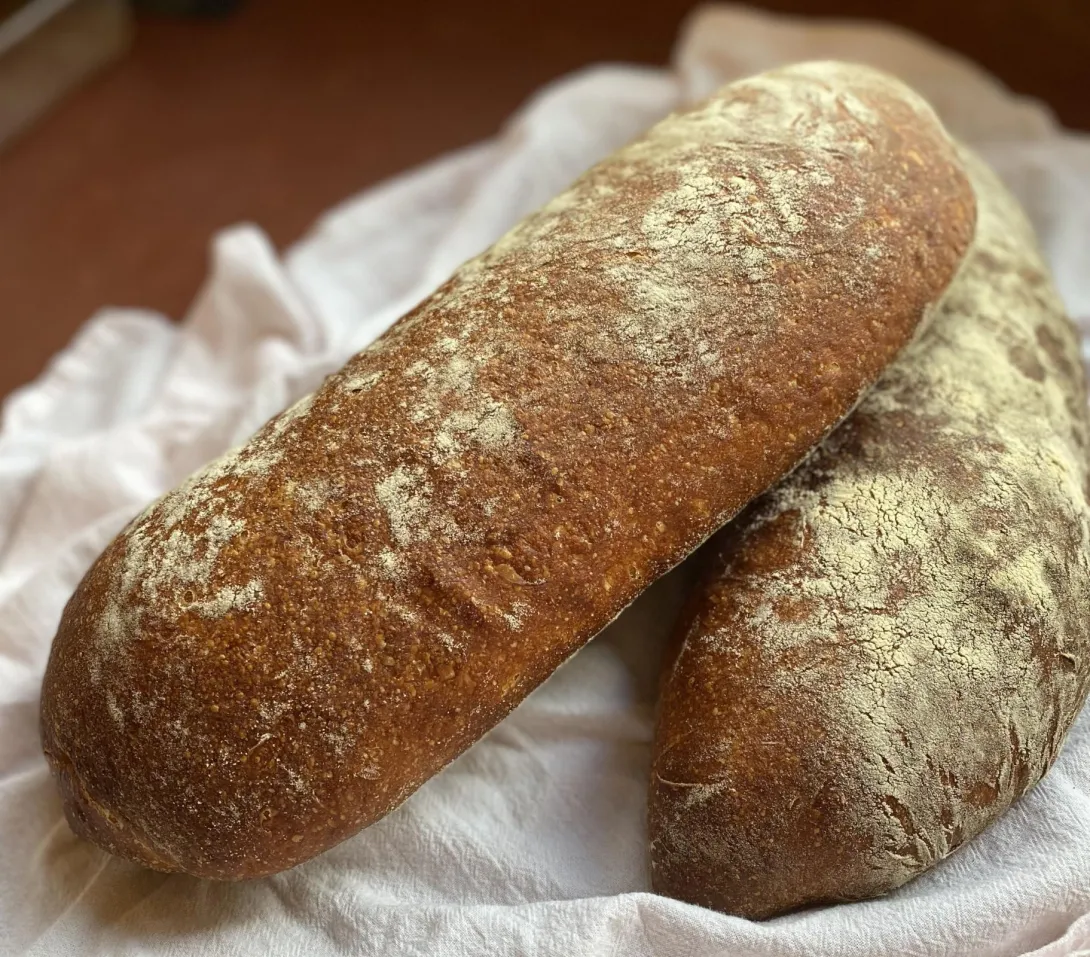
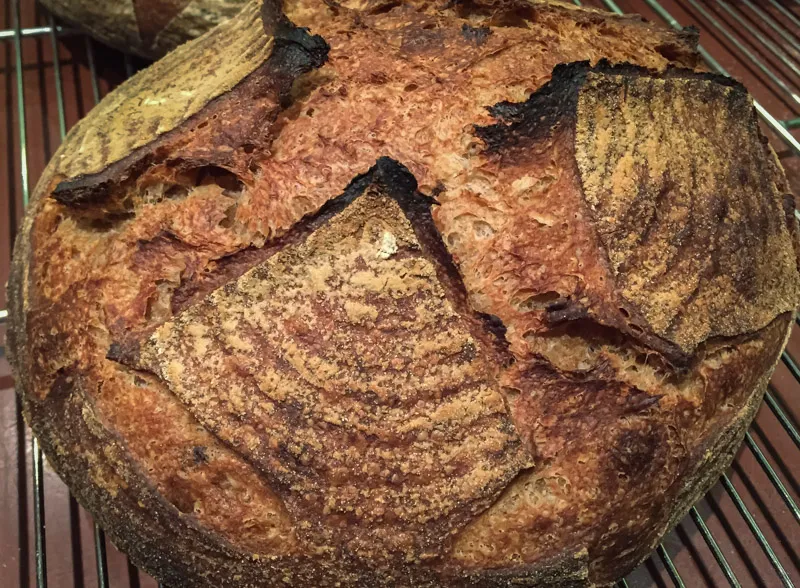
Let me step back just a bit. We had been planning a trip to Prague for several months. A couple of months before we left, my wife and I dined at a favorite restaurant, and in the course of the meal we learned that our server was newly arrived from (wait for it) Praha, the Czech name for Prague. Being in the food business, she gave us a list of several restaurants that she thought we might like. As I read about these restaurants before we left, I discovered that one of them was quite well known for their house-made bread. Obviously, that sealed the deal.


      A couple of views of the Charles Bridge in Prague


Eska is a very modern restaurant barely 18 months old when we went there the beginning of June. They are part of a large restaurant group, apparently with enough money to seed the place with a very large space, modern appliances (including a wood-fired oven, but I’ll get to that in a moment), and open architecture where diners can see everything that goes on in the kitchen. They served us as much bread as we wanted with our meal, and it was really tasty and moist.


      Eska's 33 bread, crust & crumb (somewhat blurry, apologies)


They were extremely friendly, especially Niki, who speaks excellent English. We talked for a long time, and she let me watch the bakers as they prepared the loaves and loaded them into the oven.  Unfortunately, I didn’t take photos of the oven, but it was an Italian-made deck oven with 3 individual 30-inch or so wide doors for loading. The wood is loaded into the back corner, and steam is injected manually with a sprayer. They are rightfully very proud of what they make there. Niki then offered to give me a sample of their starter, which I was glad to have. We arranged to go back the day before we left to minimize the time the starter would not be fed. The liquid starter survived the trip back in the checked bags (without leaking I’m happy to report). She also gave me a few details about the two different breads they make so I was able to reproduce a decent loaf without much problem. It even tasted nearly as good as the original.

      Three loaves from my second attempt with only 27% rye flour


About the bread: Eska makes only two types, 33 and 66, named for the percentage of rye flour in the formula. Niki told me that they also use 10% boiled, grated potatoes to keep the crumb moist. The liquid starter they gave me was quite liquid, I am guessing 150% hydration all rye. I don’t know if that is how they maintain the starter or if they use it at that hydration. Clearly some caraway seed was visible in the crumb, as was the potato.  And I tasted some malt as well.

      Crumb of my attempt. If you look closely you can see some yellow potato bits incorporated.


For my loaf I chose to cut back on the levain hydration to 125% and most of the rye flour is in the levain. I also kept the overall hydration of the dough fairly high at 82% since their final product was quite flat. I observed that at Eska, they proofed the loaves in large wooden boxes, possibly as large as 12” x 16”. The 66% rye loaves were baked whole while the 33% rye loaves were cut in half before baking. Here is the formula that I used:


If you ever make it to Prague, I recommend Eska without hesitation. Besides the bread, the food dishes were novel and innovative, ingredients very fresh. It is in the Karlin district so it was a short subway ride to get there, but well worth it. And who knows, you may get to take home some starter, too.

-Brad


breadforfun's picture
breadforfun

Happy New Year fellow bakers!
It has been a little while since I have posted anything new, but it’s not for lack of baking.  I have a little list of favorites that I have written about before that I keep going back to.

But a few weeks back, Gaetano (inumeridiieri) posted a loaf that inspired me to get back to my two-year-on-again-off-again attempt to reproduce Pane di Altamura.  I have gotten some excellent results the past month to share.
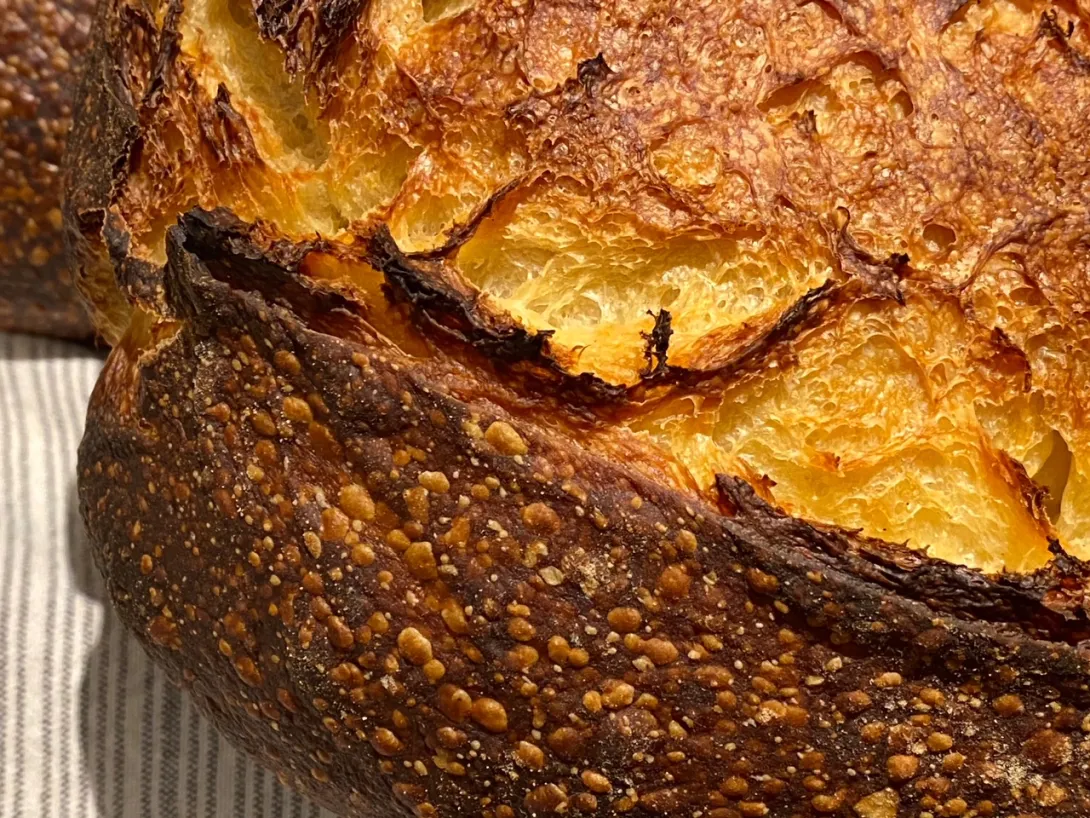
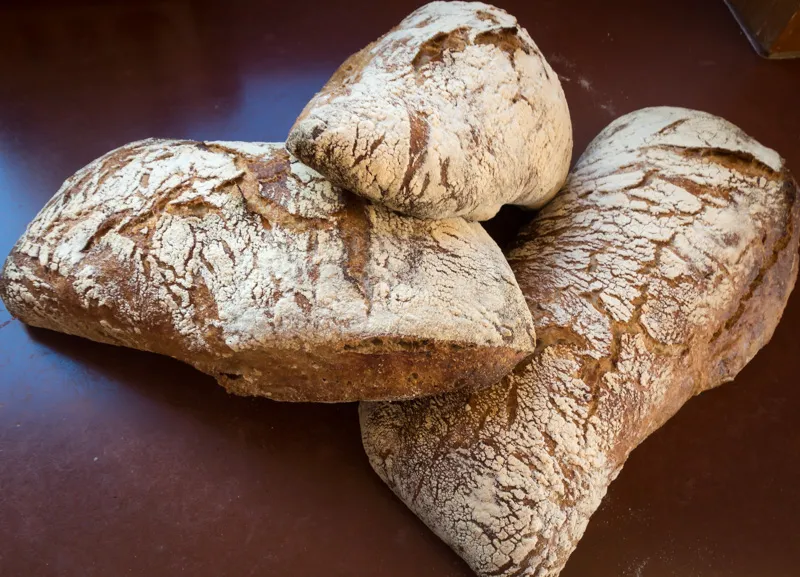
In his post, Gaetano described a type of leavening that, as far as I have found, is not available in the U.S. It is called Lievisol (pictured about ¾ down the page of his post), and though I could not find a lot of information about it, it appears to be a blend of wheat flour, a malted flour and either instant or active dry yeast. I began my trials by simply adding a little barley malt and a small amount of instant yeast (IDY) to the dough mix along with my 100% extra fancy durum starter.

Initial results were very encouraging. My first bake followed his formula as closely as I could, using 1.5g IDY and 11g malted barley flour as a replacement for the Lievisol and an overall hydration of 68.5%. The levain was 100% hydration and 43% of the flour was prefermented. The loaves turned out ok, but they were quite overbaked and a bit underproofed. I repeated the bake, correcting for these things and here are some photos of the loaves.


The malt seems to have little effect other than to darken the crust, at least in my trials, so I have eliminated it.  However, the addition of the IDY seems to give exactly the boost to the dough that I had not been getting with the levain alone. The flavor was more tangy than I expected, perhaps because of the long proof times. The crumb on this loaf is nice but much more uniform than the loaves found in Italy.

I baked a few more batches, playing around with overall hydration, pre-fermented flour %-age and bake times and temperatures. I even tried to do the traditional folded shape of Pane di Altamura, but it was not a real success as the two halves of the loaf didn’t really integrate into a single loaf. Some of the results below.


I did have some shaping issues, the large groups of holes were probably due to over flouring the bench during shaping. However, the taste was improving, the uniformity of the crumb is a bit more like artisan bread and the crust is blistery and crackly.  At this point, after some 5 tweaks, I have baked this last version a few times with really good results.

This version has an overall hydration of 73% with 36% PFF. [6]


The main things that I have learned so far:
-Durum needs a long proofing time to develop flavors.
-Temperatures in excess of around 72˚F tend to make the dough sticky and unmanageable for me.
-Using a couche for final proof helps a lot. And don’t try to proof dough directly on parchment.

For the purists out there (and I consider myself among that group), bakers yeast is not traditionally added to Pane di Altamura. So my next batch of trials will be an attempt to eliminate it.  I have also not mastered the folded over shape, and I still consider it a challenge for the new year. However, the results so far, thick,brittle and nicely honeyed crust, open crumb and good flavor suggest this is the right direction.

-Brad

breadforfun's picture
breadforfun

Even after nearly 7 years of making sourdough breads, I can still be surprised.

One of the frustrating aspects to me about bread making is the difficulty in achieving consistency from bake to bake. Of course, for most of my career I was a process engineer in the semiconductor industry, where repeatibility in process is essential, a fairly high bar.  Breadmaking is more of an art for me, in part because we are working with biological systems where the chemistry behind the process is much more complicated, and in part because we just can’t control the entire process in our homes.

I baked some of my “standard” sourdough the other day. When I say standard, it is really a riff on something I have made before, but with a twist (yes, I know changing things doesn’t help the consistency thing, but…). David’s (dmsnyder) San Joaquin Sourdough is just a fantastic bread as it is. I use it as a baseline to experiment with alternate flours. I often substitute spelt for about 20% of the total flour, but I had some khorasan wheat (Kamut®) that I needed to use up for this bake instead.

I made a 3kg batch of dough, and divided it into 2x900g and 2x600g. The larger loaves were put into lined oblong baskets while the smaller loaves were placed into floured round brotforms.  All were put into separate plastic bags and retarded overnight in the refrigerator and baked the next morning.

All the loaves had nice oven spring and looked pretty much like my other bakes. Now, here’s the surprise: The large loaves had huge blisters, and an overall shine to the crust, while the smaller loaves did not. OK, maybe the lack of shine on the small loaves was masked by the flour coating the brotforms, but why the lack of large blisters?

It was such an unusual and unexpected result, I had to see if I could repeat it.  I even used exactly the same formula, and the result was indeed the same.  Why? It seems to do with the linen liner that may wick away moisture from the top surface. This is consistent with you bakers out there that use a couche for proofing. But doesn't the flour also wick moisture away? If anyone has an explanation, I'd love to hear it.

Just for completeness, here are some crumb shots.


And a shot from the second bake.

The breads tasted fantastic.  The khorasan wheat adds a very distinct nutty and rich flavor to the breads. Regardless of the baskets used, the crust was crispy and chewy and the crumb was moist and quite fragrant. No doubt I'll be using the khorasan flour more frequently.

-Brad

breadforfun's picture
breadforfun

The last few weeks have seen a flurry of Pane di Altamura posts.  For me, it started with Michael’s (mwilson) post on the behavior of Durum flour, the semola rimacinata di grano duro used by the bakers in that famous region.  Abe (ABakEr) posted a very nice loaf with an open crumb using a pretty inventive technique. David (dmsnyder) followed up with his version that also showed off a beautiful crumb.  I first posted about my attempts about a year and a half ago after returning from my visit (pilgrimage?) to Altamura and being wowed by the bread.  I tapered off my trials after some medium successes: while the breads tasted great I was stymied in my attempts to shape it in the traditional u sckuanète folded shape.

I have been baking a lot since then, practicing and honing my skills, so it was time to try my hand at the Pane Tipo di Altamura (as David rightly calls it) again.  Lots of reading and rereading, watching and rewatching videos, and learning from others, I decided on a 65% overall hydration dough using a 100% hydration durum starter (biga naturale) that was 16.7% bakers percent of the flour, minimal proofing but assuring that there was sufficient fermentation.  The starter was refreshed 3 times at roughly 12-hour intervals.  The bake was done without steam, leaving the oven door very slightly cracked open as is done in Altamura, to try to get the 3 mm thick crust that is written into the DOP regulations.  Here is the formula and method.


I’m pretty pleased with the result, at least the outward appearance.  The shape of the loaf is as close as I’ve ever gotten to the traditional shape, although there is room for improvement. The crust darkened too fast, so I think the temperature was too hot in the beginning, so I will reduce it and bake longer next time.


[Update 4/4/16] I cut into the loaf this morning, and the crumb is a bit disappointing.  It is too dense and tight.  I also had some shaping issues that left a couple of caverns in the loaf, though I think this can be corrected with a minor adjustment.  I think my main mistake was being a bit too aggressive on the bulk ferment because of not wanting to allow the structure to degrade by proteases if overfermented. 

I am already preparing for another bake later this week, and this time I'll incorporate some ideas from both Abe and David: I like Abe's idea of letting the dough rest after final shaping, even if just a few minutes, before peeling into the oven.  I also like David's thinking that using a higher hydration for increased extensibility would be helpful.

The taste was decent, but not quite as nutty or flavorful as expected, which, I think, argues that the bulk fermentation was insufficient.

Onward and upward.

-Brad

Pages

Subscribe to RSS - breadforfun's blog