The Fresh Loaf

A Community of Amateur Bakers and Artisan Bread Enthusiasts.

Recent Blog Entries

breadsong's picture
breadsong

Hello, 

PMcCool posted a Sweet Vanilla Challah, about this time, a couple of years ago (his post is here).
I thought his bread was just lovely - and wanted to make a Challah like his for Valentine's Day
(trying for heart shapes!):


These breads are made with Mr. Hamelman's Challah, substituting some of the water with pure vanilla extract and vanilla paste, and adding 15% finely chopped white chocolate after the dough was developed.

arlo suggested adding white chocolate to 'Pain au Levain a la Vanille', another beautiful bread I was quite taken with (thanks, inlovewbread and arlo!), and I thought white chocolate would be a good addition to this Vanilla Challah.

The breads were glazed with 1 egg yolk, ½ tsp sugar and 1 tsp pure vanilla extract before baking, as instructed in PMcCool's post.
I sprinkled a bit of pearl sugar over before baking.

Have you ever been to an ice cream shop when they've been making their own waffle cones?
Don't those waffle cones smell amazing as they are cooking?
That's exactly what the kitchen smelled like as these breads were baking!

To shape these, I divided 1250g of dough into 6 pieces, approximately 208g each.

For the larger heart,
Four strands were rolled out to 24" long each.
Mr. Hamelman's Two-strand braid, method two, looked like it could form half of a heart.
I tried braiding two separate  two-strand 'braids' and set them close together to form a 'heart'. 
I used this video to help me with the braiding: http://www.youtube.com/watch?v=3YyDkdwVje0

For the smaller heart,
Two strands were rolled out longer, 30'"-32" or so each (forgot to measure!).
I used Mr. Hamelman's Two-strand braid, method one, twisting the two strands of dough, then coiling each end in towards center.

I have no crumb shot yet...I'm going to give one of these breads to family...likely the big one!

Happy Valentine's Day and Happy Baking everyone!
From breadsong

proth5's picture
proth5

My grandmother cooked professionally. I may have mentioned this before on these pages. She was not the "trained in culinary school" type of cook, she was a professional in the sense that a poor woman would be paid to cook in the home of a wealthy woman. As part of the whole "American Dream" experience for my family (a belated American dream perhaps as my ancestors were in America before the War for Independence) she cooked for many years in the home of the president of the university from which my brother and I obtained our undergraduate degrees.

But as I have also said before, there are cooks and there are bakers and my grandmother was most definitely a baker. Curiously, she never baked bread during the time that I knew her. She may have spent her youth churning the stuff out and by the time I was inhabiting the planet she was pretty enthusiastic about the stuff that she could buy from the bread man. Interestingly, though, she did a lot of work with the 4-H and county extension office and was a well known judge for bread. In fact, when I was just a kid, every bread attempt I made was subjected to her expert judging. (I've discussed this with the doctors at "The Place" and they feel this explains a lot of things.) I always appreciated it.

 She was a stickler for measuring ingredients. I have a perfectly clear memory of making a simple frosting with her and she poured in a "smidge" of vanilla directly from the bottle. She warned me quite sternly that I was NOT to do that until I was as old as she. I am now that old.

 She also was the kind of person who enjoyed writing recipes. She wrote them to the very best of her ability to the standards of the day (at least the standards for writers for home cooks) so as my exploration of old recipes continues I realized that I had some long neglected recipes written by the very best source of all. No "butter the size of an egg" or "handful of flour" for her - these were all written with precise volumetric measurements and instructions that anyone with a reasonable grasp of basic baking skills could follow. The apple didn't fall from tree, eh? I cannot calculate a baker's percentage without wondering what she would think of the kid now. She enjoyed learning new things and I'm sure she would have embraced the whole thing as eagerly as I.

 When I retired her mixer (which is almost as old as my mother and which is still carefully stored in my house) about 20 years ago to buy the Kitchen Aide I couldn't help but think that she would have been pleased that I could go out and buy whatever mixer I wanted. I wonder what she would think of My Precioussss (which is the only mixer I have owned that can tackle her "Brown Christmas Cookie" dough) - I bet she would have gotten a big kick out of it.

 While "my teacher" is the voice in my head, she is the beat of my baking heart.

She died too young - a victim of the lingering effects of bovine tuberculosis. She never saw my brother or me graduate from that university whose president she fed. So all of you who judge me harsh when people speak with near religious fervor of the goodness of un pasteurized milk must grant me some leeway.  You now know what that stuff cost me.

 So I present one of her yeast based recipes. With volume measurements and no fancy modern techniques.  As she wrote it.

I'll give a warning though, this is real Pennsylvania Dutch cooking and has been condemned by the American Heart Association. But it is good...


Moravian Sugar Cake


2 pkgs. Active dry yeast

1 cup warm water (110 F. to 115 F.)

1 cup sugar

1 teaspoon salt

2 eggs (well beaten)

1 ½ cups melted butter (use ½ cup for top of cake)

1 cup hot mashed potatoes

5 to 6 cups sifted flour

1 ½ cups light brown sugar

3 teaspoons cinnamon (more or less)


Soften yeast in the warm water (my note: see, she even knew that you didn't need to "proof" the yeast - just dissolve it - remind you of anyone?), let stand 5 or 10 min. Mix together the sugar, salt, eggs and 1 cup of the melted butter. Gradually beat in the mashed potatoes, add 1 cup of the flour, beat until smooth.  Stir in the yeast and beat enough of the remaining flour to form a light dough. Cover. Let rise in a warm place until doubled. About 2 hours. Divide dough into 3 portions and press evenly into 3 9-inch square pans. Cover, let rise until doubled. Make indentations about 1 inch apart in dough in each pan and spoon sugar mixture into each depression. Drizzle remaining ½ cup butter over top of dough. Bake at 350 F. for about 20 minutes.


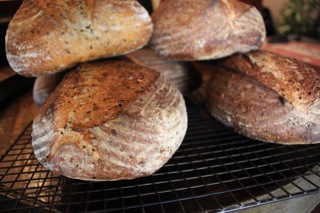
The picture below shows the finished cake. They do have a sort of "craters on the moon" look (which is how they are supposed to look.)  They taste best if one makes sure to get that extra butter in the holes filled with sugar.


The pans that I baked in were my grandmother's - still doing yeoman's work in my kitchen.

Happy Baking!


britneychelle's picture
britneychelle

So this enthusiasm about bread caught me quite off guard. If you had asked me two months ago if I wanted to start making my own bread, I probably wouldn't have paid much attention.

But things have quite changed. And it all pretty much started when I did my taxes. Much to my relief, my tax return was quite good (at least I got SOMETHING out of my schooling). And so upon receiving said tax return, I immediately purchased two things. One was a 70s vintage road bike in orange. The second, was a Breville stand mixer.

The idea of the stand mixer caught me off guard as well. I've always wanted one, but had read it off as way too expensive. Well, thanks to my employee discount at a kitchen store, it wasn't quite so expensive anymore.

I started my research. I pulled out my Joy of Cooking book to get the basics (I absolutely heart my joy of cooking!). After reading three pages, I realized I was hooked. THERE ARE SO MANY DIFFERENT KINDS OF BREADS!!

I want to make them ALL.

So I joined a website! www.thefreshloaf.com where there are basic bread making lessons, suggestions, hits, info on different materials and different ingrediants. But above all, I discovered that there was a community out there of bread enthusiasts as well!! Who knew!?? There is even a Bread Baking World Cup!!!!!! I want to go to there!!!

Tonight I shall attempt my first loaf. I'm trying to start slow and not get ahead of myself (which I do wayyy to often). I'm trying to get into my head what each part of the bread does so that maybe one day I can start experimenting and making my own versions! So tonight is a simple white loaf. I'll take a picture and post it when I'm done!

So. Excited.

~B

proth5's picture
proth5

 Sometimes I get giddy - and that isn't a pretty sight.

But I had just survived a week in a city that had its coldest recorded temperatures ever and departed from the airport like a traveler fleeing a disaster zone - no restrooms in the terminal - no lights on the jetbridge (a big "thank-you" goes out to the helpful gentleman who downloaded the flashlight app on to his iPhone!)  A little cold in what should be a warm place and things go haywire. While sitting in what can only be described as a stress position on a regional jet, I tried to escape from the reality of the situation by thinking about bread. I came up with the idea to make two batches of panned bread with different sweeteners.

My theory was that they would be two different colors and I could make a pretty loaf or two by combining the doughs in creative ways.

Arriving home to greet the new lunar year - the year of the Rabbit - I did have to confront the reality that my feng shui advisor tells me my kitchen is now in situated in a very inauspicious direction and I should eat out every meal and avoid turning on the oven.

Just this moment I'm thinking that is good advice. Although at the time I didn't allow it to stand in my way.

I went back to 10% of the total flour in the pre ferment and that flour being freshly ground triticale, but vowing to use more local ingredients decided to make one batch with 3 oz of honey and the other batch with 3 oz agave nectar instead of molasses .  Both of these are truly local.  The agave nectar was a deep brown in the bottle and claimed to taste like molasses - so I thought it would be a good substitute for the somewhat less local molasses, and would turn the dough a darker color.

Which is why my friends, I don't trust myself to improvise.

Both batches were the exact same color - so my little plan of a "pretty loaf" was pretty much gone. The doughs were pale - like a standard white loaf colored only by hints of the pre ferment.

Of course, they didn't taste bad, but they lacked the nice molasses flavor of my earlier loaves.  Local - schmocal - this Dutchie wants her molasses!  It is a taste not everyone enjoys, but I grew up on the stuff.  I could eat it straight from a spoon.

To tell the truth, I would be hard pressed to tell the taste of the bread sweetened with honey from that sweetened with agave. They were both nice white breads with mildly sweet flavor.  I consider that if I could get my hands on strongly flavored honey, like chestnut honey (which, of course would not be produced locally) I might have a different taste on my hands, but alas my access to this is limited just now and well, if I'm going to go non-local - I want my molasses!

The general formula is below.  Just use honey - or agave for all of the sweetener.  See earlier blogs for the technique.  It doesn't change.

Total Dough Wt


62.478

oz


Ingredients


Percent of Flour in Levain

0.1


Final Dough


%

Wt

UOM

%

WT

UOM

Ingredients

Wt

UOM

Total Flour

1

27

oz

1

2.7

oz

Total Flour

24.3

oz

KA AP Flour

0.9

24.3

oz


KA AP Flour

24.3

oz

Triticale Flour

0.1

2.7


1

2.7

oz


Levain Water

0.06

1.62


0.6

1.62

oz


Rolled Oats

0.17

4.59

oz


Rolled Oats

4.59

oz

Steel Cut Oats

0.11

2.97

oz


Steel Cut Oats

2.97

oz

Boiling water

0.74

19.98

oz


Boiling water

19.98

oz

Shortening(leaf lard)

0.04

1.08

oz


Shortening(leaf lard)

1.08

oz

Agave Nectar

0.112

3.024

oz


Agave Nectar

3.024

oz

Milk Powder

0.04

1.08

oz


Milk Powder

1.08

oz

Salt

0.028

0.756

oz


Salt

0.756

oz

Yeast

0.006

0.162

oz


Yeast

0.162

oz


Seed

0.008

0.216

oz

0.08

0.216

oz

Levain

4.536

oz

Totals

2.314

62.478

oz

1.68

4.536

oz


62.478


But the lack of the strong molasses flavor did do one thing - it allowed the flavor of the grains to come through.  If you look at the original formula and how it has evolved, I've taken some care to reduce the yeast and slow down the overall fermentation process.  I'm sure that this has had some impact not only on the flavor but on the crumb  - still generally a fine grained tender crumb - which I hope to see when I bake the real original vs. my original vs. my final - which will come in the next so many weeks - or next year depending on my feng shui situation.  (See, it's getting the fermentation "right" - which means right for the style of bread you are baking.) The true original would not have survived the lack of molasses - it would have had no depth (but still would be better than some of those things they sell in the supermarket).  My current version could stand on its own.  I had to wonder, though, if I had "over molassesed"  the whole affair and obscured all that hard work on getting the fermentation "right" for this style of bread.

I also began to think  (because I apparently  I do this kind of thing) about adding a little of that brown color back - not with the color of the molasses but with whole grain.

"Two roads diverged in a yellow wood", but unlike Mr Frost, I may well have the opportunity to travel both.  It is only some grain, yeast, salt and other ingredients - and that most precious one of all - time.

sharonk's picture
sharonk

HI All,
Lately I've been asked many questions about various technical aspects of making my bread. It seems the universe decided to remind me of some of the challenges so I could answer your questions from the best experience possible.

I'm preparing to vendor at a conference in a few short weeks.

Let's set aside that I decided to revise my book so the books I sell will be the most current and needed to have that done in time to self-print many books.

Let's set aside that my editor had to let go of my project about 10 pages into the book.
(My wonderful daughter took over the editing while she was preparing to move out of my house. The first night in her new apartment she stared at her computer for many hours, faithfully editing my book. I owe her big time)

Let's set aside that the ink I bought, at a good price online, has been delayed. When it finally arrived, I wasn't home and the delivery people needed a human to sign for it so it is still in their truck. (got ink from different site, not the best price, no shipping, next day delivered. I'm printing books as we speak, or as I write)

Let's set aside the logistics of packing my car for the conference: books, bread samples, humans, our own food, (we're all on special diets) rice cooker, toaster, hot pot, special pillows.

Now we come to what I wanted to really write about: I'm making samples, Mock Rye Bread. I froze some starter last week, took it out on Friday and planned to bake on Monday. The starter was sluggish, minimal bubbles, not much ferment smell at all.
Gave it an extra dose of water kefir but it didn't really help. (someone just wrote to me about just that).
Then I had to be out for a whole day so fed the starter and refrigerated it. (someone asked about that recently).
Still sluggish, no smell. I kept feeding it worrying it wouldn't be ready or perhaps it was never going to ferment properly. (Now that it's Fall the ambient temp in the house is cooler, probably part of the problem)  (3 cold aspects, frozen starter, refrigerated starter, cool house)

Monday morning comes, I hoped to have Peggy videotape a Mock Rye Bread demo for the online course but the starter is just sitting there. We switch gears and do a Feeding Technique #1 and #2 video.

Early Monday evening I feed it once more rather than dump the whole thing in the compost.
Late Monday night the starter starts rumbling and quaking and is in danger of overflowing its 16 cup bowl. (someone just asked about batters overflowing their pans)

I divide it into quart measuring cups, feed, cover and plan to bake on Tuesday morning. I'm left with 5 batches, a lot to do at once but hey, a baker's work is never done.

As I assemble the ingredients for the first loaf I see the starter is a bit too thick, so I add a little water to the next 4. They seem to be alright but instead of a slow pour into the pan, they plop in to the pan. Nowhere in my book do I mention "plop" as a batter texture.

Of course, my schedule for Tuesday does not allow for a proper rise. I will get home one and a half hours later than a 7 hour rise but I really can't get around it. As I'm driving home I visualize that the breads should stay nice and risen, hold their texture, be tall but when I come home they've fallen quite a bit. (someone just wrote about too short and too long rise times).

I bake them, they seem okay. I cut them open using a hacksaw (like someone just wrote about) Although they rose they're not fully cooked through on the top in the center of the loaf. (some wrote about that, too) I would have cooked them longer but they started to get a scorched smell.

A lot of it was usable, though, I cut off the uncooked pieces, hacksawed the rest into slices and froze them for the conference. I feel 99% sure they will be fine after thawing and toasting.
Luckily I also have some perfect loaves I made a few weeks ago.

I saved the uncooked parts and will see if they respond to double toasting. (more info for future questions)

So, All, if you thought I made perfect loaves all the time, you now know the truth. I'm still working with this fluid animal called Sourdough.
And Loving It.

ehanner's picture
ehanner

I've been wanting to make this Hamelman bread for a while. I was hoping that the wheat germ would bring nutty wholesome flavors and the oil would soften the crust some.

I wasn't disappointed by the results, except for the crumb. I was careful in my non handling of the dough and it looked good before baking but I must have man handled it when transferring and inverting the three loaves.

The flavor is good and it's going to make a good sandwich later tonight.

Eric

johannesenbergur's picture
johannesenbergur

So... time to try something new and the pictures of the pita breads on the right side of TFL has always appealed to me.

Being European, I had to use some other measurements and didn't bother getting the exactly like the recipe, so here's what I did, inspired by http://www.thefreshloaf.com/recipes/pitabread.

Ingredients: (Made 8 pita breads á 50g)


  • 1 dl tepid water
  • 15g fresh yeast
  • ½ dl plain natural yogurt (I can't seem to stop using this in my creations)
  • 5g sea salt
  • 5g honey
  • 10g olive oil
  • 50g durum/semolina flour
  • 150g regular wheat baking flour + some for dusting and adding as nessecary.
  • Optional: Spices (I used a tiny bit of ground chilli, smoked paprika and ground cilantro)


Mix the yeast with the water, add the yogurt, oil, salt and honey, mix well with a fork, till it's a greyish, oilish mixture.
Add the flour, a little at a time (100g) and stir with the fork as long as it makes sense.

Knead for around 10 mins or so. Let it rise under a luke warm tea towel in a warm place for 30 mins.

Carefully fold and strech the dough, and make a sausage. Cut the dough-sausage into appropriate size lumps, I weighed them and made them 50g. Let the pieces rest and rise for 5 mins.

Use a rolling pin to flatten the dough and hopefully you'll succeed in making them circular as well. Just make it really thin, not paper thin, but 3-5mm thick.

By this time your oven should be really hot (max. heat) and if you have a baking stone (which helps), it should be hot as well. Place the pancake lookalike dough onto the stone and bake them for 3 mins in 200°C or to taste. The breads should blow up like balloons.

Cut them up sidewise and enjoy your pitas.

Filling suggestion:
Garlic and herb roasted shoulder of lamb, sweet corn, tomato, cucumber, salad leaves and hot salsa.

...I'm going to quit blogging now and eat some more...

scootlaroo's picture
scootlaroo

I've been a long time viewer of this wonderful bread site and after much consideration I thought I'd post my own message. The bread bug has bitten me hard and I've been afflicted for the last 3 years attempting to make beautiful and tasty bread. The bread in this post is made in my backyard oven on wheels.  It's a Mugnaini oven put on a trailer which my uncle and I built about a year ago (Mar 2010).  Since building, I've thoroughly enjoyed the process of bread baking or pizza making as well as roasting delicious chickens, legs of lamb, and standing rib roasts.  After building the oven, my significant other and I attended a hearth bread making school at Quillisascut Farm in the state of Washington. It was a wonderful experience with great people and instructor that stepped us through the art of breadmaking in an Alan Scott design wood fired oven. 

I've attached a picture of the oven in backyard.

The bread made was adapted from Hamelman's Multigrain Sourdough, using sesame, flax, and sunflower seeds.  I've made this bread a couple of times and baked in my kitchen oven using a pan filled with lava rocks to create.  In this case, I doubled the home recipe, and baked outdoors, using a hot wet towel in a roasting pan, with hot water poured in the pan to create steam.  Met an artisan baker at the huge bread conference last fall in Las Vegas who recommended this technique.

This is picture of steam rolling out of oven after about 10 minutes prior to baking.


After loading oven with bread, I had to take a peak.  I know I should've waited, but it didn't seem to affect the bread.

Picture of loaves.  Roasting pan with wet towel seen on right side of loaves. Dark spot on left side of photo.

I baked the loaves approximately 30 minutes.  The oven floor was 500-550 degrees when I started.  The last two pictures are the finished products.  I share a lot of the bread I make with my Mom and Dad, neighbors, or other family members.  When I finished I had two construction guys at the house and after cooling the bread for an hour or so, shared with them.  I always get excited to cut into the bread to smell the aroma and taste.  The work crew and I love this bread's nutty flavor and aroma.

Hope you enjoyed looking.  Question?  I left the wet towel in for entire 30 minutes.  Can you over-steam bread?  I know from many of the books about baking bread, it states to steam first 15 minutes.  I didn't want to open oven again, so I left inside.  Thanks for viewing.

Scot


cubfan4ever's picture
cubfan4ever

Good Morning - what have we learned so far?  NOT to complete the first step BEFORE having your first cup of tea.  This morning, I mixed the starter, flour and water together... went back to read the directions, realized my mistake, cussed, added the salt and stuck it all in the fridge.  Sigh.  We will see what I have when I get home.

cranbo's picture
cranbo

So in a recent thread I posted a recipe that I based on a bread someone had seen on TV. I just did my best guess, based on provided ingredients and my own experience. 

I figured I should post the results, because it was mostly theoretical, but I believed it would work. The goal was yeasty, soft, fluffy bread, and use of a preferment. 

Here's the recipe, makes eight (8) 92g rolls/buns, or one good-sized loaf of bread...hence BreadBuns!

  • 100% hydration starter (sourdough or not) 100g (26.50%)
  • All purpose flour 375g (100%)
  • Water 218g (58%)
  • Brown sugar 38g (10%)
  • Salt 10g (2.65%)
  • Yeast (instant) 12g (3.30%)
  • Melted butter 26g (7%)
  • FINAL DOUGH WEIGHT (g) 778g

First, make a 100% hydration starter with 50g flour, 50g water and a pinch of yeast, mix, cover and leave at room temp for at least 6 hrs (or use some existing sourdough starter). In this case, I used some starter that I had around. 

Combine starter with remaining ingredients. This is after 1 minute of mixing at low speed. 

Mix with dough hook for 6 minutes total at KitchenAid speed #2 (low speed); this is the end result: soft, supple, quite smooth and satiny. 

Flatten, then roll into log and/or shape into ball and let rise for 1 hr in warm place, covered. 

Shaped and ready for rising...

In the bucket, ready to rise

After a 1 hour rise, it's doubled.

I decided to shape into 92g rolls, placed in a greased 9x13 pyrex dish:

Cover and let them rise in a warm place for about 1 hour, til doubled. Preheat oven to 400F

Bake for 23 minutes at 350F on middle oven rack.

Here's how they look after 10 minutes, just starting to get a hint of browning.

After the full 23 minutes, they're looking nice and brown. 

Remove from oven, carefully remove from pan and let cool on rack about 10 minutes before devouring. 

Crust and crumb are soft, light, tender and fluffy as expected. I think they could use a bit more brown sugar though, a touch more sweetness for this kind of bread. 

I like to store these in a Ziploc plastic bag to maintain that fluffy softness. Enjoy!

Pages

Subscribe to Recent Blog Entries